
1. Einleitung
Thank you for choosing the CREATE FRYER AIR PRO 3.5L Air Fryer. This appliance uses advanced hot air technology to cook your favorite foods with little to no oil, offering a healthier alternative to traditional frying. It features a 3.5-liter capacity, a digital LCD screen, and 8 pre-installed programs for convenient cooking. Please read this manual thoroughly before first use to ensure safe and optimal performance.
2. Wichtige Sicherheitshinweise
Beachten Sie beim Gebrauch elektrischer Geräte stets die grundlegenden Sicherheitsvorkehrungen, um das Risiko von Bränden, Stromschlägen und Verletzungen zu verringern.
- Vor Gebrauch alle Anweisungen lesen.
- Das Hauptgerät, das Kabel und der Stecker dürfen nicht in Wasser oder andere Flüssigkeiten getaucht werden.
- Stellen Sie sicher, dass die LautstärketagDie auf dem Gerät angegebene e entspricht Ihrer örtlichen Netzvoltage.
- Bei der Benutzung von Geräten durch oder in der Nähe von Kindern ist eine genaue Aufsicht erforderlich.
- Bei Nichtgebrauch und vor der Reinigung den Stecker aus der Steckdose ziehen. Vor dem Anbringen oder Abnehmen von Teilen abkühlen lassen.
- Betreiben Sie kein Gerät, dessen Kabel oder Stecker beschädigt ist, oder wenn das Gerät eine Fehlfunktion aufweist oder auf sonstige Weise beschädigt wurde.
- Verwenden Sie keine Aufsätze, die nicht vom Gerätehersteller empfohlen werden.
- Stellen Sie das Gerät nicht an eine Wand oder an andere Geräte. Lassen Sie mindestens 10 cm Freiraum an der Rückseite und den Seiten sowie 10 cm Freiraum über dem Gerät.
- Stellen Sie keine Gegenstände auf das Gerät.
- Verwenden Sie das Gerät nicht für andere als die in diesem Handbuch beschriebenen Zwecke.
- Hot air is released through the air outlet openings during hot air frying. Keep your hands and face at a safe distance from the steam and from the air outlet openings.
- The outer surfaces may become hot during use. Do not touch hot surfaces. Use handles or knobs.
- Vor der Inbetriebnahme ist stets sicherzustellen, dass der Korb ordnungsgemäß eingesetzt ist.
3. Produktüberschreitungview und Komponenten
Familiarize yourself with the main parts of your CREATE FRYER AIR PRO:
- Hauptgerät mit Bedienfeld
- Digitales LCD-Display
- Temperatur-/Zeitregler
- Korb für Heißluftfritteuse
- Gemüseplatte (herausnehmbar)
- Handhaben
- Lufteinlass
- Entlüftungsöffnungen

Image: A composite image displaying the CREATE FRYER AIR PRO air fryer unit alongside its separate basket and crisper plate components.
4. Einrichtung und erste Verwendung
4.1 Auspacken
Carefully remove all packaging materials, stickers, and labels from the appliance. Keep packaging for future storage or disposal.
4.2 Erstreinigung
- Wischen Sie die Außenseite des Geräts mitamp Tuch.
- Clean the basket and crisper plate with hot water, dish soap, and a non-abrasive sponge. These parts are dishwasher safe.
- Stellen Sie sicher, dass alle Teile vor der Verwendung vollständig trocken sind.
4.3 Platzierung
Place the appliance on a stable, horizontal, and heat-resistant surface. Ensure there is adequate air circulation around the unit (at least 10 cm clearance on all sides and top).
4.4 First Use (Burn-in Cycle)
Es wird empfohlen, die Heißluftfritteuse vor der ersten Benutzung etwa 10–15 Minuten lang leer bei 180 °C laufen zu lassen. Dadurch werden eventuelle Produktionsrückstände und Gerüche entfernt. Währenddessen kann ein leichter Geruch auftreten; dies ist normal.
5. Bedienungsanleitung
5.1 Grundlegende Bedienung
- Plug the power cord into a grounded wall outlet. The appliance will beep, and the display will illuminate briefly.
- Pull the basket out of the air fryer. Place your ingredients into the basket, ensuring not to overfill (do not exceed the MAX line).
- Schieben Sie den Korb wieder in die Heißluftfritteuse, bis er einrastet.
- The display will show the default temperature and time. Use the control dial to adjust the temperature (80°C to 200°C) and time (1 to 60 minutes). Press the dial to switch between temperature and time settings.
- Press the Start/Pause button (usually a play/pause icon) to begin cooking.
- During cooking, you can pull out the basket to shake or turn ingredients. The air fryer will automatically pause and resume when the basket is reinserted.
- Sobald der Timer Null erreicht hat, piept die Heißluftfritteuse und signalisiert damit, dass der Garvorgang abgeschlossen ist.
- Carefully pull out the basket and empty the cooked food. Use heat-resistant tongs or gloves.

Bild: Eine detaillierte view of the CREATE FRYER AIR PRO's digital control panel, highlighting the temperature display and various cooking program icons.
5.2 Vorinstallierte Programme
The FRYER AIR PRO comes with 8 pre-installed programs for common dishes. To use them:
- After placing food in the basket, press the Menu button (often represented by multiple icons or a 'P' symbol) to cycle through the programs.
- Each program has a preset temperature and time. You can adjust these settings manually after selecting a program if desired.
- Drücken Sie die Start/Pause-Taste, um das ausgewählte Programm zu starten.
The 8 programs include:
- Pommes Frites (Fries)
- Revben (Ribs)
- Fisk (Fish)
- Räkor (Shrimp)
- Kyckling (Chicken)
- Pajer (Pies)
- Kycklingben (Chicken Legs)
- Bröd (Bread)
5.3 Kochtipps
- Für optimale Ergebnisse heizen Sie die Heißluftfritteuse 3-5 Minuten vor, bevor Sie die Lebensmittel hinzufügen.
- Schütteln Sie den Korb nach der Hälfte der Garzeit, um eine gleichmäßige Bräunung zu gewährleisten, insbesondere bei kleineren Stücken wie Pommes frites oder Nuggets.
- Lightly brush or spray food with oil for extra crispiness, though many foods require no added oil.
- Do not overcrowd the basket. Cook in batches if necessary to ensure proper air circulation and even cooking.
- For foods that typically require baking, the air fryer can often achieve similar results with a crispy exterior.
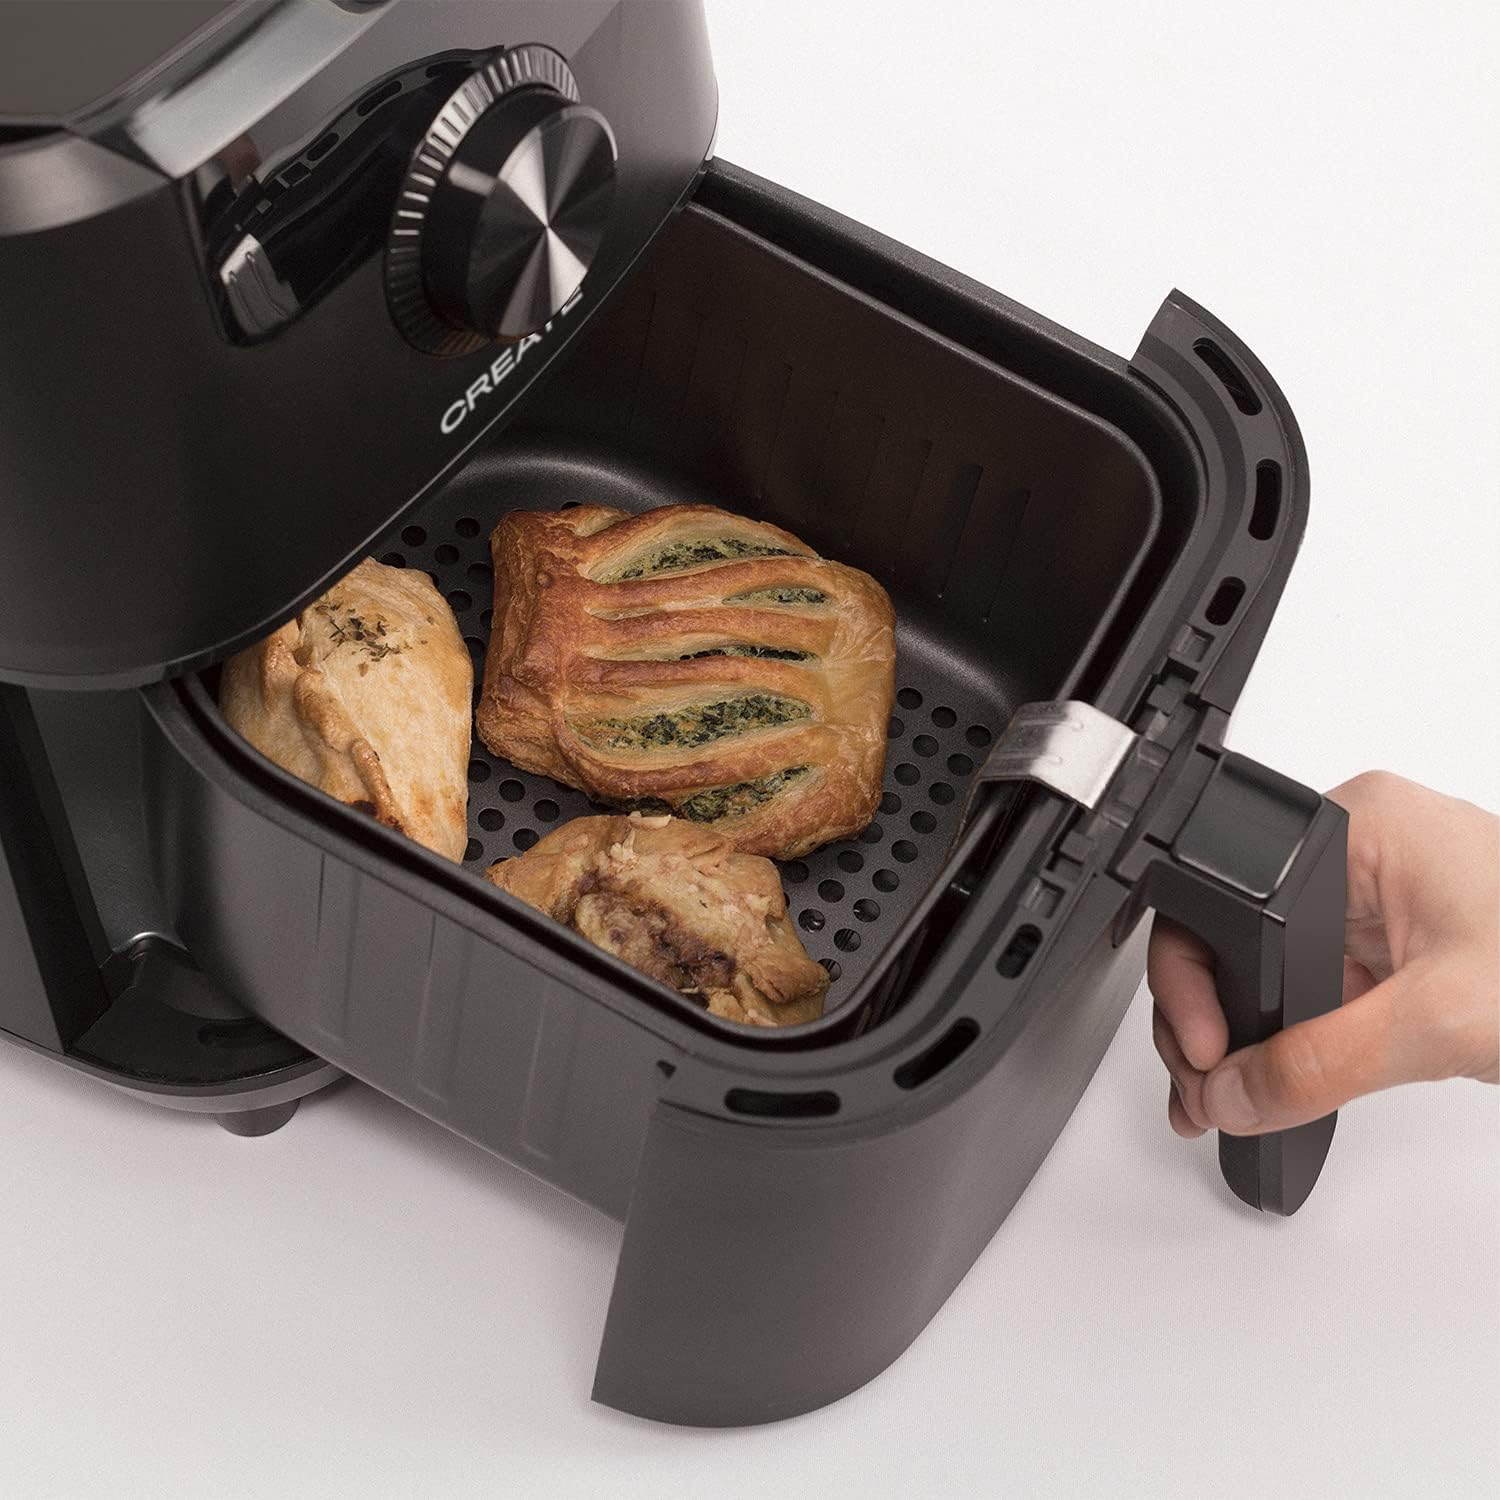
Image: The air fryer basket, pulled out from the main unit, containing cooked pastries and chicken pieces, demonstrating the cooking capacity.
6. Wartung und Reinigung
Reinigen Sie die Heißluftfritteuse nach jedem Gebrauch.
- Ziehen Sie den Netzstecker des Geräts und lassen Sie es vollständig abkühlen, bevor Sie es reinigen.
- Wischen Sie die Außenseite des Hauptgeräts mit einem Tuch ab.amp Tuch. Keine Scheuermittel verwenden.
- Remove the basket and crisper plate. Wash them with hot water, dish soap, and a non-abrasive sponge. The non-stick coating makes cleaning easy. These parts are also dishwasher safe.
- For stubborn food residues, soak the basket and crisper plate in hot water with dish soap for about 10 minutes before cleaning.
- Stellen Sie sicher, dass alle Teile vollständig trocken sind, bevor Sie das Gerät wieder zusammenbauen oder verstauen.
- Bewahren Sie die Heißluftfritteuse an einem kühlen, trockenen Ort auf.

Image: The air fryer basket, with its crisper plate, fully removed from the main unit, illustrating its readiness for cleaning.
7. Fehlerbehebung
| Problem | Mögliche Ursache | Lösung |
|---|---|---|
| Die Heißluftfritteuse lässt sich nicht einschalten. | Das Gerät ist nicht eingesteckt. | Stellen Sie sicher, dass das Netzkabel fest in eine geerdete Steckdose eingesteckt ist. |
| Das Essen wird nicht gleichmäßig gegart. | Basket is overcrowded. Food not shaken. | Cook in smaller batches. Shake the basket halfway through cooking. |
| Aus dem Gerät tritt weißer Rauch aus. | Fettrückstände von vorheriger Verwendung. | Reinigen Sie den Korb und die Gemüseschale nach jedem Gebrauch gründlich. |
| Das Essen ist nicht knusprig. | Too much moisture in food. Not enough oil (if desired). | Pat food dry before cooking. Lightly spray or brush with oil for extra crispiness. |
8. Spezifikationen
- Modellname: FRYER AIR PRO
- Modellnummer: 52025_186434
- Marke: ERSTELLEN
- Kapazität: 3.5 Liter
- Wastage: 1500 Watt
- Bandtage: 240 V
- Temperaturbereich: 80 °C - 200 °C
- Kontrollmethode: Touch, Dial
- Besondere Merkmale: Programmable, Temperature Control, Digital Display
- Material: Plastik
- Farbe: Schwarz
- Abmessungen (T x B x H): 37.8 cm x 26.5 cm x 33.7 cm
- Antihaftbeschichtung: Ja
9. Garantie und Support
For warranty information, please refer to the warranty card included with your product or visit the official CREATE website. If you encounter any issues not covered in this manual, please contact CREATE customer support for assistance.
WebWebsite: www.create.com (Example link, please refer to actual manufacturer's webWebsite)