
1. Einleitung
The FLYDIGI Vader 2 Pro is a versatile wireless game controller designed for an enhanced gaming experience across multiple platforms. This manual provides essential instructions for setting up, operating, and maintaining your controller.
The controller is compatible with Nintendo Switch, iOS, PC, and Android devices, offering a seamless transition between your preferred gaming systems.
2. Produktüberschreitungview
The Vader 2 Pro controller integrates advanced features to optimize gameplay. Key components include dual vibration motors, a 6-axis gyroscope for motion sensing, and customizable RGB lighting.

Bild 2.1: Vorderseite view of the FLYDIGI Vader 2 Pro Game Controller, showcasing dank seines ergonomischen Designs und der Tastenanordnung.
Hauptmerkmale:
- Kompatibilität mehrerer Plattformen: Supports Nintendo Switch, iOS, PC, and Android.
- Doppelte Vibrationsmotoren: Provides immersive haptic feedback with 3 adjustable levels.
- 6-Achsen-Gyroskop: Enables precise motion sensing for compatible games.
- Anpassbare RGB-Beleuchtung: Personalize the controller's aesthetic with millions of color options.
- Konfigurierbare Schaltflächen: Four additional M1-M4 buttons on the rear for personalized controls.
- Mehrere Verbindungsmodi: Bluetooth, 2.4GHz wireless (with dongle), and wired USB connection.

Image 2.2: The Vader 2 Pro controller shown with various compatible devices including a Nintendo Switch, PC laptop, iOS phone, and Android phone, illustrating its multi-platform support.

Image 2.3: The controller highlighting its built-in 6-axis gyro sensor for motion control.
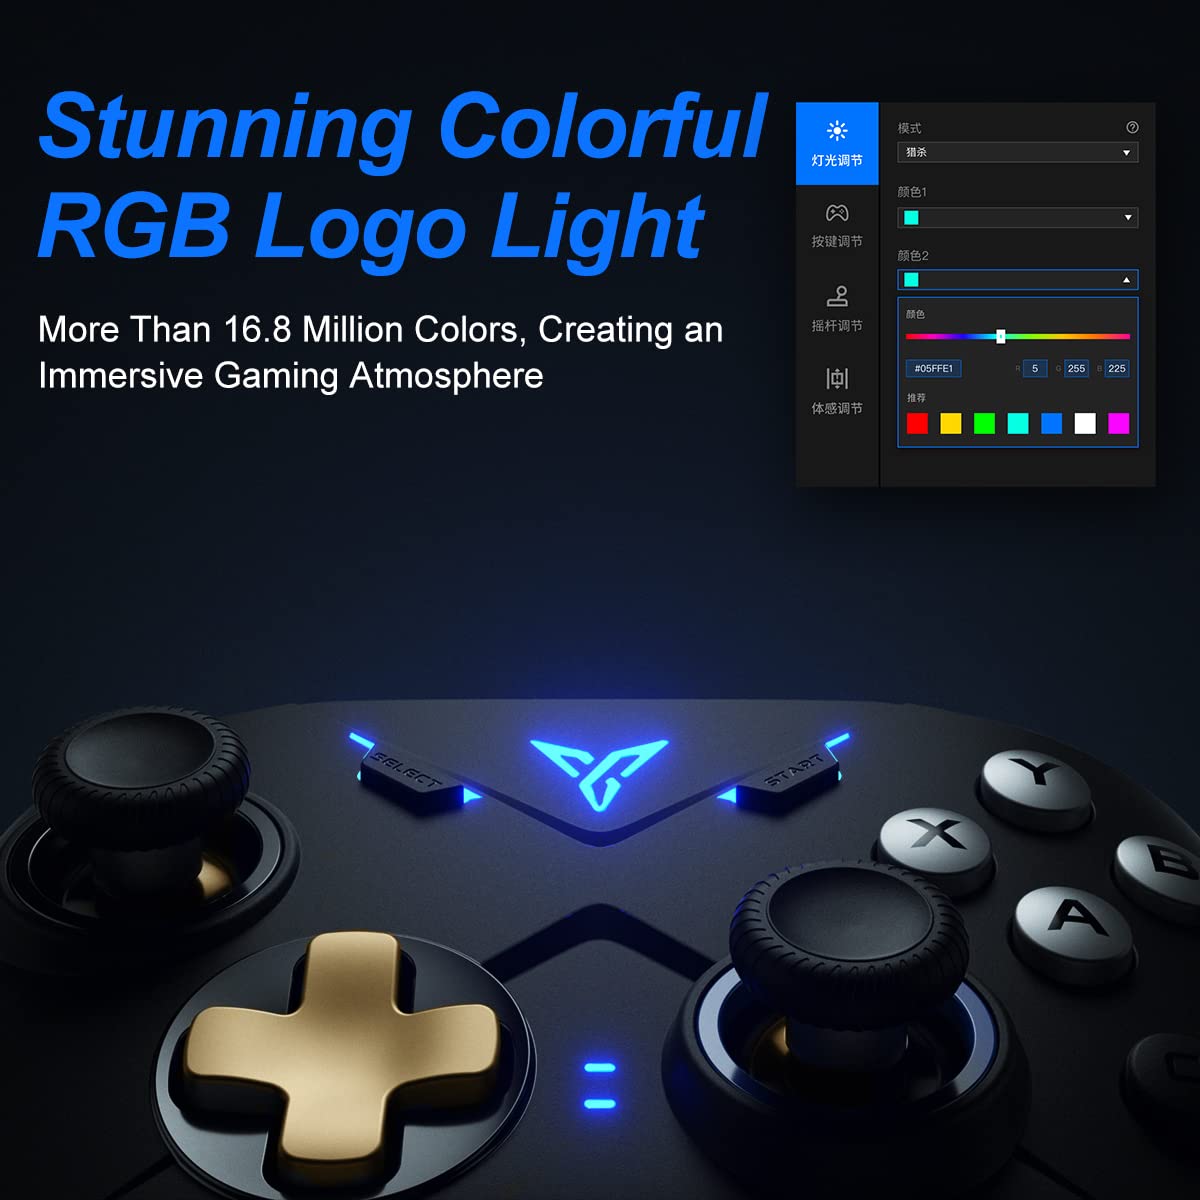
Image 2.4: Close-up of the controller's RGB logo light, demonstrating its customizable color options.

Bild 2.5: Hinten view of the controller, showing the M1-M4 configurable buttons for personalized gameplay.

Image 2.6: Illustration of the controller's asymmetric dual motor design, indicating vibration feedback.
3. Einrichtung und Verbindung
The Vader 2 Pro controller offers multiple connection methods depending on your gaming platform. Refer to the table below for specific instructions.

Image 3.1: A table detailing connection instructions for Phone/Tablet, PC/Mac, and Nintendo Switch.
Anschlussanleitung:
| Anweisung | Connect to Phone/Tablet | Connect to PC/Mac | Mit Switch verbinden |
|---|---|---|---|
| Schaltmethode | Press "+" and "B" buttons simultaneously for 3 seconds. | Press "+" and "A" buttons simultaneously for 3 seconds. | Press "+" and "X" buttons simultaneously for 3 seconds. |
| Verbindungsmethode | Bluetooth-Verbindung | 2.4GHz connector connection or USB wired connection | Bluetooth-Verbindung |
| Support-Modus | Bluetooth-Modus | 360 mode, Android mode (Press "+" and "SELECT" to switch) | Modus wechseln |
| Status der Anzeigeleuchten | No. 1 Indicator light on blue | No. 1 Indicator light on white (No. 2 red for Android mode) | No. 1 Indicator light on orange |
Additional Connection Notes:
- For PC/Mac, a 2.4GHz USB dongle is included for wireless connection. A USB-C to A cable is also provided for wired play.
- Ensure your device's Bluetooth is enabled when connecting wirelessly to phones, tablets, or Nintendo Switch.
- For iOS devices running iOS 13.4 or higher, follow the specific pairing instructions: Press and hold '+' and 'C' until the first light blinks orange and the second light stays red. Then, long press '+' for more than 3 seconds until the first light flashes orange. Go to your iOS Bluetooth settings and select the device to connect.

Image 3.2: The included USB wireless dongle and USB-C charging/data cable.
4. Bedienungsanleitung
4.1. Button Mapping and Customization
The FLYDIGI Vader 2 Pro controller supports extensive customization through the dedicated FLYDIGI PC Space Station software. This software allows you to:
- Remap buttons, including the M1-M4 rear buttons.
- Adjust joystick curves for precision control.
- Fine-tune motion sensing sensitivity.
- Program macro combos for complex actions.
- Change RGB light settings and effects.
Up to 4 sets of custom configurations can be saved directly on the controller. Download the software from the official FLYDIGI webWebsite: flydigi.com/index/down?nav_id=2
4.2. Bewegungserkennung
The integrated 6-axis gyroscope provides accurate motion control in games that support this feature, enhancing your interactive experience.
4.3. Vibrationsrückkopplung
The asymmetric dual vibration motors offer tactile feedback. You can adjust the vibration intensity to one of three levels to suit your preference.
4.4. RGB-Beleuchtung
The controller features a customizable RGB logo light, offering over 16.8 million colors. Use the FLYDIGI PC Space Station software to select your preferred lighting modes and colors.
5. Laden und Akkulaufzeit
The Vader 2 Pro controller is equipped with a rechargeable battery designed to provide up to 80 hours of gameplay on a single charge. To charge the controller, connect it to a USB power source using the provided USB-C cable.

Image 5.1: The controller positioned above a charging indicator, symbolizing its rechargeable battery.
Notiz: Actual battery life may vary based on usage patterns, vibration intensity, and RGB lighting settings.
6. Fehlerbehebung
If you encounter issues with your FLYDIGI Vader 2 Pro controller, refer to the following common solutions:
- Controller stellt keine Verbindung her:
- Ensure the controller is in the correct switching mode for your platform (Phone/Tablet, PC/Mac, Switch) as per Section 3.
- Verify that Bluetooth is enabled on your device or that the 2.4GHz dongle is properly inserted into your PC/Mac.
- Versuchen Sie, sowohl den Controller als auch Ihr Gerät neu zu starten.
- For PC connections, if Bluetooth fails, try using the 2.4GHz dongle or a wired USB connection.
- Buttons Not Responding/Mapping Issues:
- Ensure the FLYDIGI PC Space Station software is correctly installed and updated.
- Check your custom profiles within the software to ensure buttons are mapped as intended.
- Reset the controller to factory settings if custom mappings are causing issues (refer to software documentation for this process).
- Kurze Akkulaufzeit:
- Stellen Sie sicher, dass der Controller vor der Verwendung vollständig aufgeladen ist.
- Reduce vibration intensity or RGB lighting brightness/effects to conserve battery power.
- Sollte die Akkulaufzeit im Laufe der Zeit deutlich nachlassen, wenden Sie sich bitte an den Kundendienst.
- Unstable Wireless Connection:
- Ensure there are no significant obstructions or sources of interference between the controller and your device/dongle.
- Keep the controller within the recommended operating range.
- Update controller firmware via the FLYDIGI PC Space Station software.
7. Spezifikationen
| Besonderheit | Detail |
|---|---|
| Modellnummer | VADER2PRO |
| ASIN | B09LCYB48V |
| Technische Daten | 3.5 x 7.59 x 5.5 Zoll |
| Artikelgewicht | 15.84 Unzen |
| Konnektivität | Bluetooth, 2.4-GHz-Funkverbindung, USB-Kabelverbindung |
| Kompatibilität | Nintendo Switch, iOS, PC, Android |
| Besondere Merkmale | Dual Vibration Motors, 6-Axis Gyroscope, RGB Lighting, Configurable M1-M4 Buttons |
| Akkulaufzeit | Bis zu 80 Stunden (ungefähr) |
| Datum der ersten Verfügbarkeit | 21. Dezember 2021 |
8. Wartung
Um die Langlebigkeit und optimale Leistung Ihres FLYDIGI Vader 2 Pro Controllers zu gewährleisten, befolgen Sie bitte diese Wartungsrichtlinien:
- Reinigung: Reinigen Sie den Controller mit einem weichen, trockenen Tuch. Vermeiden Sie die Verwendung von scharfen Chemikalien oder Scheuermitteln.
- Lagerung: Bewahren Sie den Controller an einem kühlen, trockenen Ort fern von direkter Sonneneinstrahlung und extremen Temperaturen auf.
- Handhabung: Vermeiden Sie es, den Controller fallen zu lassen oder starken Stößen auszusetzen, da dies interne Bauteile beschädigen kann.
- Laden: Do not overcharge the battery. Disconnect the charging cable once the controller is fully charged.
9. Garantie und Support
For warranty information, technical support, or further assistance, please visit the official FLYDIGI webBesuchen Sie die Website oder kontaktieren Sie den Kundenservice. Bewahren Sie Ihren Kaufbeleg für Garantieansprüche auf.
Official FLYDIGI WebWebsite: www.flydigi.com