1. Einleitung
This user manual provides detailed instructions for the setup, operation, maintenance, and troubleshooting of your MOYSUWE MDM9 7" LCD Digital Microscope. Designed for a wide range of applications including coin collection, PCB soldering, and general observation, this microscope offers high-resolution imaging and versatile connectivity options. Please read this manual thoroughly before using the device to ensure optimal performance and longevity.
2. Lieferumfang
- 7 inch Digital Microscope x1
- 32 x 1 GB Micro-SD-Karte
- Adjustable Aluminum Alloy Stand x1
- 6 inch Extender x1
- USB-Kabel x1
3. Einrichtung
3.1 Montage
- Packen Sie alle Komponenten vorsichtig aus dem Karton aus.
- Attach the 7-inch LCD digital microscope unit to the adjustable aluminum alloy stand. Ensure it is securely fastened.
- Connect the two flexible gooseneck lights to the designated ports on the stand. Position them to illuminate the observation area.
- If observing larger objects like full coins, attach the 6-inch extender tube between the microscope lens and the stand. This provides a wider field of view and increased working distance.
- Insert the included 32GB Micro SD card into the TF card slot on the microscope unit.

Figure 3.1: Fully assembled MOYSUWE MDM9 Digital Microscope.

Figure 3.2: The 6-inch extension tube allows for a higher and wider field of view, ideal for observing entire coins.
3.2 Einschalten
Connect the microscope to a power source using the provided USB cable. The device will power on automatically or can be turned on using the power button.
4. Bedienungsanleitung
4.1 Einstellen von Vergrößerung und Fokus
The MDM9 offers a magnification range of 50X to 1200X. Use the focusing wheel on the side of the microscope to adjust the focus for a clear image. Adjust the height of the microscope unit on the stand to change the magnification level. The rotatable 7-inch LCD screen (90-degree rotation) allows for comfortable viewaus verschiedenen Blickwinkeln.
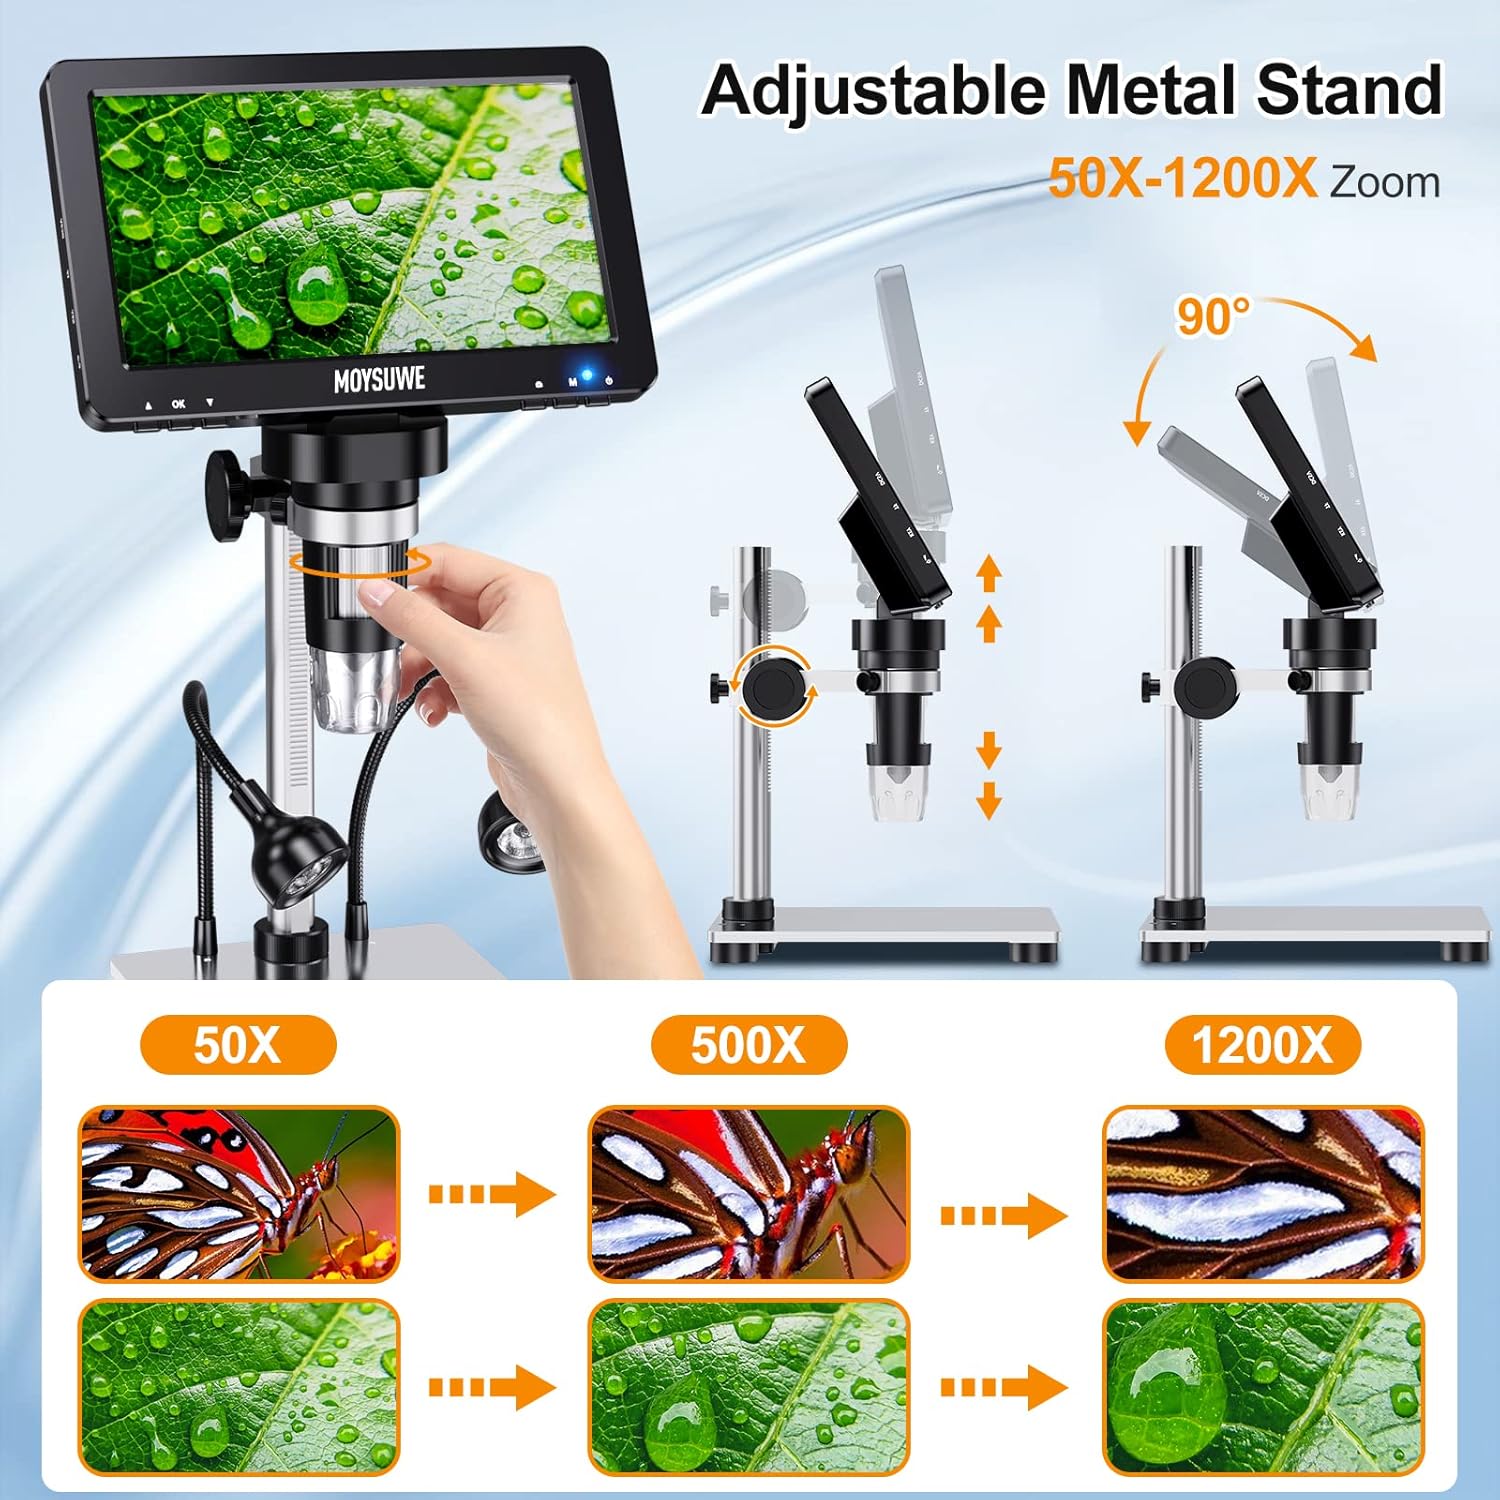
Figure 4.1: Adjusting the microscope height on the stand to achieve desired magnification levels from 50X to 1200X.
4.2 Lichtsteuerung
The microscope is equipped with 8 LED lights around the lens and 2 adjustable gooseneck lights. These lights provide ample illumination for various observation environments. Use the brightness controls to adjust the intensity of the lights for optimal clarity and detail.

Figure 4.2: Demonstrating the effect of adjustable lighting on the observed object.
4.3 Fernbedienungsbetrieb
The included smart remote control allows you to capture photos and videos, and adjust zoom without touching the microscope, preventing screen shake. This feature enhances stability and ease of use during observation and recording.

Figure 4.3: The remote control facilitates easy capture of images and videos.
4.4 Connecting to PC (Windows/Mac OS)
The MDM9 microscope can be connected to Windows and MacOS computers via its USB port for a larger viewing experience. No special drivers are required. For Windows, use the default "Windows Camera" application. For iMac/MacBook, use "Photo Booth".

Figure 4.4: Connecting the MDM9 microscope to a PC for an extended view.
Video 4.1: This video demonstrates how to connect the MDM9 digital microscope to both Mac and Windows operating systems, showcasing the process of setting up the microscope to display its view on a computer screen.
4.5 Recording and Sharing
Images and videos can be recorded directly using the remote control or buttons on the microscope. All captured media are stored in 1080P quality on the included 32GB Micro SD card, allowing for easy transfer to a computer for sharing and analysis.
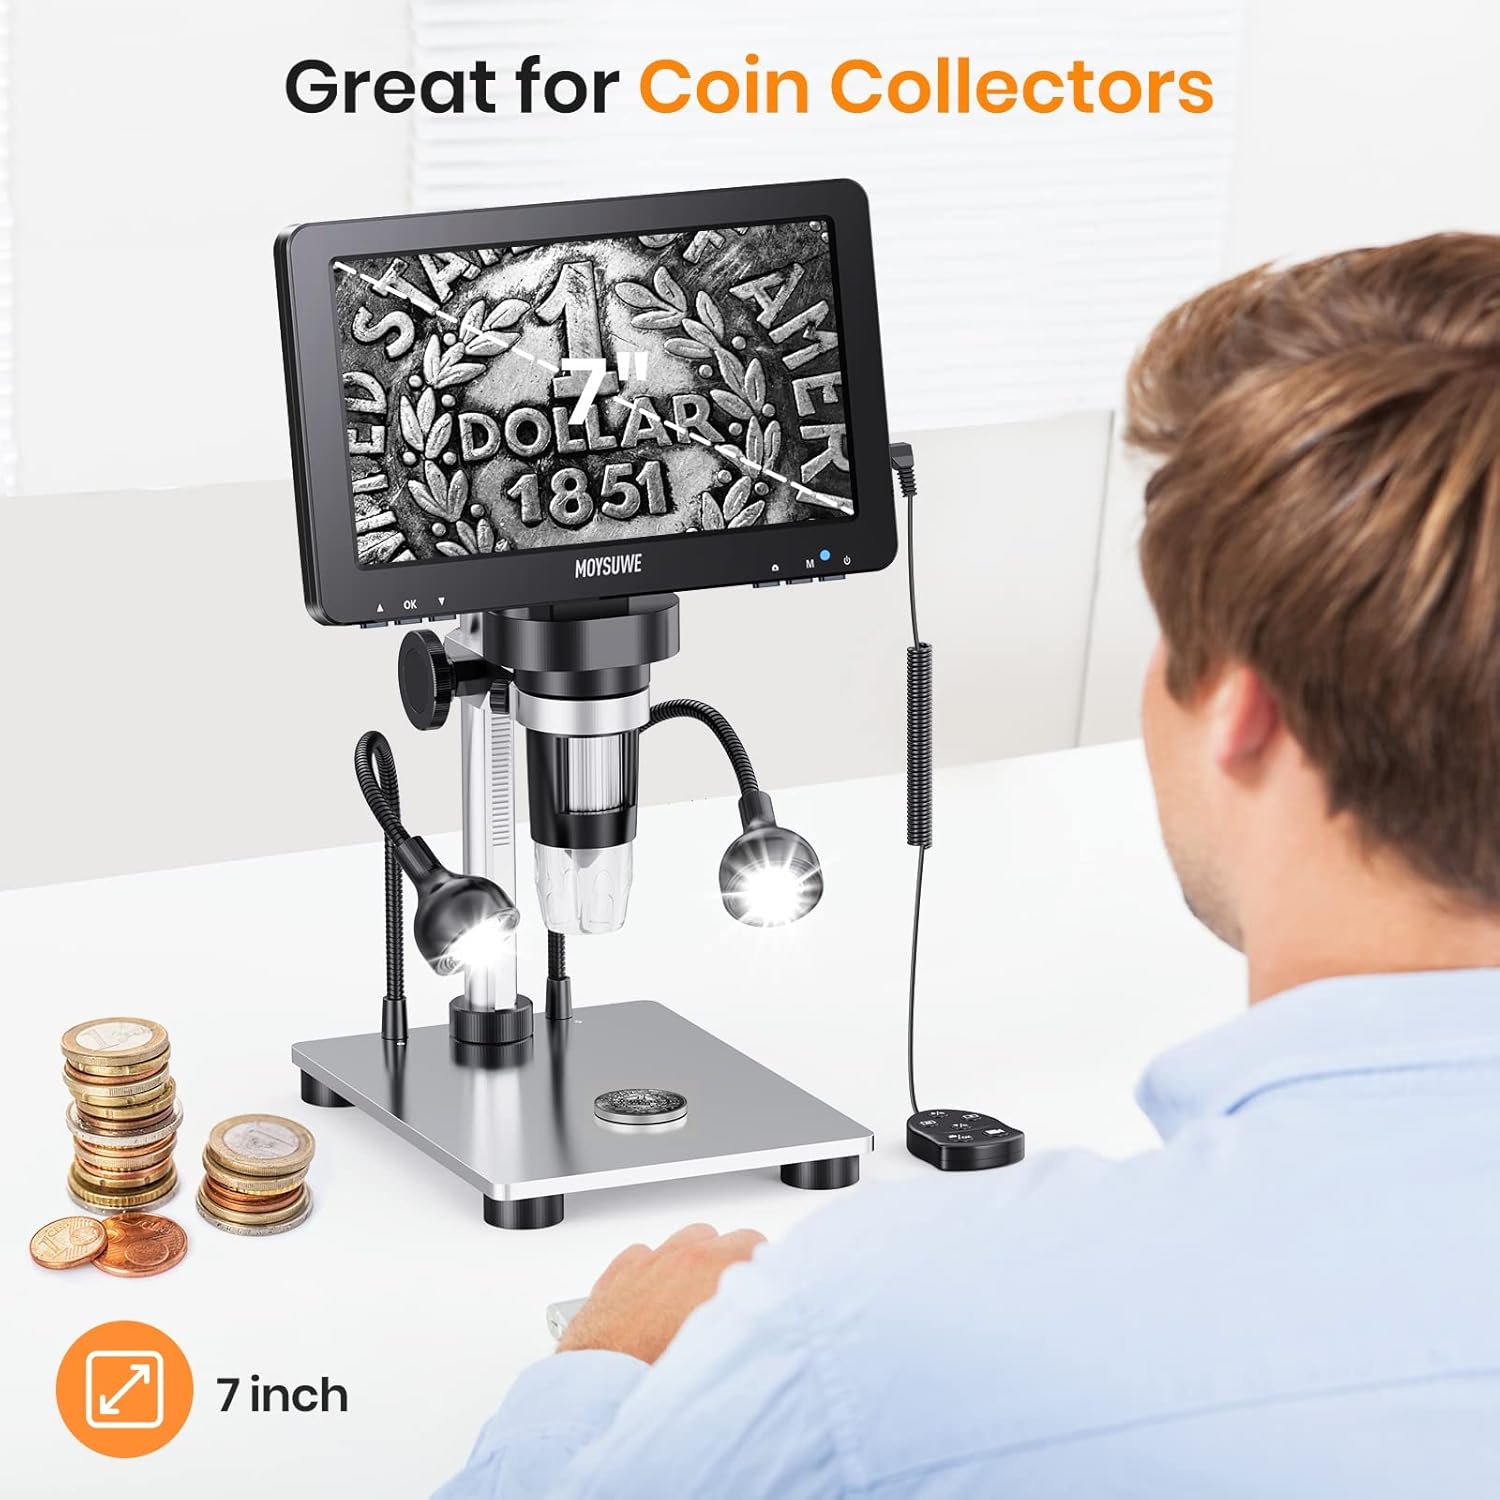
Figure 4.5: The microscope is an excellent tool for coin collectors, allowing detailed examination of coins.

Figure 4.6: The large working space and clear view make the MDM9 suitable for soldering tasks.
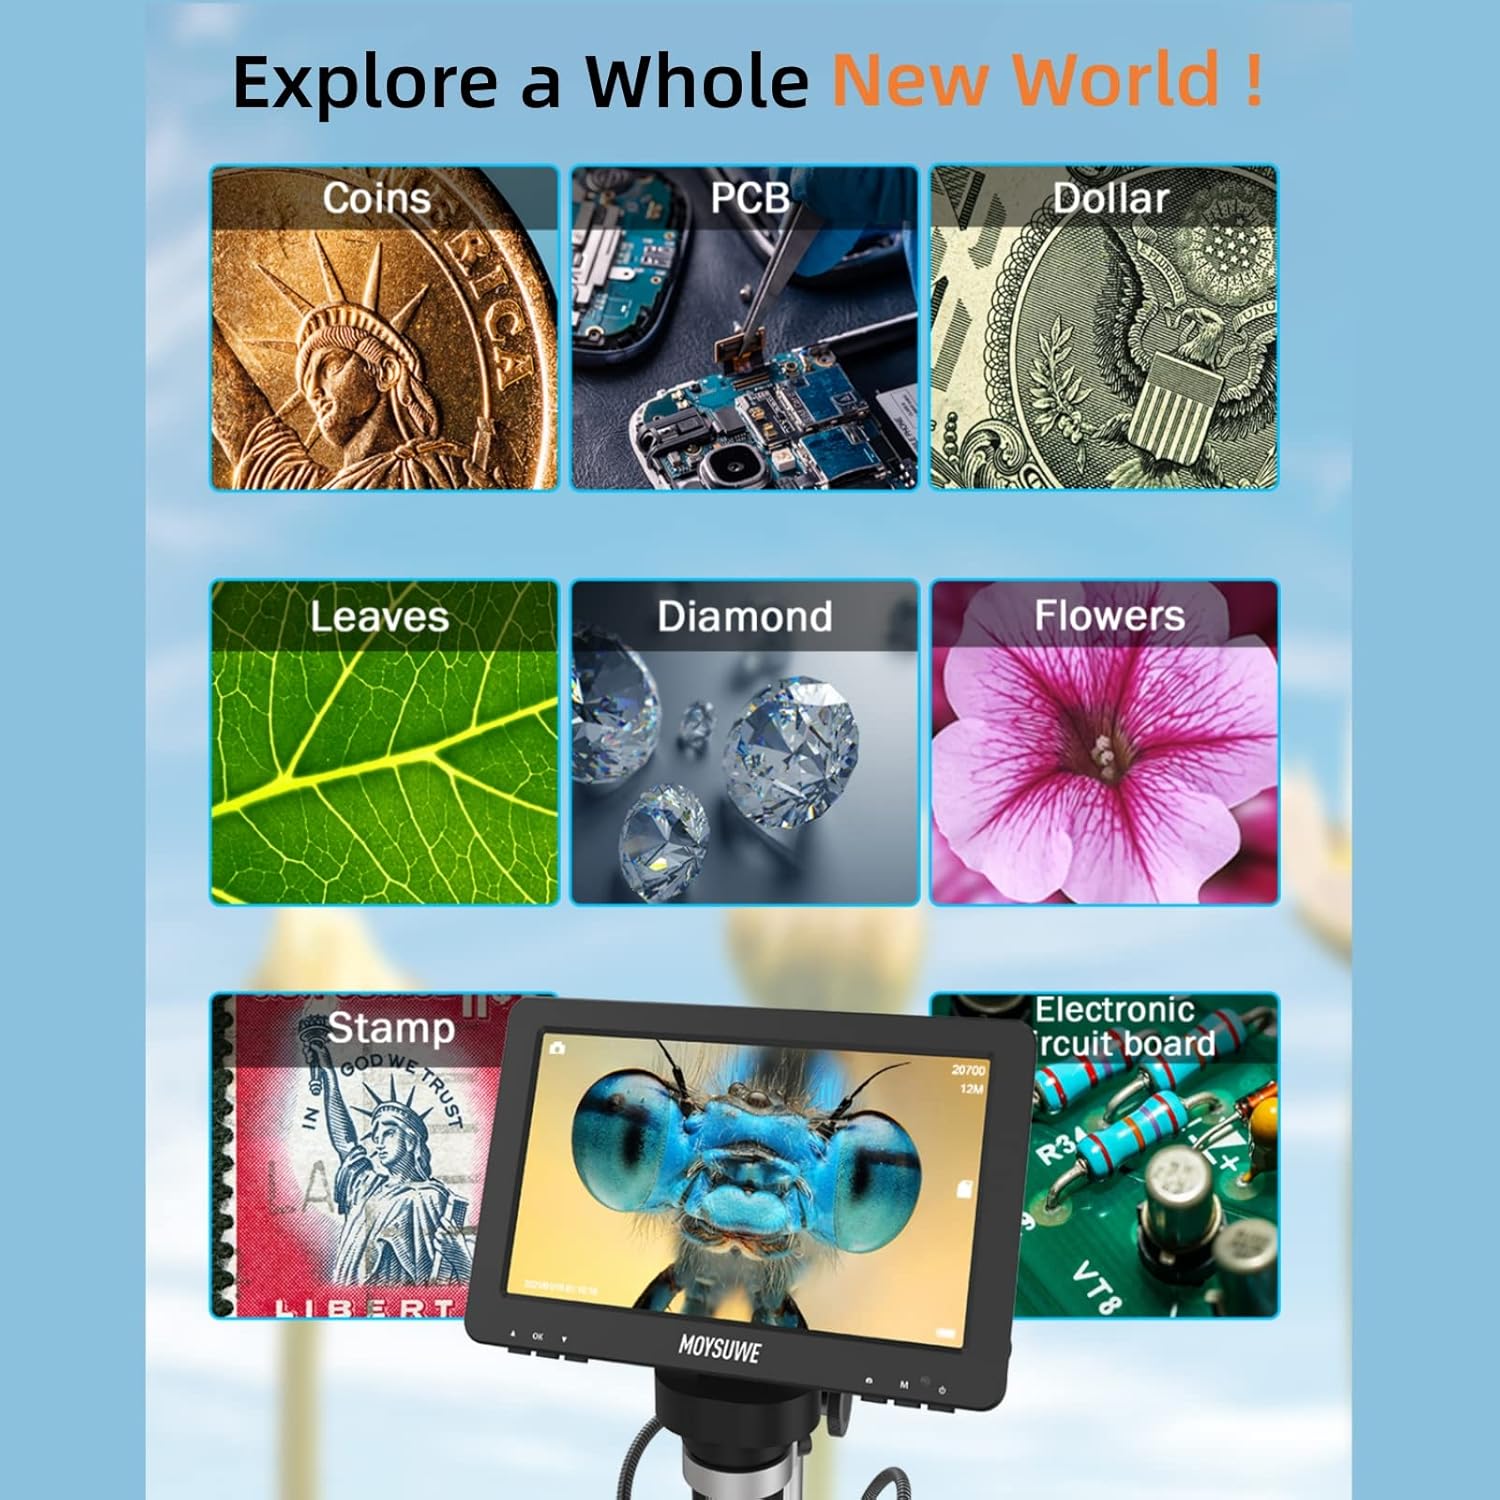
Figure 4.7: Explore a wide range of objects with your MDM9 microscope.
5. Wartung
5.1 Reinigung
- Use a soft, lint-free cloth to clean the LCD screen and lens. For stubborn smudges, a small amount of lens cleaning solution can be applied to the cloth (not directly to the screen/lens).
- Keep the microscope body and stand free from dust and debris. A soft brush or compressed air can be used for hard-to-reach areas.
- Stellen Sie vor der Reinigung sicher, dass das Gerät ausgeschaltet und vom Stromnetz getrennt ist.
5.2 Speicherung
When not in use, store the microscope in a dry, dust-free environment. Avoid extreme temperatures and direct sunlight. It is recommended to keep the lens covered to prevent dust accumulation.
5.3 Batteriepflege
The device includes a Lithium Polymer battery. For optimal battery life, avoid fully discharging the battery frequently. If storing for an extended period, charge the battery to approximately 50% before storage.
6. Fehlerbehebung
| Problem | Mögliche Ursache | Lösung |
|---|---|---|
| No image on LCD screen | Device not powered on; loose cable connection; screen mode not selected. | Ensure power cable is securely connected and device is turned on. Check if the display mode is set correctly (e.g., microscope mode vs. PC mode). |
| Verschwommenes Bild | Improper focus; incorrect working distance; insufficient lighting. | Adjust the focusing wheel. Adjust the height of the microscope on the stand. Increase brightness of LED lights. |
| Verbindung zum PC kann nicht hergestellt werden | Incorrect USB port; wrong software selected; microscope not in PC mode. | Ensure using the correct USB cable and port. Select "Windows Camera" (Windows) or "Photo Booth" (Mac). Set microscope to PC mode if applicable. |
| Fernbedienung funktioniert nicht | Battery low/dead; remote out of range; obstruction. | Replace remote control battery. Ensure clear line of sight to the microscope's sensor. |
| USB port issues (e.g., loose connection) | Wear and tear; physical stress on the port. | Handle the USB cable and port with care. Avoid applying constant pressure or bending the cable at the connection point. If issues persist, contact customer support. |
7. Spezifikationen
| Besonderheit | Detail |
|---|---|
| Modellname | MDM9 |
| Bildschirmgröße | 7 Zoll |
| Bildschirmauflösung | 1080P HD |
| Kamera Sensor | 12 Megapixel |
| Vergrößerungsbereich | 50- bis 1200-fach |
| Beleuchtung | 8 LED lights + 2 Flexible Gooseneck Lights |
| Lagerung | Micro-SD-Karte (32 GB im Lieferumfang enthalten) |
| PC-Kompatibilität | Windows, Mac OS |
| Material | Aluminum Alloy (stand and gooseneck light) |
| Technische Daten | 9.4 x 8.2 x 3.3 Zoll |
| Artikelgewicht | 2.31 Pfund |
| Stromquelle | 5 Volt (USB) |
| Batterie | 1 Lithium-Polymer-Akku (im Lieferumfang enthalten) |
8. Garantie und Support
MOYSUWE is committed to providing high-quality products and excellent after-sales service. For any questions, technical support, or warranty inquiries regarding your MDM9 Digital Microscope, please contact MOYSUWE customer support through the retailer where you purchased the product or visit the official MOYSUWE brand store online. Please retain your proof of purchase for warranty claims.