
1. Produktüberschreitungview
The Graco Extend2Fit Convertible Car Seat is designed to provide safety and comfort for your child from infancy through toddlerhood. This 2-in-1 car seat supports rear-facing harness use for infants from 1.8 kg to 22.5 kg (4-50 lb) and forward-facing harness use for toddlers from 10 kg to 30 kg (22-65 lb).
Key features include an Extend2Fit 4-position extension panel, offering up to 12.7 cm (5 inches) of additional rear-facing legroom, promoting extended rear-facing use for enhanced safety. The No-Rethread Simply Safe Adjust Harness System allows for simultaneous adjustment of the headrest and harness height. Installation is simplified with the InRight UAS system for a one-second lower anchor attachment. For convenience, fuss-free harness storage pockets keep the harness out of the way when seating or removing your child. The car seat is Graco ProtectPlus Engineered for protection in frontal, side, rear, and rollover crashes.
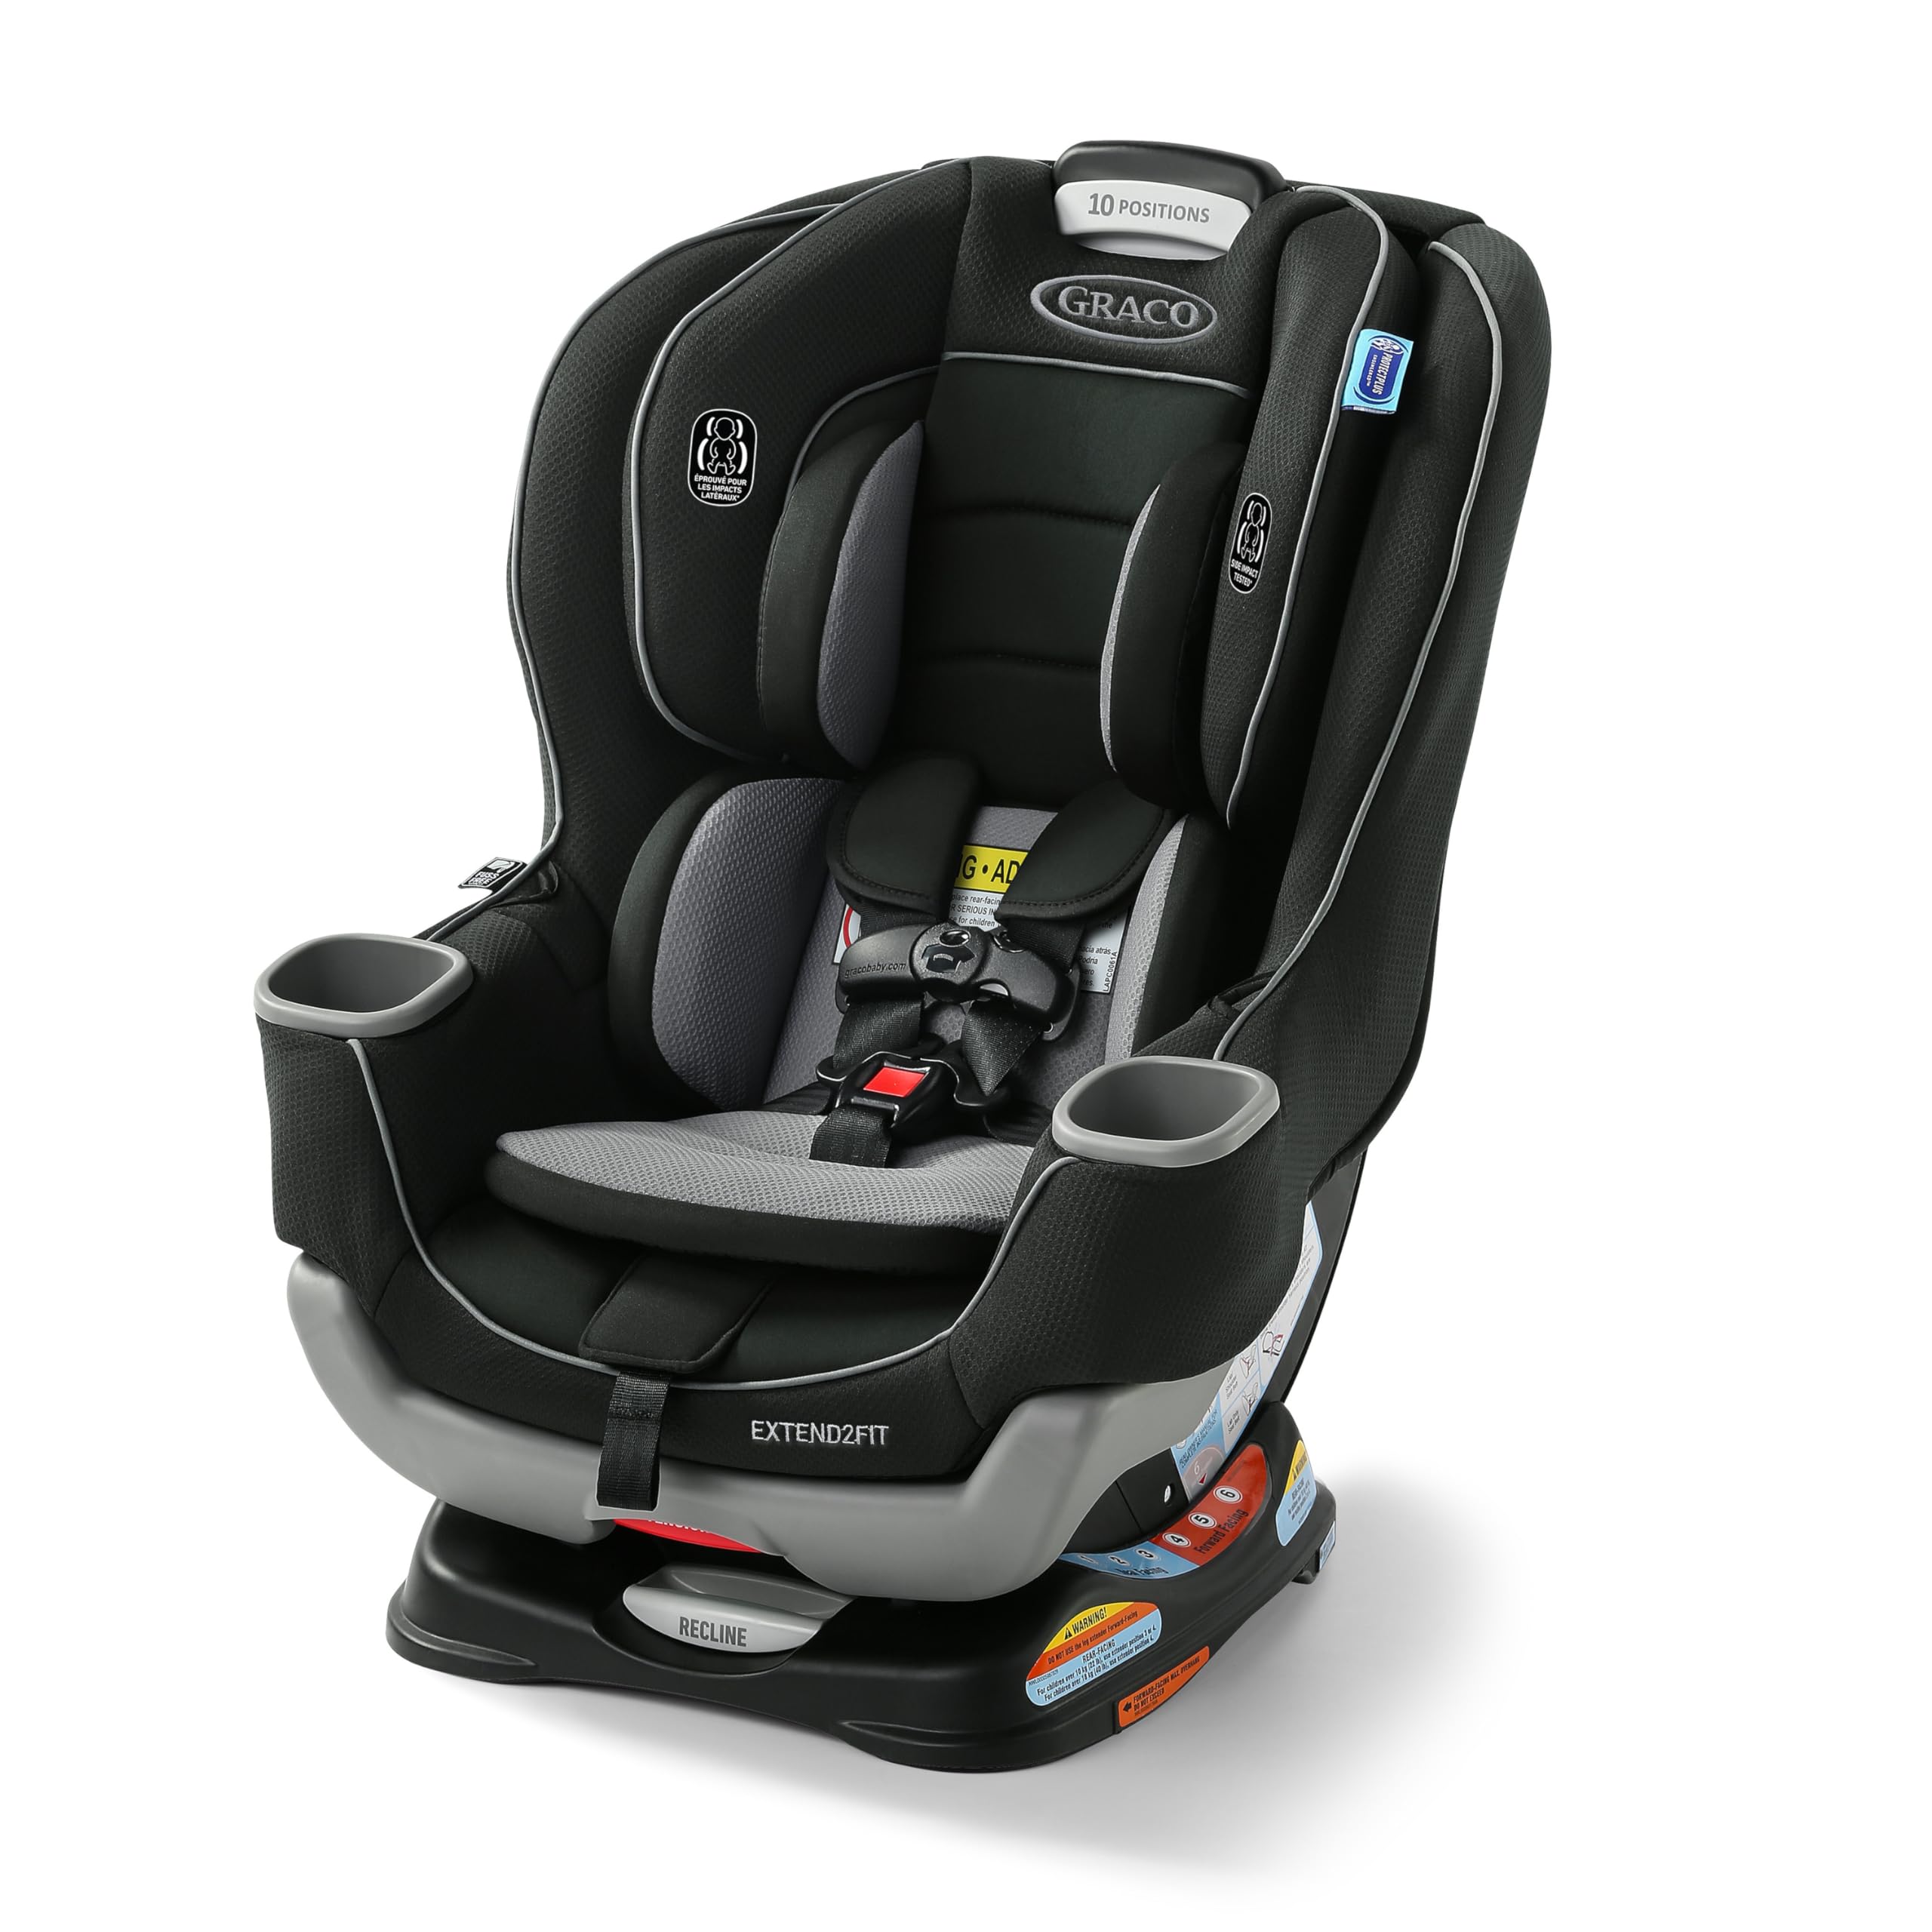
Image 1.1: The Graco Extend2Fit Convertible Car Seat, showcasing sein Design und seine Funktionen.
2. Sicherheitshinweise
Always prioritize your child's safety by following all instructions in this manual and your vehicle's owner's manual. Children are safest riding rear-facing for as long as possible, until they reach the maximum rear-facing height or weight limits of the car seat. The Extend2Fit feature is designed to facilitate this extended rear-facing use.
- Nach hinten gerichtet: For infants from 1.8 kg to 22.5 kg (4-50 lb).
- Nach vorne gerichtet: For toddlers from 10 kg to 30 kg (22-65 lb).
- The car seat is Graco ProtectPlus Engineered to help protect your child in frontal, side, rear, and rollover crashes.
- Always ensure the harness is snug and positioned correctly on your child.
- Verwenden Sie niemals einen Kindersitz, der in einen mittelschweren bis schweren Unfall verwickelt war, selbst wenn er unbeschädigt erscheint.

Image 2.1: Illustration of rear-facing and forward-facing harness positions for safe travel.

Image 2.2: Graco ProtectPlus Engineering highlights protection in various crash scenarios.
3. Einrichtung und Installation
Proper installation is crucial for the safety of your child. Always refer to the labels on the car seat and your vehicle's owner's manual for specific instructions and compatibility.
3.1. Rear-Facing Installation (1.8-22.5 kg / 4-50 lb)
- Position the car seat in the rear-facing orientation in your vehicle's back seat.
- Adjust the recline position to ensure the child's head is properly supported and the recline indicator is within the acceptable range for rear-facing.
- Extend the Extend2Fit extension panel as needed to provide additional legroom for your child.
- Secure the car seat using either the vehicle's lower anchors (LATCH/UAS) or the vehicle's seat belt.
- For LATCH/UAS installation, connect the InRight UAS connectors to your vehicle's lower anchors until you hear a click. Ensure a tight fit by pressing down firmly on the car seat while tightening the LATCH/UAS strap.
- For seat belt installation, route the vehicle's lap and shoulder belt through the designated rear-facing belt path and buckle it. Lock the vehicle's seat belt and remove all slack.
- Perform a "tug test" at the belt path: the car seat should not move more than 2.5 cm (1 inch) side-to-side or front-to-back.
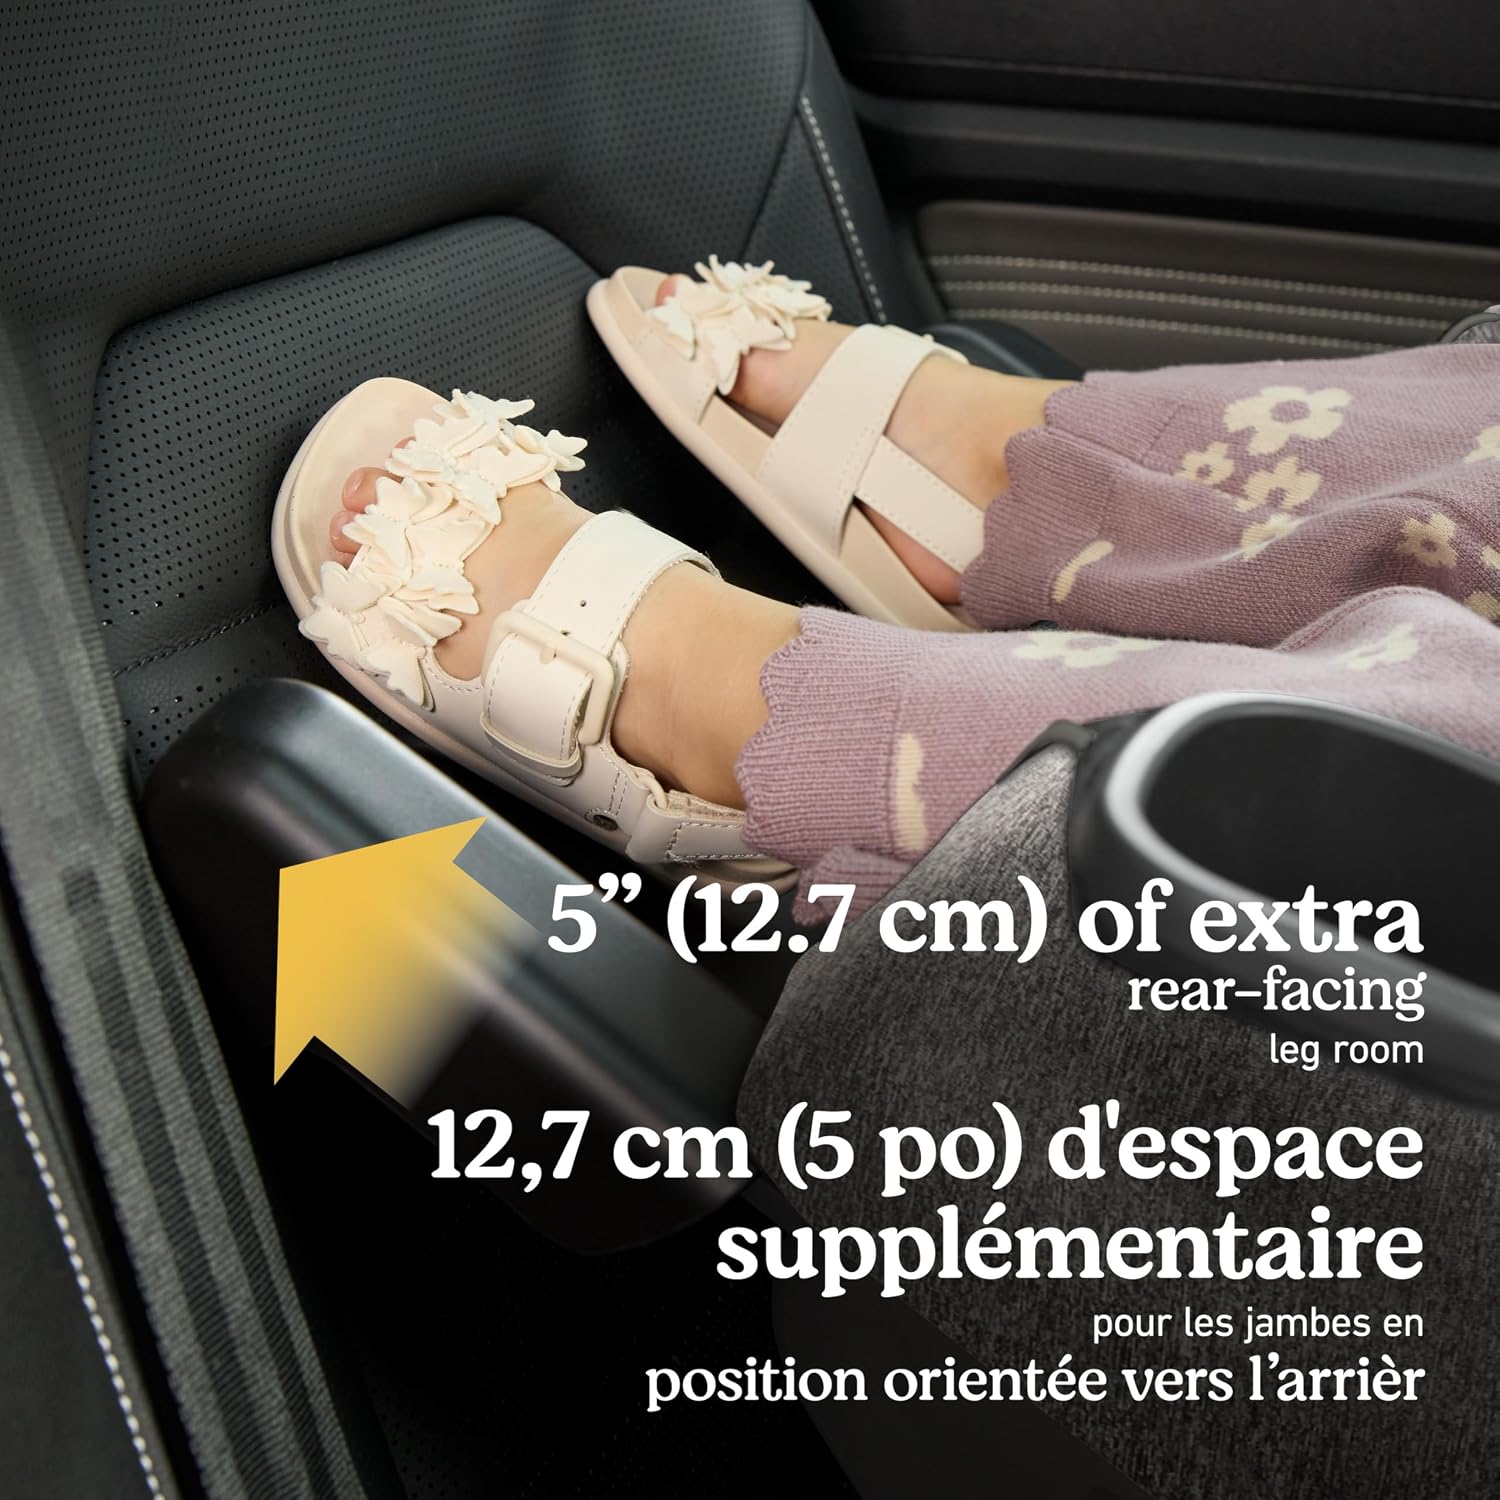
Image 3.1: The Extend2Fit extension panel provides additional legroom for rear-facing comfort.
3.2. Forward-Facing Installation (10-30 kg / 22-65 lb)
- Ensure your child meets the minimum weight and height requirements for forward-facing use.
- Position the car seat in the forward-facing orientation in your vehicle's back seat.
- Adjust the recline position as appropriate for forward-facing use.
- Secure the car seat using either the vehicle's lower anchors (LATCH/UAS) or the vehicle's seat belt.
- For LATCH/UAS installation, connect the InRight UAS connectors to your vehicle's lower anchors. Additionally, attach the top tether strap to the vehicle's designated tether anchor point and tighten.
- For seat belt installation, route the vehicle's lap and shoulder belt through the designated forward-facing belt path and buckle it. Lock the vehicle's seat belt and remove all slack. Attach the top tether strap to the vehicle's designated tether anchor point and tighten.
- Perform a "tug test" at the belt path: the car seat should not move more than 2.5 cm (1 inch) side-to-side or front-to-back.
4. Bedienungsanleitung
4.1. Gurteinstellung
The Simply Safe Adjust Harness System allows you to adjust the harness and headrest height simultaneously with one hand. This ensures a proper fit as your child grows without the need for rethreading.
- To raise or lower the headrest and harness, squeeze the adjustment handle located at the top of the headrest and slide it to the desired position.
- Ensure the harness straps are at or just below the child's shoulders for rear-facing, and at or just above the child's shoulders for forward-facing.
- Always ensure the harness is snug against your child's body, with no slack. The chest clip should be at armpit level.

Image 4.1: The Simply Safe Adjust Harness System ensures a perfect fit.
4.2. Liegepositionen
The car seat features a 6-position recline to keep your child comfortable. The recline lever is typically located at the front base of the car seat.
- Consult the recline indicator on the side of the car seat to ensure the chosen recline position is appropriate for your child's weight and the car seat's orientation (rear-facing or forward-facing).
4.3. Fuss-Free Harness Storage
To make seating and removing your child easier, the car seat includes fuss-free harness storage pockets. These pockets hold the harness straps out of the way.
- Simply tuck the buckle tongues into the designated pockets on the sides of the car seat when not in use.

Image 4.2: Fuss-free harness storage keeps straps out of the way.
4.4. Integrated Cupholders
The car seat includes two integrated cupholders for your child's drinks or snacks.
5. Wartung und Reinigung
Regelmäßige Reinigung trägt dazu bei, den Zustand und die Hygiene des Autositzes zu erhalten.
- Sitzpolster: The seat pad is machine-washable. Refer to the care tag on the seat pad for specific washing instructions (e.g., cold water, delicate cycle, air dry).
- Gurte des Gurtsystems: Reinigen Sie die Gurte mit einem Tuch.amp Das Material kann geschwächt werden. Die Gurte dürfen nicht in der Waschmaschine gewaschen oder in Wasser eingetaucht werden. webbin.
- Schnalle: Reinigen Sie die Schnalle, indem Sie sie mit einem Tuch abwischen.amp cloth. If food or debris is stuck, flush the buckle with warm water. Do not use detergents or lubricants.
- Kunststoff- und Metallteile: Kunststoff- und Metallteile mit milder Seife und kaltem Wasser abwischen.
- Do not use bleach, harsh cleaners, or abrasive pads on any part of the car seat.
6. Fehlerbehebung
In diesem Abschnitt werden häufig auftretende Probleme behandelt.
6.1. Difficulty Tightening Harness Straps
If you find it difficult to tighten the harness straps:
- Ensure the harness straps are not twisted or caught under the car seat padding.
- Pull the bottom strap of the harness first, then pull the adjustment strap on the backside of the seat. Repeat this motion, alternating between the bottom strap and the adjustment strap, until the desired tension is achieved. This method can help distribute tension and make tightening easier.
- Ensure the chest clip is unbuckled and the harness is loosened before placing the child in the seat.
6.2. Car Seat Not Securely Installed
If the car seat moves more than 2.5 cm (1 inch) at the belt path after installation:
- Re-read the installation instructions carefully for your chosen method (LATCH/UAS or seat belt).
- Ensure all slack is removed from the LATCH/UAS strap or vehicle seat belt. Apply firm downward pressure on the car seat while tightening.
- For forward-facing, ensure the top tether is correctly attached and tightened.
- Check your vehicle's owner's manual for specific car seat installation tips for your vehicle model.
7. Produktspezifikationen
| Besonderheit | Detail |
|---|---|
| Modellnummer | 8AQ49TUSCA |
| Produktabmessungen (T x B x H) | 56.9 cm x 49 cm x 63.9 cm (22.4 T x 19.3 B x 25.2 H Zoll) |
| Artikelgewicht | 9.4 kg |
| Rear-Facing Weight Range | 1.8 kg - 22.5 kg (4 lb - 50 lb) |
| Forward-Facing Weight Range | 10 kg - 30 kg (22 lb - 65 lb) |
| Kabelbaumtyp | 5-Punkt |
| Anzahl der Höhenpositionen | 10 |
| Installationstyp | LATCH (InRight UAS) / Vehicle Seat Belt |
| Material | Legierter Stahl, Polyester |
| Ursprungsland | China |

Image 7.1: Product dimensions for the Graco Extend2Fit Convertible Car Seat.
8. Garantie und Support
Herstellergarantie: Für dieses Produkt gilt eine einjährige Herstellergarantie.
For customer support, parts, or warranty claims, please contact Graco customer service. You can find contact information on the Graco official website or refer to the product registration card included with your car seat.
Kontaktdaten des Herstellers: OAKVILLE, ON, L6J 3J3 CA


