1. Einleitung
This manual provides essential information for the proper installation, operation, and maintenance of your SITERWELL Hardwired Interconnected Smoke and Carbon Monoxide Detector Combo. This device is designed to provide early warning of both smoke and carbon monoxide hazards in residential environments. Please read this manual thoroughly before installation and retain it for future reference.

Bild 1: Überview of the SITERWELL Interconnected Combination Smoke and Carbon Monoxide Detector, highlighting its features such as wireless or hardwired interconnection, 2 AA battery backup, audible alarm, self-check function, low battery warning, and 2-in-1 sensor.
2. Wichtige Sicherheitshinweise
- Den Detektor nicht lackieren. Paint can clog the sensing chambers and prevent the unit from operating correctly.
- Dieses Gerät ist ausschließlich für den Gebrauch im Wohnbereich bestimmt.
- Testen Sie den Detektor regelmäßig gemäß den Anweisungen in diesem Handbuch.
- Never ignore any alarm. Investigate the cause and take appropriate action.
- Ensure proper placement according to local codes and this manual to maximize effectiveness.
- This detector is UL 217 and UL 2034 certified, ensuring compliance with safety standards.
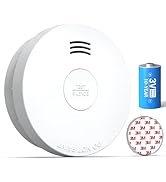
Image 2: A SITERWELL detector mounted on a ceiling, with UL Certified and UL Listed marks, indicating compliance with safety standards.
3. Packungsinhalt
Überprüfen Sie, ob alle Artikel in Ihrem Paket vorhanden sind:
- SITERWELL Hardwired Interconnected Smoke and Carbon Monoxide Detector Combo unit(s)
- Montagezubehör (Schrauben, Dübel)
- Bedienungsanleitung

Image 3: Three SITERWELL Hardwired Interconnected Smoke and Carbon Monoxide Detector Combo units, showing their design and wiring.
4. Produktmerkmale
4.1. 2-in-1 Protection with Unique Voice Alert
This device integrates both smoke and carbon monoxide detection into a single unit. It provides an audible warning exceeding 85 decibels. The unique voice alert feature distinguishes between smoke and carbon monoxide hazards, announcing either "Fire!" (with 3 long beeps) or "Warning, Carbon Monoxide, Evacuate" (with 4 quick beeps), enabling a more organized response to emergencies.
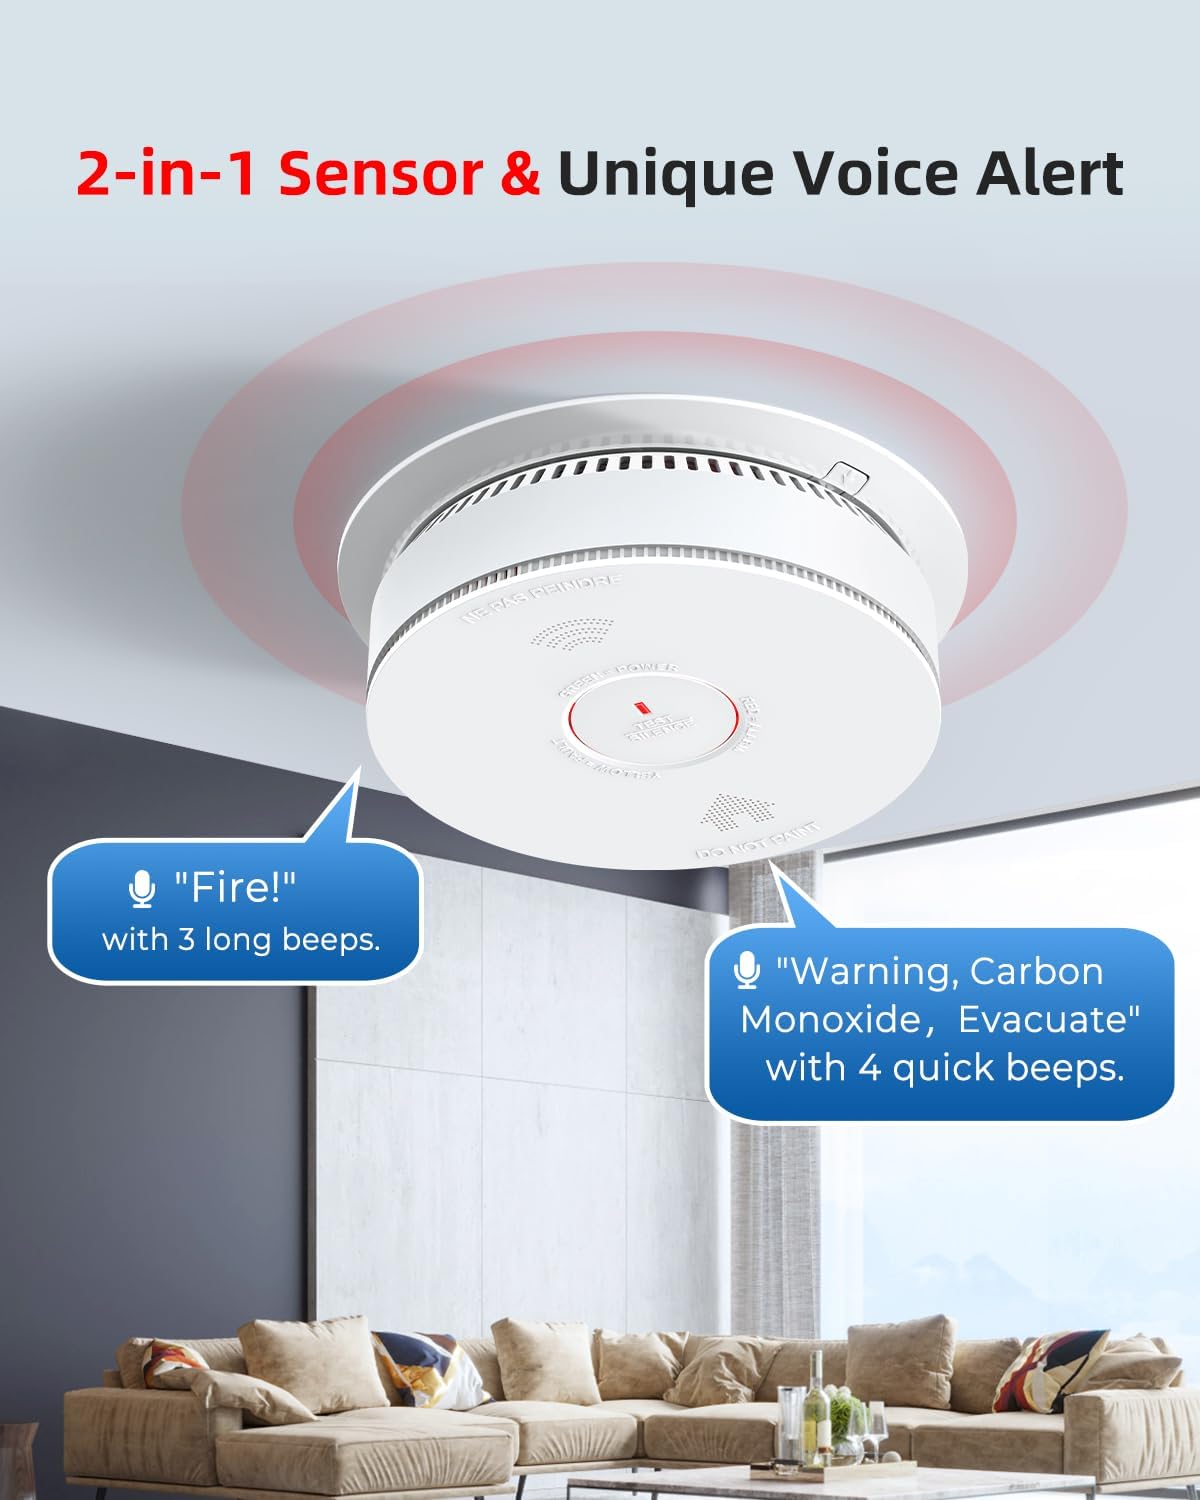
Image 4: A SITERWELL detector installed on a ceiling, illustrating its 2-in-1 sensor and unique voice alert capabilities for both fire and carbon monoxide.
4.2. Hardwired and Wireless Interconnection
The detector supports both hardwired and wireless interconnection with up to 12 compatible units. When one alarm is triggered, all interconnected alarms will sound, ensuring everyone in the building is notified of the emergency. This feature is crucial for comprehensive safety coverage across larger homes or multiple floors.
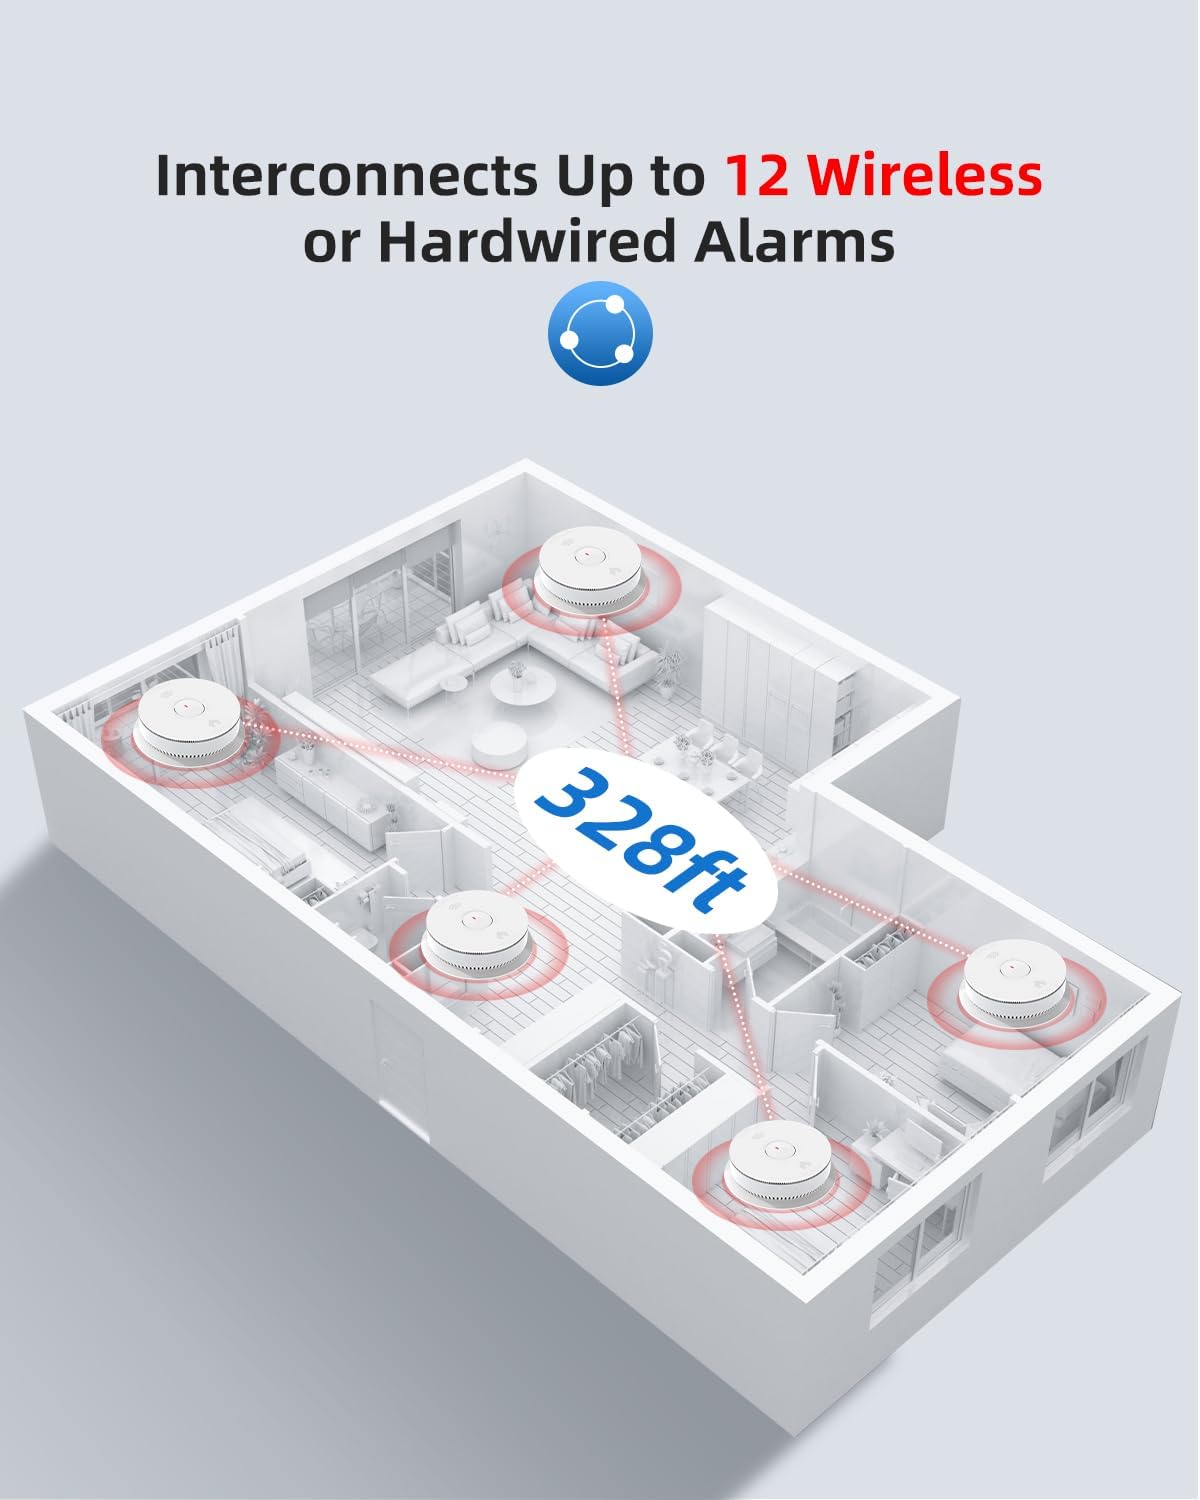
Image 5: A floor plan illustrating how multiple SITERWELL detectors can be interconnected, covering an area of up to 328 feet, ensuring all units alarm simultaneously.
4.3. AC Power with 2 AA Battery Backup
The detector operates primarily on 120V AC power. It is equipped with a 2 AA battery backup system to ensure continuous operation during power outages, maintaining your safety even when the main power supply is interrupted.

Image 6: The top panel shows the detector connected via AC wiring, while the bottom panel displays the battery compartment with two AA batteries, illustrating the dual power source.
4.4. Self-Check Function
This SITERWELL detector includes a self-check feature that automatically monitors its operational status. If the detector experiences a malfunction, it will notify you promptly, eliminating the need for frequent manual testing to confirm functionality.

Image 7: The self-check function is indicated by a green light on the detector, ensuring it is working correctly without manual intervention.
4.5. 10-Year Sensor Life
The detector is equipped with a high-quality sensor designed for a 10-year operational life, providing long-term, uninterrupted protection.
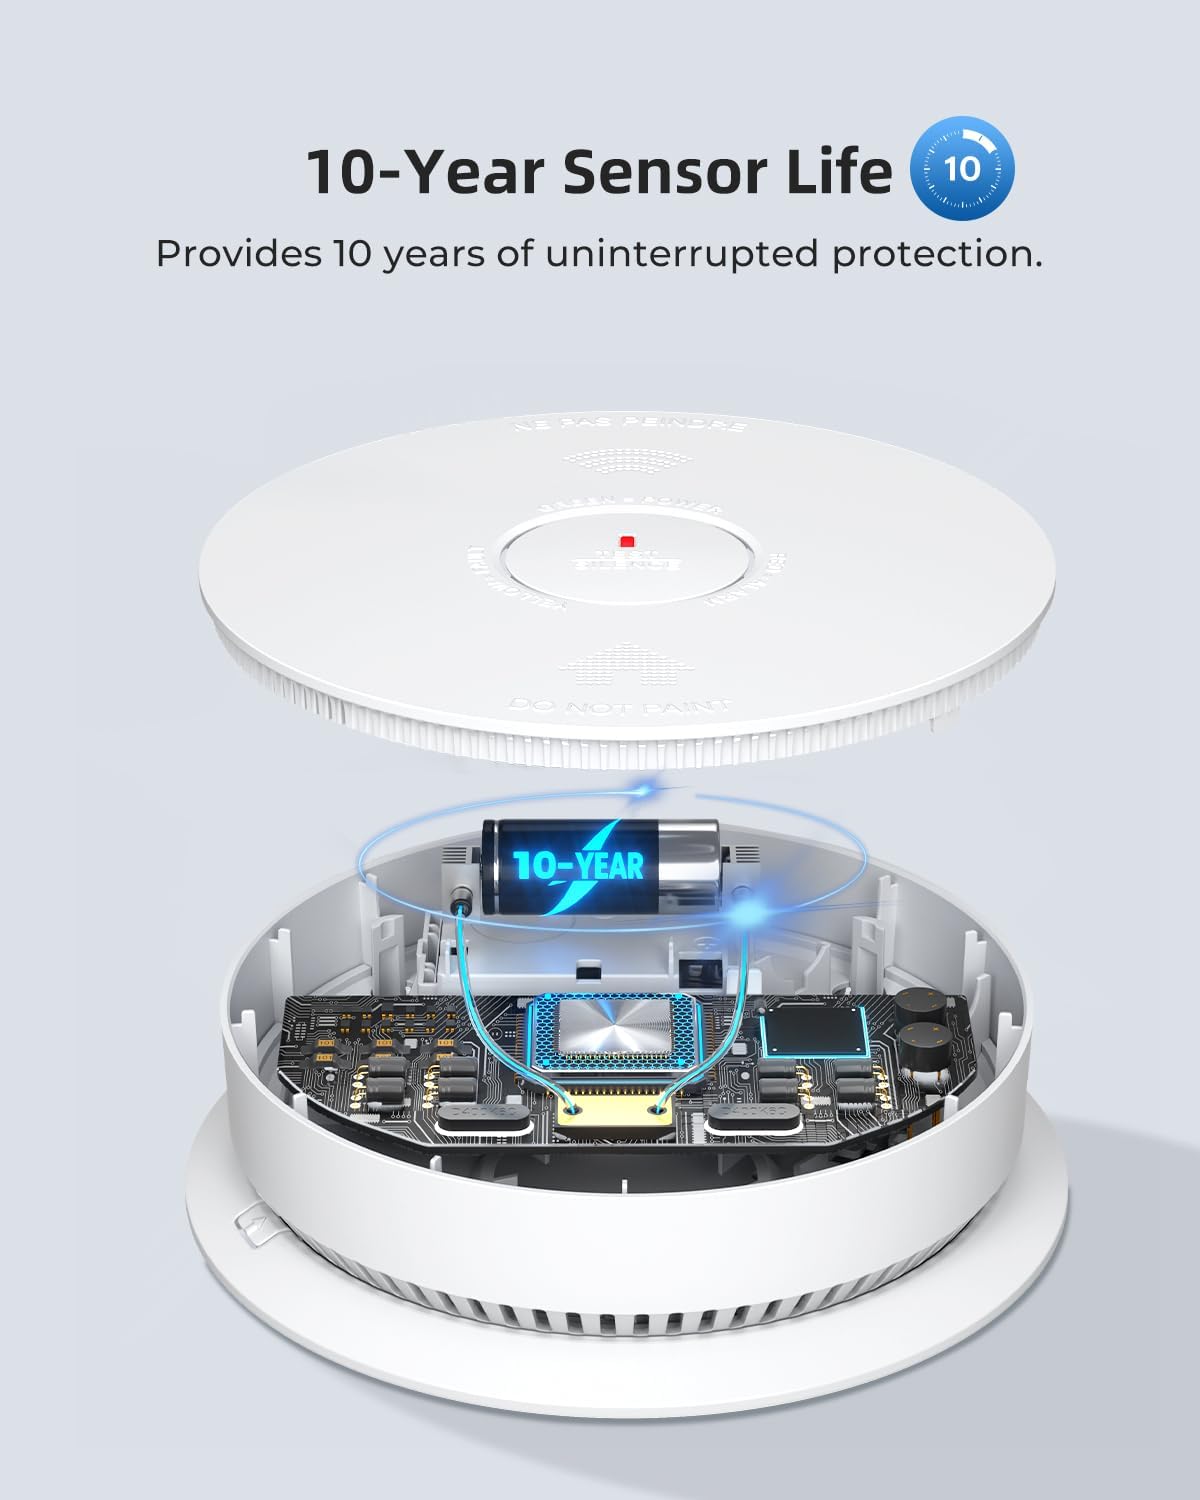
Abbildung 8: Eine explodierte view of the detector highlights its internal components, emphasizing the 10-year sensor life for extended protection.
4.6. Kompaktes Design
The detector features a compact design, measuring 6.1 inches (155 mm) in diameter and 1.6 inches (41.8 mm) in thickness, allowing for discreet installation.

Image 9: The compact design of the SITERWELL detector is shown with its dimensions, indicating a diameter of 6.1 inches (155 mm) and a thickness of 1.6 inches (41.8 mm).
5. Einrichtung und Installation
5.1. Wahl eines Standorts
Install detectors on every level of your home, including basements and attics, and inside every sleeping area. For optimal smoke detection, mount on the ceiling or high on a wall, at least 4 inches (10 cm) from any wall or ceiling intersection. For carbon monoxide detection, place the unit at a height where it can be heard by sleeping occupants, typically within 5 feet (1.5 meters) of the floor.

Image 10: Recommended placement of detectors in various rooms such as the living room, garage, and hallway for optimal coverage.
5.2. Montage des Detektors
- Twist the mounting bracket counter-clockwise to detach it from the detector unit.
- Position the mounting bracket on the ceiling or wall at your chosen location. Mark the screw holes.
- Bohren Sie gegebenenfalls Vorbohrungen und setzen Sie Wandanker ein.
- Befestigen Sie die Montagehalterung mit den mitgelieferten Schrauben.
5.3. Wiring (Hardwired Connection)
WARNUNG: Turn off power at the circuit breaker before wiring. Improper wiring can cause electric shock or fire.
- Connect the detector's black wire to the hot (live) wire of your household electrical circuit.
- Connect the detector's white wire to the neutral wire of your household electrical circuit.
- For interconnected units, connect the detector's yellow wire to the yellow wire of other interconnected detectors. Ensure all yellow wires are connected together.
- Secure all wire connections with wire nuts.
5.4. Einlegen der Batterie
Open the battery compartment on the back of the detector. Insert two AA batteries, ensuring correct polarity (+ and -). Close the battery compartment securely.
5.5. Attaching the Detector
Align the detector with the mounting bracket and twist clockwise until it locks into place. Restore power at the circuit breaker.

Image 11: Labeled components of the SITERWELL detector, including the LED indicator, buzzer, fire retardant materials, test/silence button, sounder, and air vents.
6. Bedienungsanleitung
6.1. Einschalten
Upon initial power-up (AC power and batteries installed), the detector will perform a self-test. The LED indicator will flash, and the unit may emit a short chirp or voice prompt.
6.2. LED-Anzeigestatus
The 3-color LED indicator provides visual status:
- Grün: Normal operation (flashes periodically).
- Gelb: Low battery or fault condition.
- Rot: Alarm condition (smoke or carbon monoxide detected).

Image 12: The 3-color LED indicator on the SITERWELL detector, illustrating its different states: Red for Alarm, Yellow for Low Battery, and Green for Normal operation.
6.3. Testen des Detektors
Halten Sie die Test/Schweigen button for a few seconds. The alarm will sound, and the voice alert will announce its function (e.g., "Fire!" or "Warning, Carbon Monoxide, Evacuate"). This confirms the unit is functioning correctly. Test weekly.
6.4. Silence Feature
In case of a nuisance alarm (e.g., from cooking smoke), press the Test/Schweigen button to temporarily silence the alarm for approximately 10 minutes. The detector will automatically reset after this period if the hazard has cleared. If the hazard persists, the alarm will reactivate.
7. Wartung
7.1. Regelmäßige Reinigung
Clean your detector at least once a month. Use a soft brush attachment on your vacuum cleaner to remove dust and debris from the vents. Do not use cleaning solvents or spray directly onto the unit.
7.2. Batteriewechsel
When the detector indicates a low battery (yellow LED and/or chirping), replace both AA batteries immediately. Use only specified AA alkaline batteries. Refer to section 5.4 for battery installation steps.
7.3. Indikation für das Lebensende
After approximately 10 years of operation, the detector will indicate its end-of-life with a specific chirp pattern or voice message. Replace the unit immediately when this occurs to ensure continued protection.
8. Fehlerbehebung
| Problem | Mögliche Ursache | Lösung |
|---|---|---|
| Detector chirps periodically (yellow LED) | Schwache Batterie | Tauschen Sie beide AA-Batterien aus. |
| False alarms (smoke) | Cooking fumes, steam, dust, high humidity | Press silence button. Ventilate the area. Relocate detector if nuisance alarms persist. Clean the detector. |
| Detector does not respond to test button | No power, dead batteries, unit malfunction | Check AC power. Replace batteries. If still unresponsive, replace the unit. |
| Alarm sounds continuously without apparent hazard | Dust accumulation, sensor fault | Clean the detector thoroughly. If alarm persists, replace the unit. |
| Interconnected units do not all alarm | Wiring issue, wireless connection problem, too many units | Check yellow wire connections. Ensure units are within wireless range (328ft). Verify no more than 12 units are interconnected. |
9. Spezifikationen
| Spezifikation | Detail |
|---|---|
| Modellnummer | GS886F |
| Stromquelle | 120V AC with 2 AA Battery Backup |
| Sensortyp | Photoelektrisch (Rauch), elektrochemisch (CO) |
| Alarmlautstärke | 85 dB in 3 Metern Entfernung (10 Fuß) |
| Zusammenschaltung | Up to 12 units (Hardwired or Wireless) |
| Drahtlose Reichweite | Bis zu 100 Meter (328 Fuß) im Freien |
| Betriebstemperatur | 40°F (4.4°C) bis 100°F (37.8°C) |
| Luftfeuchtigkeit bei Betrieb | 10 % bis 95 % relative Luftfeuchtigkeit (nicht kondensierend) |
| Maße | 6.1 inches (155 mm) diameter, 1.6 inches (41.8 mm) thickness |
| Material | ABS + PC feuerhemmende Materialien |
| Zertifizierungen | UL 217, UL 2034 |
| Abdeckungsbereich | Bis zu 40 Quadratmeter (430 Quadratfuß) |
10. Garantie und Support
The SITERWELL Hardwired Interconnected Smoke and Carbon Monoxide Detector Combo features a 10-year sensor life, indicating the expected operational lifespan of its detection components. For specific warranty terms and conditions, or technical support, please refer to the contact information provided with your purchase documentation or visit the official SITERWELL webWebsite.
Wichtiger Hinweis: Only purchase from SITERWELL's official website or authorized resellers to ensure genuine quality and support. Unauthorized use of SITERWELL branding and product information is prohibited and subject to legal action.
Image 13: A visual warning against counterfeit products, emphasizing the importance of purchasing from official SITERWELL sources for genuine quality and support.