
1. Einleitung
The BSIDE Z1 Pen-Type Digital Multimeter is a portable, smart, auto-ranging instrument designed for measuring AC/DC voltage, resistance, frequency, and continuity. It also features V-Alert (non-contact voltage detection) and live wire checking capabilities, along with a built-in flashlight for enhanced usability in various environments. Its compact design and smart mode functionality make it suitable for both professional and home use.
2. Sicherheitshinweise
Please read and understand all safety information before operating this multimeter. Failure to follow these instructions may result in electric shock, fire, or damage to the instrument.
- Vor Gebrauch stets sicherstellen, dass das Multimeter einwandfrei funktioniert.
- Nicht anwenden voltage oder Strom, der die für das Multimeter festgelegten maximalen Grenzwerte überschreitet.
- Beim Arbeiten an unter Spannung stehenden Stromkreisen ist äußerste Vorsicht geboten.
- Do not use the multimeter if the test leads are damaged or if the casing ist offen.
- Tauschen Sie die Batterien umgehend aus, sobald die Anzeige für niedrigen Batteriestand erscheint, um genaue Messwerte zu gewährleisten.
- Halten Sie Hände und Finger während der Messungen hinter den Sondenbarrieren.
- Das Multimeter darf nicht in explosionsgefährdeten Bereichen mit Gasen, Dämpfen oder Staub betrieben werden.
3. Packungsinhalt
Überprüfen Sie, ob alle Artikel im Paket vorhanden sind:
- 1 x BSIDE Z1 Pen-Type Digital Multimeter
- 1 x Messleitung
- 2 x AAA-Batterien
- 1 x Schraubendreher
- 1 x Benutzerhandbuch (dieses Dokument)

Figure 3.1: BSIDE Z1 Pen-Type Digital Multimeter with included test lead, batteries, and screwdriver.
4. Einrichtung
4.1 Einlegen der Batterie
The multimeter requires two 1.5V AAA batteries for operation. Follow these steps to install or replace the batteries:
- Suchen Sie die Abdeckung des Batteriefachs auf der Rückseite des Multimeters.
- Verwenden Sie den mitgelieferten Schraubendreher, um die Schraube zu lösen, mit der die Batterieabdeckung befestigt ist.
- Entfernen Sie die Batterieabdeckung.
- Legen Sie zwei AAA-Batterien ein und achten Sie dabei auf die richtige Polarität (+ und -).
- Carefully replace the battery cover and tighten the screw. Ensure the cover is securely fastened to prevent damage.
Caution: When replacing batteries, exercise care to avoid dislodging internal components. Ensure batteries are inserted correctly to prevent damage to the device.
5. Bedienungsanleitung
5.1 Ein-/Ausschalten
Drücken und halten Sie den roten Ein-/Ausschalter (U) to turn the multimeter on or off.
5.2 Smart Mode (Automatic Identification)
The multimeter features a smart mode that automatically identifies the tested parameters (AC/DC voltage, resistance, continuity) and selects the appropriate range. This simplifies operation for general measurements.

Figure 5.1: The multimeter's automatic mode selection simplifies measurements for voltage, resistance, continuity, frequency, NCV, and live wire detection.
5.3 Function Selection (Manual Mode)
Press the blue 'SEL' button to cycle through different measurement functions if manual mode is desired or for specific functions not covered by smart mode (e.g., Frequency, V-Alert, Live Check).
5.4 AC/DC-Voltage Messung
Zur Messung der Lautstärketage:
- Connect the test lead to the 'COM' port and the red probe tip to the 'INPUT' port.
- Wählen Sie AC- oder DC-Voltage mode (or allow smart mode to detect).
- Carefully touch the red probe tip to the positive point of the circuit and the test lead to the negative point.
- Lesen Sie den Bandtage-Wert auf dem Display.
5.5 Widerstandsmessung
Widerstand messen:
- Vor der Widerstandsmessung muss sichergestellt werden, dass der Stromkreis oder das Bauteil spannungsfrei ist.
- Connect the test lead to the 'COM' port and the red probe tip to the 'INPUT' port.
- Select resistance mode (or allow smart mode to detect).
- Touch the red probe tip and the test lead to the two ends of the component being measured.
- Lesen Sie den Widerstandswert auf dem Display ab.
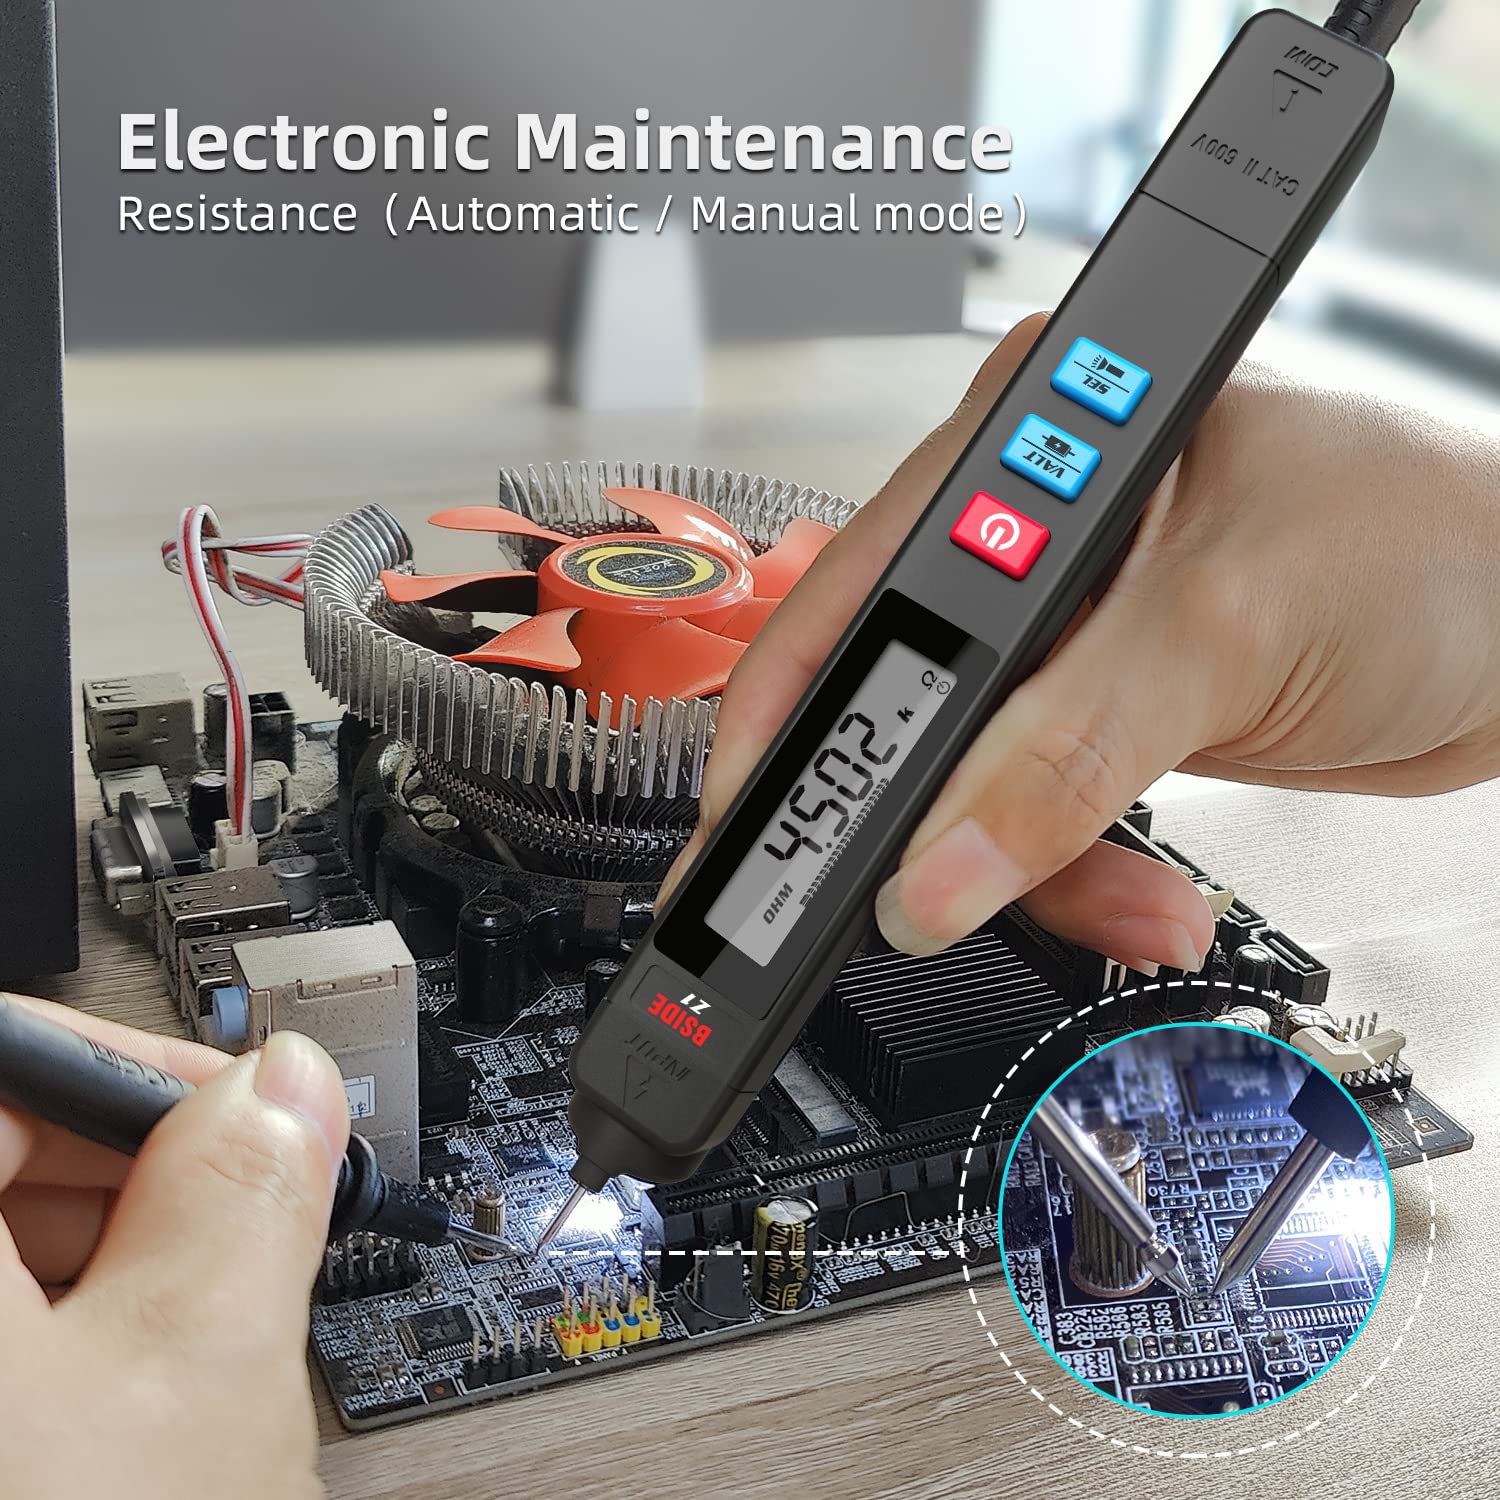
Figure 5.2: Measuring resistance on electronic components using the multimeter.
5.6 Durchgangstest
So führen Sie einen Durchgangstest durch:
- Stellen Sie sicher, dass der Stromkreis oder das Bauteil spannungsfrei ist.
- Connect the test lead to 'COM' and the red probe tip to 'INPUT'.
- Select continuity mode.
- Touch the red probe tip and the test lead to the two points you wish to test for continuity.
- If the resistance is less than 50Ω, the beeper will sound, indicating continuity.
5.7 Frequenzmessung
Frequenz messen:
- Connect the test lead to 'COM' and the red probe tip to 'INPUT'.
- Select frequency mode.
- Apply the probes to the circuit where frequency needs to be measured.
- Read the frequency value in Hertz (Hz) on the display.
5.8 V-Alarm (kontaktloser Vol)tage Erkennung)
The V-Alert function allows for non-contact detection of AC voltage, useful for identifying live wires without direct contact.
- Select V-Alert mode.
- Bring the tip of the multimeter close to the suspected live wire or outlet.
- The display will show a 'VALE' indicator, and the backlight will change color (green for low voltage, rot für hohe Volatilitättage), accompanied by an audible alarm, indicating the presence and strength of AC voltage.

Figure 5.3: The display backlight indicates voltage strength during V-Alert detection.
5.9 Prüfung auf stromführende Leitungen
Diese Funktion hilft dabei, zwischen stromführenden und neutralen Drähten zu unterscheiden.
- Select Live Wire Check mode.
- Insert the red probe tip into the socket or touch it to the wire.
- The display will show 'LIVE' and the backlight will turn red with an audible alarm if a live wire is detected. A neutral wire will typically show a weaker or no signal.

Figure 5.4: Distinguishing between live and neutral wires using the multimeter's live check function.
5.10 Taschenlampenfunktion
The built-in LED flashlight can be activated to illuminate dark work areas.

Figure 5.5: The integrated flashlight provides illumination for working in low-light conditions.
5.11 Datenhaltung
Drücken Sie die Taste „HOLD“, um den aktuellen Messwert auf dem Display einzufrieren. Drücken Sie sie erneut, um die Haltefunktion aufzuheben.
5.12 Automatische Abschaltung
The multimeter will automatically power off after a period of inactivity to conserve battery life. Press any button to wake it up.
6. Wartung
6.1 Reinigung
Wischen Sie das Multimeter ab.asing mit Adamp Mit einem Tuch und mildem Reinigungsmittel reinigen. Keine Scheuermittel oder Lösungsmittel verwenden. Das Gerät vor Gebrauch vollständig trocknen.
6.2 Speicherung
Wenn das Multimeter längere Zeit nicht benutzt wird, sollten die Batterien entfernt werden, um ein Auslaufen zu verhindern. Das Multimeter sollte an einem kühlen, trockenen Ort ohne direkte Sonneneinstrahlung und extreme Temperaturen aufbewahrt werden.
6.3 Batteriewechsel
Refer to Section 4.1 for battery replacement instructions. Always replace both batteries at the same time with new ones of the same type (1.5V AAA).
7. Fehlerbehebung
- Kein Bild / Gerät schaltet sich nicht ein:
Überprüfen Sie den Batterieeinbau und stellen Sie sicher, dass die Batterien nicht entladen sind. Tauschen Sie die Batterien gegebenenfalls aus. - Ungenaue Messwerte:
Ensure test leads are properly connected. Verify the correct measurement mode is selected. Check battery level; low batteries can affect accuracy. - Kein Kontinuitätssignal:
Ensure the circuit is de-energized. Check if the resistance is above 50Ω, as the beeper only activates below this threshold. - V-Alert / Live Check Not Responding:
Ensure the function is selected. The detection range may vary based on environmental factors and voltage Stärke.
8. Spezifikationen
| Parameter | Spezifikation |
|---|---|
| Anzeige | 2000 counts, 1.9 inch screen |
| DC-Voltage Reichweite | 0V-500V (DC Mode) / 0.5V-500V (Auto Mode) |
| DC-Voltage Genauigkeit | ± (0.8 % + 3) |
| AC-Lautstärketage Reichweite | 0V-500V (AC Mode) / 0.8V-500V (Auto Mode) |
| AC-Lautstärketage Genauigkeit | ± (1.2 % + 5) |
| Widerstandsbereich | 0 Ω-2 MΩ |
| Widerstandsgenauigkeit | ± (1.2 % + 3) |
| Frequenzbereich | 40-1000Hz (0-30V AC) / 40-400Hz (0-500V AC) |
| Frequenzgenauigkeit | ± (2.0 % + 10) |
| Kontinuität | Beeper sounds if resistance < 50Ω |
| V-Alarm (NCV) | Ja |
| Prüfung auf stromführende Leitungen | Ja |
| Stromquelle | 2 x 1.5 V AAA-Batterien |
| Maße | 185 x 22 x 22 mm |
| Gewicht | 52g (ohne Batterien) |
9. Garantie und Support
BSIDE products are designed for reliability and performance. For warranty information or technical support, please refer to the contact details provided with your purchase documentation or visit the official BSIDE webBewahren Sie Ihren Kaufbeleg als Kaufnachweis für Garantieansprüche auf.