
1. Einleitung
This manual provides instructions for the installation and care of the SRJTEK Touch Screen Digitizer Replacement for the Facetel Q3 Pro 10.1-inch Tablet. This product is designed to replace a damaged or malfunctioning touch screen digitizer, restoring touch functionality to your device. It is important to follow all instructions carefully to ensure proper installation and operation.

This image illustrates the visual improvement after replacing a damaged tablet screen with the new SRJTEK touch screen digitizer. The 'Before' section shows a tablet with a severely cracked screen, while the 'After' section displays the same tablet with a pristine, fully functional screen.
2. Sicherheitsvorkehrungen
Electronic device repair requires careful handling to prevent injury or further damage to the device. Please observe the following safety guidelines:
- Ausschalten: Always ensure the tablet is completely powered off and disconnected from any power source before beginning any repair.
- Statische Elektrizität: Discharge any static electricity from your body before handling electronic components. Use an anti-static wrist strap if available.
- Augenschutz: Wear appropriate eye protection to guard against small flying debris, especially when prying open the device.
- Vorsichtig handhaben: Electronic components are delicate. Avoid excessive force when disassembling or reassembling the tablet.
- Professionelle Installation empfohlen: Due to the intricate nature of tablet repair, professional installation is highly recommended. Incorrect installation can lead to damage to the digitizer or the tablet.
3. Packungsinhalt
Verify that all items are present in your SRJTEK Touch Screen Digitizer Replacement kit:
- 1 x Touch Screen Digitizer for Facetel Q3 Pro 10.1 inch Tablet
- 1 x Repair Tool Kit (typically includes screwdrivers, pry tools, suction cup, SIM ejector pin)
- 1 x Adhesive set

This image shows all items included in the SRJTEK touch screen replacement kit: the touch screen digitizer, a 'Disassembly Tool Card', adhesive, and a set of repair tools (screwdrivers, pry tools, suction cup, SIM ejector pin).
4. Installationsanleitung
This section outlines the general steps for replacing the touch screen digitizer. Specific disassembly and reassembly procedures may vary slightly depending on the exact tablet model. Refer to online resources or professional guides for detailed, model-specific instructions if needed.
4.1. Prüfungen vor der Installation
- Inspect the New Digitizer: Carefully inspect the new SRJTEK digitizer for any visible damage, cracks, or defects before installation.
- Test Before Adhering: Before permanently adhering the new digitizer, connect its flex cable to the tablet's motherboard and perform a preliminary test of touch functionality. Do not remove protective films or adhesive backing until the test is successful.
- Sammeln Sie Werkzeuge: Ensure you have all necessary tools from the kit, including screwdrivers, pry tools, and a heat gun or hairdryer (if required for adhesive removal).
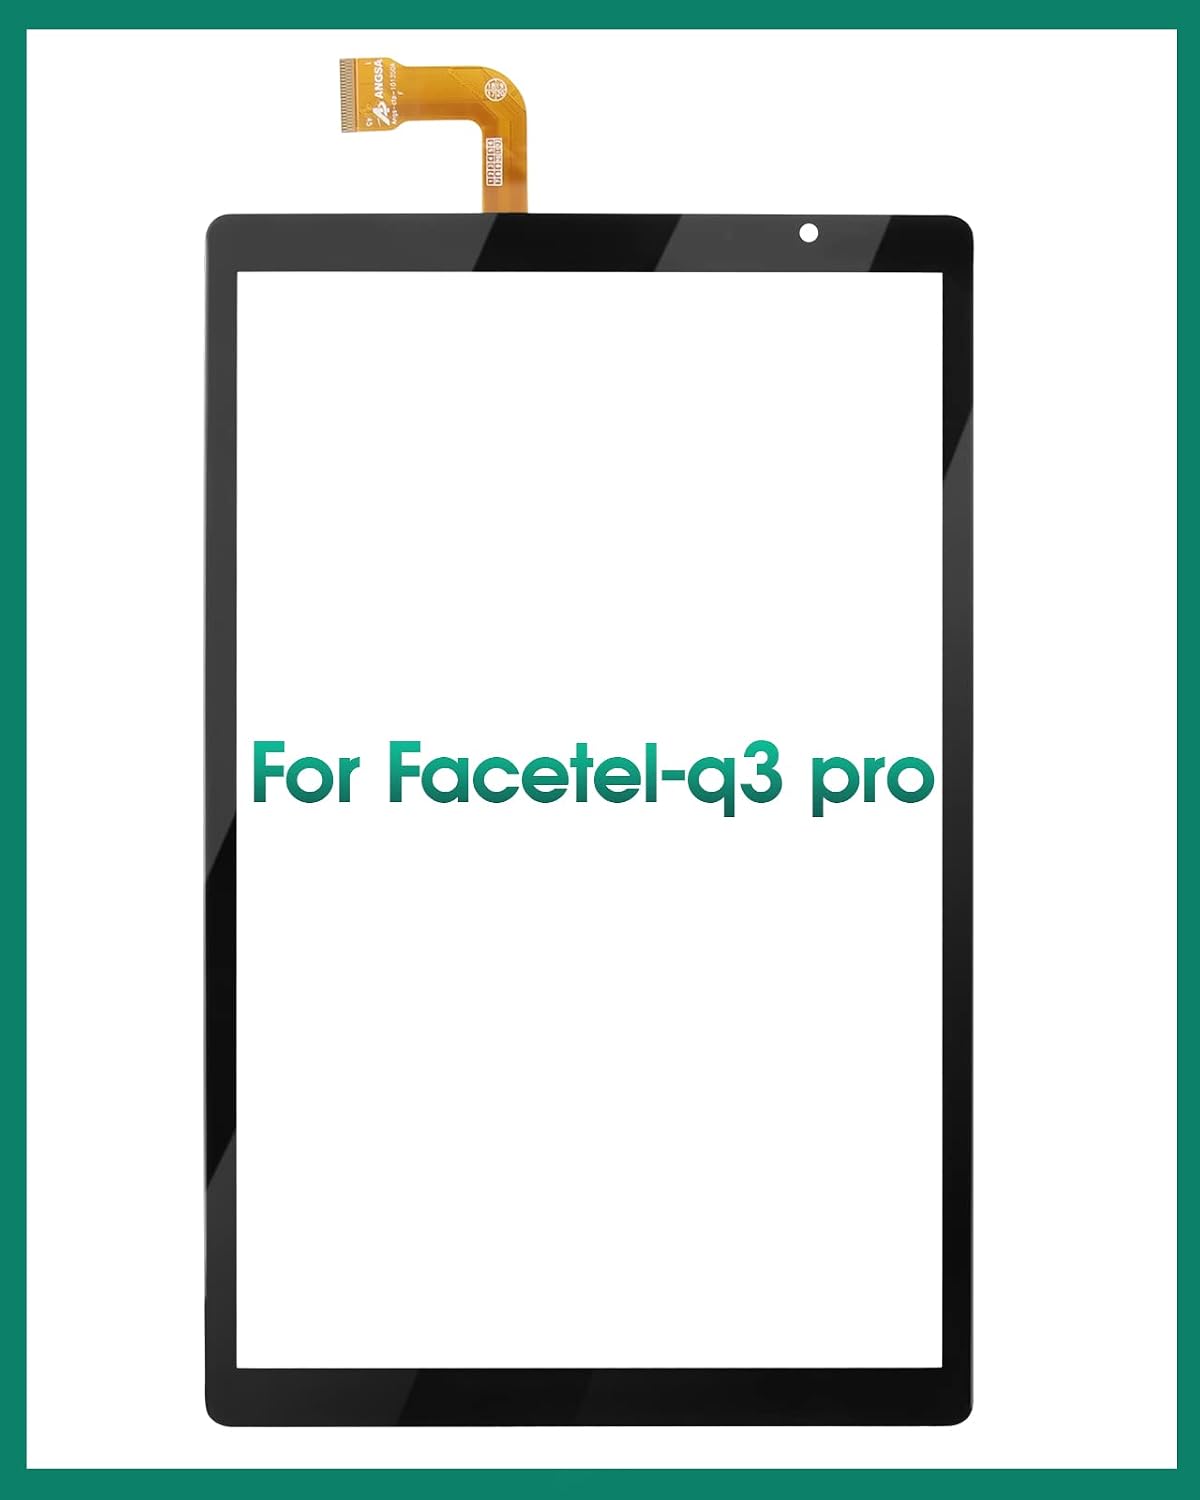
Ein klares view of the SRJTEK touch screen digitizer, specifically designed for the Facetel Q3 Pro 10.1-inch tablet. This component is the replacement part for the tablet's outer glass and touch functionality.
4.2. Demontage
- Ausschalten: Ensure the tablet is completely powered off.
- Remove SIM/SD Card: Eject any SIM or SD cards.
- Kanten erhitzen: Gently heat the edges of the tablet's screen using a heat gun or hairdryer to soften the adhesive.
- Pry Open: Carefully use pry tools to separate the old digitizer from the tablet frame. Work slowly around all edges.
- Disconnect Flex Cables: Once the old digitizer is partially lifted, locate and carefully disconnect its flex cable(s) from the motherboard.
- Alten Digitizer entfernen: Completely remove the old, damaged digitizer.
- Rahmen reinigen: Thoroughly clean any remaining adhesive residue from the tablet frame. This is crucial for a secure bond with the new digitizer.
4.3. Connecting the New Digitizer
- Connect Flex Cable: Carefully align and connect the new digitizer's flex cable to the corresponding connector on the tablet's motherboard. Ensure it is seated correctly and securely.
- Vortest: Before applying adhesive, temporarily power on the tablet to test the new digitizer's touch functionality. Test all areas of the screen and ensure responsiveness.

Eine detaillierte view of the digitizer's flex cable and integrated circuit (IC) connector. The flex cable transmits touch input to the tablet's motherboard, and the connector IC processes these signals. Proper connection of this component is crucial for touch functionality.
4.4. Zusammenbau
- Kleber auftragen: If the preliminary test is successful, remove the protective film from the adhesive strips on the new digitizer (or apply new adhesive if not pre-applied).
- Sicherer Digitalisierer: Carefully align the new digitizer with the tablet frame and gently press it into place, ensuring a firm and even bond.
- Zusammenbauen: Reassemble any other components that were removed during disassembly.
- Abschlusstest: Power on the tablet and perform a comprehensive test of all touch functions.

This image displays the reverse side of the SRJTEK touch screen digitizer, highlighting the pre-applied adhesive strips. These strips are essential for securely attaching the new digitizer to the tablet frame during installation.
5. Initial Testing and Operation
After installation, perform the following checks to ensure proper operation:
- Full Screen Touch Test: Open an application that allows drawing or a diagnostic tool to test touch responsiveness across the entire screen. Ensure there are no dead spots or unresponsive areas.
- Multi-Touch-Gesten: Test multi-touch gestures such as pinch-to-zoom to confirm proper functionality.
- Bildschirmkalibrierung: If touch input seems inaccurate or inverted, check the tablet's settings for a screen calibration option. Some tablets may require calibration after a digitizer replacement.
6. Pflege und Wartung
To maintain the performance and appearance of your new touch screen digitizer:
- Reinigung: Mit einem weichen, fusselfreien Tuch leichtampMit Wasser oder einem speziell für Elektronikbildschirme entwickelten Reiniger abspülen. Scharfe Chemikalien oder scheuernde Materialien vermeiden.
- Schutz: Consider using a screen protector and a protective case to prevent future scratches or impacts.
- Druck vermeiden: Do not apply excessive pressure to the screen, as this can damage the digitizer.
- Temperatur: Vermeiden Sie es, das Tablet extremen Temperaturen auszusetzen, da dies die Klebstoff- und Bauteilintegrität beeinträchtigen kann.
7. Fehlerbehebung
If you encounter issues after installing the SRJTEK touch screen digitizer, refer to the following troubleshooting steps:
- Keine Berührungsreaktion:
- Ensure the flex cable is securely and correctly connected to the motherboard. A loose or improperly seated connection is a common cause.
- Check for any visible damage to the flex cable or connector on the digitizer or motherboard.
- Starten Sie das Tablet neu.
- Inaccurate or Inverted Touch:
- This can sometimes occur if the digitizer is not fully compatible or if the tablet's software requires recalibration.
- Check the tablet's display or accessibility settings for a touch screen calibration option.
- Ensure the correct digitizer model was installed for your specific Facetel Q3 Pro tablet.
- A factory reset of the tablet (after backing up data) might resolve software-related calibration issues, but this is a last resort.
- Bildschirmflackern oder Anzeigeprobleme:
- While this product is a digitizer (touch layer) and not the LCD (display layer), display issues can sometimes be related to improper reassembly or damage to the LCD during the repair process.
- Ensure the LCD's flex cable is also securely connected.
- If the issue persists, the LCD itself might be damaged or the connection is faulty.
- Klebstoff hält nicht:
- Ensure the tablet frame was thoroughly cleaned of old adhesive residue before applying the new digitizer.
- Apply even pressure around the edges after installation and allow sufficient time for the adhesive to cure.
If these steps do not resolve the issue, please contact SRJTEK customer service for further assistance.
8. Produktspezifikationen
| Kompatibilität | Facetel Q3 Pro 10.1 inch Tablet |
| Typ | Touch Screen Digitizer Replacement (Without LCD) |
| Verpackungsabmessungen | 11.22 x 8.58 x 2.09 Zoll |
| Artikelgewicht | 8.4 Unzen |
| Hersteller | SRJTEK |
9. Garantie und Kundendienst
SRJTEK provides a 6 Monate Kundendienst for this product. If you encounter any problems with the item received, please contact SRJTEK customer service for assistance.
Kontaktinformationen:
- Refer to your purchase platform or product packaging for specific contact details.
- When contacting support, please provide your order number and a detailed description of the issue.
SRJTEK is committed to providing a new replacement or a satisfactory solution for any valid warranty claims.