
1. Sicherheitshinweise
Please read and understand all instructions completely before beginning installation. Failure to follow these instructions may result in electric shock, fire, or other hazards that could cause property damage or personal injury.
- Brandgefahr: Supply conductors (power wiring) connecting to the fixture must be rated 90°C. If you are uncertain, consult a qualified electrician.
- Stromschlaggefahr: Die Installation des LED-Nachrüstsatzes erfordert Kenntnisse über elektrische Leuchtensysteme. Wenn Sie nicht qualifiziert sind, versuchen Sie nicht, die Installation durchzuführen. Wenden Sie sich an einen qualifizierten Elektriker.
- Install this kit only in luminaires that have the construction features and dimensions shown in the product documentation.
- To prevent wiring harness or abrasion, do not expose wiring to edges of sheet metal or other sharp objects.
- Dieses lamp is not intended for use with emergency exit luminaires or emergency lights.
- Bevor Sie mit der Installation beginnen, prüfen Sie die örtlichen Elektrovorschriften, da diese die Verkabelungsstandards für Ihren Standort festlegen.
- The fixture is designed to be switched from a wall switch. Ensure the black power supply wire is connected to the switch. Do NOT connect the white supply wire to the switch.
- Do not leave bare wires or exposed outside the wire nut connectors.
- Machen oder verändern Sie während der Installation des Bausatzes keine offenen Löcher in einem Gehäuse von Kabeln oder elektrischen Komponenten.
- This product is ETL Listed and operates at 120VAC.
2. Produktüberschreitungview
The Maxxima 2-inch Ultra-Thin Recessed Anti-Glare LED Downlight is a canless, IC rated lighting fixture designed for various indoor applications. It features a round black trim and offers customizable lighting with 5 selectable color temperatures and dimming capabilities.
- Energieeffizient: 9W LED, equivalent to 40W, consuming less power.
- Helligkeit: 550 Lumens with anti-glare lighting and a 36° beam spread.
- Color Temperature Selectable (CCT): Choose from 2700K (Soft White), 3000K (Warm White), 3500K (Bright White), 4000K (Neutral White), or 5000K (Daylight).
- Dimmbar: Compatible with most standard LED dimmers, offering a 20%-100% dimmable range.
- Hoher CRI: 90 CRI rating for accurate color appearance.
- Langlebige Konstruktion: Features a durable cast aluminum body and deep recessed trim.
- Damp Bewertet: Geeignet für den Einsatz in damp locations such as bathrooms and kitchens.

Figure 2.1: Maxxima 2-inch Ultra-Thin Recessed LED Downlight, Black
3. Stückliste
Stellen Sie sicher, dass alle Komponenten vorhanden sind, bevor Sie mit der Installation beginnen:
- LED Downlight with spring clips
- Junction Box (with integrated CCT selection switch)
- Connector cable (pre-attached to downlight and junction box)
- Schaumdichtung
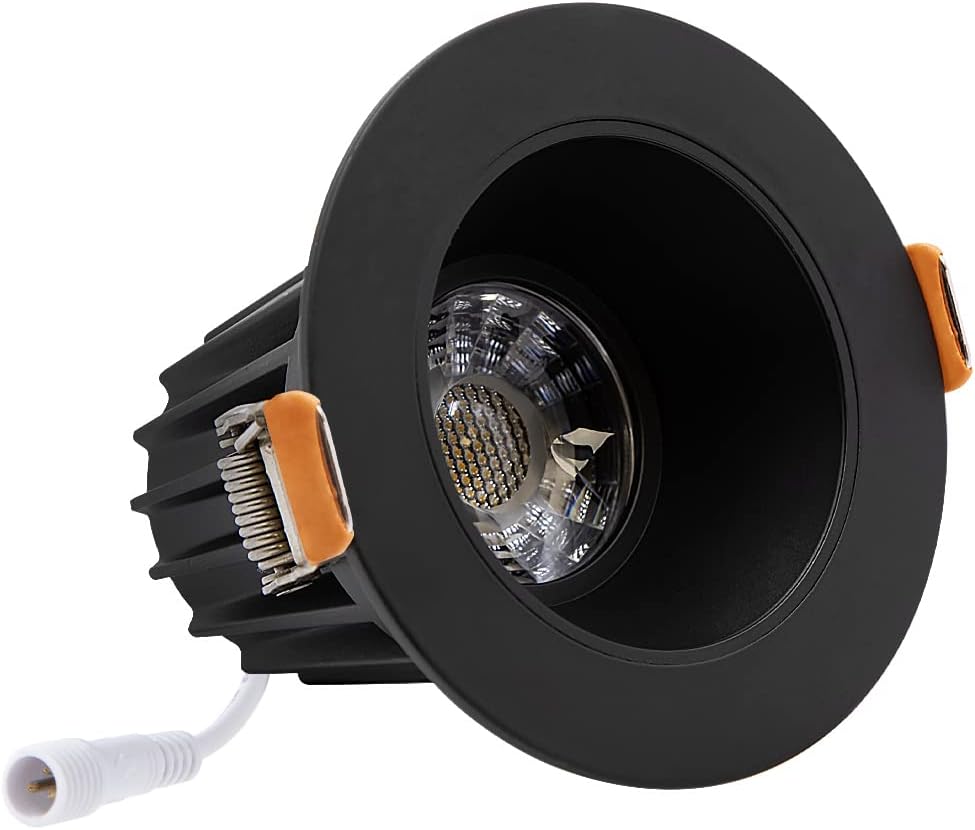
Abbildung 3.1: Seite view of the Maxxima 2-inch Ultra-Thin Recessed LED Downlight, showing the heat sink and connector.
4. Einrichtung und Installation
This downlight is designed for easy installation without the need for a traditional recessed can or housing.
- Bereiten Sie die Eröffnung vor: Cut a hole in the ceiling drywall with a recommended diameter of 2.5 inches. Ensure there are no obstructions in the ceiling space.
- Verkabelung anschließen: Open the junction box. Connect the building's supply wires (typically black for live, white for neutral, and green/bare copper for ground) to the corresponding wires inside the junction box using appropriate wire connectors. Ensure all connections are secure and comply with local electrical codes.
- Farbtemperatur auswählen: Before closing the junction box, use the CCT selection switch located inside the junction box to choose your desired color temperature (2700K, 3000K, 3500K, 4000K, or 5000K).
- Position Junction Box: Place the junction box into the ceiling beam or through the cutout hole into the ceiling cavity.
- Downlight anschließen: Connect the downlight's cable to the junction box's cable using the provided quick connector. Ensure a firm connection.
- Einbau von Einbaustrahlern: Gently push the spring clips on the sides of the downlight upwards. Insert the downlight into the cutout hole. The spring clips will automatically secure the fixture against the ceiling. Ensure the foam gasket creates a tight seal.

Abbildung 4.1: Produktabmessungen für die Installationsplanung.

Figure 4.2: CCT selection switch inside the junction box.
Video 4.1: Official product video demonstrating the features and installation of the Maxxima 2-inch Anti-Glare 5 CCT Slim LED Downlight.
5. Bedienungsanleitung
Once installed, operating your Maxxima LED downlight is straightforward.
5.1. Color Temperature Selection
The desired color temperature (CCT) must be selected using the switch inside the junction box vor installation or by accessing the junction box after installation. The available options are 2700K, 3000K, 3500K, 4000K, and 5000K.

Figure 5.1: Visual comparison of selectable color temperatures.
5.2. Dimmen
This downlight is dimmable from 20% to 100% with most standard LED dimmers. Ensure your dimmer switch is compatible with LED fixtures for optimal performance and to prevent flickering.

Figure 5.2: Downlight installed in a ceiling, demonstrating illumination.
6. Wartung
The Maxxima LED downlight requires minimal maintenance.
- Reinigung: Um die Leuchte zu reinigen, stellen Sie sicher, dass der Strom abgeschaltet ist. Wischen Sie die Oberfläche mit einem weichen, trockenen oder leicht feuchten Tuch ab.amp Tuch. Verwenden Sie keine scharfen Chemikalien oder Scheuermittel.
- Keine vom Benutzer zu wartenden Teile: The LED light source is integrated and not replaceable. Do not attempt to open or repair the fixture.
7. Fehlerbehebung
Sollten Sie Probleme mit Ihrer Einbauleuchte haben, beachten Sie bitte die folgenden häufig auftretenden Probleme und Lösungen:
| Problem | Mögliche Ursache | Lösung |
|---|---|---|
| Licht geht nicht an | No power supply; Loose wiring; Incorrect CCT setting; Faulty fixture | Check circuit breaker; Verify all wire connections are secure; Ensure CCT switch is set to a valid position; Contact support if fixture is faulty. |
| Licht flackert | Inkompatibler Dimmer; Lose Verkabelung; Überlasteter Stromkreis | Ensure dimmer is LED compatible; Check all electrical connections; Reduce load on circuit. |
| Das Licht ist zu schwach oder zu hell | Dimmer setting; CCT setting | Adjust dimmer to desired level; Verify CCT setting is as intended. |
| Licht macht summende Geräusche | Incompatible dimmer; Loose wiring | Replace with an LED-compatible dimmer; Check and secure all wiring connections. |
8. Spezifikationen
| Spezifikation | Detail |
|---|---|
| Marke | Maxima |
| Modellname | MRL-S20803B |
| Technische Daten | 3.16 Zoll L x 3.16 Zoll B x 2.6 Zoll H |
| Artikelgewicht | 13.1 Unzen |
| Farbe | Schwarz |
| Material | Aluminium |
| Leuchtenform | Einbau |
| Installationstyp | Unterputz |
| Recommended Hole Cutout | 2.5 Zoll |
| Stromquelle | Kabelgebundene Elektrik |
| Bandtage | 120 Volt |
| Wastage | 9 Watt |
| Helligkeit | 550 Lumen |
| Effizienz | 61 lm/W |
| Farbtemperatur | 2700K, 3000K, 3500K, 4000K, 5000K Wählbar |
| CRI | 90 |
| Dimmbar | Ja (20–100 %) |
| Verwendung im Innen- und Außenbereich | Innen (Damp (Bewertung) |
| Zertifizierung | ETL-gelistet |
9. Garantie und Support
This Maxxima LED downlight is covered by a 3 Jahr Garantie ab Kaufdatum.
For warranty claims, technical support, or any questions regarding your product, please contact Maxxima customer service. Refer to the product packaging or the official Maxxima webWebsite für aktuelle Kontaktinformationen.
Bitte bewahren Sie Ihren Kaufbeleg für Garantiezwecke auf.