
Einführung
This manual provides detailed instructions for the safe installation, operation, and maintenance of your Maxxima 4-inch 5 CCT Ultra Thin Recessed LED Downlight. Please read all instructions carefully before installation and retain this manual for future reference.
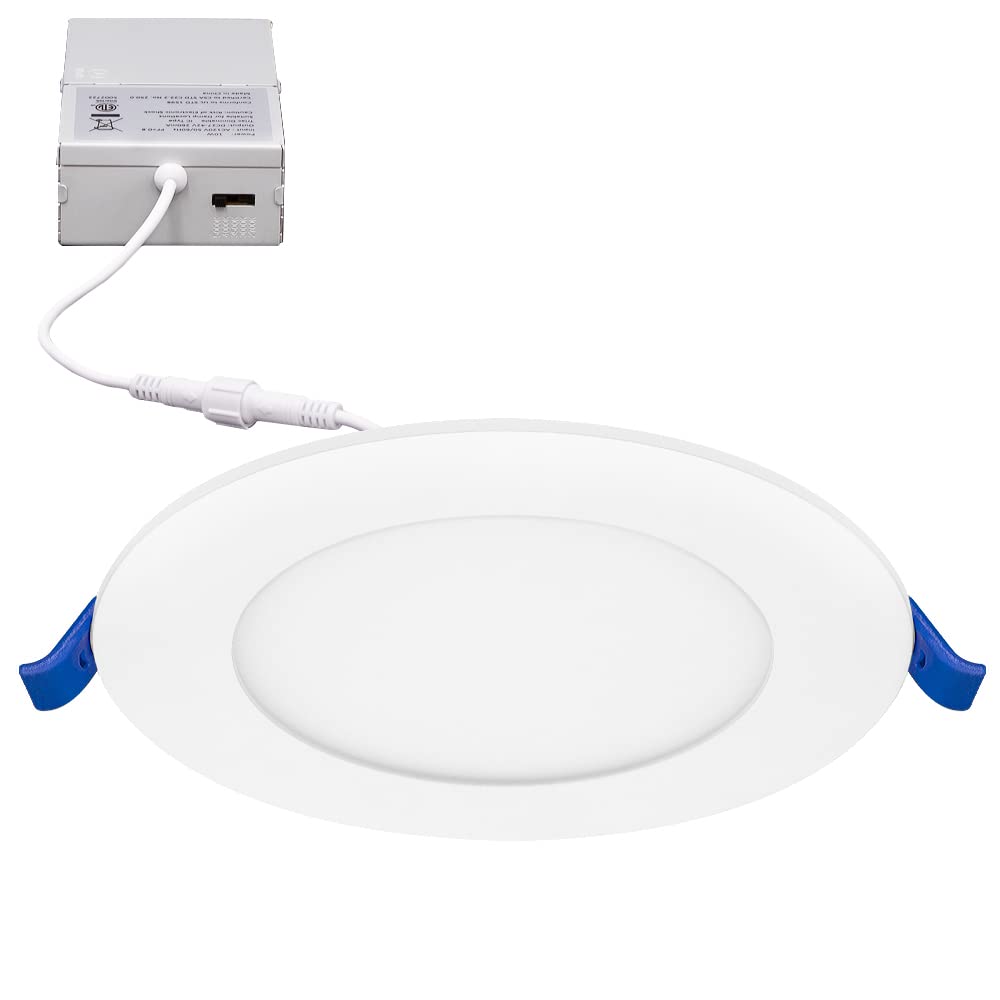
Bild: Vorderseite view of the Maxxima 4-inch 5 CCT Ultra Thin Recessed LED Downlight.
Sicherheitshinweise
Um das Risiko von Bränden, Stromschlägen oder Verletzungen von Personen zu verringern, beachten Sie bitte die folgenden Sicherheitsvorkehrungen:
- Vor Beginn der Installation oder der Durchführung von Wartungsarbeiten muss immer die Stromzufuhr am Sicherungsautomaten unterbrochen werden.
- Stellen Sie sicher, dass alle elektrischen Anschlüsse den örtlichen Vorschriften und Verordnungen sowie dem National Electric Code (NEC) entsprechen.
- Wenn Sie sich bezüglich der Verkabelung nicht sicher sind, wenden Sie sich an einen qualifizierten Elektriker.
- Nicht an Orten installieren, an denen die Betriebstemperatur die Nenntemperatur der Leuchte überschreitet.
- Diese Leuchte eignet sich für damp locations and is IC Rated, meaning it is safe for direct contact with insulation.
- Die Vorrichtung darf nicht verändert oder für andere als die vorgesehenen Zwecke verwendet werden.
Packungsinhalt
Vergewissern Sie sich vor Beginn der Installation, dass alle Komponenten vorhanden sind:
- 1 x Maxxima 4 in. 5 CCT Ultra Thin Recessed LED Downlight
- 1 x Junction Box (J-Box) with integrated power supply
- Montagezubehör
Technische Daten
| Besonderheit | Spezifikation |
|---|---|
| Modellnummer | MRL-S40905 |
| Größe | 4 Zoll |
| Wastage | 10 W (entspricht 60 W Glühlampe) |
| Lumenleistung | 750 Lumen |
| Farbtemperatur (CCT) | Wählbar: 2700K, 3000K, 3500K, 4000K, 5000K |
| Bandtage | 120 V Wechselstrom |
| Dimmbar | Yes (20% - 100% with compatible LED dimmer) |
| CRI | 82 |
| Material | Aluminium |
| Installationstyp | Unterputzmontage, ohne Gehäuse |
| Zertifizierungen | IC Rated, ETL Listed |
| Abmessungen der Anschlussdose | 1.4 Zoll H x 2.7 Zoll B x 4.11 Zoll T |
| Geräteabmessungen | 4.8” Diameter x 0.87” Thickness |
Setup und Installation
Befolgen Sie diese Schritte für eine ordnungsgemäße Installation:
- Strom ausschalten: Vor Beginn jeglicher Elektroarbeiten muss sichergestellt werden, dass die Stromzufuhr zum Installationsbereich am Sicherungsautomaten abgeschaltet ist.
- Deckenöffnung vorbereiten: Schneiden Sie an der gewünschten Stelle ein Loch mit 4 cm Durchmesser in die Decke. Stellen Sie sicher, dass sich keine Hindernisse wie Balken oder Rohre im Weg befinden.
- Verkabelung anschließen: Open the junction box cover. Connect the supply wires to the wires inside the junction box using the provided wire nuts:
- Connect the black wire from the supply to the black wire of the J-Box.
- Connect the white wire from the supply to the white wire of the J-Box.
- Connect the ground wire from the supply to the green wire of the J-Box.
- Farbtemperatur (CCT) auswählen: Before inserting the light into the ceiling, locate the CCT selection switch on the side of the junction box. Choose your desired color temperature (2700K, 3000K, 3500K, 4000K, or 5000K) by sliding the switch.
- Anschlussdose einsetzen: Setzen Sie die verdrahtete Anschlussdose in die Deckenöffnung ein.
- Einbau von Einbaustrahlern: Connect the downlight to the junction box via the male/female connector. Push the spring clips on the sides of the downlight upwards and insert the fixture into the ceiling hole. The clips will automatically secure the light in place.
- Strom wiederherstellen: Schalten Sie den Strom am Leistungsschalter wieder ein.

Image: The LED downlight connected to its junction box.

Bild: Nahaufnahme view of the CCT selection switch located on the side of the junction box.

Abbildung: Seite view of the downlight showing the tension spring clips used for installation.
Bedienungsanleitung
Auswahl der Farbtemperatur
The Maxxima 4-inch LED Downlight features 5 CCT (Correlated Color Temperature) options, allowing you to customize the light output to your preference. The selection switch is located on the side of the junction box.
- 2700K: Soft White (Warm, inviting light)
- 3000K: Warm White (Slightly brighter, still warm)
- 3500K: Bright White (Neutral, balanced light)
- 4000K: Neutral White (Cooler, more energetic light)
- 5000K: Daylight (Brightest, closest to natural daylight)
To change the CCT, you must access the junction box. It is recommended to select your preferred CCT before final installation into the ceiling. If changing after installation, ensure power is off before accessing the J-Box.

Image: Visual representation of the five selectable color temperatures.
Dimmfunktion
This LED downlight is dimmable from 20% to 100% when used with a compatible LED dimmer switch. Ensure your dimmer switch is rated for LED lighting to prevent flickering or damage to the fixture.
Wartung
The Maxxima LED Downlight requires minimal maintenance.
- Reinigung: Vor der Reinigung unbedingt den Strom abschalten. Wischen Sie die Leuchte mit einem weichen, trockenen oder leicht feuchten Tuch ab.amp Mit einem Tuch abwischen. Verwenden Sie keine Scheuermittel oder Lösungsmittel, da diese die Oberfläche oder elektrische Bauteile beschädigen können.
- Keine vom Benutzer zu wartenden Teile: The LED light source is integrated and not replaceable. Do not attempt to open or repair the fixture.
Fehlerbehebung
If you encounter issues with your downlight, refer to the following table:
| Problem | Mögliche Ursache | Lösung |
|---|---|---|
| Licht geht nicht an | Keine Stromversorgung Wackelkontakt Defekter Schalter oder Leitungsschutzschalter | Check circuit breaker and wall switch. Ensure all wiring connections are secure. Test with a known working fixture or consult an electrician. |
| Das Licht flackert oder dimmt sich unregelmäßig | Inkompatibler Dimmerschalter Lose Verkabelung | Ensure an LED-compatible dimmer is used. Check wiring connections. |
| Falsche Farbtemperatur | CCT-Schalter falsch eingestellt | Turn off power, access the junction box, and adjust the CCT selection switch to the desired setting. |
Garantie
This Maxxima LED Downlight is covered by a 3 Jahr Garantie from the date of purchase. This warranty covers defects in materials and workmanship under normal use. For warranty claims or further details, please contact Maxxima customer support.
Kundenservice
For technical assistance, troubleshooting, or warranty inquiries, please contact Maxxima customer support. Refer to the product packaging or the official Maxxima webWebsite für aktuelle Kontaktinformationen.
Please have your model number (MRL-S40905) and date of purchase available when contacting support.