1. Einleitung
This manual provides detailed instructions for the installation, operation, and maintenance of your ASALL 52-inch Wood Ceiling Fan. This fan features an RGB dimming LED light, integrated Bluetooth speaker, 3-speed regulation, a reversible motor, and timing functions, all controllable via a multifunctional remote.
Please read this manual thoroughly before installation and use to ensure safe and efficient operation. Keep this manual for future reference.
2. Sicherheitshinweise
WARNUNG: To reduce the risk of electric shock, ensure the electricity is turned off at the circuit breaker or fuse box before beginning installation. Do not use with a dimmer switch; dimming function is limited to the remote control.
VORSICHT: Alle Verkabelungen müssen den nationalen und lokalen Elektrovorschriften entsprechen. Wenn Sie mit Verkabelungen nicht vertraut sind, wenden Sie sich bitte an einen qualifizierten Elektriker.
Ensure the installation site can support the weight of the fan (approximately 14.33 lbs).
3. Packungsinhalt
Before installation, verify that all accessories are complete. If any parts are missing or damaged, please contact customer support.
- Motor (1)
- Licht (1)
- Wood Fan Blades (3)
- Remote Control (1)
- Connecting Rods (5-inch, 10-inch, 15-inch options)
- Montagehalterung und Hardware
- Product Installation Instructions and Brand Product Brochure (1)

Image: All components included in the ASALL 52-inch ceiling fan package.
4. Einrichtung und Installation
For detailed visual guidance, please refer to the official installation videos provided below or search for "ASALL-FAN009" on YouTube.
4.1. Fan Blade Assembly
- Entfernen Sie das lamp panel and nuts from the fan body.
- Remove the nuts from the fan blade installation area.
- Install the gasket onto the nut that was just removed.
- Use the nuts to fix the fan blades to the motor housing.
- Installieren Sie das l . neuamp Bedienfeld.
4.2. Connecting Rod Installation
- Choose the appropriate length of the connecting rod (5, 10, or 15 inches) based on your ceiling height.
- Remove the two safety bolts and the green ground wire from the connecting rod.
- Before installing the connecting rod, unplug the driver connector from the fan body.
- Loosen the two nuts that fix the position of the connecting rod on the fan body. Pass the wires through the connecting rod and insert the rod into the corresponding position on the fan body.
- Take out the second safety bolt, insert it into the head end of the connecting rod, and then lift the entire fan light before tightening the nut of the green ground wire and the two connecting rod nuts. (Important: The entire fan light must be lifted up before tightening the nut, otherwise it may shake later. Apply some force to push the safety bolt. If the safety bolt is firmly fixed and cannot be pushed, you can continue with the next steps.)
- Take out the small lamp cover and large lampshade, as well as the green ground wire holder, and place them on the connecting rod in the order shown in the video.
4.3. Ceiling Mounting and Wiring
- Fix the hanging board securely to the ceiling using appropriate hardware.
- Connect the live and neutral wires from your ceiling to the corresponding wires from the fan's controller. Then connect the green ground wire. Finally, combine the fan light driver and controller connectors. (Please note: When wiring, make sure that the circuit breaker and switch are de-energized to avoid electric shock.)
- Loosen the nut on the hanging board, then fix the cover under the nut, and finally tighten the nut.
- Connect the joint between the lamp and the fan, then fasten the anti-drop hook, and finally fix the lamp in a rotating manner.
Installationsvideos:
Video: Fan Light Series - Function Introduction and Installation. This video demonstrates the overall functionality and installation process of the fan light.
Video: Installation tutorial and feature demonstration. This video provides a step-by-step guide for installation and showcases various features of the fan.
5. Bedienungsanleitung
5.1. Fernbedienungsfunktionen

Image: The remote control for the ASALL ceiling fan, showing various function buttons.
- Ein-/Ausschalten: Drücken Sie den Netzschalter, um Ventilator und Licht ein- oder auszuschalten.
- Licht ein/aus: Press the LED button to toggle the light.
- Anpassung der Farbtemperatur: Press the 'K' button to cycle through cold white (6800K), natural light (4000K), and warm light (2700K).
- Helligkeitsanpassung: Use the '+' and '-' buttons to adjust light brightness from 10% to 100%.
- RGB-Farbänderung: Press the 'RGB' button to cycle through various RGB colors.
- Musikrhythmusmodus: Press and hold the 'RGB' button for more than 5 seconds to activate music rhythm mode, where lights change with the music.
- Regelung der Lüftergeschwindigkeit: Select from 3-speed options (1, 2, 3) for desired airflow.
- Umkehrmotor: Press the reverse button to switch between summer (downward airflow) and winter (upward airflow) modes. Allow the fan to slow down before reversing direction.
- Timing-Funktion: Set a timed shutdown for the fan.
- Nachtlichtfunktion: Aktivieren Sie einen Nachtlichtmodus mit geringer Helligkeit.
5.2. Bluetooth-Lautsprecherverbindung
To connect your device to the fan's Bluetooth speaker:
- Stellen Sie sicher, dass der Lüfter eingeschaltet ist.
- Aktivieren Sie Bluetooth auf Ihrem Mobiltelefon oder Tablet.
- Suchen nach the Bluetooth device named "MX Light" or similar.
- Geben Sie den PIN-Code ein: 8888 wenn Sie dazu aufgefordert werden.
- Once connected, the fan will emit a beeping sound. You can now play music or audio through the fan's speaker.

Image: The ASALL ceiling fan with visual representation of music notes, indicating its Bluetooth speaker functionality.
6. Wartung
- Regularly clean the fan blades and light cover with a soft, damp Tuch. Keine Scheuer- oder Lösungsmittel verwenden.
- Ensure all screws and connections are secure periodically.
- Der Motor benötigt keine Schmierung.
7. Fehlerbehebung
| Problem | Mögliche Ursache | Lösung |
|---|---|---|
| Lüfter läuft nicht. | Der Lüfter erhält keinen Strom. Lose Kabelverbindungen. Batterie der Fernbedienung schwach. | Leistungsschalter/Sicherung prüfen. Stellen Sie sicher, dass alle Kabelverbindungen sicher sind. Ersetzen Sie die Batterien der Fernbedienung. |
| Licht geht nicht an. | Light wire connection loose. Problem mit dem LED-Treiber. | Check light wire connections. Kontaktieren Sie den Kundendienst. |
| Der Lüfter macht übermäßige Geräusche. | Loose screws on fan blades or mounting. Unausgeglichene Klingen. | Ziehen Sie alle Schrauben fest. Ensure blades are balanced and securely attached. |
| Bluetooth-Verbindung wird nicht hergestellt. | Incorrect PIN. Gerät zu weit entfernt. | Ensure PIN 8888 is entered correctly. Move device closer to the fan. |
8. Spezifikationen
- Modellname: ASALL001
- Teilenummer: FAN002-B
- Größe: 52 Zoll
- Höhe: 15 inch / 20 inch (optional, from ceiling to bottom of fan housing)
- Material: Wooden fan blade + hardware
- Artikelgewicht: 14.33 Pfund
- Energiequelle: AC
- Bandtage: 110 Volt
- Wastage: Fan 52 watts, Light 18 watts
- Lichtquellentyp: LED
- Farbtemperatur: Cold White (6800K), Natural Light (4000K), Warm Light (2700K)
- Besondere Merkmale: Bluetooth music, Dimmable and adjustable brightness LED light source, RGB color change function, Reversible function, Timer
- Kontrollmethode: Fernbedienung
- Verwendung im Innen- und Außenbereich: Outdoor (suitable for covered outdoor areas)
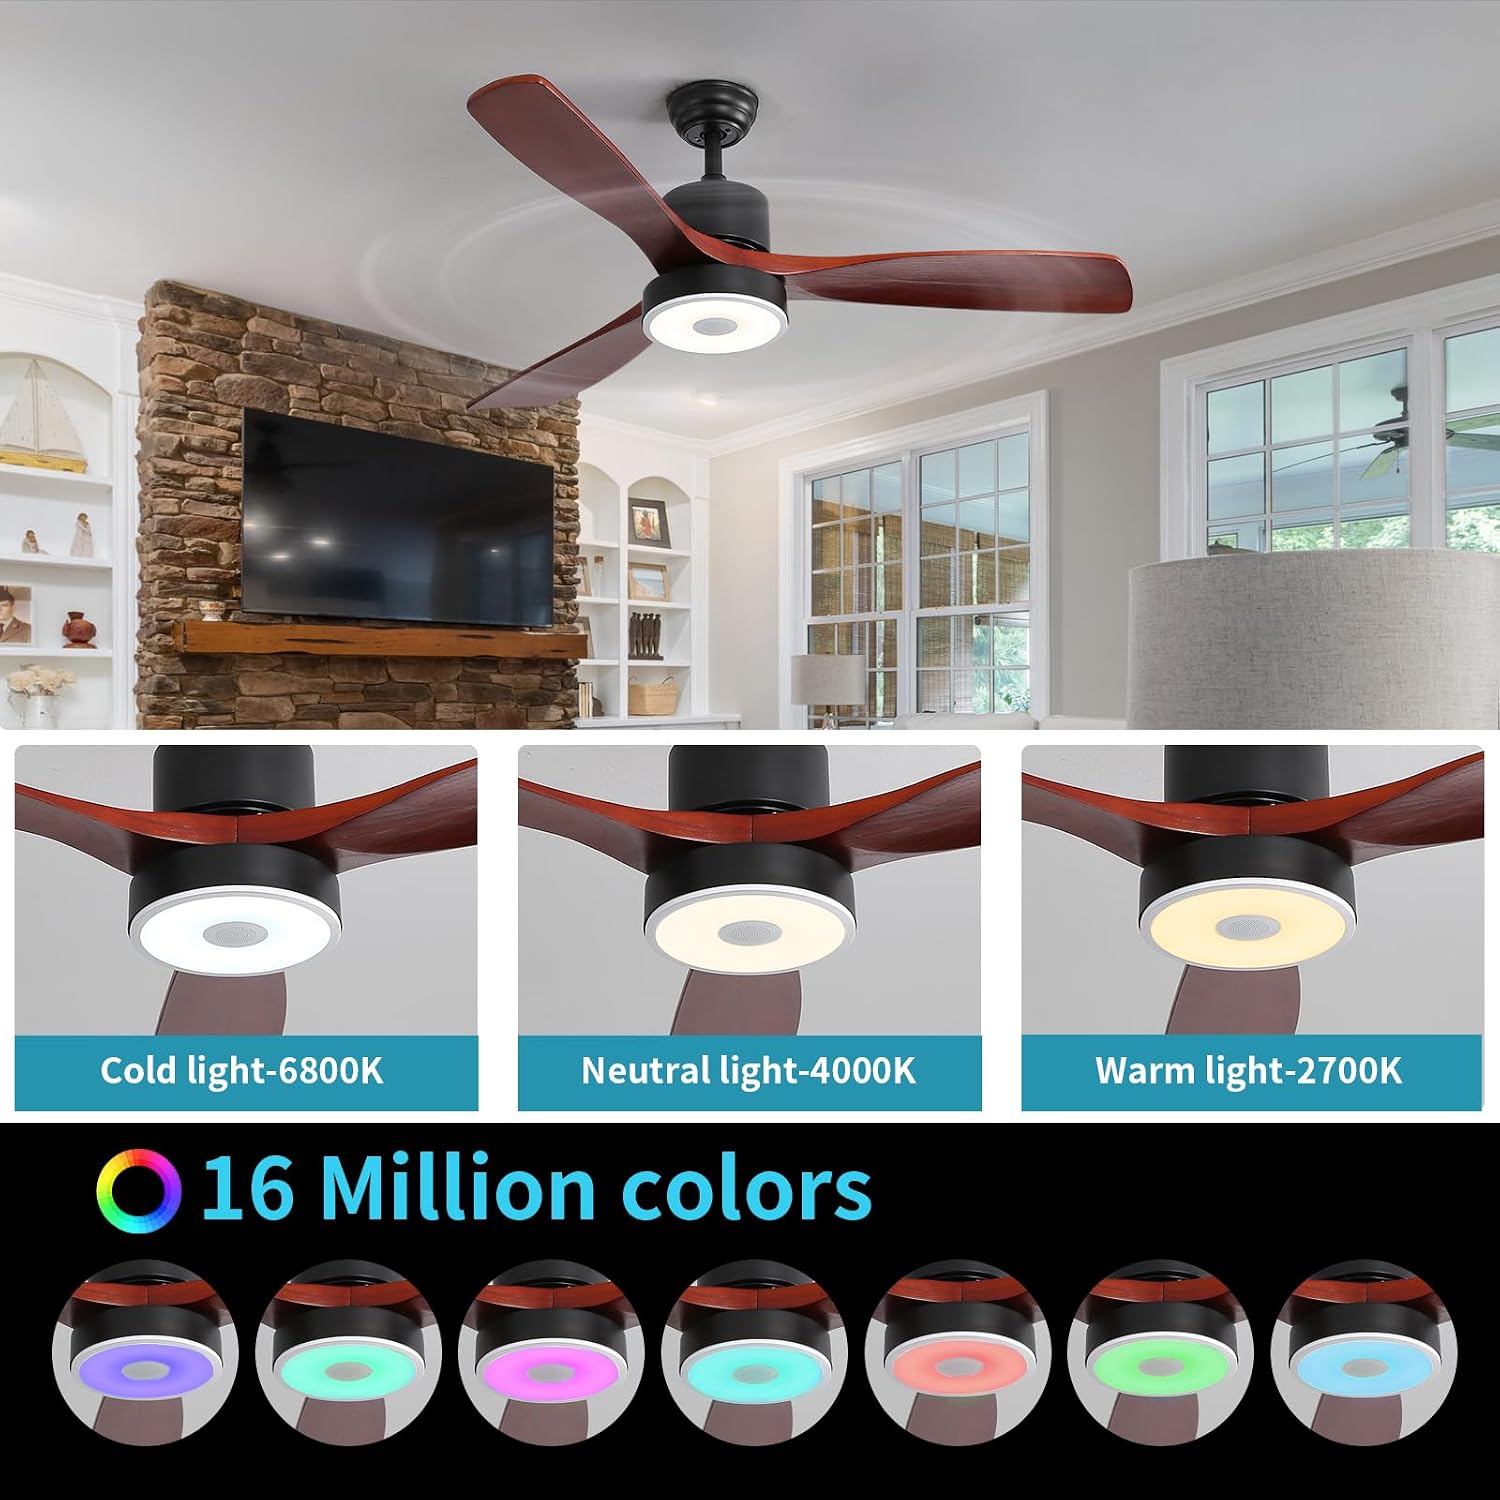
Image: Diagram illustrating the dimensions of the 52-inch fan and suitability for various ceiling types.
9. Garantie und Support
This product has been certified by FCC, CE, and GS, ensuring quality and safety standards.
For any questions or assistance regarding the use of this product, please contact us through Amazon. Our customer service team is available to provide 24-hour support.