
1. Einleitung
Thank you for choosing the GEEKOM MiniAir 11 Mini PC. This compact and powerful device is designed for various computing tasks, from everyday browsing to 4K media playback. This manual provides essential information for setting up, operating, maintaining, and troubleshooting your Mini PC.
2. Lieferumfang
Carefully unpack your GEEKOM MiniAir 11 and ensure all items are present:
- GEEKOM MiniAir 11 Mini-PC
- Netzteil
- Stromkabel
- HDMI-Kabel
- Mini DisplayPort-auf-HDMI-Adapter
- VESA-Halterung und Schrauben
- Aufbewahrungstasche
- Benutzerhandbuch (dieses Dokument)
- Mascot Figurine (Special Edition)
- GEEKOM Mouse Pad (Special Edition)

Figure 2.1: Contents of the GEEKOM MiniAir 11 Special Edition box.
3. Produktüberschreitungview
The GEEKOM MiniAir 11 features a compact design with various ports for connectivity and expansion.
3.1 Frontplatte

Figure 3.1: Front panel ports.
- USB Type-C (SS 10): Nur Datenübertragung.
- USB 3.2 Gen1 (SS 5): Hochgeschwindigkeits-Datenübertragung.
- Kopfhöreranschluss: Für Audioausgabe.
- Netzschalter: Zum Ein-/Ausschalten des Geräts.
3.2 Rückseite

Abbildung 3.2: Anschlüsse auf der Rückseite.
- Power Socket (19V DC): Schließen Sie hier das Netzteil an.
- Mini DisplayPort (DP): Für Videoausgabe.
- Gigabit-LAN: Für kabelgebundene Netzwerkverbindung.
- 2x USB 3.2 Gen1 (SS 5): Hochgeschwindigkeits-Datenübertragung.
- USB Type-C (SS 10): Nur Datenübertragung.
- HDMI: For video output (supports 4K UHD).
3.3 Seitenwände

Figure 3.3: Side panel with SD card slot.
- SD-Kartensteckplatz: For expanding storage with an SD card.
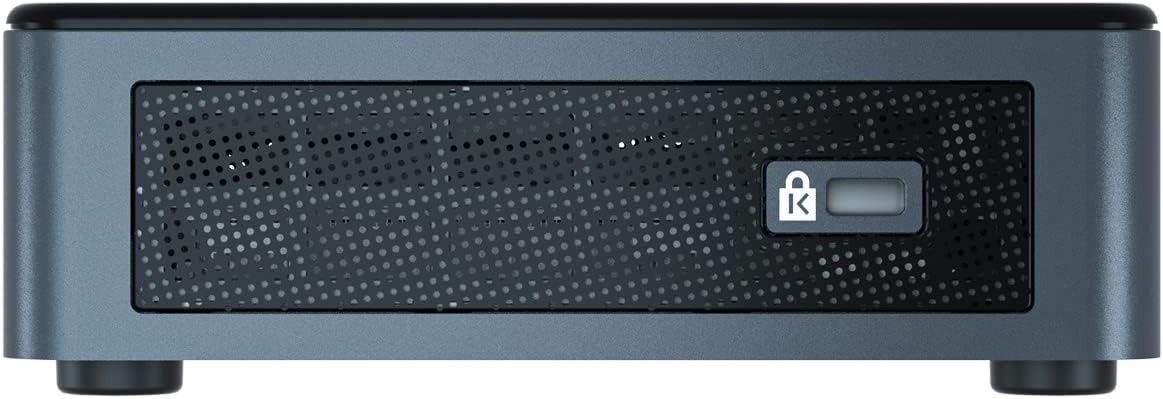
Figure 3.4: Side panel with Kensington lock slot.
- Steckplatz für Kensington-Schloss: Zur physischen Sicherheit.
4. Einrichtung
Follow these steps to set up your GEEKOM MiniAir 11:
- Anschluss an das Display: Connect your monitor or TV to the Mini PC using the HDMI cable or Mini DisplayPort to HDMI adapter.
- Peripheriegeräte anschließen: Schließen Sie Ihre Tastatur, Maus und alle anderen USB-Geräte an die verfügbaren USB-Anschlüsse an.
- Mit Netzwerk verbinden: For a wired connection, plug an Ethernet cable into the Gigabit LAN port. For Wi-Fi, the device will prompt you during initial Windows setup.
- Strom anschließen: Connect the power adapter to the Mini PC's power socket, then plug the power cable into an electrical outlet.
- Einschalten: Press the power button on the front panel. The device will boot up, and you will be guided through the Windows 11 Pro setup process.
5. Betriebssystem
The GEEKOM MiniAir 11 comes pre-installed with Windows 11 Pro, offering a full desktop experience. Ensure your operating system is regularly updated for optimal performance and security.
6. Wartung
Um die Langlebigkeit und optimale Leistung Ihres Mini-PCs zu gewährleisten, beachten Sie bitte die folgenden Wartungstipps:
- Reinigung: Regularly clean the exterior with a soft, dry cloth. Use compressed air to clear dust from vents to maintain proper airflow and cooling.
- Software-Updates: Keep Windows 11 Pro and all drivers updated. This can be done through Windows Update in the Settings menu.
- Speicherverwaltung: Löschen Sie regelmäßig unnötige fileund Anwendungen, um Speicherplatz freizugeben.
- Umfeld: Betreiben Sie den Mini-PC in einem gut belüfteten Bereich, fern von direkter Sonneneinstrahlung, Wärmequellen und übermäßiger Feuchtigkeit.
7. Komponenten aktualisieren
The GEEKOM MiniAir 11 offers upgrade options for RAM and storage:
- RAM: The device features two DDR4 RAM slots. It comes with 8GB DDR4 RAM (one slot occupied) and is upgradable to a maximum of 32GB (16GB per slot).
- SSD: The Mini PC includes a 256GB M.2 NVMe SSD. This can be upgraded to a 1TB M.2 NVMe SSD. Note that upgrading the SSD will require reinstalling the operating system.
For detailed instructions on how to access and upgrade these components, please refer to the official GEEKOM support resources or consult a qualified technician.
8. Fehlerbehebung
If you encounter issues with your GEEKOM MiniAir 11, try the following basic troubleshooting steps:
- Kein Strom: Ensure the power adapter is securely connected to both the Mini PC and a working electrical outlet. Try a different outlet.
- Kein Bildschirm: Verify that the HDMI or Mini DisplayPort cable is correctly connected to both the Mini PC and your display. Ensure the display is set to the correct input source.
- Langsame Leistung: Check for background applications consuming resources. Ensure Windows and drivers are updated. Consider upgrading RAM or SSD if performance issues persist.
- Netzwerkprobleme: For wired connections, check the Ethernet cable and router. For Wi-Fi, ensure the device is connected to the correct network and the signal is strong. Restart your router if necessary.
- Periphere Verbindungen nicht erkannt: Versuchen Sie, das Peripheriegerät an einen anderen USB-Anschluss anzuschließen. Stellen Sie sicher, dass die Treiber für das Peripheriegerät installiert sind.
For more advanced troubleshooting, visit the GEEKOM support webWebsite.
9. Spezifikationen
| Besonderheit | Spezifikation |
|---|---|
| Marke | GEEKOM |
| Modellname | GEEKOM MiniAir 11 |
| Modellnummer | GMA11N5095S |
| Betriebssystem | Windows 11 Pro |
| CPU Modell | Intel Celeron N5095 (11th Gen Quad-Core) |
| CPU-Geschwindigkeit | Bis zu 2.9 GHz |
| Grafikkarte | Intel UHD Graphics 605 (integriert) |
| RAM | 8GB DDR4 (Upgradable to 32GB Max) |
| Lagerung | 256GB M.2 NVMe SSD (Upgradable to 1TB Max) |
| Kabellose Konnektivität | Wi-Fi (5GHz AC), Bluetooth 4.0 |
| Kabelgebundene Konnektivität | Gigabit-LAN |
| Videoausgang | HDMI, Mini DisplayPort (Supports 4K UHD) |
| USB-Anschlüsse | 3x USB 3.2 Gen1, 2x USB Type-C (Data Only) |
| Andere Häfen | Headphone Jack, SD Card Slot, Kensington Lock Slot |
| Maße | 4.61 x 4.41 x 1.34 Zoll |
| Kühlmethode | Luft |
10. Garantie und Support
GEEKOM products are designed for reliability and performance. For warranty information, product registration, and technical support, please visit the official GEEKOM webBesuchen Sie die Website oder kontaktieren Sie den Kundenservice. Bewahren Sie Ihren Kaufbeleg für Garantieansprüche auf.
GEEKOM Offiziell WebWebsite: www.geekompc.com