
Andoer e417fe28-cba1-49bd-8acb-ddcd73b41592
Bedienungsanleitung für die digitale 4K-Videokamera von Andoer
Model: e417fe28-cba1-49bd-8acb-ddcd73b41592
1. Einleitung
This user manual provides detailed instructions for operating your Andoer 4K Digital Video Camera. Please read this manual thoroughly before using the camera to ensure proper operation and to maximize its performance. Keep this manual for future reference.
1.1 Packungsinhalt
Bitte überprüfen Sie nach dem Öffnen des Pakets, ob alle unten aufgeführten Artikel vorhanden und in einwandfreiem Zustand sind:
- 1 x Andoer 4K Digital Video Camera
- 2 x NP-40 Li-ion Battery (one pre-installed)
- 1 x USB-Kabel
- 1 x Videokabel
- 1 x Fernbedienung
- 1 x Kameratasche
- 1 x Benutzerhandbuch (Englisch)

Image: The Andoer 4K Digital Video Camera, remote control, and two NP-40 Li-ion batteries, illustrating the main components included in the package.
2. Produktmerkmale
The Andoer 4K Digital Video Camera is equipped with a range of features designed to enhance your video recording and photography experience:
- 4K Ultra HD-Videoaufnahme: Capture stunning videos at 4K/30fps and 2.7K/30fps resolutions.
- 56-MP-Standbildaufnahme: Produce high-resolution photos up to 56 megapixels (interpolation).
- 3.0 Inch IPS Touchscreen: A rotatable 270° touchscreen for intuitive control and versatile viewwinkeln.
- 18-facher Digitalzoom: Bring distant subjects closer without compromising image quality.
- IR Nachtsicht: Record clear and natural footage in low-light or dark environments.
- WiFi-Konnektivität: Easily connect to your smartphone or tablet via the DV-CAM APP for remote control, live view, Und file Übertragung.
- Face Detection & Anti-Shake: Enhance focus and stability for clearer shots.
- Unterstützung für externe Mikrofone: Hot shoe mount for connecting an external microphone for improved audio quality.
- Standard-Stativhalterung: 1/4 inch thread for mounting on a tripod or other accessories.

Image: An infographic highlighting the camera's main features including 4K 56MP resolution, 18X Digital Zoom, Face Detection, Night Vision, Dual Outputs, Digital Anti-shake, IPS Touchscreen, WiFi Connection, and Built-in Microphone.
3. Erste Schritte
3.1 Einlegen und Laden der Batterie
The camera uses NP-40 Li-ion batteries. One battery is typically pre-installed. Ensure batteries are fully charged before first use.
- Öffnen Sie die Abdeckung des Batteriefachs an der Unterseite der Kamera.
- Insert the NP-40 battery, ensuring the correct polarity.
- Schließen Sie den Batteriefachdeckel fest.
- To charge, connect the camera to a power source using the provided USB cable. The charging indicator light will illuminate.
- Der Ladevorgang ist abgeschlossen, wenn die Kontrollleuchte erlischt.
3.2 Installation der SD-Karte
The camera supports SD/SDHC cards up to 128GB (Class 6 or above recommended, not included).
- Suchen Sie den SD-Kartensteckplatz, der sich normalerweise an der Seite oder Unterseite der Kamera befindet.
- Setzen Sie die SD-Karte so ein, dass die Metallkontakte in die richtige Richtung zeigen (siehe Abbildung neben dem Steckplatz). Drücken Sie sie hinein, bis sie einrastet.
- Zum Herausnehmen die Karte vorsichtig wieder hineindrücken, bis sie herausspringt.
4. Grundlegende Bedienung
4.1 Ein-/Ausschalten
- Einschalten: Open the LCD screen or press the Power button.
- Ausschalten: Close the LCD screen or press and hold the Power button.
4.2 Video aufnehmen
- Schalten Sie die Kamera ein.
- Ensure the camera is in video recording mode (indicated by an icon on the screen). If not, use the Mode button to switch.
- Press the Record button (usually a red circle) to start recording.
- Drücken Sie die Aufnahmetaste erneut, um die Aufnahme zu stoppen.
4.3 Fotos aufnehmen
- Schalten Sie die Kamera ein.
- Stellen Sie sicher, dass sich die Kamera im Fotomodus befindet.
- Verwenden Sie den LCD-Bildschirm, um den Bildausschnitt festzulegen.
- Press the Photo button (often a camera icon or shutter button) to take a picture.
4.4 Zoomfunktion
Die Kamera verfügt über einen 18-fachen digitalen Zoom.
- Use the T (Telephoto) button to zoom in.
- Use the W (Wide) button to zoom out.

Image: A visual demonstration of the 18X digital zoom capability, showing how the camera can magnify distant subjects.
4.5 Wiedergabe
- In standby mode, press the Playback button (often an arrow icon) to enter playback mode.
- Verwenden Sie die Navigationsschaltflächen, um durch Ihre aufgezeichneten Videos und Fotos zu blättern.
- Press the OK button to play a video or view ein Foto im Vollbildmodus.
- Drücken Sie die Wiedergabetaste erneut, um den Wiedergabemodus zu verlassen.
5. Erweiterte Funktionen
5.1 WiFi-Verbindung
The camera supports WiFi connectivity for remote control and file transfer via the DV-CAM APP.
- Download and install the "DV-CAM" APP on your smartphone or tablet from your device's app store.
- Navigieren Sie an der Kamera zu den WLAN-Einstellungen und aktivieren Sie WLAN. Der Name (SSID) und das Passwort des WLAN-Netzwerks der Kamera werden angezeigt.
- On your smartphone/tablet, go to WiFi settings and connect to the camera's WiFi network using the provided password.
- Open the DV-CAM APP. You can now view lebe footage, control recording, take photos, and download files direkt auf Ihr Mobilgerät.

Image: A visual representation of the camera's WiFi function, showing a smartphone connected to the camera to view lebe footage or transfer files.
5.2-Zoll-Infrarot-Nachtsichtgerät
The IR Night Vision feature allows you to record in low-light conditions.
- To activate IR Night Vision, locate the IR button or setting in the camera menu.
- When activated, the camera will use infrared light to illuminate the scene, capturing clear black and white footage in der Dunkelheit.

Image: A side-by-side comparison demonstrating the effectiveness of IR Night Vision, showing a scene in normal light versus the same scene captured in darkness using infrared.
5.3 3.0 Inch IPS Touchscreen
The 3.0-inch IPS touchscreen offers intuitive control and can be rotated 270 degrees for various shooting angles, including self-recording.
- Tap the screen to access menu options or focus.
- Swipe to navigate through playback or menu pages.
- Rotate the screen to face forward for vlogging or self-portraits.
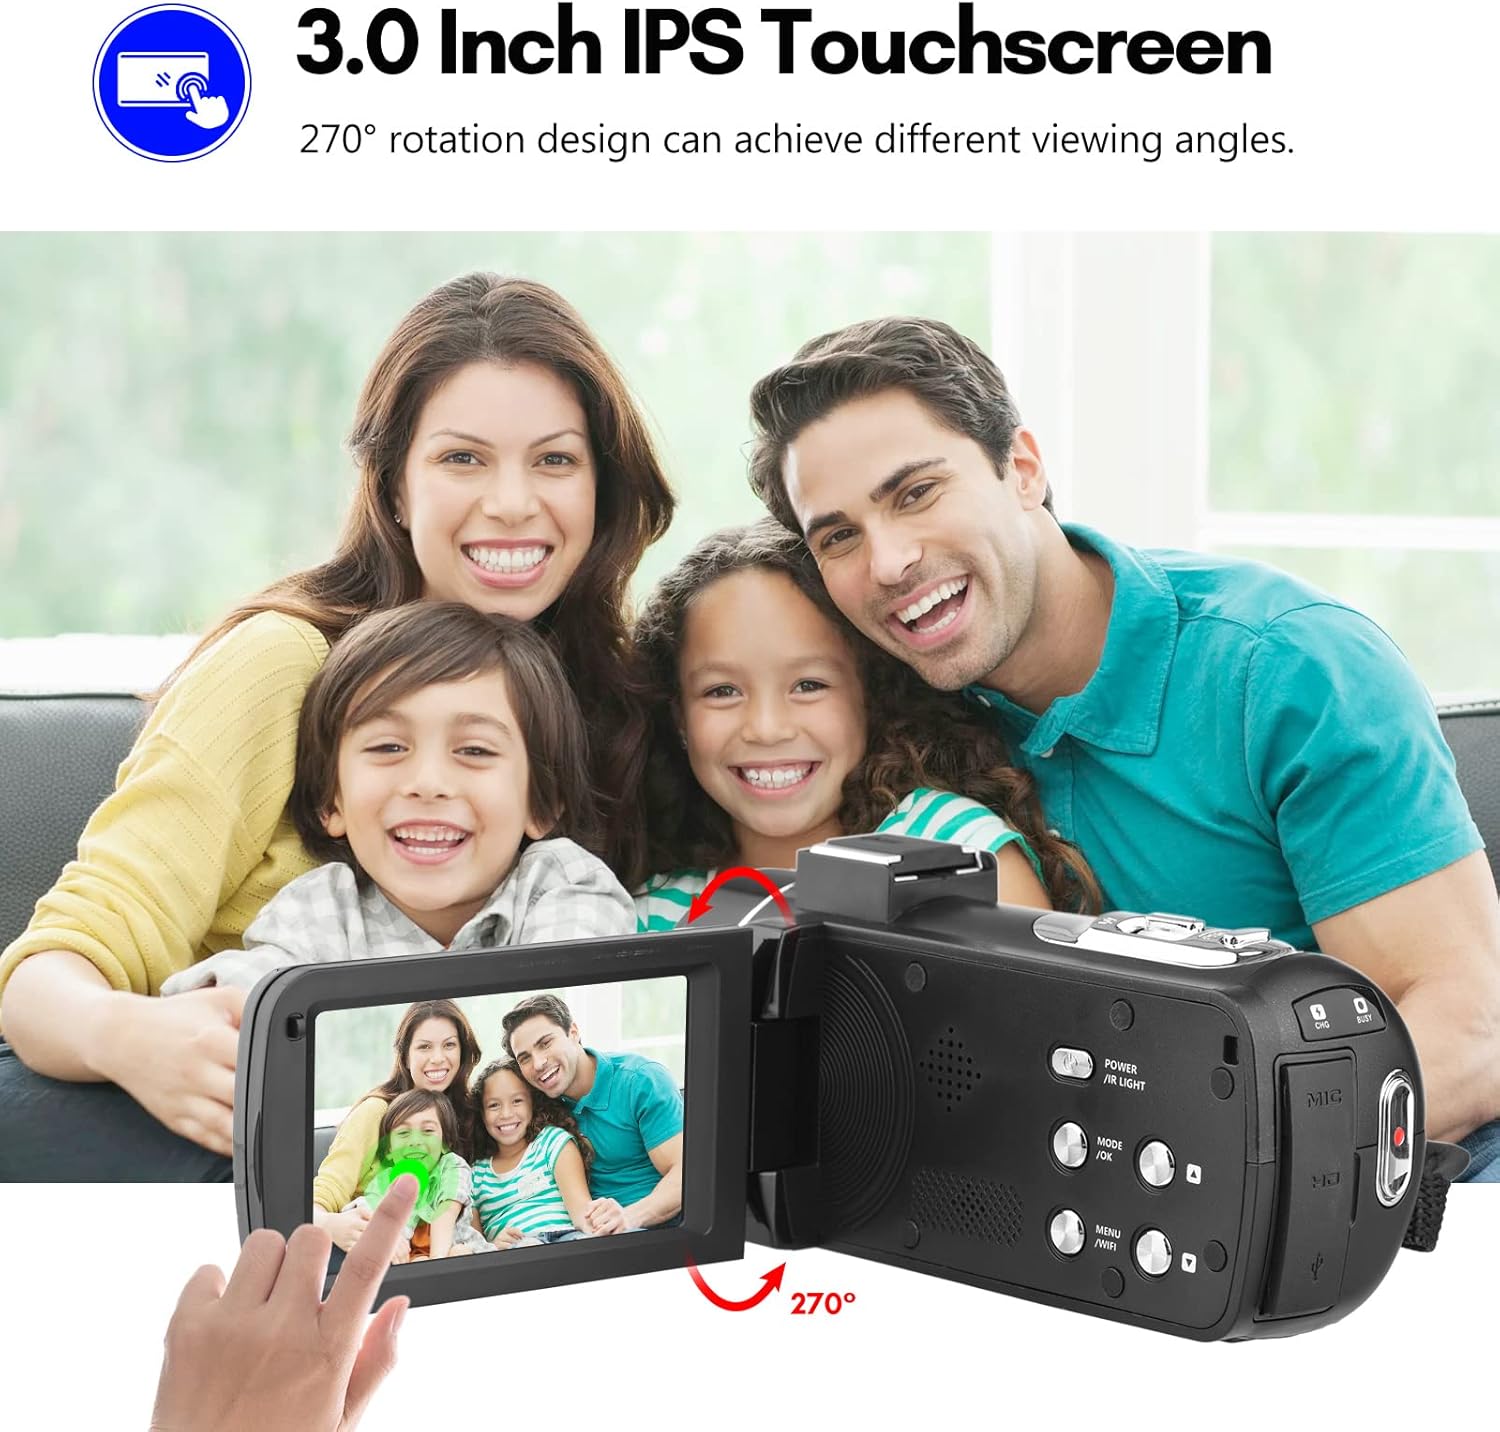
Image: The Andoer camera with its 3.0-inch IPS touchscreen rotated, demonstrating its 270-degree rotation capability for flexible viewing und Selbstaufzeichnung.
5.4 Menüeinstellungen
Access the camera's menu to adjust various settings such as video resolution, photo resolution, white balance, exposure, self-timer, and auto power off.
- Drücken Sie die MENÜ-Taste, um das Einstellungsmenü aufzurufen.
- Use the navigation buttons or touchscreen to select options.
- Drücken Sie OK, um die Auswahl zu bestätigen.
- Drücken Sie zum Beenden erneut MENU.
6. Konnektivität
The camera offers multiple connectivity options for viewing and transferring your media.
6.1 Connecting to a TV (HD Multimedia Interface)
- Stellen Sie sicher, dass die Kamera ausgeschaltet ist.
- Connect one end of the HD multimedia interface cable (not explicitly listed in package contents, but mentioned in description) to the camera's HD port and the other end to an HD input on your TV.
- Turn on the TV and select the correct HD input source.
- Turn on the camera. The camera's display will be mirrored on the TV screen, allowing you to view Fotos und Videos.
6.2 Anschluss an einen Computer (USB)
- Stellen Sie sicher, dass die Kamera ausgeschaltet ist.
- Schließen Sie die Kamera mit dem mitgelieferten USB-Kabel an Ihren Computer an.
- Turn on the camera. It will typically enter "Mass Storage" or "PC Camera" mode. Select "Mass Storage" to access files.
- The camera will appear as a removable disk drive on your computer, allowing you to transfer files.

Image: An illustration detailing how to connect the Andoer camera to a television via HD multimedia interface and to a computer via USB for viewing and transferring media.
7. Wartung
7.1 Reinigung der Kamera
- Verwenden Sie ein weiches, trockenes Tuch, um das Kameragehäuse zu reinigen.
- For the lens, use a specialized lens cleaning cloth and lens cleaning solution. Avoid touching the lens with your fingers.
- Verwenden Sie keine scharfen Reinigungsmittel oder Lösungsmittel, da diese die Oberfläche der Kamera beschädigen können.
7.2 Speicherung
- Wenn die Kamera längere Zeit nicht benutzt wird, sollte der Akku entfernt werden.
- Bewahren Sie die Kamera an einem kühlen, trockenen Ort auf, fern von direkter Sonneneinstrahlung und extremen Temperaturen.
- Use the provided camera bag to protect it from dust and scratches.
8. Fehlerbehebung
| Problem | Mögliche Ursache | Lösung |
|---|---|---|
| Die Kamera lässt sich nicht einschalten. | Die Batterie ist leer oder falsch eingesetzt. | Laden Sie den Akku auf oder setzen Sie ihn wieder richtig ein. |
| Videoaufnahmen/Fotos können nicht aufgenommen werden. | Die SD-Karte ist voll, gesperrt oder nicht eingelegt. | Löschen files, unlock the SD card, or insert an SD card. |
| Schlechte Bild-/Videoqualität. | Die Linse ist verschmutzt; unzureichende Beleuchtung; falsche Einstellungen. | Clean the lens; use IR Night Vision in low light; adjust resolution/exposure settings. |
| WLAN-Verbindungsprobleme. | Incorrect password; APP not installed; distance too far. | Verify password; install DV-CAM APP; move closer to camera. |
9. Spezifikationen
| Besonderheit | Detail |
|---|---|
| Bildsensor | CMOS |
| ISO | Auto, 100, 200, 400, 800, 1600 |
| Lagerung | SD/SDHC Card, max. 128GB (Class 6 or above) |
| Linse | Fixed, f/2.6, f=7.0mm |
| Fokusentfernung | 0.5m bis unendlich |
| Bildschirm | 3.0 Inch IPS Touchscreen (270° rotation) |
| Photo Format & Resolution | JPG, 56M/ 48M/ 30M/ 24M/ 20M/ 16M/ 12M/ 8M/ 5M |
| Video Format & Resolution | MP4, 4K/30fps, 2.7K/30fps, 1080P/60fps, 1080P/30fps, 720P/60fps, 720P/30fps |
| Digital Zoom | 18X |
| IR-Licht | <1.0M |
| Weißabgleich | Auto/ Daylight/ Cloudy/ Tungsten/ Fluorescent |
| Belichtung | ± 3.0 EV |
| Selbstauslöser | OFF/2s/ 5s/ 10s |
| Automatische Abschaltung | OFF/ 1min/3min/ 5min/ 10min |
| Mikrofon | Built-in, supports external microphone |
| Stromversorgung | 1 x NP-40 Li-ion Battery |
| Batterie der Fernbedienung | 2 x AAA-Batterien (nicht im Lieferumfang enthalten) |
| Kameragröße | 12.6 x 5.8 x 5.9 cm |
| Kameragewicht | 318 g |
10. Garantie und Support
For warranty information and technical support, please refer to the official Andoer webBesuchen Sie die Website oder kontaktieren Sie den Kundenservice. Bewahren Sie Ihren Kaufbeleg als Kaufnachweis auf.
You can visit the official Andoer store on Amazon for more information: Andoer Store
11. Sicherheitshinweise
Bitte beachten Sie die folgenden Sicherheitsvorkehrungen, um Verletzungen oder Schäden am Produkt zu vermeiden:
- Setzen Sie die Kamera keinen extremen Temperaturen, direkter Sonneneinstrahlung oder hoher Luftfeuchtigkeit aus.
- Halten Sie die Kamera von Wasser und anderen Flüssigkeiten fern.
- Versuchen Sie nicht, die Kamera zu zerlegen oder zu verändern. Reparaturen dürfen nur von autorisiertem Servicepersonal durchgeführt werden.
- Keep plastic bags and packaging materials away from babies and children to avoid suffocation hazards.

Image: A multi-language warning label emphasizing the importance of keeping plastic bags away from children to prevent suffocation.
Ask a question about this manual
Ask about setup, troubleshooting, compatibility, parts, safety, or missing instructions. Manuals+ will review the question and use this page’s manual context to help answer it.