
1. Einleitung
The BSIDE X1A is a compact and intelligent digital multimeter pen designed for efficient and safe electronic parameter detection. This device offers multiple measurement functions including DC/AC voltage, resistance, and frequency, making it an essential tool for electricians, hobbyists, and DIY enthusiasts. Its pen-type design ensures portability and ease of use in various working environments.
2. Sicherheitshinweise
Please read and understand all safety warnings and operating instructions before using this instrument. Failure to follow these instructions could result in electric shock, fire, or serious injury.
- Always select the correct function and measurement range for your task.
- Do not exceed the maximum input value specified for each measurement range.
- When the meter is connected to a circuit, avoid touching the metallic parts of the test leads.
- Bei der Messung von Volumentages above 60V DC or 30V AC (RMS), always keep your fingers behind the finger guards on the test probes.
- Versuchen Sie nicht, das Volumen zu messentage if the terminal voltage übersteigt 500 V DC oder 500 V AC.
- Before changing measurement functions, ensure the test leads are disconnected from the circuit under test.
- Never measure resistance or continuity on live circuits. Ensure the circuit is de-energized to prevent damage to the meter or injury.
- Do not operate the instrument near explosive gases, vapors, or dust.
- Discontinue use immediately if any abnormality or malfunction is observed.
- Ensure the bottom case and battery cover are securely fastened before operating the meter.
- Avoid storing or using the meter in direct sunlight, high temperatures, or high humidity.
3. Packungsinhalt
Bitte prüfen Sie, ob alle unten aufgeführten Artikel in Ihrem Paket enthalten sind. Sollten Artikel fehlen oder beschädigt sein, wenden Sie sich bitte an Ihren Händler.
- 1 x BSIDE X1A Digital Multimeter Pen
- 1 x Messleitungssatz (rot und schwarz)
- 1 x Benutzerhandbuch
- 1 x Schraubendreher (für Batteriefach)
- 1 x Aufbewahrungstasche
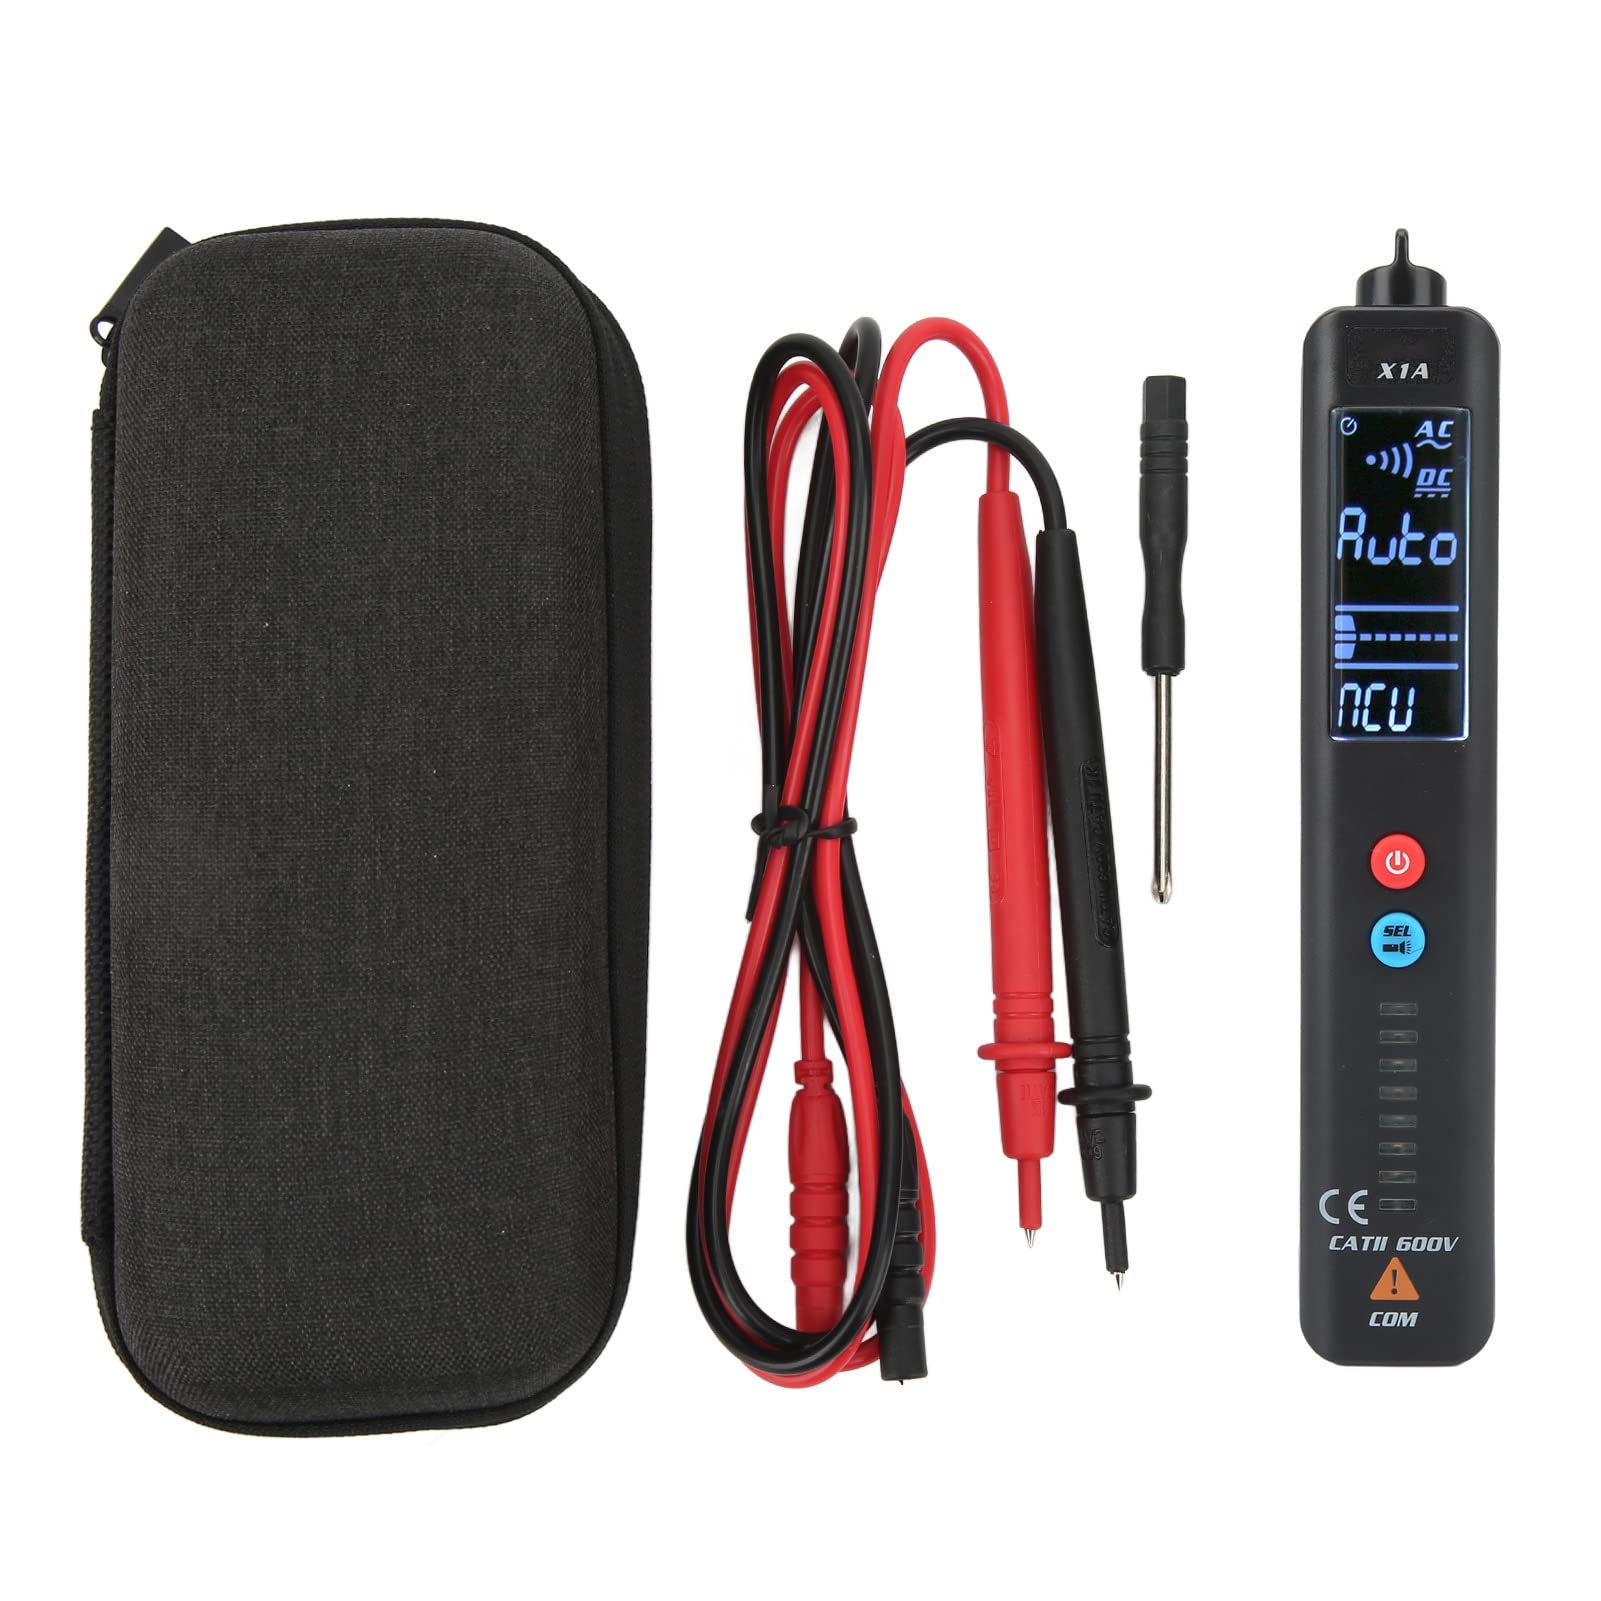
Image 3.1: Complete package contents of the BSIDE X1A Digital Multimeter Pen, including the pen meter, test leads, screwdriver, and storage bag.
4. Produktüberschreitungview
The BSIDE X1A features a clear digital display and intuitive controls for various electrical measurements.
- Notfall-Taschenlampe: Equipped with a built-in flashlight for improved visibility in low-light conditions, enhancing safety during night work.
- Multifunktionsmessung: Supports various measurements including voltage, resistance, and frequency to meet diverse testing needs.
- Tragbar und kompakt: Its pen-type design makes it easy to carry and suitable for most work environments.
- Langlebige Konstruktion: Made from high-quality ABS material, providing impact resistance, scratch resistance, and environmental friendliness.

Bild 4.1: Vorderseite view of the BSIDE X1A Digital Multimeter Pen, highlighting the display, power button, and mode selection button.
5. Einrichtung
5.1 Einlegen der Batterie
The BSIDE X1A requires two 1.5V AAA batteries for operation.
- Suchen Sie die Abdeckung des Batteriefachs auf der Rückseite des Multimeterstifts.
- Verwenden Sie den mitgelieferten Schraubendreher, um die Schraube zu lösen, mit der die Batterieabdeckung befestigt ist.
- Entfernen Sie die Batterieabdeckung.
- Legen Sie zwei 1.5V AAA-Batterien ein und achten Sie dabei auf die richtige Polarität (+ und -).
- Bringen Sie die Batterieabdeckung wieder an und ziehen Sie die Schraube fest an.
6. Bedienungsanleitung
6.1 Ein-/Ausschalten
Drücken und halten Sie den roten Ein-/Ausschalter (U) um das Gerät ein- oder auszuschalten.
6.2 Modusauswahl
The BSIDE X1A operates in two main modes. Press the blue 'SET' button to cycle through available measurement functions (e.g., Voltage, Resistance, Frequency, NCV).
6.3 Messung der Gleich-/Wechselspannungtage
- Schalten Sie das Multimeter ein.
- Wählen Sie die entsprechende Lautstärketage measurement mode (DC V or AC V) using the 'SET' button. The display will indicate the selected mode.
- Connect the red test lead to the positive (+) terminal of the circuit and the black test lead to the negative (-) terminal or ground.
- Lesen Sie den BandtagDer auf dem Bildschirm angezeigte Wert.
6.4 Widerstandsmessung
- Vor der Widerstandsmessung muss sichergestellt werden, dass der Stromkreis spannungsfrei ist.
- Turn on the multimeter and select the resistance measurement mode (Ω).
- Connect the test leads across the component or circuit section where resistance is to be measured.
- Lesen Sie den auf dem Bildschirm angezeigten Widerstandswert ab.
6.5 Frequenz messen
- Turn on the multimeter and select the frequency measurement mode (Hz).
- Schließen Sie die Messleitungen an den Stromkreis an, in dem die Frequenz gemessen werden soll.
- Read the frequency value displayed on the screen.
6.6 Berührungslose Voltage (NCV) Erkennung
Die NCV-Funktion ermöglicht die Erkennung von Wechselstromspannungen.tage without direct contact. Select NCV mode and bring the tip of the multimeter close to the conductor. The device will indicate the presence of AC voltage durch visuelle und/oder akustische Warnsignale.
7. Wartung
- Reinigung: Verwenden Sie ein weiches,amp Tuch zum Reinigen des Zählersasing. Verwenden Sie keine scheuernden Reinigungs- oder Lösungsmittel.
- Batteriewechsel: Tauschen Sie die Batterien aus, sobald die Anzeige für niedrigen Batteriestand erscheint, um genaue Messwerte zu gewährleisten. Hinweise zum Einlegen der Batterien finden Sie in Abschnitt 5.1.
- Lagerung: Bei längerer Nichtbenutzung die Batterien entfernen, um ein Auslaufen zu verhindern. Das Messgerät an einem kühlen, trockenen Ort, vor direkter Sonneneinstrahlung und extremen Temperaturen geschützt aufbewahren.
8. Fehlerbehebung
If you encounter issues with your BSIDE X1A, refer to the following common troubleshooting steps:
- Kein Display/Stromanschluss: Prüfen Sie, ob die Batterien richtig eingesetzt sind und ausreichend geladen sind. Tauschen Sie die Batterien gegebenenfalls aus.
- Ungenaue Messwerte: Ensure the correct measurement function and range are selected. Check test lead connections for proper contact. Verify that the circuit is de-energized for resistance/continuity tests.
- Keine NCV-Erkennung: Ensure the NCV mode is active and the tip of the meter is brought sufficiently close to the AC voltagDie Quelle.
- Zähler reagiert nicht: Versuchen Sie, das Messgerät aus- und wieder einzuschalten. Sollte das Problem weiterhin bestehen, tauschen Sie die Batterien aus.
Sollten die Probleme durch diese Schritte nicht behoben werden können, wenden Sie sich bitte an den Kundendienst.
9. Spezifikationen
| Parameter | Wert |
|---|---|
| Modell | X1A |
| Material | ABS |
| DC-Voltage Reichweite | Bis zu 500V |
| AC-Lautstärketage Reichweite | Bis zu 500V |
| Widerstandsbereich | 0 Ω bis 20 MΩ |
| Frequenzbereich | Bis zu 1000Hz |
| Stromversorgung | 2 x 1.5V AAA-Batterien (nicht im Lieferumfang enthalten) |
10. Gewährleistung
This product is covered by a standard manufacturer's warranty against defects in materials and workmanship. The warranty period typically begins from the date of purchase. Please retain your proof of purchase for warranty claims. For specific warranty terms and conditions, refer to the documentation provided with your purchase or contact the retailer.
11. Unterstützung
For technical assistance, product inquiries, or service requests, please contact the retailer or manufacturer's customer support. Contact information can usually be found on the product packaging or the retailer's website. When contacting support, please have your product model (X1A) and purchase details ready.