
OOYCYOO P 60A
OOYCYOO MPPT 60A Solarladeregler – Benutzerhandbuch
Model: P 60A
1. Einleitung
This manual provides detailed instructions for the installation, operation, and maintenance of your OOYCYOO MPPT 60A Solar Charge Controller. This device is designed to efficiently manage power flow from your solar panels to your battery bank, ensuring optimal charging and system protection. It supports automatic 12V/24V system voltage identification and is compatible with various battery types.
Key features include a backlit LCD display, a 4-stage battery charging algorithm, and comprehensive protection functions.
2. Sicherheitshinweise
- Schließen Sie immer zuerst die Batterie, dann das Solarpanel und zuletzt den Verbraucher an. Trennen Sie die Verbraucher in umgekehrter Reihenfolge.
- Ensure all wiring is correctly polarized to prevent damage.
- Do not connect inverters or inductive loads directly to the controller's load terminals.
- Installieren Sie den Controller in einem gut belüfteten Bereich, fern von brennbaren Materialien.
- The controller generates heat during operation; ensure adequate airflow. The integrated cooling fan activates when the temperature exceeds 45°C and turns off below 40°C.
- Verwenden Sie für alle Verbindungen geeignete Leitungsschutzschalter und Sicherungen.
- This device is for indoor use only. Protect it from water and moisture.
3. Produktüberschreitungview
The OOYCYOO MPPT 60A Solar Charge Controller is designed for efficient solar power management. It features an LCD display for real-time data, multiple protection functions, and support for various battery types.
3.1 Packungsinhalt
- 1 x OOYCYOO MPPT 60A Solar-Laderegler
- 1 x Temperatursensor
- 1 x Benutzerhandbuch (Englisch)
3.2 Komponentenidentifikation

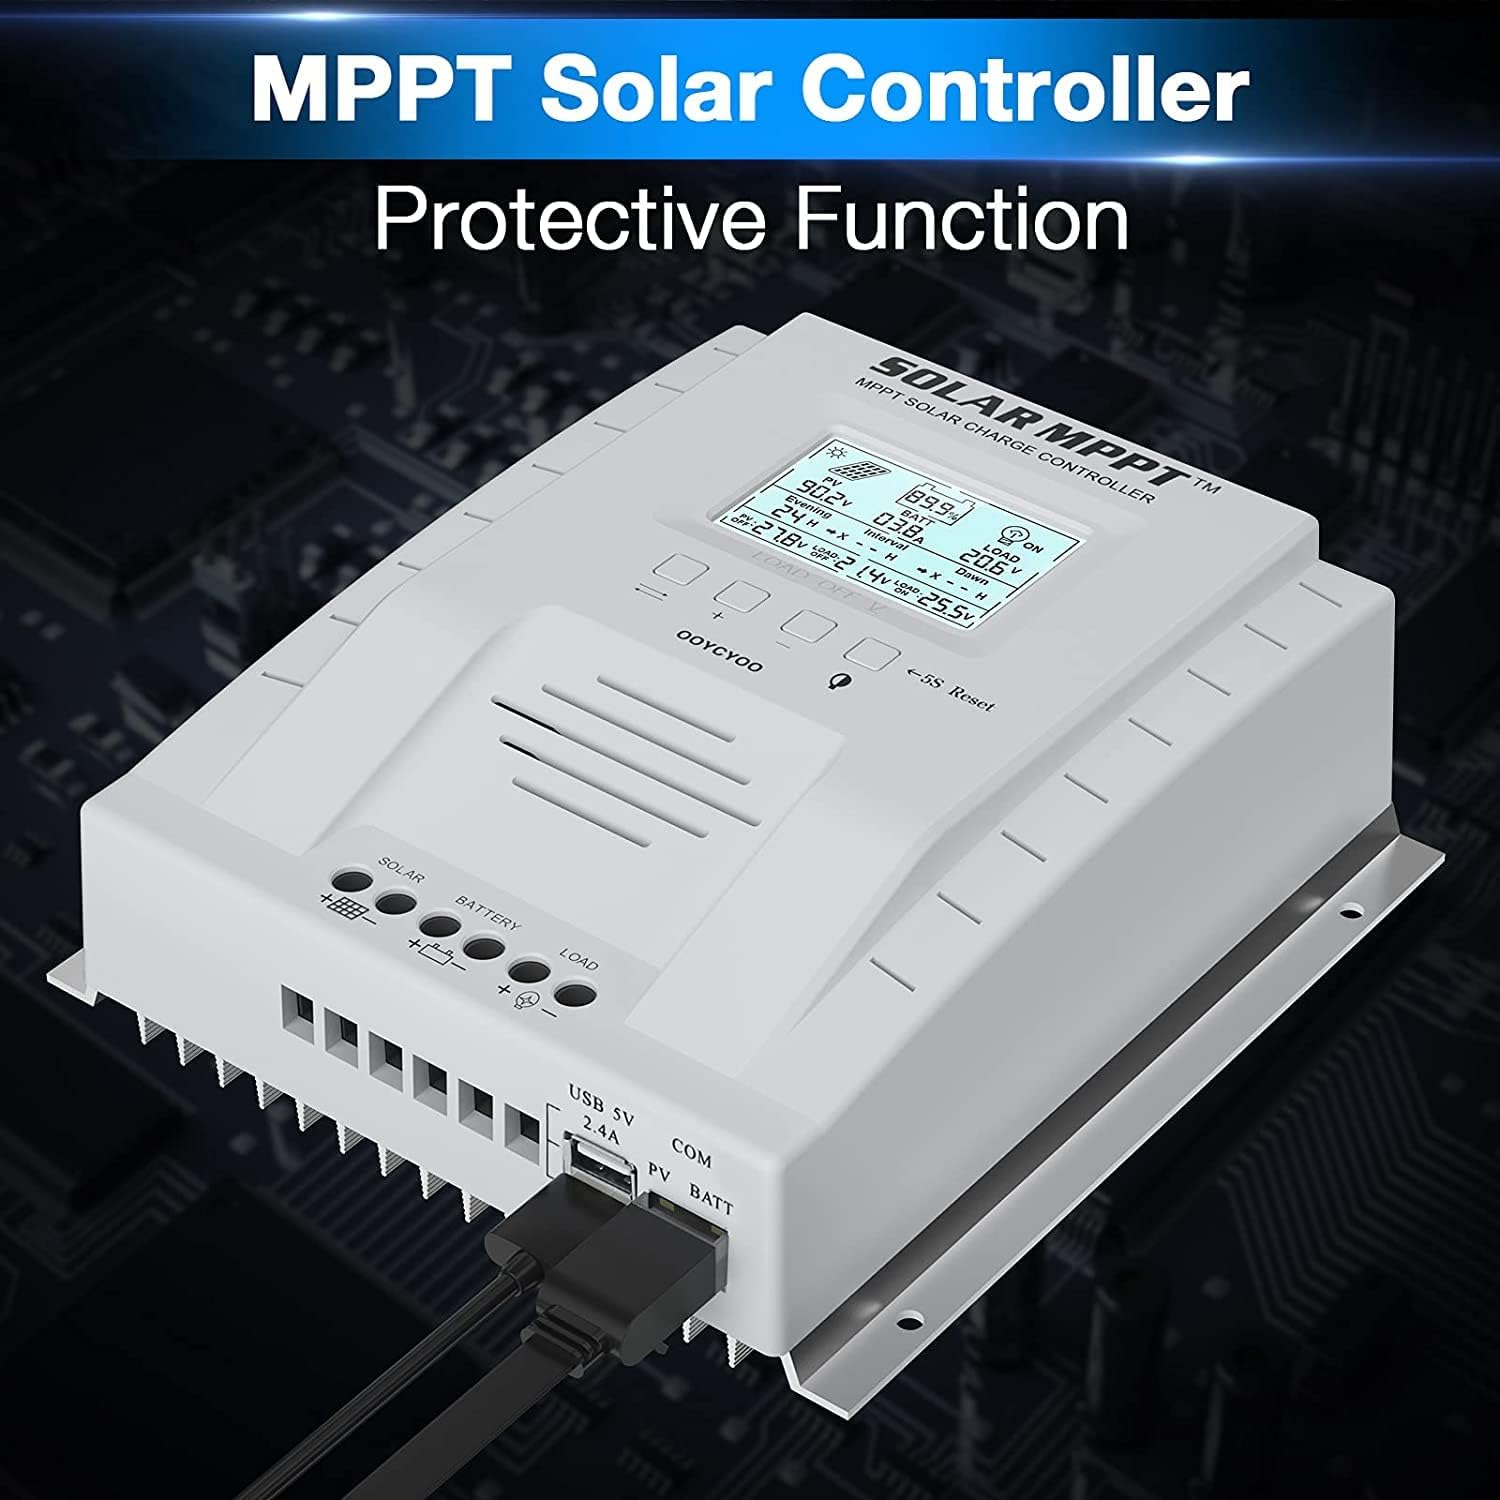
The controller features a clear LCD display on the front for monitoring system status. Below the display are control buttons for navigation and settings. Connection terminals for solar panels, battery, and load are located at the bottom. USB ports and an RS485 communication port are on the side.
4. Einrichtung und Installation
Eine korrekte Installation ist entscheidend für den sicheren und effizienten Betrieb Ihres Solarladereglers. Befolgen Sie diese Schritte sorgfältig.
4.1 Montage des Controllers
- Choose a dry, well-ventilated location, protected from direct sunlight, high temperatures, and water.
- Stellen Sie sicher, dass um den Controller herum ausreichend Platz zur Wärmeableitung vorhanden ist.
- Mount the controller vertically on a wall or stable surface using the provided mounting holes.
4.2 Kabelverbindungen
Follow the connection order precisely to avoid damage to the controller or other components.
- Schließen Sie die Batterie an: Connect the positive and negative terminals of the battery to the corresponding battery terminals on the controller. Ensure correct polarity. The controller will automatically detect the system voltage (12 V oder 24 V).
- Schließen Sie die Solarpaneele an: Connect the positive and negative leads from your solar panel array to the corresponding PV terminals on the controller. Ensure correct polarity. Do not exceed the maximum PV input voltage von 100V DC.
- Last anschließen (optional): Connect your DC loads to the load terminals on the controller. Note that the load output is for DC loads only. Do not connect inverters or inductive loads directly to these terminals.
- Connect the Remote Temperature Sensor: Plug the temperature sensor into its dedicated port. This sensor helps the controller optimize charging based on battery temperature.

Wichtiger Hinweis: Always connect the battery first and disconnect the solar panel last. Incorrect connection order can damage the controller.
5. Bedienungsanleitung
Once installed, the controller will begin operation automatically. The LCD display provides real-time system information.
5.1 LCD-Display und Tasten

The backlit LCD displays critical system parameters such as PV voltage, batterie voltage, charging current, load current, and accumulated energy (KWH). The four buttons below the display are used for navigation and settings adjustment:
- Umschalttaste: Used to cycle through display screens or confirm selections.
- '+' (Plus) Key: Erhöht Werte oder bewegt sich in Menüs nach vorne.
- '-' (Minus) Key: Verringert Werte oder bewegt sich in Menüs zurück.
- Manual Switch Load Key: Toggles the load output on/off manually.
- 5S Reset: Zum Wiederherstellen der Werkseinstellungen 5 Sekunden lang gedrückt halten.
5.2 Battery Charging Algorithm
Der Controller nutzt einen 4-stage charging algorithm to optimize battery life and performance:
- Sammelladung: Charges the battery at maximum current until the voltage erreicht die Boost-Voltage.
- Boost-Ladung: Ladungen bei konstantem Volumentage for a set period to ensure full charge.
- Erhaltungsladung: Maintains the battery at a lower voltage to prevent self-discharge and overcharging.
- Equalization (for specific battery types): Lädt die Batterie periodisch über, um das Zellvolumen auszugleichen.tages and prevent sulfation.
5.3 Unterstützte Batterietypen
The controller is compatible with various battery types, including:
- Lead-Acid (Sealed, Gel, Flooded)
- Lithium (LFP)
- User-defined parameters for other battery types.
Pre-set charging parameters are available for Sealed, Gel, Flooded, and LI (LFP) batteries. Users can customize parameters for other battery types as needed.
6. Schutzfunktionen
The OOYCYOO MPPT 60A Solar Charge Controller incorporates multiple protection mechanisms to ensure system safety and longevity:
- PV Overcurrent/Overpower Protection
- PV Short Circuit Protection
- PV-Verpolungsschutz
- Reverse Charging at Night Protection
- Batterie-Verpolungsschutz
- Batterieüberschusstage-Schutz
- Battery Over-discharge Protection
- Battery Overtemperature Protection
- Controller Overtemperature Protection
- Lithium Battery Low Temperature Protection
- Lastkurzschlussschutz
- Lastüberlastungsschutz
- TVS High Voltage Überspannungsschutz
7. Wartung
Regular maintenance ensures optimal performance and extends the lifespan of your solar charge controller.
- Verbindungen prüfen: Überprüfen Sie regelmäßig alle Kabelverbindungen auf festen Sitz und Korrosion. Ziehen Sie lose Verbindungen fest.
- Controller reinigen: Keep the controller clean and free of dust. Use a dry cloth to wipe the exterior. Ensure ventilation openings are not obstructed.
- Auf Schäden prüfen: Check for any signs of physical damage, overheating, or unusual odors.
- Batterieinspektion: Follow the manufacturer's maintenance guidelines for your specific battery type.
8. Fehlerbehebung
In diesem Abschnitt werden häufig auftretende Probleme behandelt, die bei Ihrem Solarladeregler auftreten können.
| Problem | Mögliche Ursache | Lösung |
|---|---|---|
| Controller lässt sich nicht einschalten / LCD-Bildschirm bleibt schwarz | Keine Batterie angeschlossen oder Batteriespannungtage zu niedrig. Verpolung der Verbindung. | Stellen Sie sicher, dass die Batterie angeschlossen ist und ausreichend geladen ist.tage. Batteriepolarität prüfen. |
| Keine Aufladung durch Solarpaneele | Solar panels not connected or reverse polarity. Insufficient sunlight. PV voltage zu niedrig oder zu hoch. | Check solar panel connections and polarity. Ensure adequate sunlight. Verify PV voltage is within operating range (e.g., 18V-96V for 12V system, 36V-96V for 24V system). |
| Laden funktioniert nicht | Load output disabled. Load short circuit or overload. Battery voltage zu niedrig. | Check load output status on LCD. Disconnect load and check for short circuit. Ensure battery is sufficiently charged. |
| Überhitzung des Controllers | Poor ventilation. Excessive load or charging current. | Ensure adequate airflow around the controller. Reduce load or charging current if possible. |
| ungenau voltage-Lesungen | Loose connections. Faulty temperature sensor. | Check all wiring connections. Ensure temperature sensor is properly connected. |
9. Spezifikationen
Technical specifications for the OOYCYOO MPPT 60A Solar Charge Controller.
| Parameter | Wert |
|---|---|
| Nennladestrom | 60 A |
| Systemlautstärketage | 12V/24V Auto Identification |
| max. PV Leerlauf Voltage | 100 V Gleichstrom |
| Maximale PV-Eingangsleistung (12-V-System) | 750 W |
| Maximale PV-Eingangsleistung (24-V-System) | 1500 W |
| DC/DC Transfer Efficiency | Bis zu 98.7% |
| Betriebstemperatur | -20℃ bis +55℃ |
| Anschlussgröße | 10 AWG |
| Abmessungen (L*B*H) | 8.3 x 8.4 x 3.4 Zoll (21.2 x 20.8 x 8.4 cm) |
| Gewicht | 3 kg |
| Anzeigetyp | LCD-Hintergrundbeleuchtung |
| UPC | 768461886785 |
| Modellnummer | P 60A |


10. Garantie und Support
For warranty information or technical support, please contact your retailer or the manufacturer directly. Refer to the product packaging or purchase documentation for specific contact details.
Ask a question about this manual
Ask about setup, troubleshooting, compatibility, parts, safety, or missing instructions. Manuals+ will review the question and use this page’s manual context to help answer it.