Superlux UK82
Superlux UK82 Dual-Channel UHF Wireless Microphone System User Manual
Modell: UK82
1. Einleitung
This manual provides detailed instructions for the proper setup, operation, and maintenance of your Superlux UK82 Dual-Channel UHF Wireless Microphone System. The UK82 system is designed for reliable audio transmission in various applications, including live performances, presentations, and events. It features a dual-channel UHF receiver and two handheld wireless transmitters, allowing for simultaneous use of both microphones.
The system incorporates advanced frequency-hopping spread spectrum (FHSS) technology and offers up to 200 manually selectable frequencies to ensure stable performance even in environments with high radio frequency interference. With a practical outdoor range of up to 50 meters (line-of-sight), it provides freedom of movement. The receiver offers both balanced XLR and standard 1/4-inch output options for versatile connectivity with professional mixers and PA systems.
2. Packungsinhalt
Carefully unpack the box and ensure all items are present and in good condition. If any items are missing or damaged, please contact your Superlux dealer.
- 1 x UK82 Dual-Channel UHF Wireless Receiver
- 2 x Handheld UHF Wireless Transmitters (Microphones)
- 1 x Netzteil für Empfänger
- 2 x Antennas for Receiver
- 1 x 1/4-inch to 1/4-inch Audio Cable
- Benutzerhandbuch (dieses Dokument)

Image: Superlux UK82 system components as packaged.
3. Systemkomponenten im Überblickview
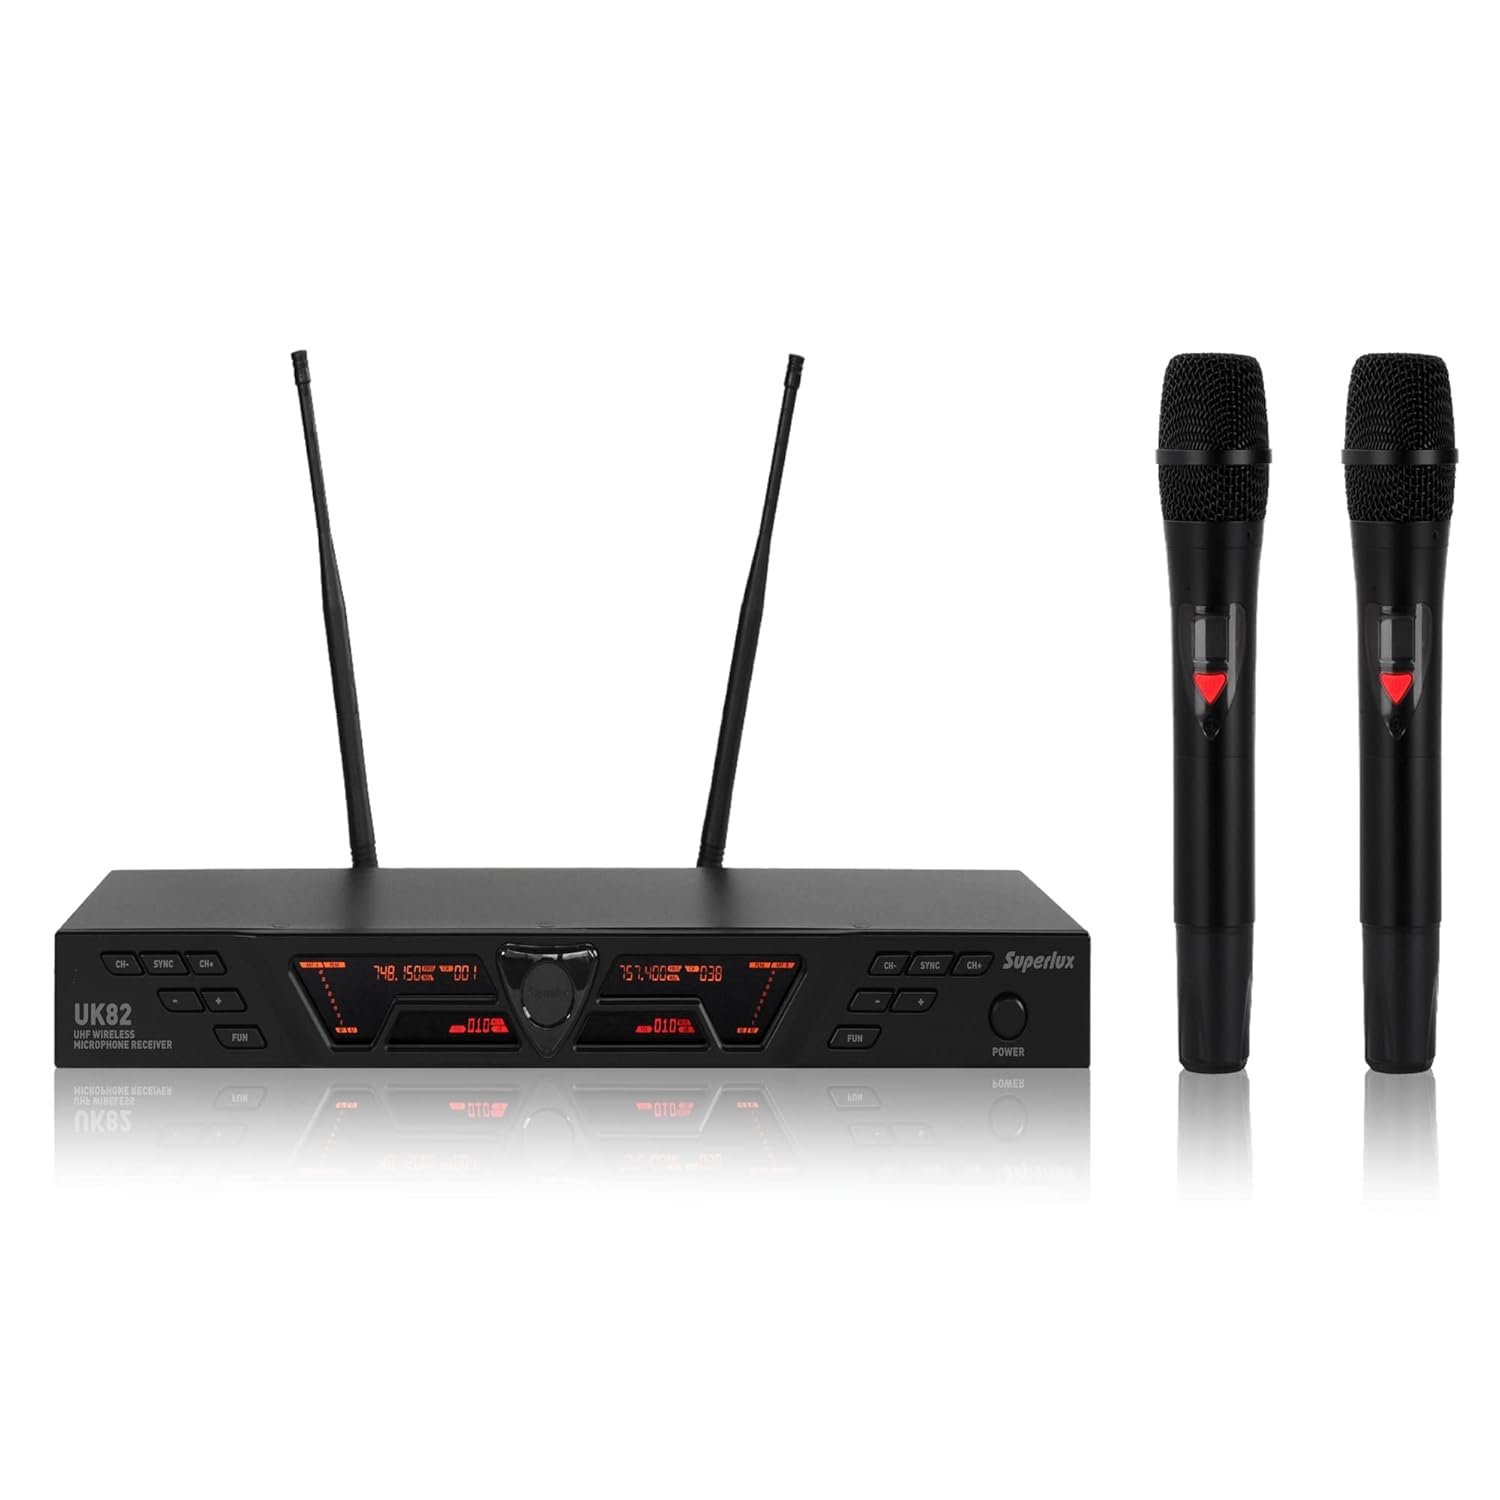
Image: Superlux UK82 Receiver and Handheld Microphones.
3.1. UK82 Receiver
The receiver unit processes the wireless audio signals from the microphones. It features:
- Zweikanalbetrieb: Simultaneously receives signals from two microphones.
- LCD Anzeige: Shows channel information, frequency, and signal strength.
- Frequency Selection Buttons: For manual frequency adjustment.
- IR Sync Function: For quick and easy pairing with transmitters.
- Lautstärkeregler: Independent volume adjustment for each channel.
- Ausgangsanschlüsse: Balanced XLR outputs (for professional mixers) and a mixed 1/4-inch output (for simpler PA systems).
- Antennenanschlüsse: Connect the included antennas for optimal signal reception.
3.2. Handheld Transmitters (Microphones)
The two handheld microphones transmit audio wirelessly to the receiver. Each microphone features:
- Ergonomisches Design: Auch für längere Nutzung geeignet.
- LCD Anzeige: Indicates battery status and current channel/frequency.
- Netzschalter: Ein/Aus-Steuerung.
- IR-Sensor: Zur Synchronisierung mit dem Empfänger.
- Batteriefach: Houses two AA batteries (not included).
4. Installationsanleitung
- Antennen anschließen: Screw the two antennas onto the antenna connectors on the rear panel of the UK82 receiver. Position them vertically for best reception.
- Empfänger mit Strom versorgen: Connect the provided power adapter to the DC IN port on the receiver and plug it into a suitable power outlet. Press the POWER button on the receiver's front panel. The display should illuminate.
- Mit Audiosystem verbinden:
- For Professional Mixers (XLR): Use XLR cables (not included) to connect the BALANCED XLR OUTPUTS (CH1 and CH2) on the receiver to the corresponding input channels on your mixer.
- For PA Systems (1/4-inch): Use the supplied 1/4-inch audio cable to connect the MIXED 1/4-inch OUTPUT on the receiver to an available input on your PA system or ampschwerer.
- Batterien in Mikrofone einlegen: Unscrew the bottom part of each handheld microphone to reveal the battery compartment. Insert two AA batteries into each microphone, observing the correct polarity (+/-). Screw the bottom part back on securely.
- Mikrofone einschalten: Press and hold the power button on each handheld microphone until its LCD display illuminates.
- Frequency Synchronization (IR Sync):
- On the receiver, select the desired channel (CH1 or CH2) using the corresponding frequency selection buttons.
- Press the SYNC button on the receiver for the selected channel. The IR indicator on the receiver will flash.
- Align the IR sensor on the handheld microphone (usually near the bottom of the display) with the IR window on the receiver. Hold them close (within 10-20 cm) until the microphone's display shows the same frequency as the receiver and the SYNC indicator on the receiver stops flashing.
- Repeat this process for the second microphone on the other channel.
- Erster Soundcheck: Speak into each microphone while observing the audio level indicators on your mixer or PA system. Adjust the volume controls on the receiver and your audio system as needed.
5. Bedienungsanleitung
5.1. Lautstärke anpassen
Each channel on the receiver has an independent volume control knob. Rotate the knob clockwise to increase volume and counter-clockwise to decrease it. Always start with lower volume settings and gradually increase to avoid sudden loud noises.
5.2. Frequenzänderungen
The UK82 system offers up to 200 selectable frequencies to avoid interference. If you experience signal dropouts or interference, change the operating frequency:
- On the receiver, press the UP/DOWN buttons for the desired channel to cycle through available frequencies.
- Once a new frequency is selected on the receiver, perform an IR Sync (as described in Section 4.6) to update the corresponding handheld microphone.
5.3. Receiver Lock Function
To prevent accidental changes to settings during operation, the receiver features a lock function. Consult the receiver's specific controls for activation and deactivation of this feature. Typically, it involves holding down a combination of buttons for a few seconds.
5.4. Idle Mute Function
The system may include an idle-mute functionality to suppress noise when a microphone is not in use. This feature automatically mutes the audio output from a channel if no signal is detected for a certain period. Refer to the receiver's display or manual for indicators related to this function.

Image: Superlux UK82 in various usage scenarios.
6. Fehlerbehebung
| Problem | Mögliche Ursache | Lösung |
|---|---|---|
| Keine Tonausgabe |
|
|
| Interference or signal dropouts |
|
|
| Mikrofonanzeige funktioniert nicht |
|
|
7. Technische Daten

Image: Superlux UK82 Technical Specifications.
| Besonderheit | Detail |
|---|---|
| Modell | UK82 |
| Mikrofon-Formfaktor | Mikrofonsystem (Handgerät) |
| Konnektivitätstechnologie | Drahtloses UHF |
| Anzahl der Kanäle | 2 (Dual-Channel) |
| Frequenzbereich | 640-690 MHz (200 selectable frequencies) |
| Betriebsentfernung | Up to 50 m (line-of-sight, outdoor) |
| Richtcharakteristik | Unidirektional |
| Empfängerausgangsanschlüsse | Balanced XLR (2), Mixed 1/4-inch (1) |
| Stromquelle des Empfängers | Corded Electric (AC 100-240V, DC 12V 2000mA) |
| Stromversorgung des Senders | 2 x AA Batteries (per microphone) |
| Artikelgewicht | 2.2 Kilogramm (System) |
| Abmessungen (L x B x H) | 20 x 42 x 4.5 Centimeters (Receiver) |
| Material | Metall |
| Besondere Merkmale | Dual Channel UHF System, Interference-Free Signal, FHSS/Auto-Scan Technology, Receiver Lock Function, Idle-Mute Function |
8. Pflege und Wartung
- Reinigung: Reinigen Sie Empfänger und Mikrofone mit einem weichen, trockenen Tuch. Verwenden Sie keine flüssigen Reiniger oder Lösungsmittel, da diese die Oberfläche oder interne Bauteile beschädigen können.
- Batteriewechsel: Replace microphone batteries promptly when the low-battery indicator appears on the microphone's LCD display. Remove batteries if the microphones will not be used for an extended period to prevent leakage.
- Lagerung: Store the system in a cool, dry place away from direct sunlight and extreme temperatures. When transporting, use appropriate padding to protect components from physical shock.
- Antennen: Handle antennas carefully. Do not bend them excessively. Ensure they are securely attached during operation.
9. Garantie und Support
For warranty information and technical support, please contact your local Superlux distributor or the retailer from whom you purchased the product. Keep your purchase receipt as proof of purchase.
Hersteller: Goang-Fann Co. Ltd, Taiwan (SUPERLUX)
Importeur/Verpacker (Indien): MX-MDR TECHNOLOGIES LIMITED
- Adresse: Plot 101 Sector 1 Gauraipada Vasai (East) Palghar - 401208 Mumbai INDIA
- E-Mail: info@mdrelectronics.com / dipesh@mdrelectronics.com / mx-mdr@mdrelectronics.com
- Kontakt Nr .: 9552529345 / 8805029016 (for Packer), 9552529341 / 8805029016 (for Importer)
- WebWebsite: www.mdrelectronics.com
Ask a question about this manual
Ask about setup, troubleshooting, compatibility, parts, safety, or missing instructions. Manuals+ will review the question and use this page’s manual context to help answer it.