
1. Einleitung
This manual provides essential information for the proper installation, configuration, and operation of your Teltonika RUT951 4G LTE Router. The RUT951 is a robust industrial cellular router designed for professional applications, offering reliable internet connectivity via 4G LTE, Wi-Fi, and Ethernet. It features dual-SIM support for network redundancy and is powered by RutOS, providing advanced customization and security features.
2. Produktüberschreitungview
2.1 Hauptmerkmale
- Dual-SIM 4G LTE cellular connectivity for reliable network access.
- Integrated Wi-Fi (802.11b/g/n) for local wireless networking.
- Four Ethernet interfaces (3x LAN, 1x WAN) for wired connections.
- Powered by RutOS for advanced customization, automation, and security.
- Robust design suitable for various IoT and industrial scenarios.
2.2 Packungsinhalt
The standard package for the Teltonika RUT951 router typically includes:
- Teltonika RUT951 Router Unit
- Netzteil
- 2 x Mobile Antennas (SMA)
- 2 x Wi-Fi Antennas (RP-SMA)
- Ethernet-Kabel
- Kurzanleitung
2.3 Router-Layout
Familiarize yourself with the router's ports, indicators, and slots.
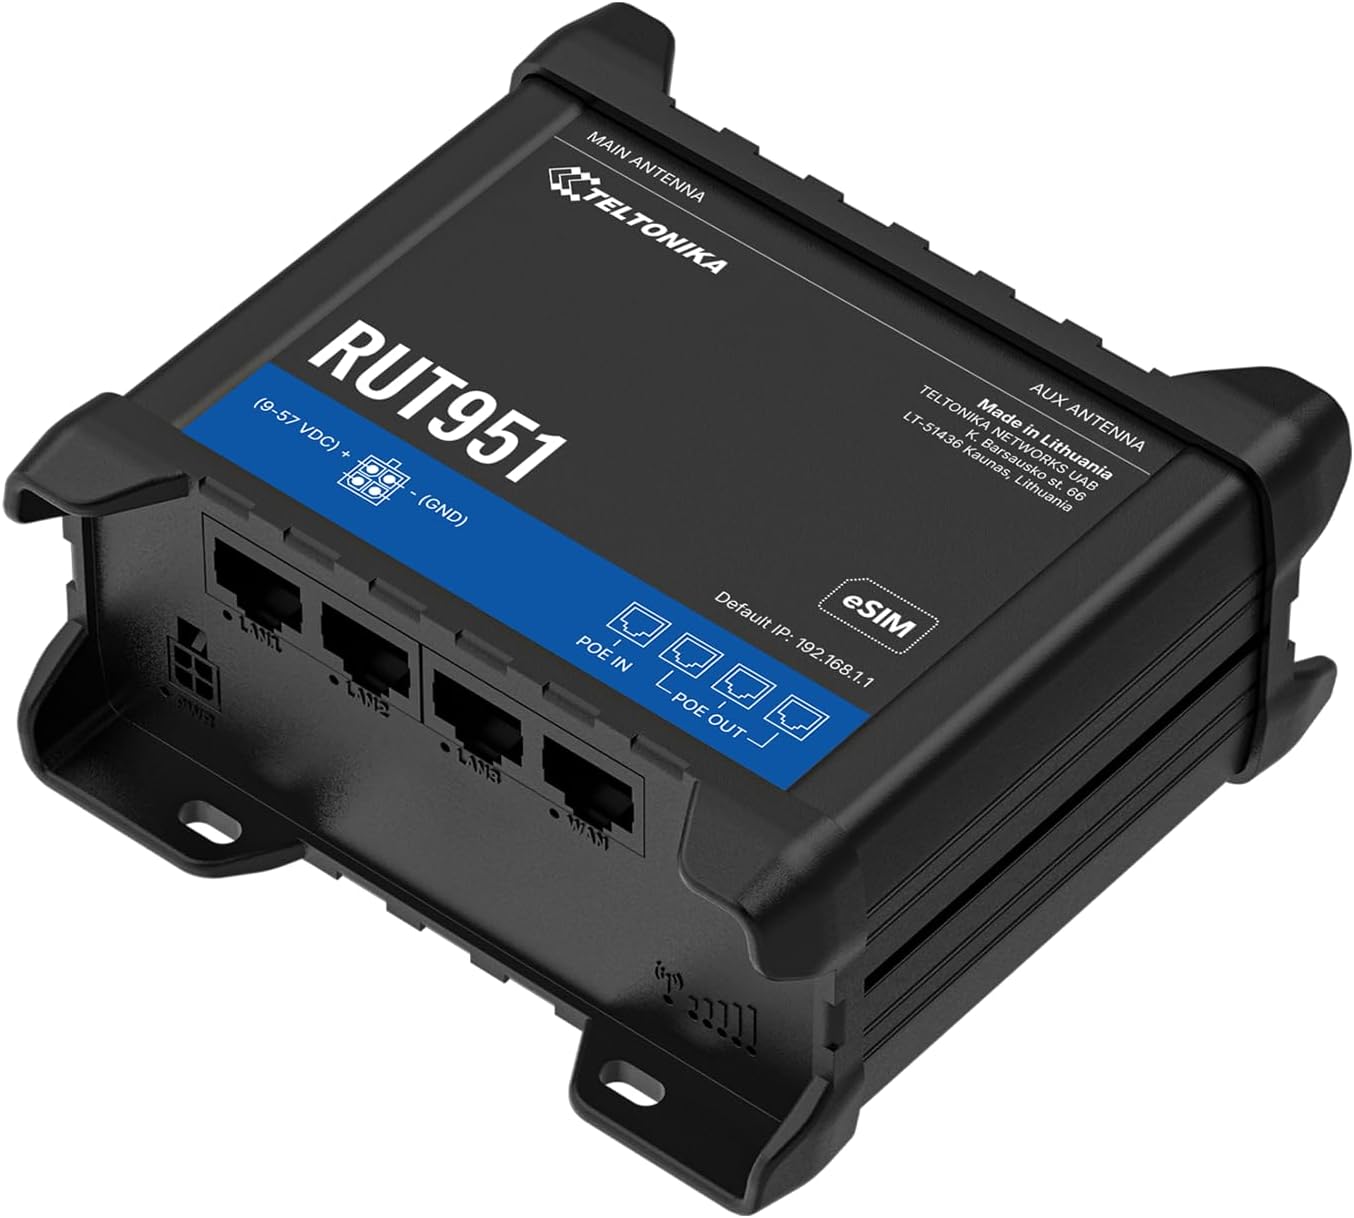
Abbildung 1: Front view of the Teltonika RUT951 router, showing the model name and general design.

Abbildung 2: Detailed diagram illustrating the various ports and indicators on the Teltonika RUT951 router, including mobile and Wi-Fi antenna connectors, SIM slots, Ethernet ports, power socket, and LED indicators.
- Mobile AUX Antenna Connector (SMA female): For secondary mobile antenna.
- Mobile MAIN Antenna Connector (SMA female): For primary mobile antenna.
- SIM1-/SIM2-Steckplätze: For inserting cellular SIM cards.
- Reset-Knopf: To restore factory settings or reboot.
- Wi-Fi Antenna Connectors (RP-SMA female): For Wi-Fi antennas.
- Steckdose: Zum Anschluss des Netzteils.
- LAN-Ethernet-Ports: Zum Verbinden von Geräten im lokalen Netzwerk.
- WAN-Ethernet-Anschluss: For connecting to an external network (e.g., fiber modem).
- LEDs zur Anzeige der Mobilfunksignalstärke: Indicate cellular signal strength.
- LED-Statusanzeige für Mobilfunkverbindung: Indicates cellular connection status.
- LAN-LEDs: Indicate activity on LAN ports.
- WAN-LED: Zeigt Aktivität am WAN-Port an.
3. Einrichtungsanweisungen
3.1 Installation der SIM-Karte
- Locate the SIM card slots (SIM1 and SIM2) on the top panel of the router.
- Using a SIM ejector tool or a paperclip, gently press the small button next to the SIM slot to open it.
- Insert your activated Mini-SIM card(s) into the slot(s) with the gold contacts facing down and the notched corner oriented correctly.
- Push the SIM tray back into the router until it clicks into place.

Abbildung 3: Spitze view of the RUT951, highlighting the SIM card slots and antenna connectors.
3.2 Antennenanschluss
- Screw the two mobile antennas onto the SMA connectors labeled 'MOBILE' (MAIN and AUX) on the top panel.
- Screw the two Wi-Fi antennas onto the RP-SMA connectors labeled 'WIFI' on the top panel.
- Ensure all antennas are securely tightened for optimal signal reception.
3.3 Stromanschluss
- Connect the provided power adapter to the power socket on the router.
- Stecken Sie das andere Ende des Netzteils in eine geeignete Steckdose.
- The router will power on automatically. Observe the power LED indicator.

Abbildung 4: Unten view of the RUT951, showing the Ethernet ports and power input.
3.4 Ethernet-Verbindung
To connect a device directly to the router:
- Connect one end of an Ethernet cable to any of the LAN ports (LAN1, LAN2, LAN3) on the router.
- Connect the other end of the Ethernet cable to your computer or network device.
- If you are using the router as a WAN gateway, connect your external modem (e.g., fiber modem) to the WAN port.
4. Bedienungsanleitung
4.1 Erster Zugriff auf WebUI
- Ensure your computer is connected to the router via Ethernet or Wi-Fi. The default Wi-Fi SSID and password can be found on the router's label.
- Öffnen Sie ein web Browser und geben Sie die Standard-IP-Adresse ein: 192.168.1.1
- You will be prompted for login credentials. The default username is Administrator. The default password is also Administrator (or as specified on the router's label).
- Upon first login, you will be guided through a setup wizard to change the default password and configure basic settings.
4.2 Netzwerkkonfiguration
After initial login, you can configure various network settings through the WebBenutzeroberfläche:
- WAN-Einstellungen: Configure your cellular (4G LTE) connection, including APN settings, or set up the Ethernet WAN port.
- LAN-Einstellungen: Manage the local network IP address range and DHCP server.
- Wlan einstellungen: Change Wi-Fi SSID, password, security protocols, and channel settings.
- Dual-SIM: Configure failover or load balancing between the two SIM cards for continuous connectivity.
- VPN: Set up various VPN protocols for secure remote access.
5. Wartung
5.1 Firmware-Updates
Regularly updating the router's firmware is crucial for security, performance, and new features. Firmware updates can be performed via the WebUI under the 'System' or 'Firmware' section. Always download firmware from the official Teltonika Networks webWebsite.
5.2 Werksreset
Sollten weiterhin Probleme auftreten oder Sie Ihre Anmeldedaten vergessen haben, können Sie einen Werksreset durchführen:
- With the router powered on, locate the RESET button (refer to Figure 2).
- Press and hold the RESET button for approximately 10 seconds until all LEDs flash.
- Lassen Sie die Taste los. Der Router wird mit den Werkseinstellungen neu gestartet.
6. Fehlerbehebung
- Keine Internetverbindung:
- Prüfen Sie, ob die SIM-Karte eingelegt und aktiviert ist.
- Überprüfen Sie die APN-Einstellungen im WebUI
- Ensure mobile antennas are securely connected.
- Check cellular signal strength LEDs.
- WLAN funktioniert nicht:
- Stellen Sie sicher, dass WLAN aktiviert ist im WebUI
- Check Wi-Fi antenna connections.
- Verify Wi-Fi SSID and password.
- Kein Zugriff möglich WebBenutzeroberfläche:
- Ensure your device is connected to the router (Ethernet or Wi-Fi).
- Überprüfen Sie die IP-Einstellungen Ihres Computers (sollte auf automatischen IP-Bezug eingestellt sein).
- Versuchen Sie, den Cache Ihres Browsers zu leeren oder einen anderen Browser zu verwenden.
- Perform a factory reset if you suspect incorrect IP configuration or forgotten password.
7. Spezifikationen
| Besonderheit | Spezifikation |
|---|---|
| Marke | Teltonik |
| Modellname | RUT951 |
| Konnektivitätstechnologie | Wi-Fi, 4G LTE, 3G, 2G |
| Drahtloser Kommunikationsstandard | 802.11b, 802.11g, 802.11n |
| Frequenzbandklasse | Dualband |
| Anzahl der Ports | 4 (3x LAN, 1x WAN) |
| LAN-Port-Bandbreite | 100 Mbit/s |
| Datenübertragungsrate | 150 Megabits Per Second (Max Upstream) |
| Betriebssystem | RutOS |
| Artikelgewicht | 287 Gramm |
| Bandtage | 30 Volt |
| Security Protocol | WPS (and others via RutOS) |
| Abdeckung | Dual SIM network redundancy |
8. Sicherheitshinweise
- Verwenden Sie nur das mit dem Gerät mitgelieferte Netzteil.
- Das Gerät darf weder Wasser, Feuchtigkeit noch extremen Temperaturen ausgesetzt werden.
- Vermeiden Sie, das Gerät in der Nähe von Wärmequellen oder in direktem Sonnenlicht aufzustellen.
- Sorgen Sie für ausreichende Belüftung, um eine Überhitzung zu vermeiden.
- Versuchen Sie nicht, das Gerät zu öffnen oder zu verändern. Dadurch erlischt die Garantie.
- Das Gerät und sein Zubehör müssen gemäß den örtlichen Vorschriften verantwortungsvoll entsorgt werden.
9. Garantie und Support
The Teltonika RUT951 router comes with a standard manufacturer's warranty. For detailed warranty terms and conditions, please refer to the documentation included with your product or visit the official Teltonika Networks website. For technical support, firmware downloads, and additional resources, please visit the Teltonika Networks support portal or contact your vendor.