Pipishell PISRB4
Pipishell 5-Tier Shoe Rack Instruction Manual
Model: PISRB4
Marke: Pipishell
1. Einleitung
Thank you for choosing the Pipishell 5-Tier Shoe Rack. This manual provides essential information for the proper assembly, operation, and maintenance of your new shoe organizer. Designed for efficiency and style, this rack offers a practical solution for decluttering your entryway, closet, or any small space.
2. Sicherheitshinweise
WARNING: Always secure the shoe rack to the wall using the included anti-tip kit to prevent tipping. Do not overload shelves; the top shelf supports up to 44 lbs and each other shelf supports up to 22 lbs. Keep shoes away from the back edge of the shelves to prevent them from falling off.
3. Enthaltene Komponenten
Please ensure all parts are present before beginning assembly. If any parts are missing or damaged, please contact customer support.
- Holzdeckplatte
- Metal Side Frames (Left & Right)
- Adjustable Mesh Shelves (4x)
- Pleuelstangen
- Hardware (Screws, Allen Wrench, Anti-tip Kit)
- Verstellbare Füße
4. Einrichtungsanweisungen
Follow these steps to assemble your Pipishell 5-Tier Shoe Rack. Assembly is straightforward and typically takes 30-60 minutes.
4.1. Auspacken und Vorbereitung
Carefully unpack all components and lay them out on a clean, flat surface. Identify each part using the provided list.
4.2. Rahmenmontage
Connect the vertical metal frame pieces using the provided screws and Allen wrench. Ensure all connections are secure but do not fully tighten until all parts are in place.
4.3. Regalmontage
Insert the mesh shelves into the designated slots on the metal frames. You have two options for shelf orientation:
- Flache Konfiguration: For standard shoe storage or general items.
- Slanted Configuration: Ideal for displaying shoes or for easier access, especially for high heels.

Image: Two shelving assembly options, showing shoes placed flat and slanted on the mesh shelves.
The dense mesh design of the shelves prevents high heels from falling through, ensuring stability for all types of footwear.
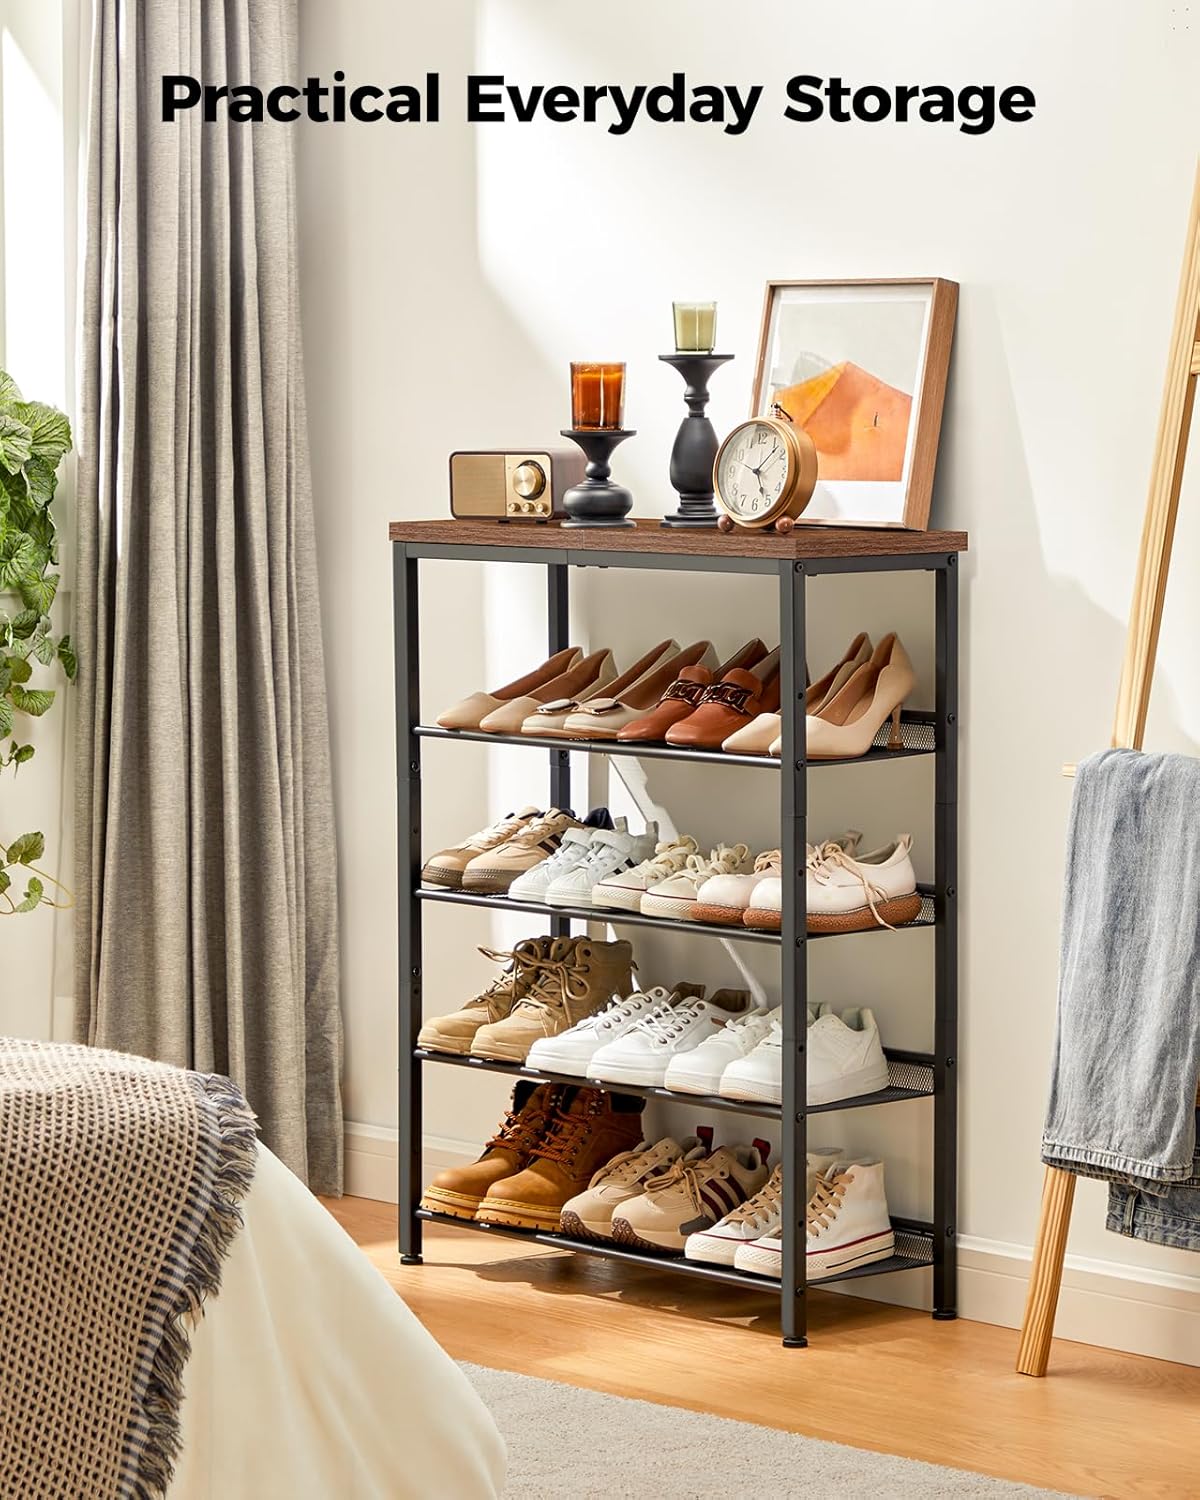
Bild: Nahaufnahme view of the expanded metal mesh shelf, highlighting how it supports high heels without them slipping through.
4.4. Top Panel Attachment
Place the wooden top panel onto the assembled frame and secure it with the remaining screws. Ensure it is flush and stable.
4.5. Installation des Kippschutz-Kits
For added safety, especially in households with children or pets, install the anti-tip kit by securing the rack to the wall according to the instructions provided with the kit. Adjust the feet at the bottom to ensure the rack is stable on uneven flooring.

Image: Close-up of the adjustable feet at the base of the shoe rack, designed for stability on uneven surfaces.
5. Bedienungsanleitung
Your Pipishell 5-Tier Shoe Rack is now ready for use. Utilize its versatile design to organize your belongings effectively.
5.1. Schuhaufbewahrung
Place your shoes on the mesh shelves. The adjustable shelves allow you to customize the height between tiers, accommodating different shoe sizes from flats and sandals to tall boots. For optimal organization, consider placing frequently used shoes on easily accessible shelves.

Image: Illustration showing how the shelves can be adjusted to accommodate various shoe heights, including tall boots.
5.2. Vielseitiger Speicher
Beyond shoes, the rack can serve as a general storage shelf. The sturdy wooden top can hold decorative items, keys, or small bags, while the mesh shelves can store books, small bins, or other household items.
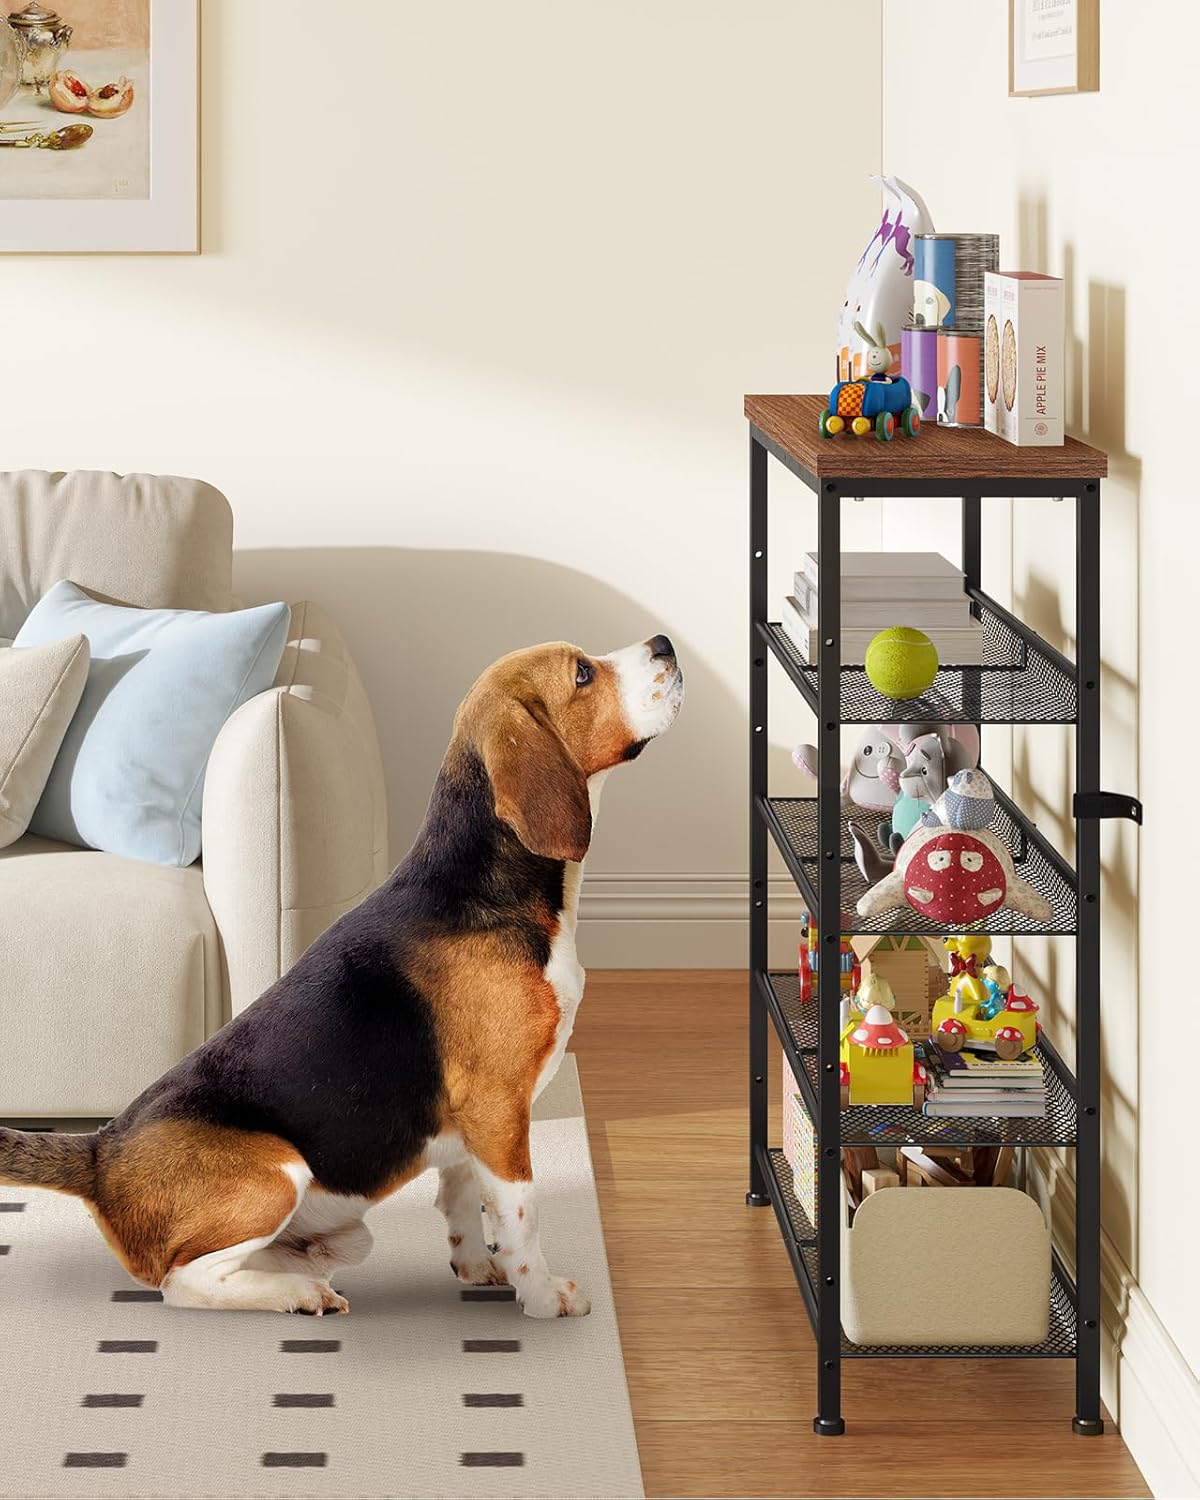
Image: The shoe rack is shown in a living room setting, holding various items like books, decorative objects, and small storage baskets, demonstrating its versatility.
6. Wartung
To keep your shoe rack in optimal condition, follow these simple maintenance guidelines:
- Reinigung: Wipe with a dry cloth to remove dust and dirt. Avoid using harsh chemicals or abrasive cleaners.
- Regelmäßige Kontrollen: Überprüfen Sie regelmäßig alle Schrauben und Verbindungen, um sicherzustellen, dass sie fest und sicher sind.
- Lastmanagement: Adhere to the specified weight limits for each shelf to prevent damage and maintain stability.
7. Fehlerbehebung
Sollten Sie Probleme mit Ihrem Schuhregal haben, beachten Sie bitte die folgenden gängigen Lösungsansätze:
- Wackeln: Ensure all assembly bolts are fully tightened. Use the adjustable feet at the bottom of the rack to level it on uneven surfaces.
- Shoes Falling Off: The rack features raised shelf back edges to prevent shoes from slipping off. Ensure shoes are placed within the confines of the shelf.
- High Heels Slipping: The dense mesh design is specifically engineered to prevent high heels from falling through. If issues persist, ensure the shoes are placed correctly on the mesh.
8. Spezifikationen
| Besonderheit | Detail |
|---|---|
| Zimmertyp | Closet, Living Room, Bedroom |
| Anzahl der Einlegeböden | 5 |
| Besonderheit | Einstellbar |
| Technische Daten | 10"T x 29.5"B x 37"H |
| Stil | Klassiker |
| Ausführung | Holzoptik |
| Marke | Pipishell |
| Hinweise zur Produktpflege | Mit einem trockenen Tuch abwischen |
| Montage erforderlich | Ja |
| Artikelgewicht | 17 Pfund |
| Möbelfinish | Metall |
| Maximum Recommended Load (Top) | 44 Pfund |
| Empfohlene Maximalbelastung (pro Regalboden) | 22 Pfund |
9. Garantie und Support
This Pipishell 5-Tier Shoe Rack comes with a standard manufacturer's warranty. For detailed warranty information, customer support, or to download the full user manual, please refer to the official product page or contact Pipishell customer service.
Das Benutzerhandbuch (PDF) finden Sie auch hier: https://manuals.plus/m/af91fac7c57f519a4893e06911e97ebec0f55b88cb6675f1ae802f2ffe5faf4b
Ask a question about this manual
Ask about setup, troubleshooting, compatibility, parts, safety, or missing instructions. Manuals+ will review the question and use this page’s manual context to help answer it.