1. Einleitung
The KICKER Gold-Series 50GOLD154 is a 15-inch (38cm) dual voice coil (DVC) 4-ohm subwoofer, designed to deliver powerful and precise bass in various vehicle audio systems. This special 50th Anniversary Edition subwoofer combines classic aesthetics with modern KICKER engineering, featuring an 800 Watts RMS power handling and 1600 Watts peak power. It incorporates a Uniplate motor assembly with Forced-Air Cooling and a SoloKon Cone System for enhanced performance and durability.
Bild: Vorderseite view of the KICKER 50GOLD154 15-inch Gold Series Subwoofer, showcasing the black cone with the gold KICKER logo.
2. Sicherheitshinweise
Please read and understand all safety instructions before installing and operating your KICKER 50GOLD154 subwoofer. Failure to follow these guidelines may result in injury or damage to the product or vehicle.
- Always disconnect the vehicle's battery negative terminal before beginning any electrical installation to prevent electrical shock or short circuits.
- Ensure proper wiring and impedance matching to prevent damage to the subwoofer, ampVerstärker oder elektrisches System des Fahrzeugs.
- Avoid exposing the subwoofer to moisture, excessive heat, or direct sunlight for prolonged periods.
- Verwenden Sie während der Installation geeignete persönliche Schutzausrüstung, wie z. B. Schutzbrille und Handschuhe.
- Montieren Sie den Subwoofer sicher, um zu verhindern, dass er bei plötzlichen Bremsmanövern oder Kollisionen zum Geschoss wird.
- Operating audio systems at extremely high volumes can cause permanent hearing damage. Use caution and maintain a safe listening level.
3. Lieferumfang
Upon unpacking your KICKER 50GOLD154 Gold Series Subwoofer, please verify that all components are present:
- Single (1) 15-inch DVC Subwoofer
- Montageschablone
- KICKER Sticker
- Bedienungsanleitung (dieses Dokument)
4. Einrichtung und Installation
Proper installation is crucial for optimal performance and longevity of your subwoofer. If you are unsure about any part of the installation process, consult with a professional car audio installer.
4.1 Montagehinweise
The KICKER 50GOLD154 subwoofer requires a suitable enclosure for optimal sound reproduction. Ensure the enclosure is robust and properly sealed. Use the provided mounting template for precise cutout dimensions.
- Einbautiefe: 7-15/16 Zoll (20.1 cm)
- Montageausschnitt: 13-3/4 Zoll (35 cm)
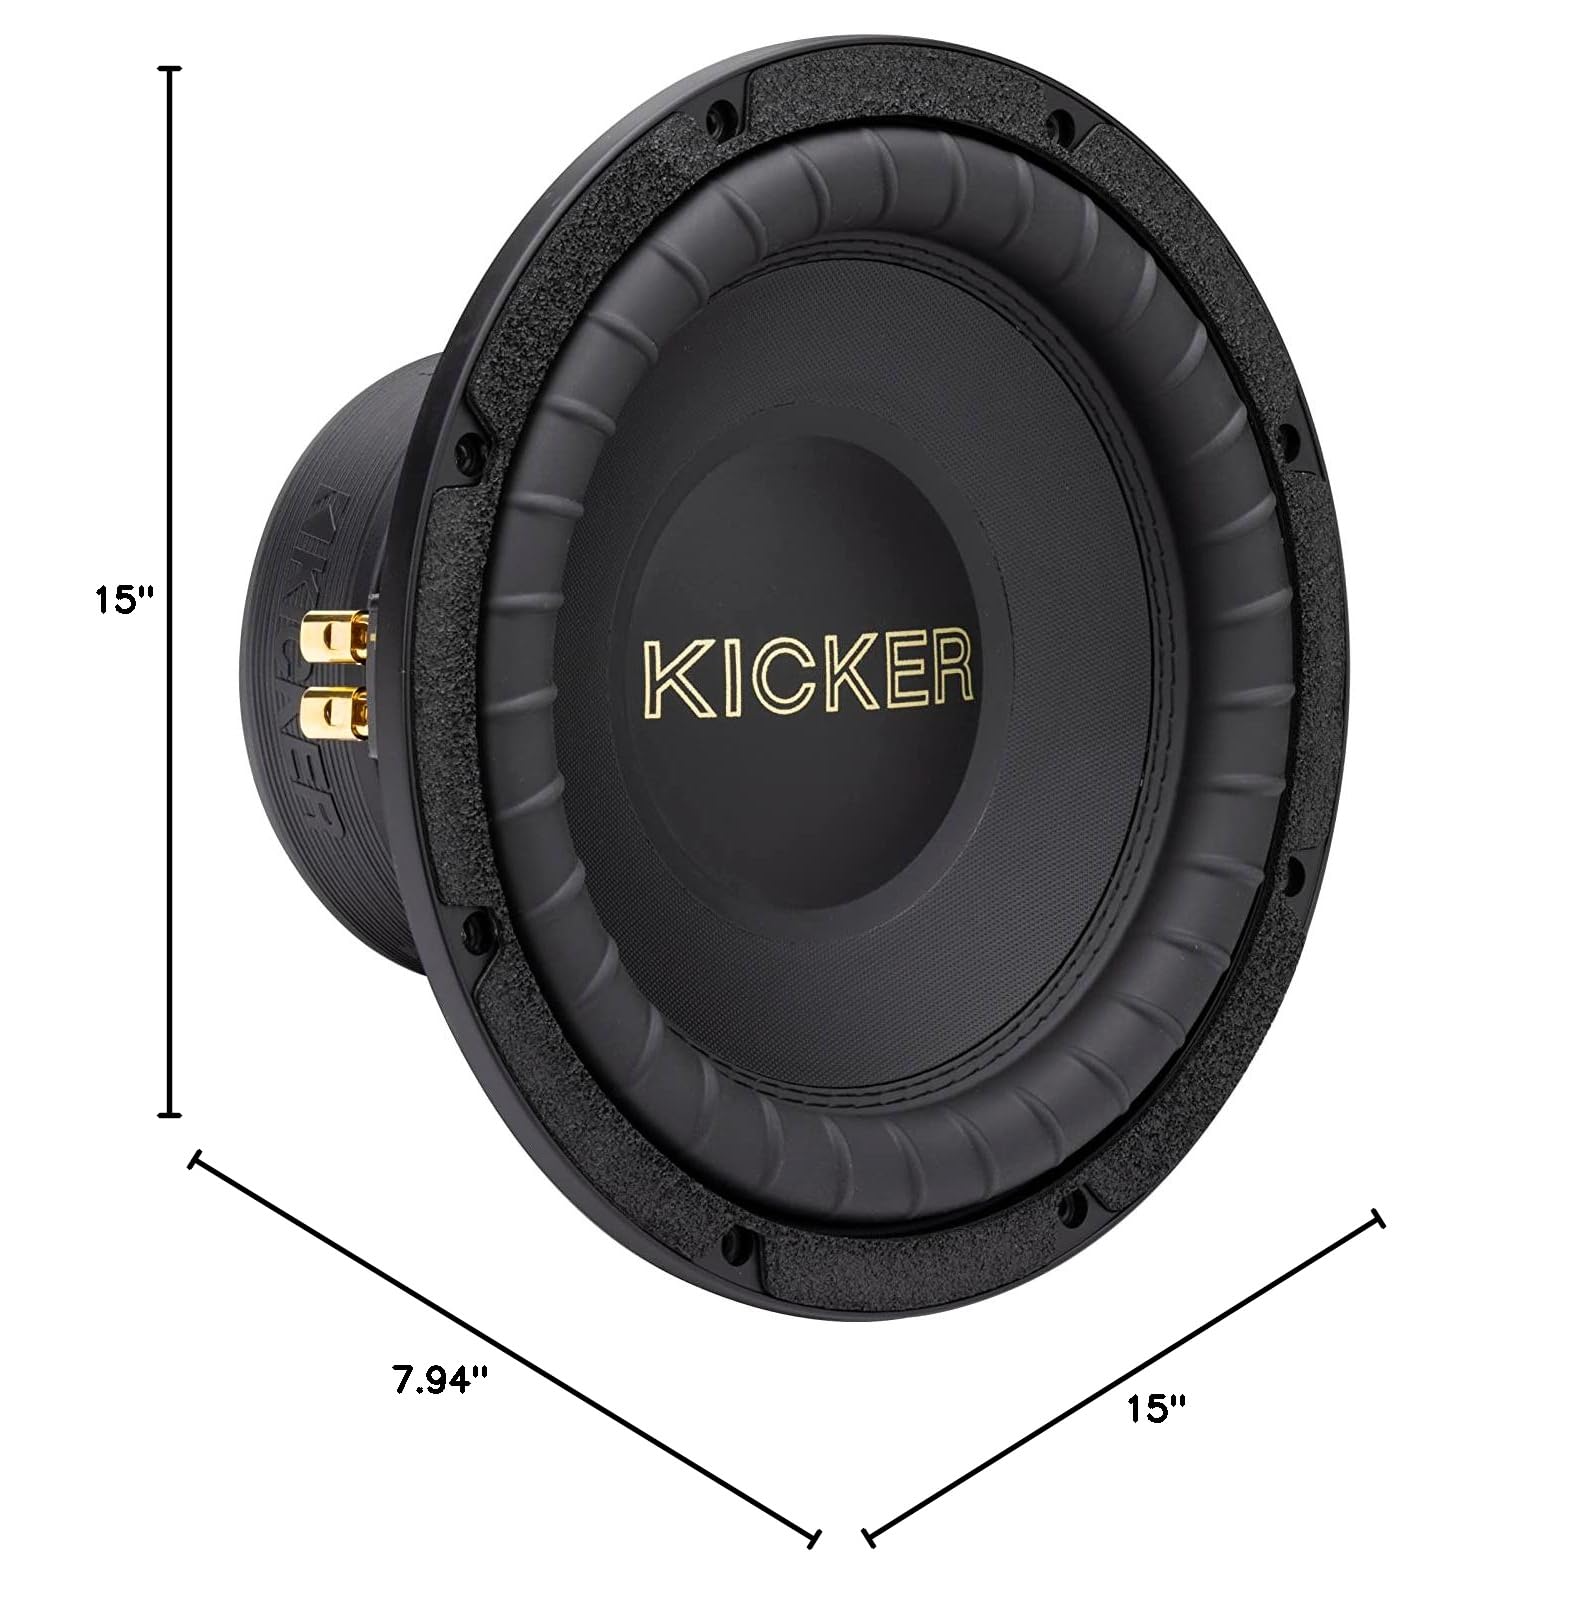
Image: Diagram showing the dimensions of the KICKER 50GOLD154 subwoofer, including its 15-inch diameter and 7.94-inch depth.
4.2 Wiring the Dual Voice Coil (DVC)
The 50GOLD154 features a Dual 4-ohm Voice Coil, offering flexibility in wiring configurations. It can be wired to present either a 2-ohm or an 8-ohm load to your ampVerstärker. Stellen Sie immer sicher, dass Ihr ampDer Verstärker ist bei der gewählten Impedanz stabil.
The oversized spring-loaded speaker terminals allow for fast and secure connection with up to 12 AWG sized wire.

Abbildung: Seite view of the KICKER 50GOLD154 subwoofer, highlighting the robust frame and the gold-plated spring-loaded speaker terminals.
4.2.1 Parallel Wiring (2-ohm load)
To achieve a 2-ohm load, connect the positive terminal of Voice Coil 1 to the positive terminal of Voice Coil 2. Then, connect the negative terminal of Voice Coil 1 to the negative terminal of Voice Coil 2. Finally, connect the combined positive to the ampdie positive Ausgangsleistung des Verstärkers und die kombinierte negative Ausgangsleistung an den amplifier's negative output.
4.2.2 Series Wiring (8-ohm load)
To achieve an 8-ohm load, connect the positive terminal of Voice Coil 1 to the amplifier's positive output. Connect the negative terminal of Voice Coil 1 to the positive terminal of Voice Coil 2. Finally, connect the negative terminal of Voice Coil 2 to the amplifier's negative output.
4.3 Amplifier-Anpassung
It is essential to match your amplifier's power output to the subwoofer's capabilities. The 50GOLD154 has a recommended RMS power range of 400-800 watts and a peak power handling of 1600 watts. Using an amplifier that provides power within this RMS range will ensure optimal performance and prevent damage.
5. Bedienung des Subwoofers
Once the subwoofer is correctly installed and wired, follow these steps for initial operation and optimal sound adjustment:
- Erstes Einschalten: After verifying all connections, turn on your vehicle's audio system. Start with the amplifier gain set to its minimum and the head unit volume low.
- Verstärkungseinstellung: Erhöhen Sie allmählich die amplifier's gain control until you hear a balanced sound without distortion. Avoid setting the gain too high, as this can lead to clipping and damage the subwoofer.
- Crossover-Einstellungen: Nutzen Sie Ihre amplifier's or head unit's low-pass filter (LPF) to send only low frequencies to the subwoofer. A common starting point for the LPF is between 80Hz and 100Hz.
- Phasensteuerung: Wenn Ihr amplifier or head unit has a phase control (0°/180°), experiment with both settings to find the one that provides the most impactful and cohesive bass response with your main speakers.
- Achten Sie auf Verzerrungen: If you hear any distortion, immediately reduce the volume or amplifier gain. Prolonged operation with distortion can cause irreversible damage to the subwoofer.
6. Wartung
Regular maintenance will help ensure the longevity and consistent performance of your KICKER 50GOLD154 subwoofer.
- Reinigung: Keep the subwoofer cone and surround free from dust, dirt, and debris. Use a soft, dry cloth to gently wipe the surfaces. Avoid using harsh chemicals or abrasive cleaners.
- Verbindungsprüfungen: Periodically inspect all wiring connections to ensure they remain tight and free from corrosion. Loose connections can lead to intermittent performance or damage.
- Umweltschutz: While designed for vehicle use, avoid exposing the subwoofer to extreme temperatures (very hot or very cold) or high humidity for extended periods.
- Gehäuseintegrität: Regularly check the subwoofer enclosure for any signs of damage, cracks, or air leaks, which can negatively impact sound quality.
7. Fehlerbehebung
If you encounter issues with your KICKER 50GOLD154 subwoofer, refer to the following troubleshooting guide before contacting support.
| Problem | Mögliche Ursache | Lösung |
|---|---|---|
| Kein Ton vom Subwoofer |
|
|
| Verzerrter oder undeutlicher Bass |
|
|
| Subwoofer-Überhitzung |
|
|
| Schwacher oder dumpfer Bass |
|
|
8. Spezifikationen
Detailed technical specifications for the KICKER 50GOLD154 15-Inch Gold Series Subwoofer:
- Modell: 50GOLD154
- Lautsprechertyp: Subwoofer
- Subwoofer-Durchmesser: 15 Zoll (38 cm)
- RMS-Belastbarkeit: 400-800 Watt
- Umgang mit Spitzenleistung: 1600 Watt
- Impedanz: Dual 4-ohm Voice Coil (wireable to 2-ohm or 8-ohm)
- Empfindlichkeit: 89.4dB 1W/1M
- Frequenzgang: 25 Hz bis 500 Hz
- Einbautiefe: 7-15/16 Zoll (20.1 cm)
- Montageausschnitt: 13-3/4 Zoll (35 cm)
- Produktabmessungen (T x B x H): 7.94" x 15" x 15"
- Artikelgewicht: 17.91 Pfund
- Konnektivitätstechnologie: Verdrahtet
- Hauptmerkmale: SoloKon Cone System, Forced-Air Cooling, Uniplate Motor Assembly

Image: Diagram illustrating KICKER's Forced-Air Cooling technology, showing how cone motion helps dissipate heat from the voice coil.
9. Garantieinformationen
The KICKER 50GOLD154 Gold Series Subwoofer comes with a limited warranty. The specific terms and duration of the warranty may vary by region and retailer. Please retain your proof of purchase for warranty claims.
For detailed warranty information, including coverage, exclusions, and how to make a claim, please visit the official KICKER website or contact KICKER customer support directly. Unauthorized modifications or improper installation may void the warranty.
10. Unterstützung
For technical assistance, further troubleshooting, or any questions regarding your KICKER 50GOLD154 subwoofer, please utilize the following resources:
- Official KICKER WebWebsite: Besuchen www.kicker.com Produktinformationen, FAQs und Kontaktdaten für den Support finden Sie hier.
- Kundendienst: Refer to the KICKER website for phone numbers or email contacts for customer support in your region.
- Autorisierte Händler: Your local authorized KICKER dealer can also provide installation assistance and technical support.