
Einführung
The XTUGA PR6X is a professional 6-channel audio mixing console designed for various audio applications, including studio recording, live performances, and events. It features advanced functionalities such as a 99 DSP effects processor, a 7-band graphic equalizer, independent +48V phantom power for condenser microphones, Bluetooth connectivity, and USB recording capabilities. This manual provides comprehensive instructions for the proper setup, operation, and maintenance of your PR6X mixer.
Produkteigenschaften
- 6-Kanal-Eingang: Includes 4 mono MIC inputs and 2 stereo inputs (5/6).
- +48V Phantomspeisung: Independent phantom power available for each microphone channel, supporting condenser microphones.
- 99 DSP Effects Processor: Integrated high-quality digital signal processing with 99 selectable effects for enhanced audio.
- 7-Band-Grafik-Equalizer: Provides precise control over the overall sound output.
- Bluetooth-Funktionalität: Allows wireless audio streaming from compatible smart devices.
- USB-Schnittstelle: Supports U-DISK MP3 input for playback and recording directly to a USB flash drive.
- Stummschaltfläche: Individual mute control for each channel.
- AUX SEND Controls: For external effects or monitor mixes.
Aufstellen
Follow these steps to set up your XTUGA PR6X mixer:
- Stromanschluss: Connect the provided power adapter to the DC IN adapter connector (31) on the rear panel and plug it into a suitable power outlet. Press the POWER switch (30) to turn on the mixer.
- Mikrofonanschluss: Connect dynamic or condenser microphones to the XLR or 1/4" COMBI inputs (1) for channels 1-4. For condenser microphones, activate the +48V phantom power switch (2) for the respective channel.
- Stereo Input Connection: Connect stereo line-level devices (e.g., keyboards, media players) to the L/MONO 5/6 inputs (3).
- Ausgangsanschluss: Schließen Sie Ihre Hauptlautsprecher an oder amplifier to the L & R OUTPUT jacks (24). For monitoring, connect headphones to the PHONE jack (18) or monitor speakers to the AUX1 MON output (9).
- USB-/Computeranschluss: For USB playback or recording, insert a USB flash drive into the USB port (14) or connect the mixer to a computer using a USB cable.

Bild: Hinten und oben view of the XTUGA PR6X mixer with all controls and ports labeled for easy identification. This diagram shows the power input, various audio inputs (XLR, 1/4"), USB port, and output connections.
Bedienungsanleitung
Kanalsteuerung
- GAIN (4): Adjusts the input sensitivity for each channel. Set this to an appropriate level to prevent clipping.
- HIGH (6), MID (7), LOW (8): 3-band equalizer controls for adjusting the treble, midrange, and bass frequencies of each individual channel.
- EFF (10): Steuert die Signalstärke, die vom Kanal an den internen DSP-Effektprozessor gesendet wird.
- VOL (11): Passt die Ausgangslautstärke für jeden Kanal an.
- MUTE-Taste: Press to mute or unmute the corresponding channel.
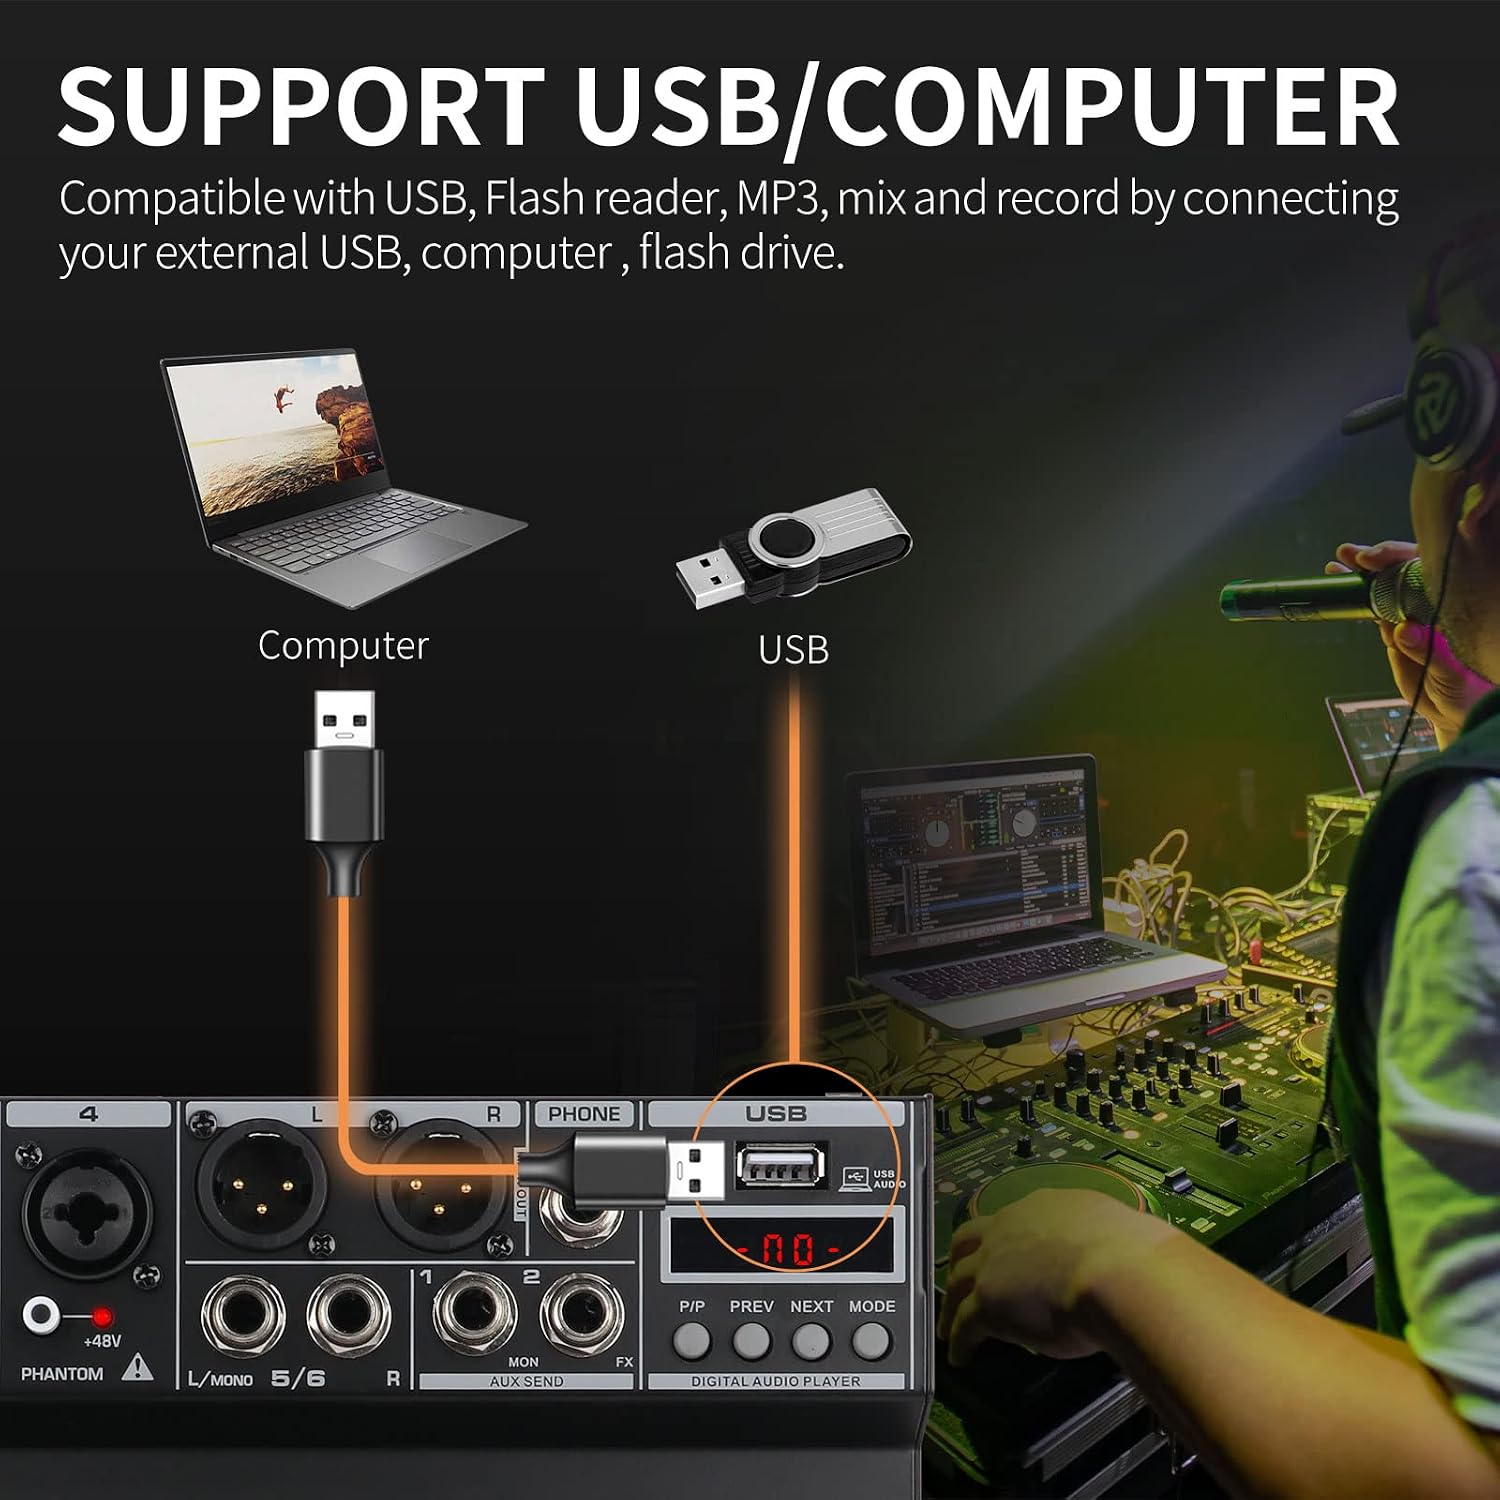
Bild: Nahaufnahme view of the 3-band EQ knobs (HIGH, MID, LOW) for individual channels on the XTUGA PR6X mixer. This image highlights the range of adjustment for each frequency band, allowing for precise tonal shaping.
DSP-Effektprozessor
The PR6X features 99 built-in DSP effects. To use them:
- Drehen Sie den PROGRAM/PARAMETER (26) knob to select the desired effect number (01-99). The selected effect number will be displayed on the digital screen.
- Drücken Sie die PROGRAM/PARAMETER (26) knob to confirm the selection and activate the effect.
- Passen Sie die EFF VOL (28) knob to control the overall level of the applied effect.
- Verwenden Sie die FX TO AUX1 (23) knob to send the effect signal to the AUX1 output for monitoring or external processing.

Bild: Section of the XTUGA PR6X mixer showing the digital display for DSP effects and the PROGRAM/PARAMETER knob. The image illustrates how to rotate the knob to select an effect type and press it to apply the effect, with a visual representation of the 99 DSP reverb effects.
7-Band-Grafik-Equalizer
The 7-band stereo graphic equalizer (20) allows for fine-tuning of the main mix's frequency response. Adjust the sliders for each frequency band (63Hz, 160Hz, 400Hz, 1kHz, 2.5kHz, 6.3kHz, 16kHz) to boost or cut specific frequencies, shaping the overall sound to your preference.

Bild: Detaillierte view of the 7-band stereo graphic equalizer on the XTUGA PR6X mixer. This image shows the frequency bands and their respective sliders, along with example frequency response curves for high, mid, and low EQ adjustments.
Bluetooth-Funktion
So verbinden Sie ein Bluetooth-Gerät:
- Stellen Sie sicher, dass der Mixer eingeschaltet ist.
- Aktivieren Sie Bluetooth auf Ihrem Smart-Gerät (Smartphone, Tablet) und suchen Sie nach verfügbaren Geräten.
- Select "AUDIO MP3" from the list of devices to pair.
- Sobald die Verbindung hergestellt ist, können Sie Audio drahtlos an das Mischpult streamen.

Bild: The XTUGA PR6X mixer displaying "BT" on its digital screen, indicating Bluetooth mode. A smartphone is shown connected, illustrating wireless music streaming capability. The image also shows the Bluetooth search name "AUDIO MP3".
USB-Wiedergabe und -Aufnahme
The mixer supports USB flash drives for MP3 playback and recording.
- Wiedergabe: Stecken Sie einen USB-Stick mit MP3 ein files into the USB port (14). Use the P/P (Play/Pause), PREV (Previous), NEXT (Next), and MODE buttons to control playback.
- Aufnahme: The mixer can record audio directly to a USB flash drive. Refer to the specific recording instructions in the full manual for detailed steps on initiating and managing recordings.

Bild: Illustration of the XTUGA PR6X mixer connected to a computer via USB and a USB flash drive inserted. This image demonstrates the mixer's compatibility with USB devices for mixing and recording audio, showing a user interacting with a computer setup.
Headset and Microphone Connection
The mixer includes a dedicated 3.5mm HEADSET input for connecting a headset with an integrated microphone, improving compatibility for recording devices.

Bild: A user wearing headphones and speaking into a microphone connected to the XTUGA PR6X mixer. The image highlights the 3.5mm HEADSET input, indicating improved compatibility for various recording devices.
Wartung
To ensure the longevity and optimal performance of your XTUGA PR6X mixer:
- Reinigung: Reinigen Sie die Außenseite des Mischers mit einem weichen, trockenen Tuch. Vermeiden Sie flüssige Reiniger oder Lösungsmittel, da diese die Oberfläche oder die internen Bauteile beschädigen können.
- Lagerung: Bewahren Sie den Mixer an einem kühlen, trockenen Ort fern von direkter Sonneneinstrahlung, extremen Temperaturen und übermäßigem Staub auf.
- Handhabung: Avoid dropping or subjecting the mixer to strong impacts. Disconnect all cables before moving the unit.
- Ausschalten: Schalten Sie den Mixer immer aus und trennen Sie ihn vom Stromnetz, wenn er längere Zeit nicht benutzt wird.
Fehlerbehebung
If you encounter issues with your XTUGA PR6X mixer, refer to the following common problems and solutions:
- Keine Tonausgabe:
- Prüfen Sie alle Kabelverbindungen (Eingang, Ausgang, Stromversorgung).
- Ensure channel volume (VOL) and main output volume (L MAIN R) knobs are turned up.
- Überprüfen Sie, ob die Kanäle nicht stummgeschaltet sind.
- Check the connected speakers/amplifier for power and proper function.
- Verzerrter Klang:
- Um Übersteuerungen zu vermeiden, muss der GAIN-Regler des Eingangskanals reduziert werden.
- Lower the channel volume (VOL) or main output volume.
- Check input source for distortion.
- Bluetooth stellt keine Verbindung her:
- Ensure Bluetooth is enabled on your smart device and the mixer is in Bluetooth mode.
- Stellen Sie sicher, dass kein anderes Gerät mit dem Mischpult gekoppelt ist.
- Try restarting both the mixer and your smart device.
- Phantomspeisung funktioniert nicht:
- Ensure the +48V phantom power switch (2) is activated for the specific channel.
- Verify that the microphone cable is an XLR type, as phantom power is typically delivered via XLR connections.
Technische Daten
| Besonderheit | Spezifikation |
|---|---|
| Marke | XTUGA |
| Modell | PR6X |
| Anzahl der Kanäle | 6 (4 Mono MIC + 2 Stereo) |
| DSP-Effekte | 99 Eingebaute Effekte |
| Equalizer | 7-Band Stereo Graphic EQ, 3-Band Channel EQ |
| Phantom Power | Independent +48V per MIC channel |
| Konnektivität | Bluetooth, USB (U-DISK MP3 input/recording) |
| Produkttypname | Audio-Mixer |
| Verpackungsabmessungen | 30.5 x 26.5 x 10.5 cm |
| Gewicht | 1.97 Kilogramm |
Garantie und Support
XTUGA Audio products come with a 12-month manufacturer assurance. For technical support, warranty claims, or further assistance, please contact XTUGA customer service through their official channels. Keep your purchase receipt as proof of purchase for warranty services.