
Einführung
The Apitor Robot Wheels Dual Coding Robot (Model APR011) is an educational STEM toy designed to introduce children aged 5 and up to the fundamentals of coding through interactive play. This robot offers two distinct programming methods: screen-free physical button coding using activity cards and a map, and app-based graphical programming via Bluetooth. This manual provides detailed instructions for setting up, operating, maintaining, and troubleshooting your robot to ensure a rewarding learning experience.
Videobeschreibung: Ein offizielles Demonstrationsvideo zeigtasing the Apitor Robot Wheels Dual Coding Robot in action, highlighting its features and dual coding capabilities for children aged 5-7.
Lieferumfang
Upon unboxing your Apitor Robot Wheels, please verify that all components listed below are present:
- 1 x Robot Wheels Unit
- 48 x Codierungskarten
- 12 x Aktivitätskarten
- 1 x Leitfadenkarte
- 1 x Space Map
- 1 x Benutzerhandbuch (dieses Handbuch)
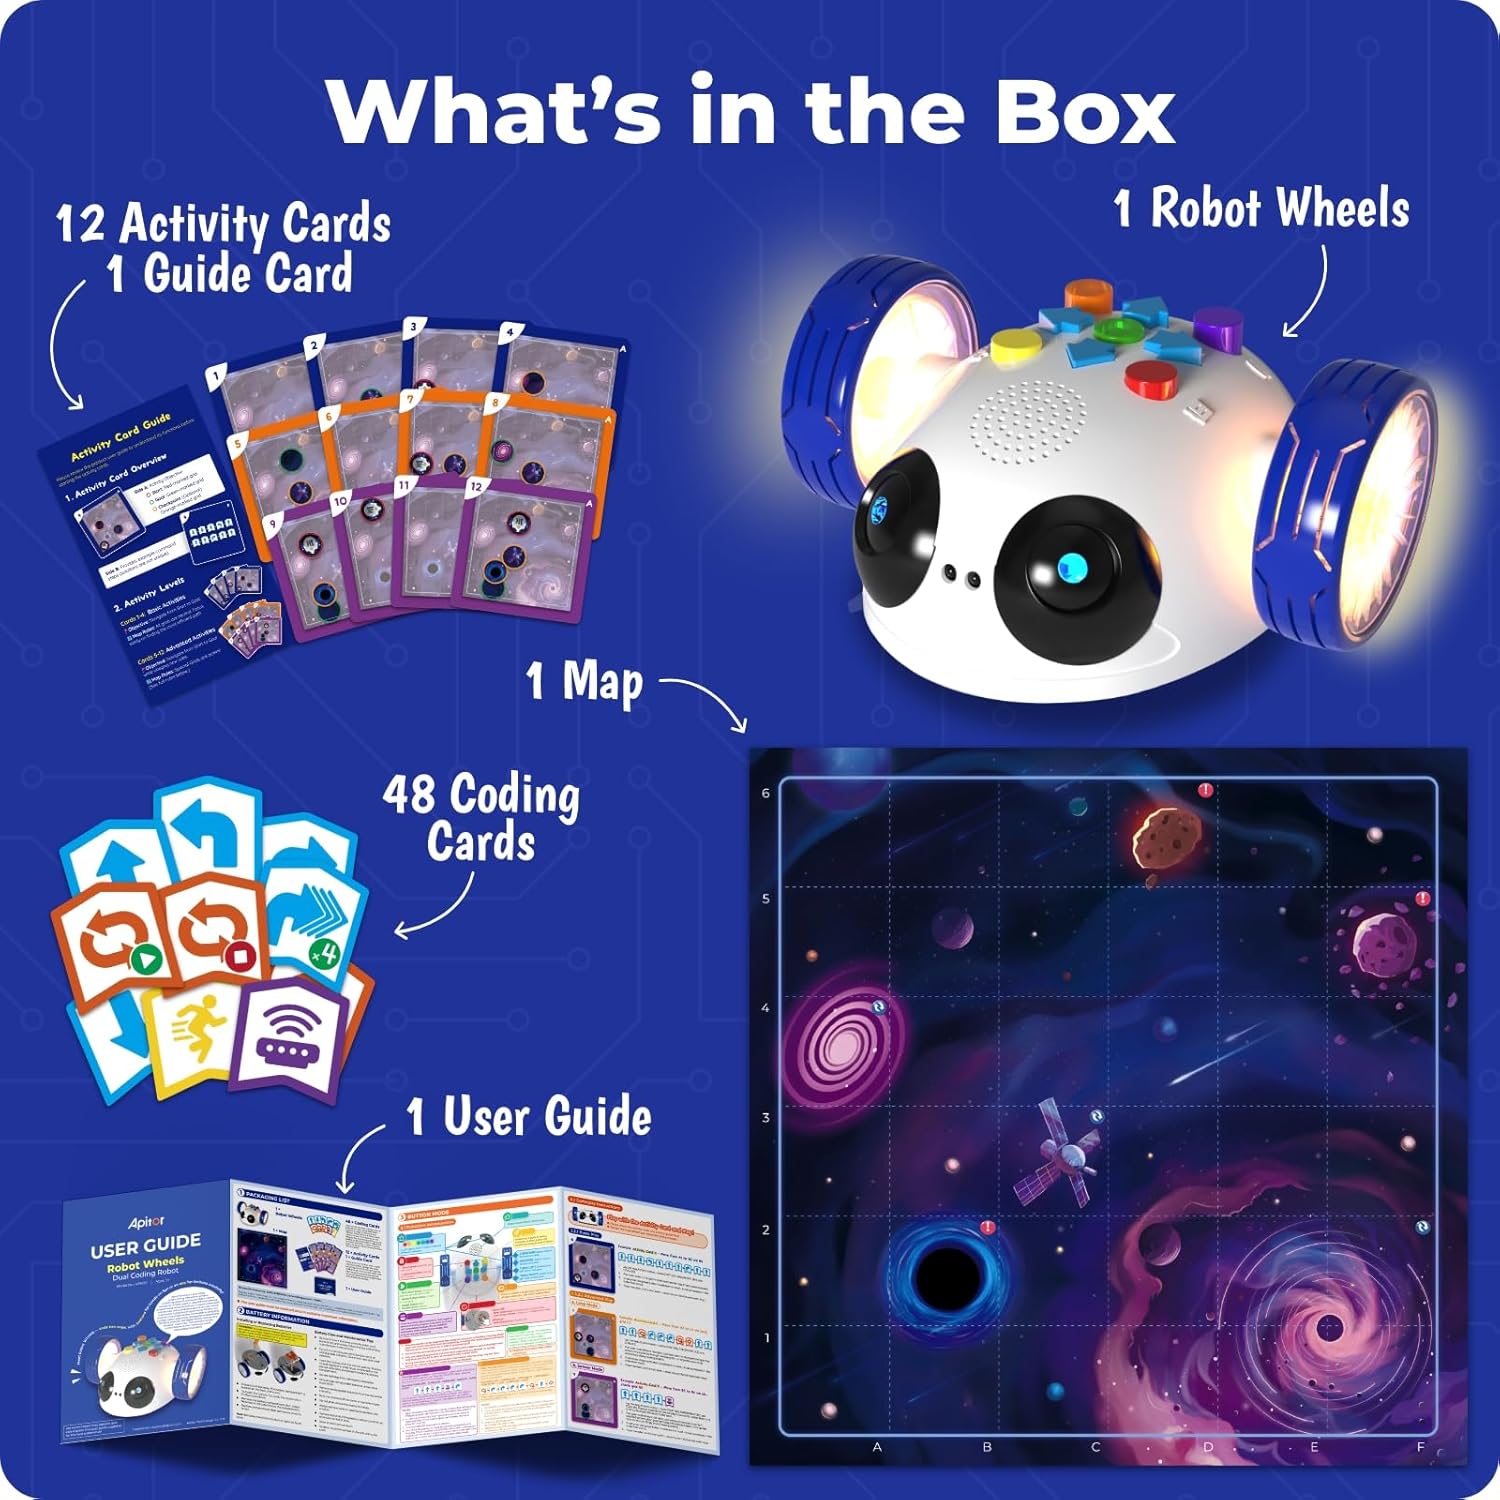
Bildbeschreibung: A visual representation of all items included in the Apitor Robot Wheels package, neatly arranged to show the robot, various cards, the space map, and the user guide.
Aufstellen
Einlegen der Batterie
The Robot Wheels unit requires 3 AA batteries (not included) for operation. Follow these steps to install the batteries:
- Locate the battery compartment on the underside of the Robot Wheels unit.
- Mit einem kleinen Kreuzschlitzschraubendreher die Abdeckung des Batteriefachs abschrauben.
- Legen Sie 3 neue AA-Batterien ein und achten Sie dabei auf die richtige Polarität (+/-), wie im Batteriefach angegeben.
- Bringen Sie die Batteriefachabdeckung wieder an und sichern Sie sie mit der Schraube.
Notiz: Verwenden Sie für optimale Leistung stets neue Batterien. Mischen Sie keine alten und neuen Batterien oder verschiedene Batterietypen.
Preparing the Play Area
Unfold the provided Space Map and place it on a flat, clear surface. Ensure there are no obstacles that could interfere with the robot's movement, especially when using the obstacle avoidance feature.
Bedienungsanleitung
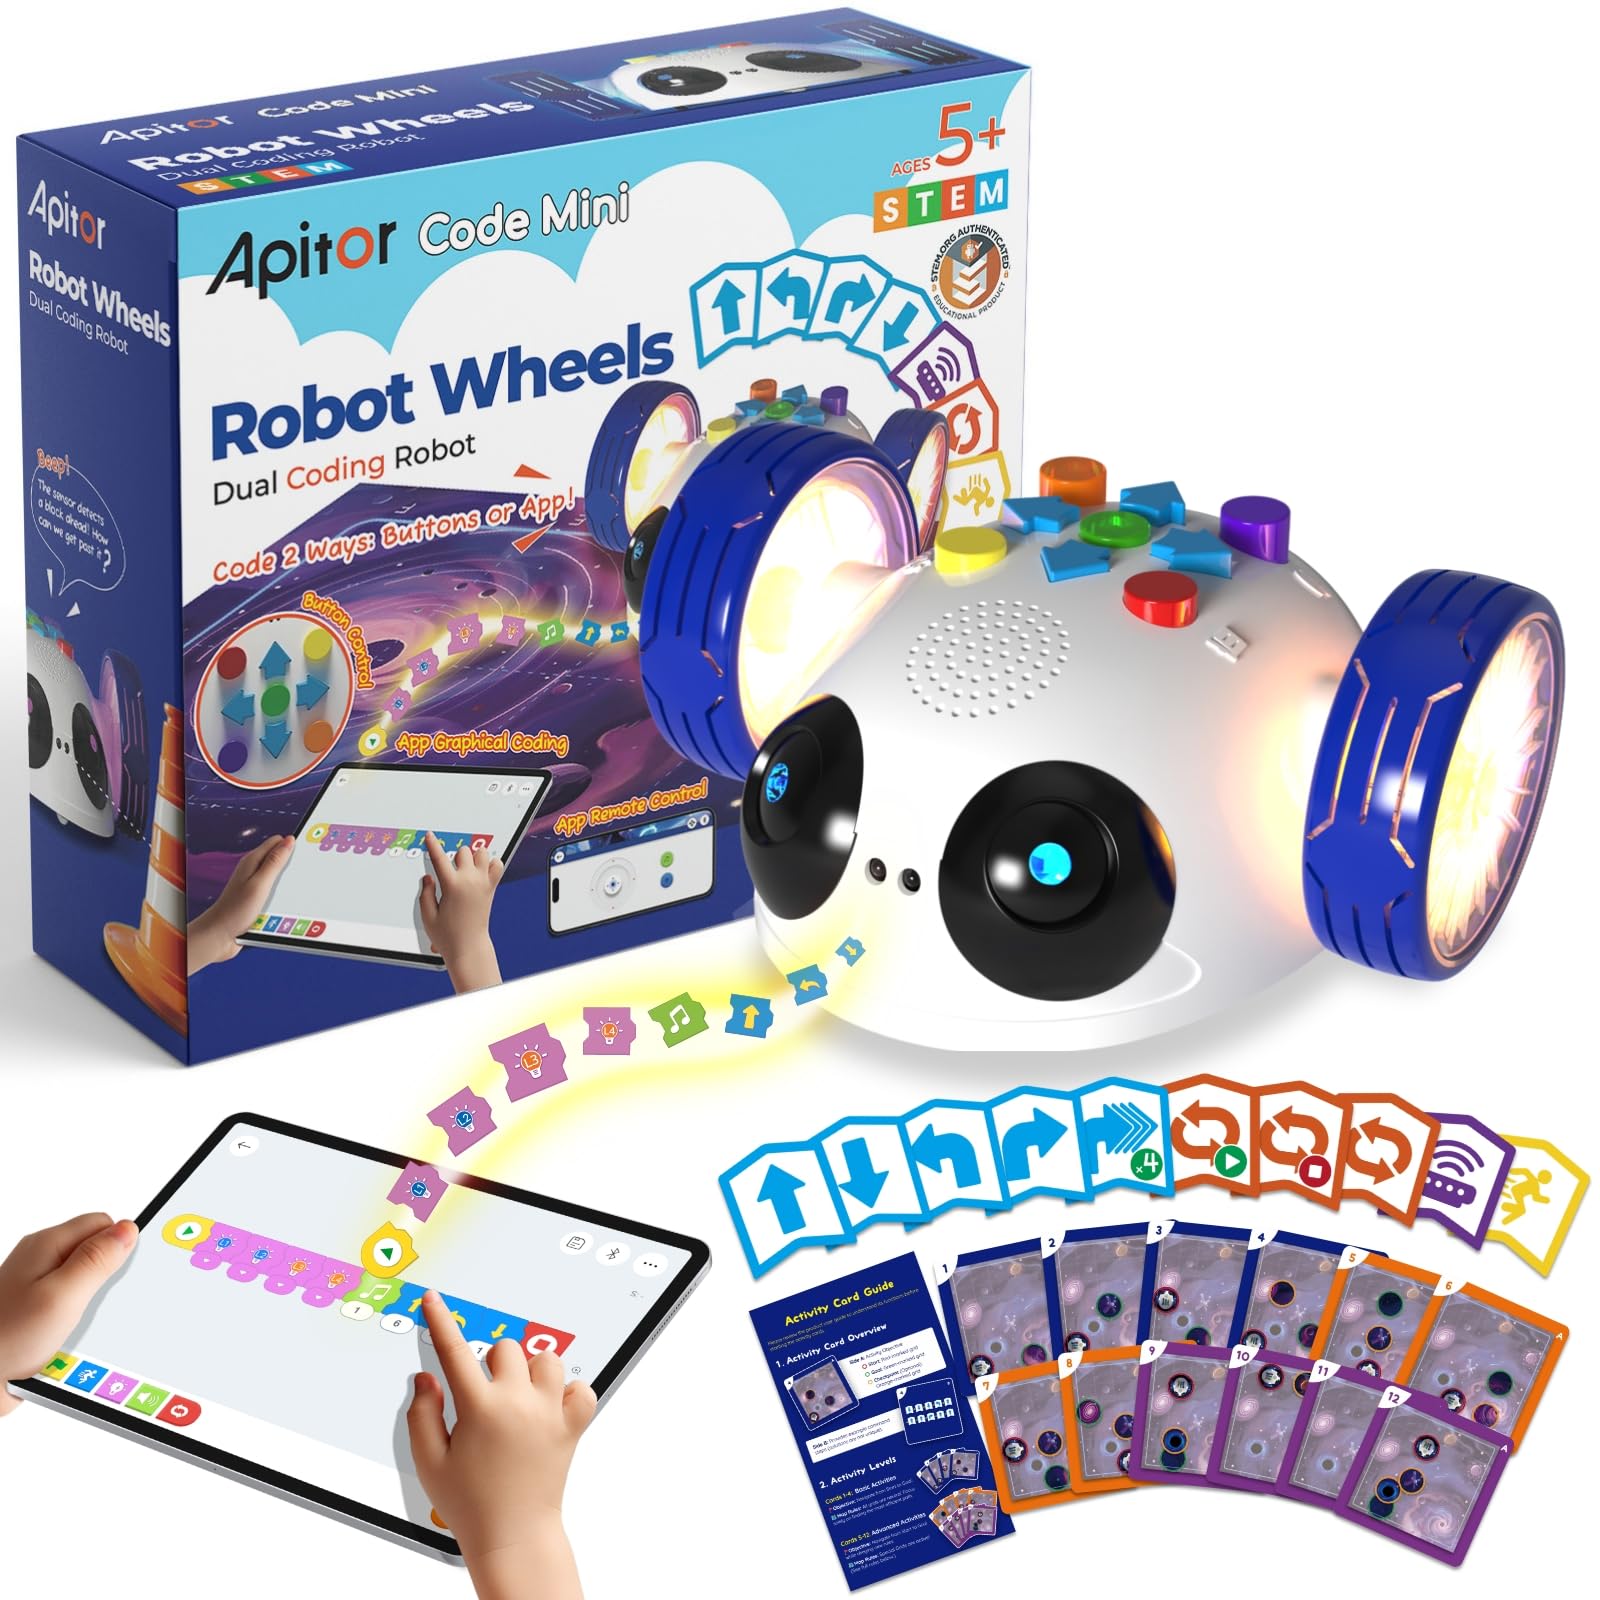
The Apitor Robot Wheels offers two primary modes of operation: Button Mode for screen-free physical coding and App Mode for Bluetooth-controlled graphical programming.
1. Button Mode (Screen-Free Coding)
This mode allows children to program the robot directly using physical buttons and coding cards, fostering an understanding of basic coding logic without a screen.
- Einschalten: Press the orange power button located on the underside of the robot. The robot's lights will illuminate.
- Select an Activity: Choose an Activity Card. Each card displays a starting position and a goal on the Space Map, along with the sequence of movements required to reach the goal.
- Platzieren Sie den Roboter: Position the Robot Wheels on the designated starting point on the Space Map, ensuring it faces the correct initial direction as shown on the Activity Card.
- Enter Program: Press the green 'Start/Pause' button on the robot. The robot is now ready to receive commands. Use the directional buttons (up, down, left, right) and other action buttons (e.g., loop, turn) on the robot's top panel to input the sequence of commands from the Activity Card. Each button press will be accompanied by a sound or light cue.
- Programm ausführen: After entering the full sequence of commands, press the green 'Start/Pause' button again to execute the program. The robot will move according to the programmed sequence.
- Programm löschen: To clear the current program and start a new one, press the red 'Clear' button.
Bildbeschreibung: This image illustrates the hands-on, screen-free coding method, showing a child interacting directly with the robot's buttons and the physical coding cards on a space-themed map.
2. App Mode (Bluetooth Control)
For extended play and advanced programming, connect your Robot Wheels to the dedicated Apitor Kit app on a compatible smart device.
- Laden Sie die App herunter: Suchen nach "Apitor Kit" in the Apple App Store or Google Play Store, or scan the QR codes provided in the user guide to download the free app.
- Bluetooth aktivieren: Stellen Sie sicher, dass Bluetooth auf Ihrem Smart-Gerät aktiviert ist.
- Den Roboter anschließen: Power on the Robot Wheels unit. In the Apitor Kit app, navigate to the connection screen and select your robot from the list of available devices. The robot's lights will indicate a successful connection.
- Fernbedienung: Use the 'Control' interface within the app to drive the robot manually using a virtual joystick.
- Grafische Programmierung: Access the 'Code' interface in the app. Drag and drop colorful coding blocks to create complex sequences of movements, sounds, and light patterns. Press the 'Play' button in the app to execute your code.
- Challenges & Games: Explore the 'Challenge' section for interactive games and missions that provide structured learning opportunities and downloadable maps for continuous engagement.

Bildbeschreibung: This image demonstrates the app's graphical programming interface, where a child uses a tablet to visually construct code sequences for the robot.

Bildbeschreibung: This image shows the remote control functionality of the app, with a child using a smartphone to navigate the robot via an on-screen joystick.
Wartung
To ensure the longevity and optimal performance of your Apitor Robot Wheels, follow these maintenance guidelines:
- Reinigung: Wipe the robot with a soft, dry cloth. Do not use harsh chemicals or abrasive cleaners. Avoid submerging the robot in water.
- Batteriepflege: Remove batteries if the robot will not be used for an extended period to prevent leakage. Dispose of used batteries responsibly.
- Lagerung: Store the robot and its accessories in a cool, dry place, away from direct sunlight and extreme temperatures. Keep all small parts, especially the coding cards, organized and protected.
Fehlerbehebung
If you encounter any issues with your Apitor Robot Wheels, please refer to the following common problems and solutions:
- Roboter lässt sich nicht einschalten:
- Prüfen Sie, ob die Batterien korrekt mit der richtigen Polarität eingelegt sind.
- Ersetzen Sie sie durch frische AA-Batterien.
- Robot Not Moving/Responding in Button Mode:
- Ensure the green 'Start/Pause' button was pressed to enter programming mode before inputting commands, and pressed again to execute.
- Verify that the robot is on a flat surface and its wheels are not obstructed.
- Batteriestand prüfen.
- App Connection Issues (Bluetooth):
- Stellen Sie sicher, dass Bluetooth auf Ihrem Smart-Gerät aktiviert ist.
- Ensure the robot is powered on and within Bluetooth range (typically 10 meters).
- Restart both the robot and the app.
- Check if the app has necessary permissions (e.g., location) enabled as required by Bluetooth protocol.
- Robot Not Following App Commands:
- Confirm the robot is successfully connected via Bluetooth in the app.
- Review your graphical code for any logical errors.
- Hindernisvermeidung funktioniert nicht:
- Ensure the infrared sensor on the front of the robot is clean and unobstructed.
- Test in different lighting conditions, as strong direct light can sometimes interfere with infrared sensors.
Technische Daten
| Technische Daten | 5 x 5.7 x 2.6 Zoll |
| Artikelgewicht | 1.65 Pfund |
| Artikelmodellnummer | APR011 |
| Vom Hersteller empfohlenes Alter | 5 - 5 years (suitable for ages 5-8 and up) |
| Stromquelle | 3 x AA-Batterien (nicht im Lieferumfang enthalten) |
| Konnektivität | Bluetooth 4.0 oder höher |
| App-Kompatibilität | Android 8 oder höher, iOS 10 oder höher |
Sicherheitshinweise
WARNUNG: ERSTICKUNGSGEFAHR – Kleinteile. Not for children under 3 years. Adult supervision is recommended during play, especially with younger children, to ensure safe handling of small components like coding cards.
Garantie und Support
Apitor Technology Co., Ltd. stands behind the quality of its products. For specific warranty details, please refer to the packaging or contact Apitor customer support directly. If you have any questions, require technical assistance, or need to report a defect, please visit the official Apitor website or contact their customer service team through the contact information provided on the product packaging or their webWebsite.