
1. Einleitung
Thank you for choosing the XTUGA D900 Dual UHF Wireless Microphone System. This system is designed to provide high-quality audio transmission for various applications, including karaoke, DJ events, weddings, church services, business meetings, classroom activities, and live performances. This manual will guide you through the setup, operation, and maintenance of your new wireless microphone system.
The XTUGA D900 features dual handheld microphones with adjustable echo, treble, and bass controls, paired with a versatile mini receiver that offers both 3.5mm and 6.35mm output options for broad compatibility with audio devices.

Image: The XTUGA D900 system is suitable for performances, family entertainment, classroom speeches, and program hosting.
2. Packungsinhalt
Bitte überprüfen Sie das Paket, um sicherzustellen, dass alle Artikel vorhanden sind:
- 2 x XTUGA D900 Handheld Wireless Microphones
- 1 x Mini Wireless Receiver (with 3.5mm jack)
- 1 x 6.35mm Adapter (for receiver)
- 1 x USB-Ladekabel (für den Empfänger)
- 2 x Anti-roll Rings (for microphones)
- Bedienungsanleitung
3. Produktmerkmale
- Hochwertiger Klang: Clear voice transmission without feedback or distortion.
- Dual UHF Wireless System: Two microphones operating on independent UHF channels (ChA and ChB), each with 50 adjustable frequencies (573-599 MHz range) to prevent interference.
- Bedienelemente am Mikrofon: Each handheld microphone features direct controls for volume, 7 levels of echo adjustment, and 5 levels of treble/bass adjustment.
- Versatile Receiver: Mini wireless receiver with a 3.5mm output, convertible to 6.35mm for wide compatibility with various audio equipment.
- Große Funkreichweite: Stable signal transmission up to 20 meters (65 feet).
- Wiederaufladbarer Empfänger: Built-in battery provides up to 8 hours of use on a 4-hour charge.
- Bluetooth-Wiedergabe: The receiver supports Bluetooth connectivity for playing background music from a smartphone or other devices.

Image: Close-up of the XTUGA D900 microphone displaying its multifunctional adjustment capabilities for echo, volume, treble, and bass.
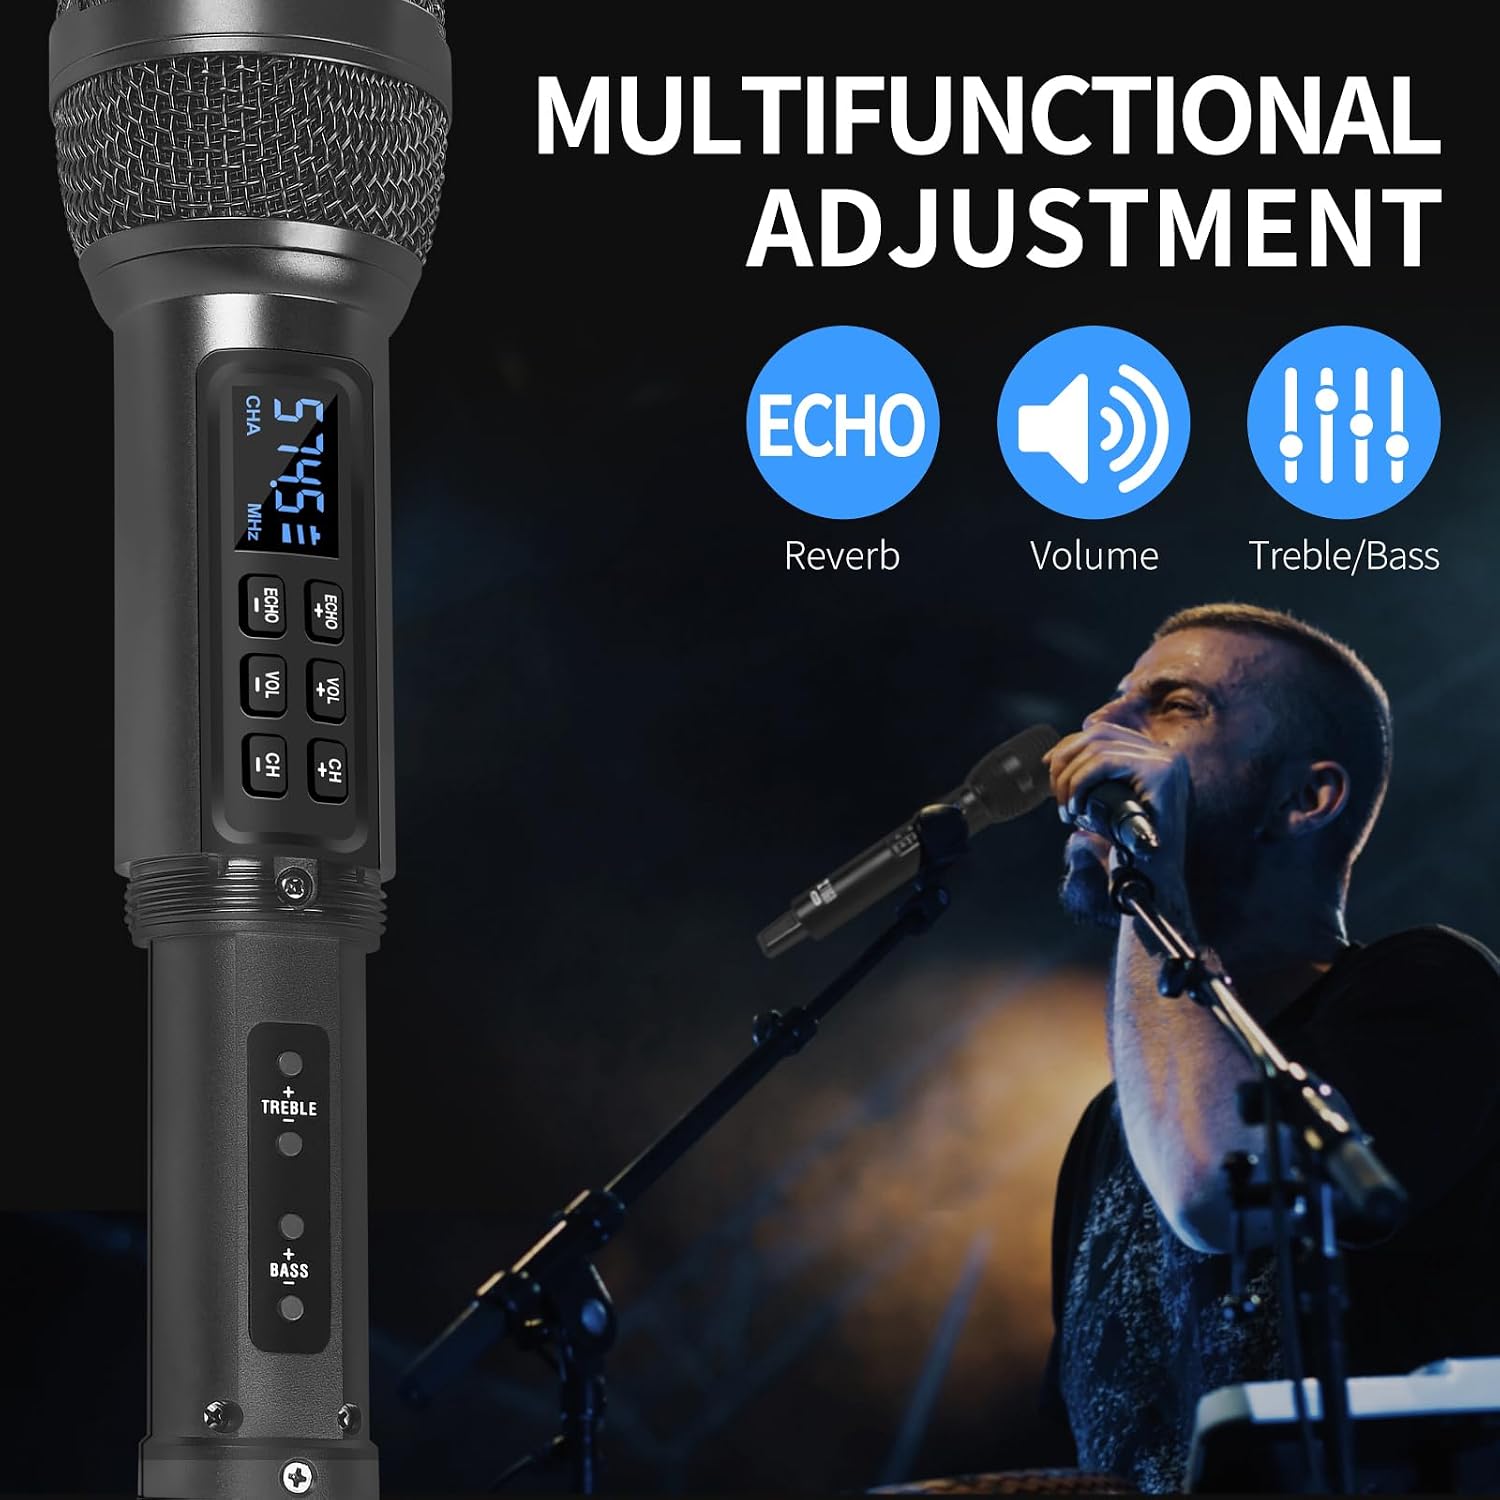
Image: The XTUGA D900 handheld microphone featuring a digital display for frequency and channel information.
4. Installationsanleitung
4.1. Empfängeranschluss
- Identify Output: Determine if your audio device (e.g., amplifier, mixer, speaker, soundbar, PC) requires a 3.5mm or 6.35mm input.
- Receiver anschließen:
- For 3.5mm input: Directly plug the mini wireless receiver's 3.5mm jack into your device's audio input port.
- For 6.35mm input: Attach the provided 6.35mm adapter to the receiver's 3.5mm jack, then plug it into your device's 6.35mm audio input port.
- Empfänger einschalten: Press and hold the POWER button on the receiver until the indicator lights illuminate.
4.2. Mikrofon-Setup
- Batterien einlegen: Open the battery compartment of each microphone and insert two AA batteries (not included), ensuring correct polarity.
- Mikrofone einschalten: Press and hold the power button on each microphone. The display will light up, showing the channel and frequency.
- Automatische Kopplung: The microphones and receiver should automatically pair. The RF indicator lights (A.RF, B.RF) on the receiver will turn solid blue when a microphone is successfully connected.

Image: Connectivity diagram illustrating how to connect the XTUGA D900 microphone and receiver to different audio systems using 3.5mm or 6.35mm inputs. Note: Not recommended for small speakers under 15 watts.

Image: The XTUGA D900 system, showing two microphones and the receiver, highlighting a stable 20-meter wireless signal range.
5. Bedienungsanleitung
5.1. Mikrofonsteuerung
- Ein-/Ausschalten: Press and hold the power button on the microphone for 2-3 seconds.
- Lautstärkeregelung: Press the 'VOL +' or 'VOL -' buttons on the microphone to adjust the microphone's output volume.
- Echoanpassung: Press the 'ECHO +' or 'ECHO -' buttons to cycle through 7 levels of echo effect.
- Höhen-/Bassregelung: Press the 'TREBLE +' or 'TREBLE -' buttons to adjust the treble. Press the 'BASS +' or 'BASS -' buttons to adjust the bass. There are 5 levels for each.
- Frequenzanpassung: Press the 'CH +' or 'CH -' buttons to change the operating frequency. Each microphone (ChA and ChB) has 50 selectable frequencies to avoid interference.

Image: Two XTUGA D900 microphones illustrating the frequency adjustment buttons (CH+/-) and their digital displays.
5.2. Receiver Bluetooth Playback
The receiver supports Bluetooth connectivity for playing background music from a compatible device.
- Bluetooth aktivieren: Stellen Sie sicher, dass der Empfänger eingeschaltet ist.
- Paarung: On your smartphone or Bluetooth-enabled device, search for Bluetooth devices and select "X168" to connect.
- Musik abspielen: Once connected, you can play music from your device, and the audio will be transmitted through the receiver to your connected sound system.

Image: The XTUGA D900 receiver demonstrating Bluetooth playback functionality, connected to a smartphone.
6. Batterieinformationen
6.1. Receiver Battery
- The receiver has a built-in rechargeable battery.
- To charge, connect the receiver to a USB power source using the provided USB charging cable.
- Eine vollständige Aufladung dauert in der Regel etwa 4 Stunden und ermöglicht eine ununterbrochene Nutzung von bis zu 8 Stunden.
- The POWER indicator light on the receiver will show charging status.
6.2. Microphone Batteries
- Each microphone requires two AA batteries (not included).
- Replace batteries when the microphone display indicates low power or when audio quality degrades.
- Always use fresh, high-quality batteries for optimal performance.

Image: The XTUGA D900 receiver highlighting its strong battery life, offering up to 8 hours of operation after a 4-hour charge.
7. Wartung
- Reinigung: Wipe the microphones and receiver with a soft, dry cloth. Do not use liquid cleaners or solvents.
- Lagerung: Lagern Sie das System an einem kühlen, trockenen Ort, geschützt vor direkter Sonneneinstrahlung und extremen Temperaturen.
- Batteriepflege: Remove AA batteries from microphones if not used for an extended period to prevent leakage. Charge the receiver's battery periodically if stored for long durations to maintain battery health.
- Handhabung: Avoid dropping the microphones or receiver, as this can damage internal components.
8. Fehlerbehebung
| Problem | Mögliche Ursache | Lösung |
|---|---|---|
| Kein Ton vom Mikrofon |
|
|
| Sound distortion or interference |
|
|
| Receiver Bluetooth not connecting |
|
|
9. Spezifikationen
| Besonderheit | Detail |
|---|---|
| Marke | XTUGA |
| Modellname | XTUGA D900 |
| Konnektivitätstechnologie | UHF Wireless, Auxiliary, Bluetooth (Receiver) |
| Steckertyp | 3.5-mm-Klinkenbuchse, 6.35-mm-Klinkenbuchse (mit Adapter) |
| Mikrofon-Formfaktor | Handgerät |
| Frequenzbereich | 573 MHz - 599 MHz (30 adjustable frequencies per channel) |
| Anzahl der Frequenzen | 50 frequencies per channel (ChA and ChB) |
| Drahtlose Reichweite | Bis zu 20 Meter (65 Fuß) |
| Akkulaufzeit des Empfängers | Bis zu 8 Stunden (nach 4 Stunden Ladezeit) |
| Mikrofon-Stromversorgung | 2 x AA Batteries (per microphone, not included) |
| Kompatible Geräte | PC, Smartphone, TV, Tablets, Laptops, Power Amplifiers, Mixers, Speakers, Soundbars, Bus Audio |
| Besondere Merkmale | Volume Control, 7-level Echo Adjustment, 5-level Treble Adjustment, 5-level Bass Adjustment |
| Bestandteile umfaßten | 2 Microphones, 1 Mini Wireless Receiver, 1 6.35mm Adapter, 1 USB Charging Cable |
| Ursprungsland | China |
10. Sicherheitshinweise
- Setzen Sie das Gerät weder Regen noch Feuchtigkeit aus.
- Das Gerät darf nicht auseinandergebaut werden. Alle Wartungsarbeiten dürfen nur von qualifiziertem Fachpersonal durchgeführt werden.
- Von Wärmequellen und offenen Flammen fernhalten.
- Batterien sind gemäß den örtlichen Vorschriften verantwortungsvoll zu entsorgen.
- Avoid using the system near strong electromagnetic fields, which may cause interference.
11. Garantie und Support
XTUGA products are designed for reliability and performance. For warranty information or technical support, please refer to the warranty card included with your purchase or contact XTUGA customer service through the retailer where you purchased the product.
Bitte bewahren Sie Ihren Kaufbeleg für eventuelle Garantieansprüche auf.