1. Einleitung
Thank you for choosing the FLYLINKTECH BD10 6000A 12V Car Jump Starter and Power Bank. This device is designed to provide emergency jump-starting for vehicles and serve as a portable power bank for various electronic devices. Please read this manual thoroughly before use to ensure safe and optimal operation.

Image 1.1: The FLYLINKTECH BD10 Jump Starter unit with its smart battery clamps.
2. Sicherheitshinweise
Beachten Sie stets die folgenden Sicherheitsvorkehrungen, um Verletzungen oder Schäden am Gerät oder Fahrzeug zu vermeiden:
- Versuchen Sie nicht, eine eingefrorene Batterie mit Starthilfekabeln zu starten.
- Stellen Sie die korrekte Polaritätsverbindung sicher (rote Klemme).amp nach positiv, schwarz clamp to negative). Reverse polarity can cause damage.
- Erlauben Sie nicht den intelligenten ClampSie müssen sich berühren, wenn sie an den Starthilfe-Booster angeschlossen sind.
- Bewahren Sie das Gerät außerhalb der Reichweite von Kindern auf.
- Do not expose the device to extreme temperatures (above 60°C / 140°F or below -20°C / -4°F) or direct sunlight for extended periods.
- Zerlegen oder modifizieren Sie das Gerät nicht.
- Verwenden Sie ausschließlich die bereitgestellten Smart-Funktionen.amps und Ladekabel.
- Sollte das Gerät während des Gebrauchs übermäßig heiß werden, trennen Sie es sofort vom Stromnetz.

Image 2.1: The jump starter incorporates multiple safety features such as spark-proof, reverse polarity, overvoltage, short circuit, overload, and high-temperature protection.
3. Packungsinhalt
Überprüfen Sie, ob alle Artikel im Paket vorhanden sind:
- FLYLINKTECH BD10 Jump Starter Unit
- Smart Battery Klamps
- USB-C-auf-USB-C-Kabel
- USB-A-auf-USB-C-Kabel
- 12V DC Kfz-Ladeadapter
- Bedienungsanleitung
- Aufbewahrungskoffer

Image 3.1: The complete package includes the jump starter, smart clamps, various cables, user manual, and a protective storage case.
4. Einrichten und Laden
4.1 Erstgebühr
Before first use, fully charge the jump starter. The device features a 26800mAh battery capacity.
- Connect the provided USB-C cable to the jump starter's USB-C input port.
- Connect the other end of the cable to a compatible USB wall charger (not included). For fastest charging, use a PD 45W charger.
- Das LED-Display zeigt den Ladestatus und den Akkustand in Prozent an.tage.
4.2 Charging Times
| Ladegerät-Bewertung | Ungefähre Ladezeit |
|---|---|
| 5W | 18 Stunden |
| 18 W | 7 Stunden |
| 45 W | 2 Stunden |
Note: A 45W wall charger is not included in the package.

Image 4.1: The device supports PD 45W fast charging, significantly reducing recharge time when using a compatible charger.
5. Bedienungsanleitung
5.1 Starthilfe für Ihr Fahrzeug
The FLYLINKTECH BD10 is capable of jump-starting all gas engines and diesel engines up to 12.0L.
- Sicherstellen, dass ausreichend geladen ist: Check the jump starter's LED screen to ensure it has at least 50% charge.
- Connect Smart Clamps: Stecken Sie den blauen Stecker des Smart-Handys ein.amps into the jump starter's 12V output port. Ensure a firm connection.
- Anschluss an die Autobatterie:
- Befestigen Sie die rot (+) clamp an den Pluspol der Fahrzeugbatterie.
- Befestigen Sie die Schwarz (-) clamp an den Minuspol der Fahrzeugbatterie.
- Prüfindikator: Der smarte Klamp indicator light should turn solid green, indicating a correct connection. If it flashes or shows red, check connections and battery status.
- Press BOOST (if needed): If the vehicle battery is extremely low or completely dead, press the 'BOOST' button on the jump starter. Wait for the indicator light on the smart clamps to turn solid green.
- Startfahrzeug: Attempt to start your vehicle. If it doesn't start on the first try, wait 30 seconds before trying again. Do not attempt more than 3 consecutive starts.
- Cl entfernenamps: Sobald das Fahrzeug startet, entfernen Sie sofort den Smart-Schlüssel.ampTrennen Sie die Kabel von der Autobatterie und anschließend vom Starthilfegerät.

Image 5.1: The jump starter connected to a car battery, ready for operation. It supports 6000A peak current, 12V output, and is suitable for a wide range of engines.

Image 5.2: Visual guide illustrating the four steps to jump-start a vehicle: connect the plug, attach clamps, press boost, and start the engine.
5.2 Powerbank-Funktion
The BD10 can charge multiple electronic devices via its USB-A and USB-C ports.
- USB1-Ausgang: Up to 18W (max)
- USB2-Ausgang: Up to 18W (max)
- USB-C-Ausgang: Bis zu 45 W (PD)
Connect your device using the appropriate USB cable to the desired output port. The LED screen will show 'OUT' and the wattage being drawn.

Image 5.3: The jump starter functioning as a power bank, simultaneously charging a smartphone and a tablet via its USB ports.
5.3 LED Taschenlampe
The built-in LED flashlight offers three modes: constant light, SOS signal, and strobe light.
- Press and hold the flashlight button to turn on the constant light.
- Press the button again to cycle through SOS and strobe modes.
- Zum Ausschalten erneut gedrückt halten.

Image 5.4: The integrated LED flashlight provides illumination, an SOS signal, and a strobe function for emergency situations.
5.4 Informative LED Screen
The 6.0-inch LED screen provides real-time information about the device's status:
- Batteriestand: Zeigt den verbleibenden Batteriestand in Prozent antage.
- EIN/AUS-Anzeige: Shows whether the device is charging (IN) or discharging (OUT).
- Wastage Anzeige: Indicates the power (W) being drawn or supplied.
- Fehlerwarnungen: Displays specific error codes or symbols if an issue occurs.
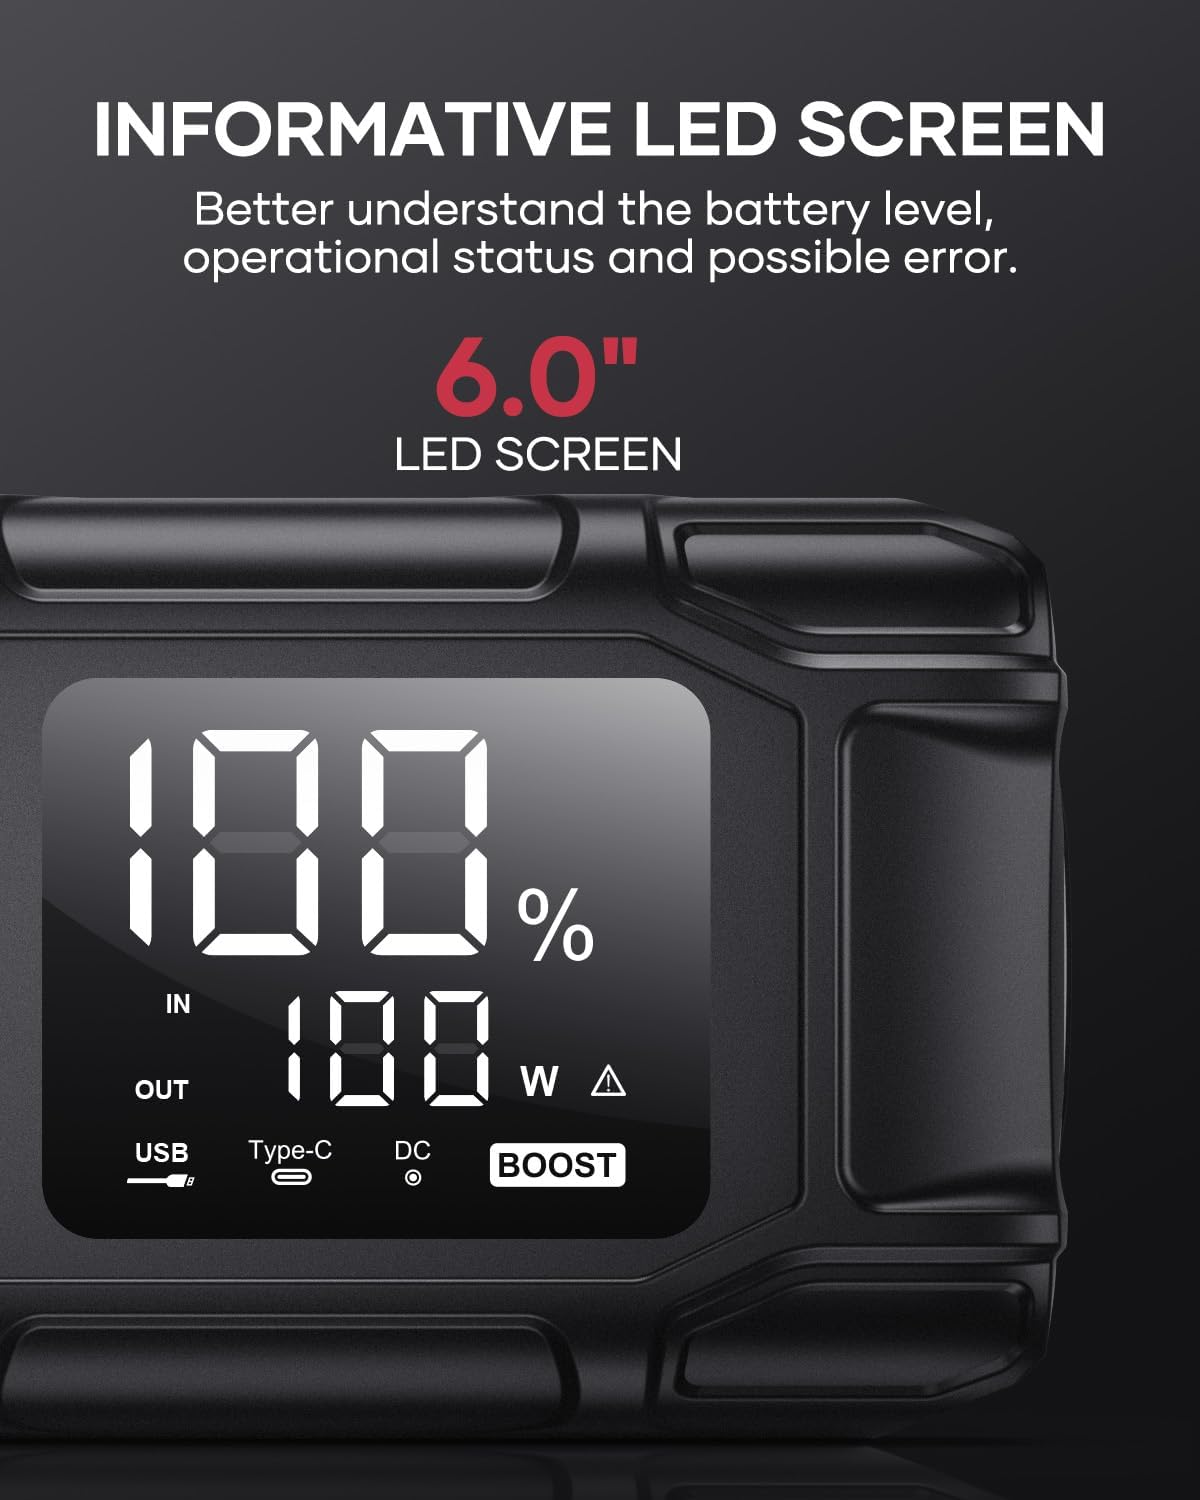
Image 5.5: The 6.0-inch LED screen provides clear information on battery percentage, input/output status, and power consumption.
6. Wartung
- Regelmäßig aufladen: Um die Batterielebensdauer zu verlängern, laden Sie den Starthilfe-Booster alle 3 bis 6 Monate auf, auch wenn er nicht in Gebrauch ist.
- Lagerung: Store the device in its protective case in a cool, dry place, away from direct sunlight and moisture.
- Reinigung: Reinigen Sie das Gerät mit einem weichen, trockenen Tuch. Verwenden Sie keine scharfen Chemikalien oder Scheuermittel.
- Clamp Pflege: Stellen Sie sicher, dass die Smart-ClampDie Produkte werden vor und nach jedem Gebrauch gereinigt und auf Korrosionsfreiheit geprüft.
7. Fehlerbehebung
The device features multiple alarm situations indicated by audible signals and screen displays:
- Niedrige Lautstärketage Schutz: Audible signal "3". Recharge the device.
- Externe Lautstärketage Exceeds Vehicle Voltage: Audible signal "4". Check vehicle battery voltage.
- Kurzschlussschutz: Audible signal "5". Check clamp connections for short circuits.
- Safety Mode Activated: Audible signal "6". Device has entered safety mode due to an issue.
- Überstromschutz: Audible signal "7". Reduce load or check connections.
- Alarm für hohe/niedrige Temperatur: Audible signal "8". Allow device to return to operating temperature range (-20°C to 60°C).
- Umgekehrte Verbindung: Audible signal "9". Correct the clamp Polarität.

Bild 7.1: Überview of the device's multi-alarm system, indicating various protection states with unique audible signals.
Sollten die Probleme nach Durchführung dieser Schritte weiterhin bestehen, wenden Sie sich bitte an den Kundendienst.
8. Spezifikationen
| Besonderheit | Spezifikation |
|---|---|
| Marke | FLIEGENLINKTECH |
| Modell | BD10 |
| Spitzenausgangsstrom | 6000 Ampehe |
| Batteriekapazität | 26800 mAh |
| Ausgangsvolumentage | 12 V |
| USB-C-Eingang/Ausgang | PD 45 W |
| USB-A-Ausgang | 18 W (max.) |
| Applicable Engine Types | All Gas, up to 12.0L Diesel |
| Betriebstemperatur | -20 °C bis 60 °C (-4 °F bis 140 °F) |
| Technische Daten | 23.95 x 10 x 5.69 cm |
| Artikelgewicht | 920 g |

Image 8.1: The device is designed to operate reliably in extreme climates, from -20°C (-4°F) to 60°C (140°F).
9. Garantie und Support
FLYLINKTECH is committed to providing high-quality products. For any questions, technical assistance, or warranty claims, please refer to the contact information provided with your purchase or visit the official FLYLINKTECH webBitte bewahren Sie Ihren Kaufbeleg für Garantiezwecke auf.