
1. Einleitung
This manual provides essential information for setting up, operating, maintaining, and troubleshooting your Beelink SER5 5500U Mini PC. Please read it carefully before using the product to ensure optimal performance and longevity.
The Beelink SER5 5500U is a compact and powerful Mini PC featuring an AMD Ryzen 5 5500U processor, designed for various applications from office work to multimedia entertainment and light gaming. It supports dual 4K display output and offers robust connectivity options.
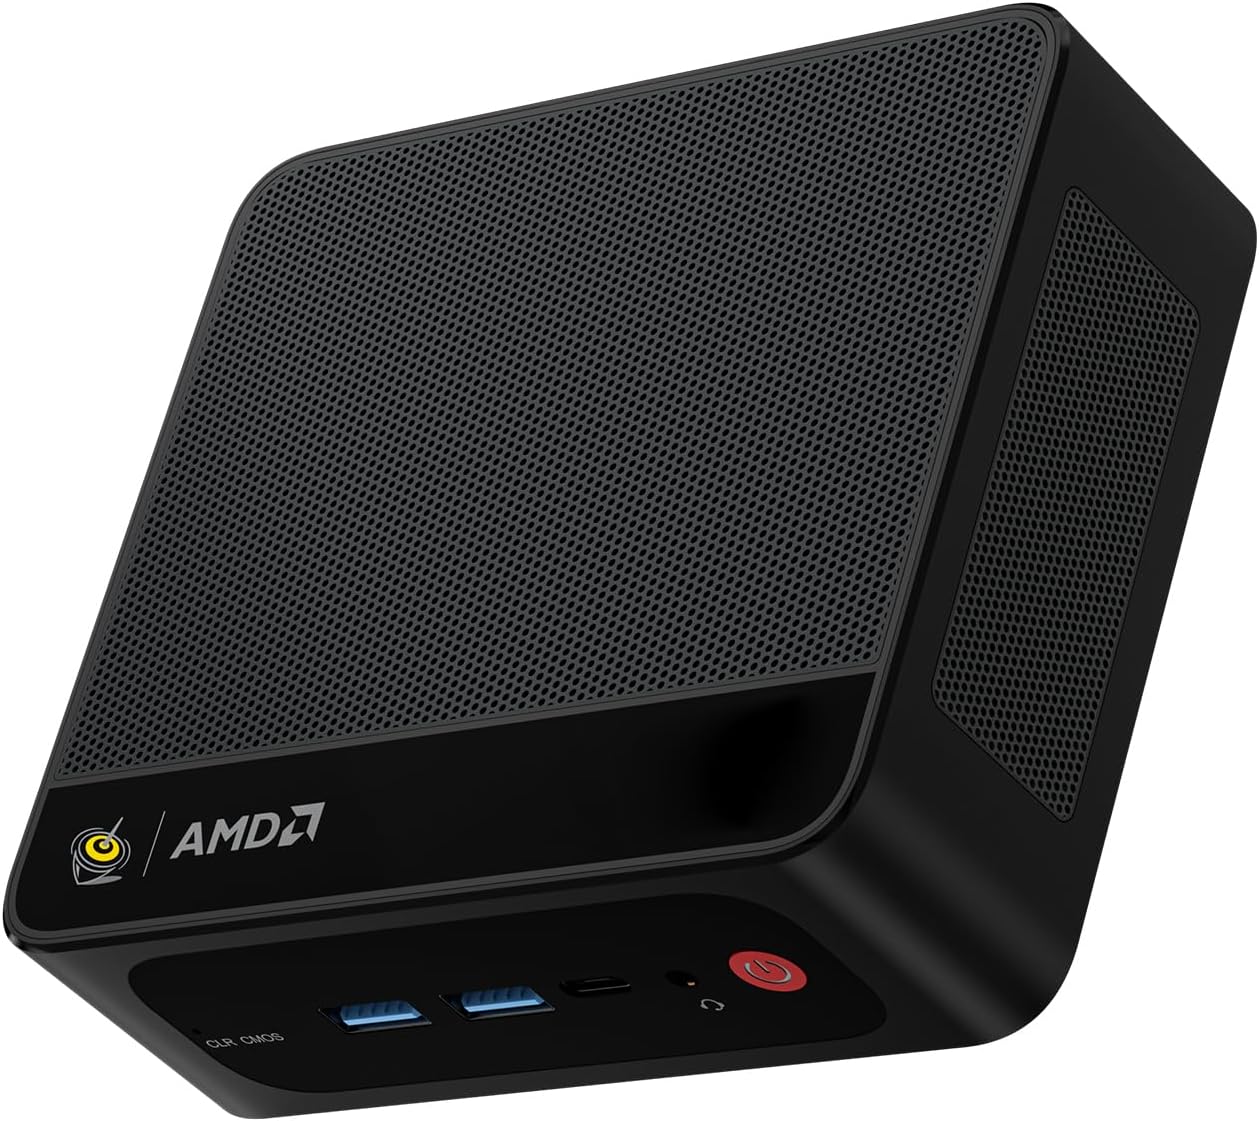
Figure 1: Beelink SER5 5500U Mini PC
2. Packungsinhalt
Überprüfen Sie, ob alle Artikel im Paket vorhanden sind:
- Beelink SER5 5500U Mini PC (x1)
- HDMI Cable (100cm) (x1)
- Power Adapter (19V/3.42A) (x1)
- Wall-Mounted Bracket (x1)
- Benutzerhandbuch (dieses Dokument)
3. Einrichtungsanweisungen
3.1 Anschließen von Peripheriegeräten
- Display anschließen: Use the provided HDMI cable to connect your monitor to the HDMI port on the Mini PC. Alternatively, use a DisplayPort cable for DP connection.
- Tastatur und Maus anschließen: Schließen Sie Ihre USB-Tastatur und -Maus an die verfügbaren USB-Anschlüsse an.
- Strom anschließen: Schließen Sie das Netzteil an den DC-Eingang des Mini-PCs an und stecken Sie das Netzteil anschließend in eine Steckdose.
- Netzwerkverbindung (optional): Für eine kabelgebundene Verbindung schließen Sie ein Ethernet-Kabel an den 2.5G-LAN-Anschluss an. Für eine drahtlose Verbindung stellen Sie sicher, dass Ihr WLAN-Netzwerk verfügbar ist.

Abbildung 2: Anschlüsse vorne und hinten
3.2 Erster Startvorgang
Press the power button on the front of the Mini PC. The system will boot up, and you will see the Windows 11 Pro setup screen. Follow the on-screen instructions to complete the initial Windows setup.
4. Bedienungsanleitung
4.1 Ein-/Ausschalten und Neustart
- Einschalten: Drücken Sie die Einschalttaste.
- Ausschalten: Klicken Sie in Windows auf die Schaltfläche „Start“ und wählen Sie dann „Ein/Aus“ > „Herunterfahren“. Alternativ können Sie den Netzschalter 5 Sekunden lang gedrückt halten, um das Herunterfahren zu erzwingen (nicht für den regelmäßigen Gebrauch empfohlen).
- Neustart: Klicken Sie in Windows auf die Schaltfläche „Start“ und wählen Sie dann „Ein/Aus“ > „Neustart“.
4.2 Dual-Display-Setup
The Beelink SER5 5500U supports dual 4K display output via its HDMI and DisplayPort interfaces. Connect two monitors to these ports. Windows will automatically detect the displays. You can configure display settings (extend, duplicate, etc.) via Windows Display Settings.

Figure 3: Dual Display Configuration
4.3 Drahtlose Konnektivität
- WLAN 6: The Mini PC supports Wi-Fi 6 (802.11ax) for high-speed wireless internet. Connect via Windows network settings.
- Bluetooth 5.2: Pair Bluetooth devices such as keyboards, mice, or headphones through Windows Bluetooth settings.
4.4 Speichererweiterung
The Mini PC includes a 500GB M.2 PCIe NVME 2280 SSD. For additional storage, a 2.5-inch HDD/SSD (not included) can be installed in the dedicated slot. Refer to the internal hardware guide for installation steps.
5. Wartung
5.1 Reinigung
Regularly clean the exterior of the Mini PC with a soft, dry cloth. Use compressed air to gently clear dust from the ventilation openings to maintain optimal airflow and cooling performance. Do not use liquid cleaners directly on the device.
5.2 Softwareaktualisierungen
Keep your Windows operating system and device drivers updated. Windows Update will handle most OS updates. For graphics drivers (AMD Radeon Graphics), visit the AMD official webWebsite für die neuesten Versionen.
5.3-Kühlsystem
The Beelink SER5 5500U features a high-speed cooling fan. Ensure the Mini PC is placed in a well-ventilated area and that the air vents are not obstructed to prevent overheating.

Abbildung 4: Interner Lüfter
6. Fehlerbehebung
6.1 Kein Strom
- Stellen Sie sicher, dass das Netzteil sowohl mit dem Mini-PC als auch mit einer funktionierenden Steckdose fest verbunden ist.
- Prüfen Sie die Funktionsfähigkeit der Steckdose, indem Sie ein anderes Gerät anschließen.
- Versuchen Sie es gegebenenfalls mit einem anderen, kompatiblen Netzteil.
6.2 Keine Anzeige
- Vergewissern Sie sich, dass das HDMI- oder DisplayPort-Kabel sowohl mit dem Mini-PC als auch mit dem Monitor fest verbunden ist.
- Stellen Sie sicher, dass der Monitor eingeschaltet und auf die richtige Eingangsquelle (HDMI/DP) eingestellt ist.
- Testen Sie es nach Möglichkeit mit einem anderen Monitor oder Kabel.
- If the issue persists, try resetting the CMOS by pressing the CLR CMOS button (refer to Figure 2 for location).
6.3 Probleme mit der Netzwerkverbindung
- Kabelgebunden (LAN): Check the Ethernet cable connection and your router/modem.
- Wireless (Wi-Fi/Bluetooth): Ensure Wi-Fi and Bluetooth are enabled in Windows settings. Restart your router/modem.
- Aktualisieren Sie gegebenenfalls die Netzwerktreiber.
6.4 Systemverlangsamung
- Schließen Sie unnötige Anwendungen, die im Hintergrund laufen.
- Prüfen Sie, ob Windows-Updates ausstehen, und installieren Sie diese gegebenenfalls.
- Ensure the cooling vents are clear of obstructions.
- Führen Sie eine Datenträgerbereinigung und Defragmentierung durch (bei HDD, bei SSD nicht erforderlich).
7. Spezifikationen

Abbildung 5: Produktspezifikationview
| Besonderheit | Detail |
|---|---|
| Marke | Beelink |
| Modell | SER5 5500U |
| Betriebssystem | Windows 11 Pro |
| CPU | AMD Ryzen 5 5500U (6 Cores/12 Threads, 2.1GHz Base, up to 4.0GHz Boost) |
| Grafik | AMD Radeon Grafik (7 Kerne, 1800 MHz) |
| RAM | 16 GB DDR4 (Dual Channel, erweiterbar auf bis zu 64 GB) |
| Lagerung | 500GB M.2 PCIe NVME 2280 SSD (expandable with 2.5-inch HDD/SSD) |
| Videoausgang | 1x HDMI (4K@60Hz), 1x DisplayPort (4K@60Hz) |
| USB-Anschlüsse | 3x USB 3.2 Gen2, 1x USB 2.0, 1x Type-C (Data) |
| Netzwerk | Wi-Fi 6 (802.11ax), Bluetooth 5.2, 2.5G LAN (RJ45) |
| Audio | Audioanschluss (Kopfhörer & Mikrofon) |
| Maße | 12.6 x 11.3 x 4.2 cm |
| Kühlung | Luftkühlung |
| Netzteil | 19 V/3.42 A |
8. Garantie und Support
8.1 Garantieinformationen
Your Beelink SER5 5500U Mini PC comes with a 3 Jahr HerstellergarantieBitte bewahren Sie Ihren Kaufbeleg für Garantieansprüche auf.
8.2 Product Key Retrieval
If you received your product without a physical product key, you can contact Beelink support to obtain it. Please provide the SN code located on the bottom of your product when contacting support.
8.3 Kundendienst
For technical assistance, warranty claims, or any other inquiries, please contact Beelink customer support through the official Beelink store or website. Support is typically available within 24 hours for messages.