
1. Einleitung
Thank you for choosing the Commax CMV-70S 7-inch LED Intercom System. This manual provides essential information for the safe and efficient installation, operation, and maintenance of your new intercom system. Please read this manual thoroughly before use and keep it for future reference.
2. Sicherheitshinweise
- Ensure all electrical connections are made by a qualified professional to prevent electric shock or fire.
- Das Gerät darf weder Wasser, Feuchtigkeit noch extremen Temperaturen ausgesetzt werden.
- Do not attempt to open or repair the unit yourself. Refer all servicing to authorized personnel.
- Use only the specified power supply (AC 100V - 240V).
- Halten Sie das Gerät von direkter Sonneneinstrahlung und Wärmequellen fern.
3. Packungsinhalt
Bitte prüfen Sie, ob alle unten aufgeführten Artikel in Ihrem Paket enthalten sind. Sollten Artikel fehlen oder beschädigt sein, wenden Sie sich bitte an Ihren Händler.
- Commax CMV-70S Monitor Unit
- Montagehalterung
- Bedienungsanleitung
- Screws (T)4 x 18mm (4 pcs)
- Screw (M)3 x 6mm (1 pc)
- Connection Cables (2P(1EA), 4P(3EA))
- Door Camera (if included in your specific kit)

Abbildung 3.1: Packungsinhalt
4. Produktüberschreitungview
The Commax CMV-70S features a 7-inch LED screen and intuitive touch controls for visitor communication and door access. Familiarize yourself with the components of the monitor unit:
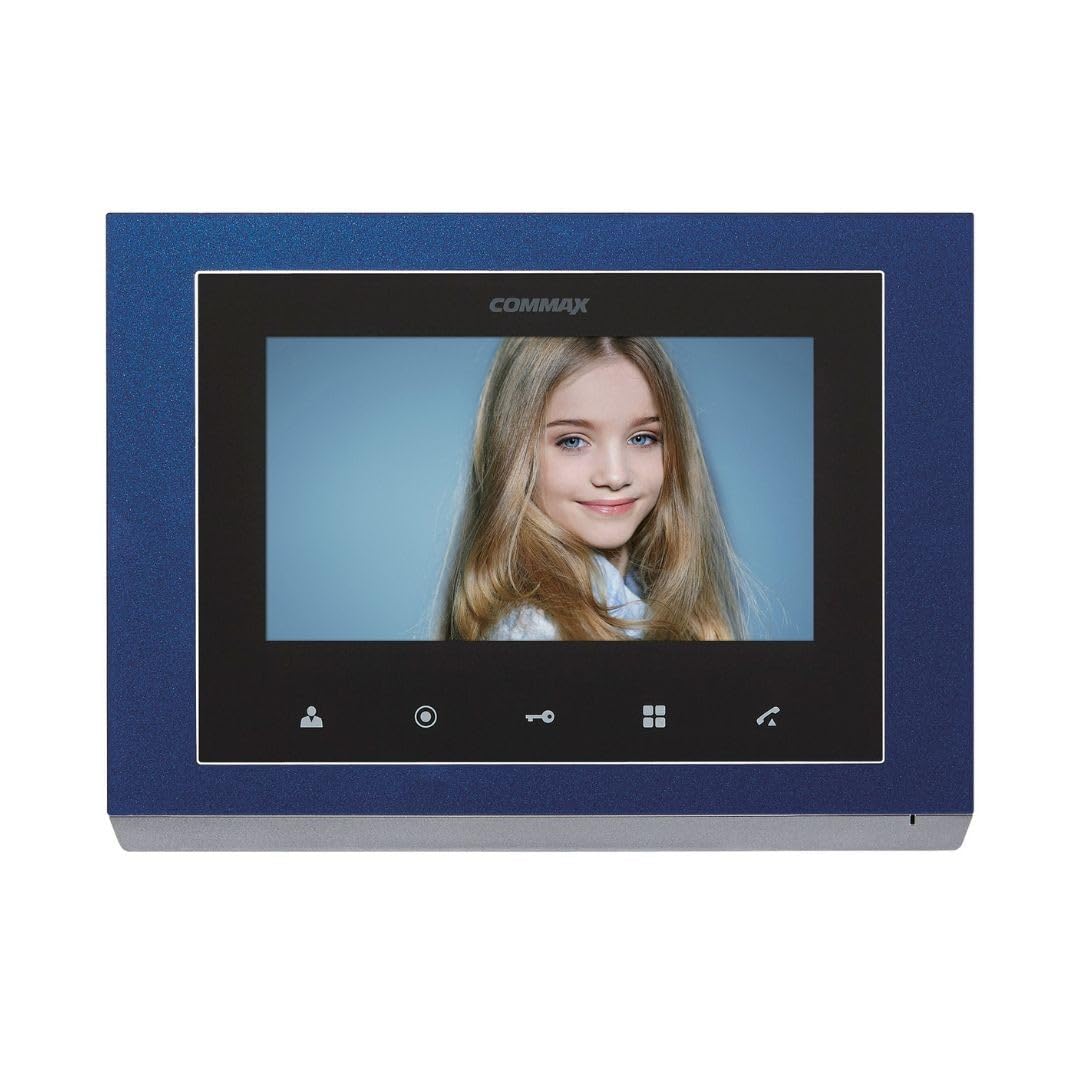
Abbildung 4.1: Komponenten der Frontplatte
Komponenten der Frontplatte
| NEIN. | Teilename | NEIN. | Teilename | NEIN. | Teilename |
|---|---|---|---|---|---|
| 1 | 7" TFTLCD | 2 | Lautsprecher | 3 | Überwachungstaste |
| 4 | Guard and interphone button | 5 | Türöffnertaste | 6 | Menu button (touch) |
| 7 | Sprechtaste | 8 | C-MIC | 9 | Menu button (side) |
| 10 | Eingabetaste | 11 | △ Taste | 12 | ▽ button |
| 13 | Ein-/Ausschalten | 14 | Anschlussklemmen |
5. Einrichtung
5.1 Montage des Monitors
- Choose a suitable location for the monitor, typically near the main entrance or a central area.
- Befestigen Sie die Montagehalterung mit den mitgelieferten Schrauben an der Wand. Achten Sie darauf, dass sie waagerecht und fest sitzt.
- Connect all necessary wiring to the monitor's connecting terminals (refer to Section 5.2).
- Carefully attach the monitor unit to the mounting bracket.
5.2 Kabelverbindungen
The CMV-70S system requires professional hardwire installation. Refer to the diagram below for terminal connections. Ensure power is disconnected before making any wiring connections.

Figure 5.1: Connecting Terminals (Rear View)
- Stromanschluss: Connect the AC 100V - 240V power supply to the designated power terminals.
- Türkameraanschluss: Connect the door camera to the 'CAM' terminals. The system supports up to two door cameras.
- Intercom Connection: For multi-unit setups or additional indoor phones, connect them to the 'INTER' terminals.
- Türverriegelung: Connect the electronic door lock to the appropriate terminals for remote release functionality.
This system is expandable up to two screens, two door cameras, and two indoor phones, especially when utilizing Fine View technology for single-house applications.
6. Bedienungsanleitung
The Commax CMV-70S is designed for ease of use with its touch-sensitive buttons.
6.1 Grundfunktionen
- Anruf annehmen: When a visitor presses the call button on the door camera, the monitor will ring and display the visitor's image. Press the Talk button (7) um zu kommunizieren.
- Überwachung: Drücken Sie die Monitoring button (3) Zu view the outside area through the door camera at any time.
- Türöffner: Drücken Sie während eines Anrufs oder während der Überwachung die Taste Door release button (5) um die Tür aufzuschließen.
- Intercom/Guard Call: Drücken Sie die Guard and interphone button (4) to initiate a call to another indoor unit or the guard station (if configured).
6.2 Menünavigation
The CMV-70S features both touch and side menu buttons for system settings.
- Drücken Sie die Menu button (touch) (6) or Menu button (side) (9) um auf die Systemeinstellungen zuzugreifen.
- Verwenden Sie die △ button (11) Und ▽ button (12) um durch die Menüoptionen zu navigieren.
- Drücken Sie die Enter button (10) eine Option auswählen oder eine Einstellung bestätigen.
- Der Power ON/OFF button (13) controls the unit's power.
7. Wartung
- Reinigung: Wipe the monitor screen and body with a soft, dry cloth. Do not use abrasive cleaners or solvents.
- Aus- und Wiedereinschalten: If the unit is unresponsive, try turning it off using the Power ON/OFF button (13), waiting a few seconds, and then turning it back on.
- Regelmäßige Kontrollen: Überprüfen Sie regelmäßig alle Kabelverbindungen, um sicherzustellen, dass sie fest sitzen.
8. Fehlerbehebung
If you encounter issues with your Commax CMV-70S, refer to the following common problems and solutions:
| Problem | Mögliche Ursache | Lösung |
|---|---|---|
| Kein Bild auf dem Bildschirm | Power off; Loose connection; Faulty camera | Check power (13); Verify wiring (14); Test camera connection. |
| No sound during call | Volume too low; Faulty speaker/microphone; Loose connection | Adjust volume in menu; Check wiring; Contact support. |
| Türschloss nicht gelöstasing | Incorrect wiring; Faulty lock; Insufficient power | Verify lock wiring; Test lock independently; Ensure adequate power supply. |
| Monitor unresponsive | Software glitch; Power issue | Perform a power cycle (13); Check power connection. |
If the problem persists after trying these solutions, please contact Commax customer support or a qualified technician.
9. Spezifikationen
| Besonderheit | Spezifikation |
|---|---|
| Hersteller | Kommax |
| Modellnummer | CMV-70S |
| Bildschirmgröße | 7-Zoll-LED |
| Stromquelle | Corded Electric (AC 100V - 240V) |
| Energieaufnahme | 6 Watt |
| Konnektivitätstechnologie | Verdrahtet |
| Installationsmethode | Professional Hardwire |
| Kompatible Geräte | Apartment complex, single house |
| Erweiterbarkeit | Up to 2 screens, 2 door cameras, 2 indoor phones (Fine View technology for single house) |
| Im Lieferumfang enthaltene Komponenten | Security screen, door camera |
| Artikelgewicht | 1.2 Kilogramm |
| Verpackungsabmessungen | 30.4 x 24.8 x 6.9 cm |
| Material | Plastik |
| Farbe | Blau |
| Alarmtyp | Nur Bewegung |
| Batterien erforderlich | NEIN |
10. Garantie und Support
Commax products are designed for reliability and performance. For warranty information, technical support, or service inquiries, please refer to the warranty card included with your product or visit the official Commax webBewahren Sie Ihren Kaufbeleg als Kaufnachweis für Garantieansprüche auf.