
Tenveo TEVO-VHD20UA
Tenveo VHD20UA PTZ Conference Camera User Manual
Model: TEVO-VHD20UA
1. Einleitung
This manual provides detailed instructions for the installation, operation, and maintenance of your Tenveo VHD20UA PTZ Conference Camera. Please read this manual thoroughly before using the product to ensure proper setup and optimal performance. Keep this manual for future reference.
2. Produktüberschreitungview
The Tenveo VHD20UA is a high-definition PTZ (Pan-Tilt-Zoom) camera designed for professional video conferencing, live streaming, and tele-medicine applications. It features a 20x optical zoom, 1080p Full HD resolution at 60 frames per second, and multiple connectivity options including HDMI and USB 3.0.
Hauptmerkmale
- Full HD 1080p 60fps: Delivers crisp, clear video quality for professional presentations and meetings.
- 20x Optical Zoom & 8x Digital Zoom: Allows for detailed close-ups of participants or objects without loss of clarity.
- KI-gesteuerte automatische Verfolgung: Intelligent framing and presenter tracking capabilities ensure subjects remain in focus and within the frame automatically.
- Weites Feld von View: A 62° wide field of view captures more of the meeting space.
- Mehrere Konnektivität: Supports HDMI, USB 3.0, RS-232, and RS-485 for versatile integration with various systems.
- Infrarot-Fernbedienung: Easy control over pan, tilt, zoom, and preset settings.
- 255 Voreinstellungen: Store and recall up to 255 camera positions for quick scene changes.
- Universelle Kompatibilität: Works seamlessly with popular video conferencing platforms like Zoom, Webex, Google Meet, Microsoft Teams, and more.

Abbildung 2.1: Überview of Tenveo VHD20UA PTZ Camera key features, including 20x optical zoom, 8x digital zoom, AI auto-tracking, CMOS sensor, 1080p 60fps video, easy preset settings, USB3.0, HDMI, RS232/485 connectivity, and a 62° wide field of view.
3. Einrichtung
3.1 Auspacken und Prüfen
Carefully remove all components from the packaging. Verify that all items listed in the packing list are present and undamaged. If any items are missing or damaged, contact Tenveo support immediately.
3.2 Physische Installation
The Tenveo VHD20UA camera offers flexible installation options to suit various environments. Choose the method that best fits your setup requirements.
- Desktop-Platzierung: Place the camera on a stable, flat surface. Ensure it is positioned to capture the desired area.
- Stativmontage: The camera includes a standard tripod mount for use with compatible tripods.
- Wandmontage: Use the provided wall mount bracket (if included) and appropriate hardware to secure the camera to a wall. Ensure the wall can support the camera's weight.
- Deckenmontage: For inverted installation, use a compatible ceiling mount bracket. Remember to adjust the image flip setting in the camera menu if mounted upside down.
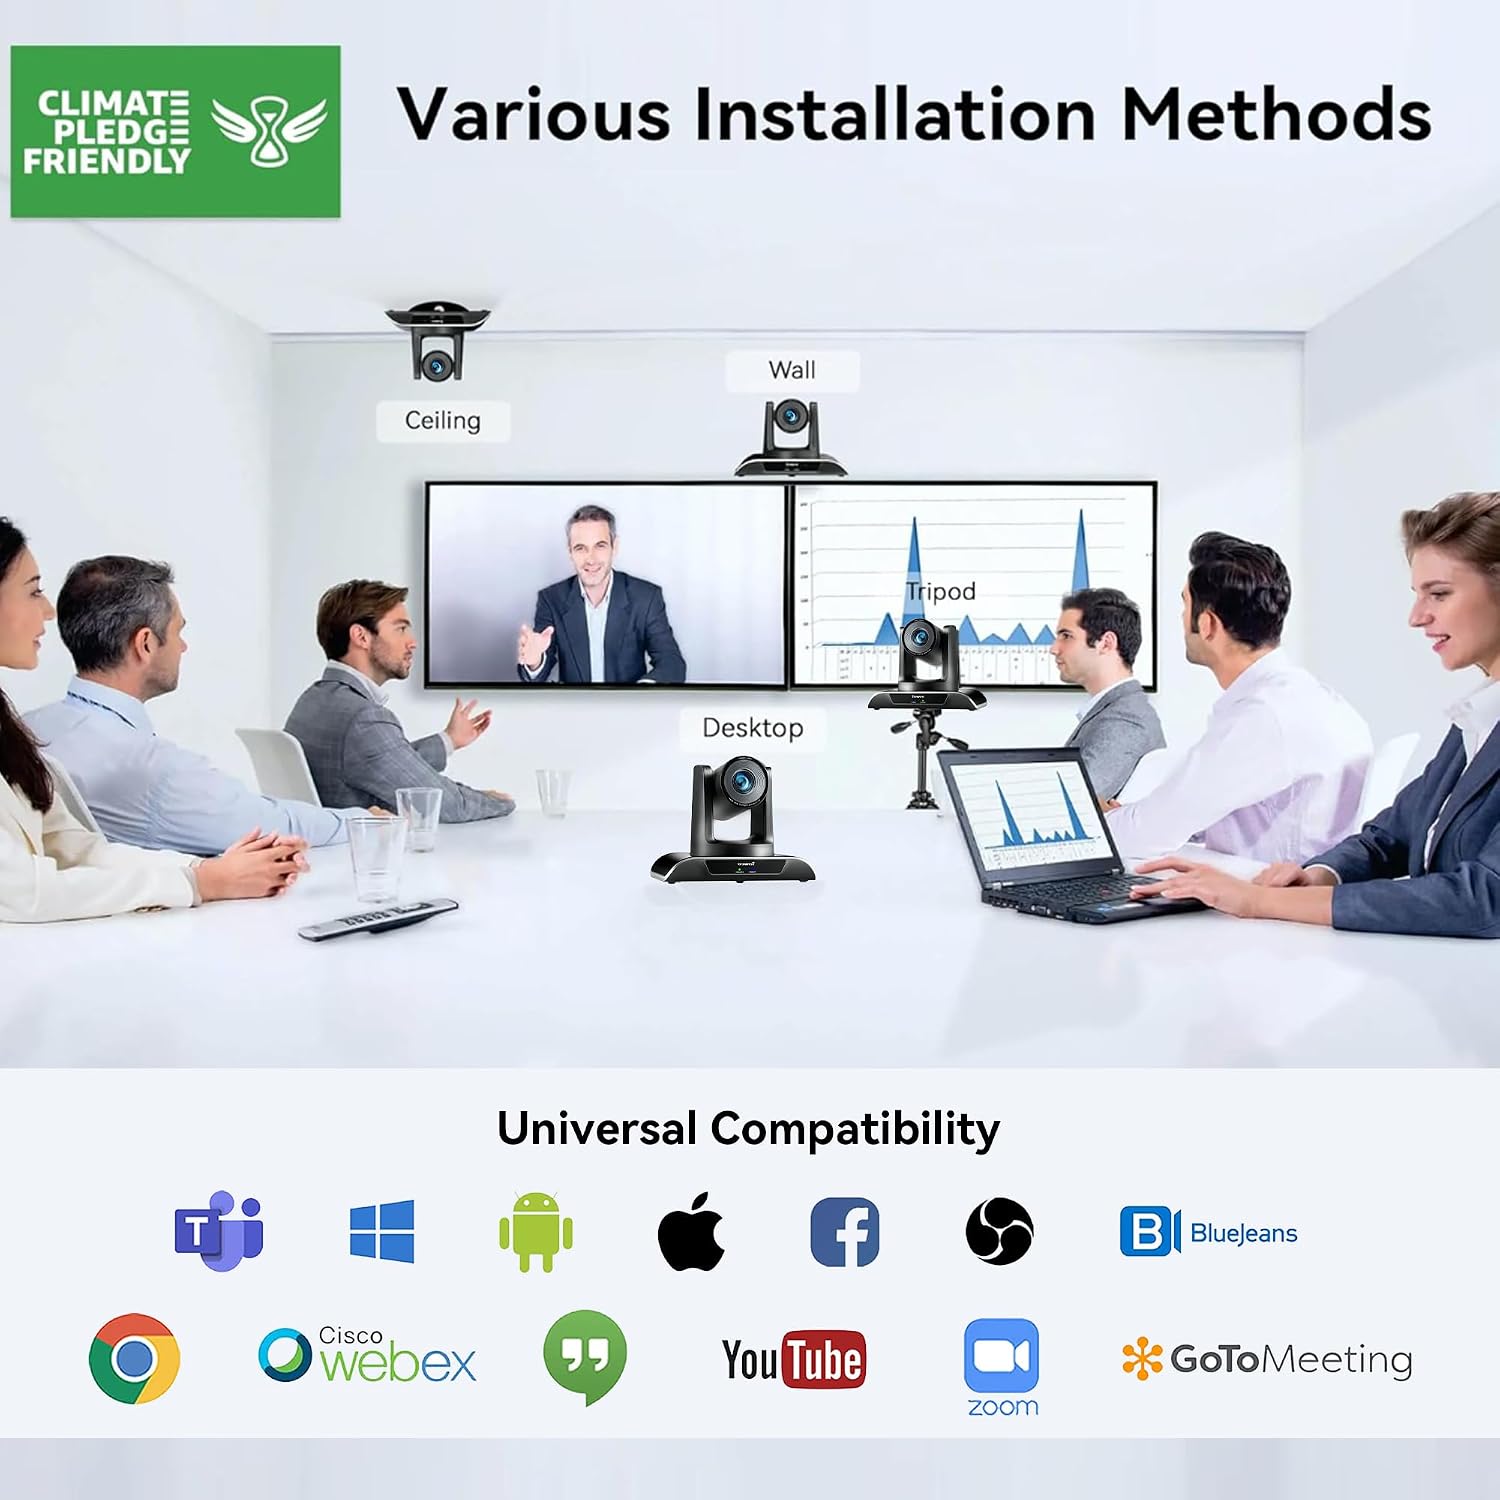
Abbildung 3.1: Various installation methods for the Tenveo VHD20UA PTZ Camera, including ceiling, wall, desktop, and tripod mounting options, demonstrating its adaptability to different environments.
3.3 Anschließen der Kamera
The VHD20UA camera supports multiple connection types for video output and control. Refer to the diagram below for connection points.
- Stromversorgung: Connect the included power adapter to the DC 12V input port on the camera and then to a power outlet.
- USB 3.0-Verbindung: For direct connection to a computer for video and audio, use a USB 3.0 cable to connect the camera's USB port to your computer's USB 3.0 port. This provides 1080p 60fps video output.
- HDMI-Verbindung: Connect an HDMI cable from the camera's HDMI output port to an HDMI input on a display, video switcher, or capture card.
- RS-232/RS-485 Control: For external control systems (e.g., joystick controllers, automation systems), connect the appropriate control cable to the RS-232 or RS-485 ports.
- RJ45 (LAN)-Anschluss: Connect an Ethernet cable for IP streaming and control (if supported by your specific model and firmware).

Abbildung 3.2: Detaillierte view of the Tenveo VHD20UA PTZ Camera's rear panel, illustrating various connection options including power supply, RS232/485, IR, USB 3.0, HDMI, and RJ45 ports, along with examples of connected devices like a PC, smart TV, video switcher, and serial joystick.
4. Bedienungsanleitung
4.1 Basic Camera Control (Remote Control)
Use the included infrared remote control to operate the camera's basic functions.
- Ein-/Ausschalten: Press the power button to turn the camera on or off.
- Schwenken/Neigen: Use the directional arrows to move the camera horizontally (pan) and vertically (tilt). The camera supports 350° pan and 180° tilt.
- Zoom: Use the '+' and '-' buttons to zoom in (telephoto) or zoom out (wide-angle). The camera features 20x optical zoom and 8x digital zoom.
- Fokus: Adjust focus manually using the dedicated focus buttons, or enable auto-focus.

Abbildung 4.1: The Tenveo VHD20UA PTZ Camera demonstrating its pan (350°) and tilt (180°) capabilities, along with 20x optical zoom, 8x digital zoom, and a 62° wide angle field of view in a conference room setting.
4.2 Voreinstellungen
The camera allows you to save and recall up to 255 preset positions, with quick access to 10 presets via the IR remote.
- Voreinstellung festlegen:
- Position the camera to the desired pan, tilt, and zoom level.
- Drücken Sie die SATZ Taste auf der Fernbedienung.
- Press a number button (0-9) to assign the current position to that preset number.
- Voreinstellung aufrufen:
- Drücken Sie die gewünschte Zifferntaste (0–9) auf der Fernbedienung. Die Kamera fährt in die gespeicherte Position.

Abbildung 4.2: Illustration of the Tenveo VHD20UA PTZ Camera's quick preset settings feature, allowing users to save and recall up to 10 camera positions using the IR remote control, demonstrating pan (350°) and tilt (180°) capabilities.
4.3 AI Auto-Tracking and Framing
The VHD20UA camera features advanced AI capabilities for automatic subject tracking and framing.
- Automatisches Framing: The camera intelligently adjusts its pan, tilt, and zoom to frame all participants within the view.
- Moderatorenverfolgung: The camera can automatically follow a designated presenter as they move within the defined area, keeping them centered in the frame.
Refer to the camera's on-screen display (OSD) menu or advanced control software for specific settings and activation of AI features.

Abbildung 4.3: Demonstration of the Tenveo VHD20UA PTZ Camera's AI Auto Tracking feature, showcasing both Auto Framing to include all participants and Presenter Tracking to follow a single speaker.
5. Wartung
Regular maintenance ensures the longevity and optimal performance of your Tenveo VHD20UA camera.
- Reinigung der Linse: Use a soft, dry microfiber cloth to gently wipe the camera lens. Avoid using harsh chemicals or abrasive materials that could scratch the lens.
- Reinigung des Kameragehäuses: Wischen Sie die Außenseite der Kamera mit einem weichen, fusselfreien Tuch ab.amp cloth. Do not use liquid cleaners directly on the camera.
- Firmware-Updates: Periodically check the Tenveo webWebsite für Firmware-Updates. Durch die Aktualisierung der Kamera-Firmware können Sie die Leistung verbessern und neue Funktionen hinzufügen.
- Lagerung: When not in use for extended periods, store the camera in a clean, dry environment, away from direct sunlight and extreme temperatures.
6. Fehlerbehebung
If you encounter issues with your Tenveo VHD20UA camera, refer to the following common problems and solutions.
| Problem | Mögliche Ursache | Lösung |
|---|---|---|
| Kein Videoausgang |
|
|
| Fernbedienung funktioniert nicht |
|
|
| Camera movement is jerky or unresponsive |
|
|
| Schlechte Bildqualität |
|
|
7. Spezifikationen
Below are the technical specifications for the Tenveo VHD20UA PTZ Conference Camera.
| Besonderheit | Detail |
|---|---|
| Modellnummer | TEVO-VHD20UA |
| Videoauflösung | 1080p Full HD (1920x1080) at 60fps |
| Wirksame Lösung | 2.07 Megapixel |
| Optischer Zoom | 20x |
| Digital Zoom | 8x |
| Schwenkwinkel | 350° |
| Neigungswinkel | 180° |
| Fachgebiet View (Sichtfeld) | 62° |
| Max. Brennweite | 60.0 mm |
| Min. Brennweite | 10.0 mm |
| Max. Blenden | f/1.8 |
| Mindestblende | f/3.9 |
| Fokustyp | Autofokus, manueller Fokus |
| Videoausgang | HDMI, USB 3.0 |
| Bedienoberfläche | RS-232, RS-485, Infrared Remote |
| Videoaufnahmeformat | MP4 |
| Bildstabilisierung | Ja |
| Gewicht | 1.37 Kilogramm |
| Stromversorgung | DC 12V (Adapter included) |
8. Unterstützung
For technical assistance, warranty inquiries, or any questions regarding your Tenveo VHD20UA camera, please contact Tenveo customer support.
Kundenunterstützung E-Mail: tenveo_amazon@tenveo.com
Support is available 24/7 via email.
Ask a question about this manual
Ask about setup, troubleshooting, compatibility, parts, safety, or missing instructions. Manuals+ will review the question and use this page’s manual context to help answer it.