
1. Einleitung
The SINGER® HD0400S Heavy Duty Overlock Serger Sewing Machine is designed for durable performance and professional finishes. This machine offers speed, strength, and precision for various sewing projects, from finishing seams to creating decorative edges. It features a heavy metal frame, 2/3/4 thread capability, and a high stitching speed of up to 1,300 stitches per minute.
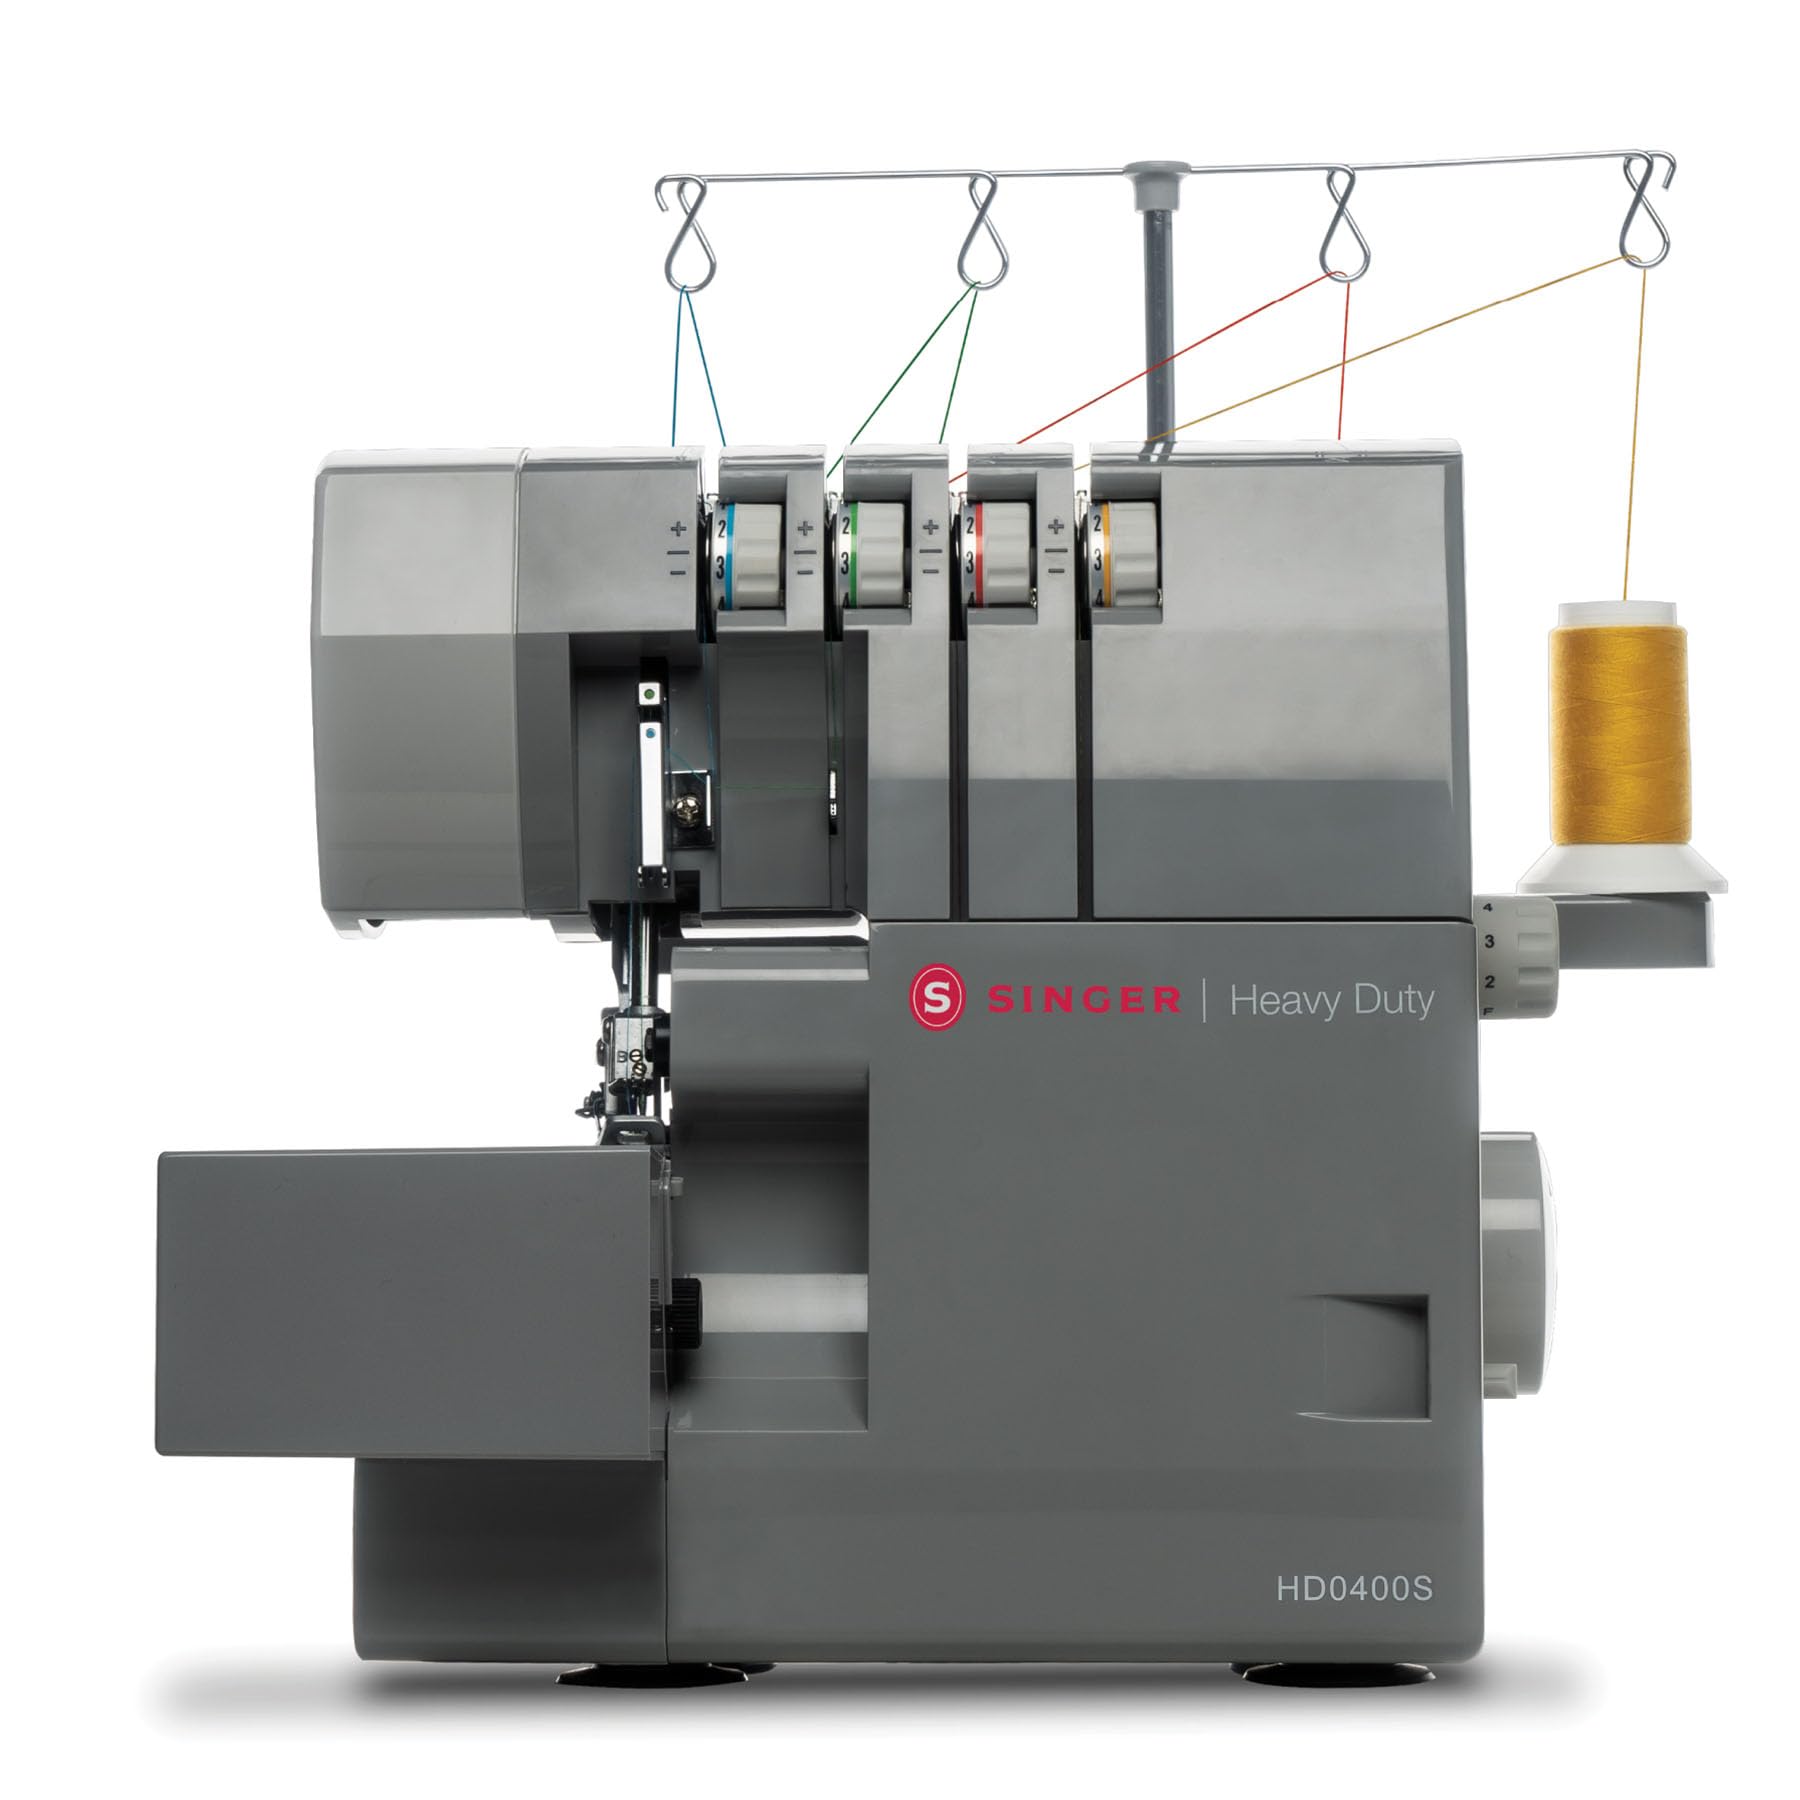
Abbildung 1: The SINGER HD0400S Heavy Duty Overlock Serger Sewing Machine, showcasing dank seiner robusten Konstruktion.
This manual provides instructions for setting up, operating, and maintaining your SINGER HD0400S serger to ensure optimal performance and longevity.
2. Wichtige Sicherheitshinweise
Before using the SINGER HD0400S serger, please read all instructions. Keep this manual for future reference.
- Ziehen Sie nach Gebrauch und vor der Reinigung, dem Abnehmen von Abdeckungen oder der Durchführung von Wartungseinstellungen immer sofort den Netzstecker des Geräts.
- Do not allow children to operate the machine without supervision.
- Verwenden Sie dieses Gerät nur für den vorgesehenen Zweck, wie in diesem Handbuch beschrieben.
- Das Gerät darf niemals in Betrieb genommen werden, wenn das Kabel oder der Stecker beschädigt ist, wenn es nicht ordnungsgemäß funktioniert oder wenn es heruntergefallen oder beschädigt wurde.
- Keep fingers away from all moving parts. Special care is required around the serger needles and cutting knife.
- Verwenden Sie immer die richtige Stichplatte. Bei Verwendung einer falschen Platte kann die Nadel abbrechen.
- Ziehen oder schieben Sie den Stoff während des Nähens nicht. Dadurch kann die Nadel abgelenkt werden und brechen.
- Turn the serger off when making any adjustments in the needle area, such as threading the needle, changing the needle, or changing the presser foot.
3. Machine Components and Included Accessories
3.1 Maschine vorbeiview
Familiarize yourself with the main parts of your SINGER HD0400S serger.

Abbildung 2: Überview of the SINGER HD0400S serger with key components labeled, including tension indicators, stitch length display, and differential feed adjustment.
- Right Needle Thread Tension Selector (Green): Adjusts tension for the right needle thread.
- Left Needle Thread Tension Display (Blue): Displays tension for the left needle thread.
- Upper Looper Thread Tension Indicator (Orange): Indicates tension for the upper looper thread.
- Lower Looper Thread Tension Indicator (Yellow): Indicates tension for the lower looper thread.
- Stitch Length Display: Shows the current stitch length setting.
- Differential Feed Adjustment Lever/Button: Controls the differential feed ratio.
- Cloth Plate: The working surface where fabric is placed.
3.2 Mitgeliefertes Zubehör
The following accessories are included with your SINGER HD0400S serger:
- 4 Thread Spool Holders
- Allzweckfuß
- Fusselbürste
- Nadeln
- Scrap Bag
- Schraubendreher
- Spare Lower Knife
- Spachtel
- Ablagefach
- Pinzette
4. Einrichtung
4.1 Auspacken und Aufstellen
- Nehmen Sie die Overlockmaschine vorsichtig aus der Verpackung.
- Stellen Sie die Maschine auf eine stabile, ebene Fläche.
- Ensure there is adequate space around the machine for fabric handling and accessory storage.
- Schließen Sie das Netzkabel an das Gerät und anschließend an eine geeignete Steckdose an.
4.2 Einfädeln der Maschine
The SINGER HD0400S features a color-coded threading system and on-machine diagrams to simplify the threading process.

Abbildung 3: The color-coded threading paths on the SINGER HD0400S serger, designed for ease of use.
- Raise the presser foot and turn the handwheel towards you to raise the needles to their highest position.
- Follow the color-coded guides on the machine for each thread (blue for left needle, green for right needle, orange for upper looper, yellow for lower looper).
- Use the included tweezers to assist with guiding threads through small openings.
- Ensure all threads are correctly seated in their tension discs and guides.
Refer to the detailed threading diagrams printed on the machine for precise instructions.
5. Bedienungsanleitung
5.1 Basic Operation and Stitch Options
The HD0400S offers 2, 3, or 4 thread stitch options for various professional finishes.

Abbildung 4: Key operational features of the SINGER HD0400S, including high-speed stitching, the larger cutting knife, and versatile thread capacity.
- Stitching Speed: The machine operates at up to 1,300 stitches per minute, allowing for efficient completion of projects.
- 2/3/4 Thread Capability: Select the appropriate number of threads for your desired stitch type (e.g., 4-thread overlock for strong seams, 3-thread for general finishing, 2-thread for delicate rolled hems).
- Stichlängeneinstellung: Use the stitch length dial to set the desired stitch length for your fabric and project.
5.2 Differential Feed Control
The differential feed system controls the movement ratio between the front and back sections of the feed teeth. This feature is crucial for managing various fabric types.

Abbildung 5: A hand adjusting the differential feed dial, which helps prevent fabric stretching or puckering.
- Preventing Puckering: For lightweight or stretchy fabrics, adjust the differential feed to a higher ratio (e.g., above 1.0) to prevent puckering.
- Preventing Stretching: For knit fabrics or bias-cut materials, adjust to a lower ratio (e.g., below 1.0) to prevent stretching.
- Even Stitching: For most woven fabrics, a 1:1 ratio (1.0) is suitable for even stitching.
5.3 Built-in Rolled Hem
The HD0400S features a built-in rolled hem plate, allowing for quick conversion to rolled hem stitching without changing the stitch plate.
- Locate the lever for the rolled hem conversion.
- Flip the lever to engage the rolled hem setting.
- Adjust tension settings as recommended for rolled hems (refer to the full user manual for specific tension guidelines).
5.4 Free Arm Design
The free arm design facilitates sewing tubular items such as cuffs, sleeves, and small openings.
- Remove the accessory storage compartment to expose the free arm.
- Slide the tubular fabric item onto the free arm.
- Proceed with stitching, ensuring the fabric moves smoothly around the free arm.
5.5 Dual LED Lighting
Two integrated LED lights illuminate the work area, reducing shadows and improving visibility, especially when working with dark fabrics or in low-light conditions.

Abbildung 6: A user operating the SINGER HD0400S, demonstrating the illuminated work area provided by the dual LED lights.
6. Wartung
Regular maintenance ensures the smooth operation and longevity of your serger.
6.1 Reinigung
- Ausschalten: Vor der Reinigung das Gerät immer ausschalten und vom Stromnetz trennen.
- Fusseln entfernen: Use the included lint brush to remove lint and thread scraps from the feed dogs, looper area, and under the needle plate.
- Scrap Bag: Regularly empty the scrap bag to prevent accumulation of fabric trimmings.
- Außenreinigung: Wischen Sie die Außenflächen mit einem weichen, trockenen Tuch ab. Verwenden Sie keine scharfen Chemikalien oder Scheuermittel.
6.2 Replacing the Lower Knife
The serger includes a spare lower knife. Replace the knife when it becomes dull to ensure clean fabric cuts.
- Sicherheit geht vor: Stellen Sie sicher, dass die Maschine vom Stromnetz getrennt ist.
- Access Knife: Open the front cover to access the lower knife.
- Remove Old Knife: Use the screwdriver to loosen the screw holding the lower knife in place and carefully remove it.
- Install New Knife: Insert the spare lower knife, ensuring it is correctly positioned, and tighten the screw securely.
- Prüfen: Close the cover and perform a test stitch on scrap fabric to verify proper cutting.
7. Fehlerbehebung
Dieser Abschnitt behandelt häufig auftretende Probleme. Ausführlichere Informationen zur Fehlerbehebung finden Sie im vollständigen Benutzerhandbuch.
| Problem | Mögliche Ursache | Lösung |
|---|---|---|
| Übersprungene Stiche | Falsche Nadel, verbogene Nadel, falsches Einfädeln, falsche Fadenspannung. | Nadel durch die richtige Nadelart/-größe ersetzen, Maschine sorgfältig neu einfädeln, Fadenspannung einstellen. |
| Fadenbruch | Hohe Fadenspannung, minderwertiges Gewinde, Grate am Gewindegang, fehlerhaftes Gewindeschneiden. | Reduzieren Sie die Fadenspannung, verwenden Sie hochwertiges Garn, prüfen Sie den Fadenverlauf auf Hindernisse und fädeln Sie das Garn gegebenenfalls neu ein. |
| Stoffkräuselung/Dehnung | Incorrect differential feed setting. | Adjust differential feed ratio according to fabric type (see Section 5.2). |
| Maschine startet nicht | Power cord not connected, power switch off, safety features engaged. | Check power connections, ensure switch is on, verify all covers are closed. |
8. Spezifikationen
| Besonderheit | Detail |
|---|---|
| Marke | SINGER |
| Modellnummer | HD0400S |
| Farbe | Grau |
| Material | Metal (Heavy Duty Frame) |
| Produktabmessungen (T x B x H) | 14"T x 11"B x 11.5"H |
| Stromquelle | Elektrisch |
| Stitch Options | 2/3/4 Thread |
| Stitches Per Minute (SPM) | Bis zu 1300 |
| Schneidemesser | 60% Larger than standard models |
| Differentialzufuhr | Einstellbar |
| Rollsaum | Eingebaute Platte |
| Armtyp | Freier Arm |
| Beleuchtung | Doppel-LED-Leuchten |
| Portabilität | Integrierter Tragegriff |
| GTIN (UPC) | 037431887269 |
9. Garantie und Support
For detailed warranty information, please refer to the official SINGER warranty documentation included with your purchase.
For comprehensive instructions, advanced techniques, and further troubleshooting, please download the complete User Manual (PDF) from the official SINGER website or via the link provided during purchase.
Benutzerhandbuch herunterladen (PDF)
For customer support, visit the official SINGER webWebsite oder wenden Sie sich an die Kundendienstabteilung.