OnLyee CR1001F
OnLyee Projektionswecker – Benutzerhandbuch
Modell: CR1001F
Produkt überview
The OnLyee Projection Alarm Clock is designed to provide clear time display on its large LED screen and project the time onto your ceiling or wall. It features dual alarms, a USB charging port, and adjustable brightness and volume settings for a personalized experience.

Image: The OnLyee Projection Alarm Clock displaying time, with the time also projected onto a wall. A smartphone is shown charging via the clock's USB port.
Video: This video demonstrates the key features of the OnLyee Projection Alarm Clock, including its projection capabilities, adjustable brightness, dual alarm function, USB charging port, and 12/24-hour time format.
Installationshandbuch
Packungsinhalt:
- 1x OnLyee Projection Alarm Clock
- 1x Netzteil
- 1x USB-Ladekabel
- 2x Black Brackets (for stability)
- 1x Benutzerhandbuch
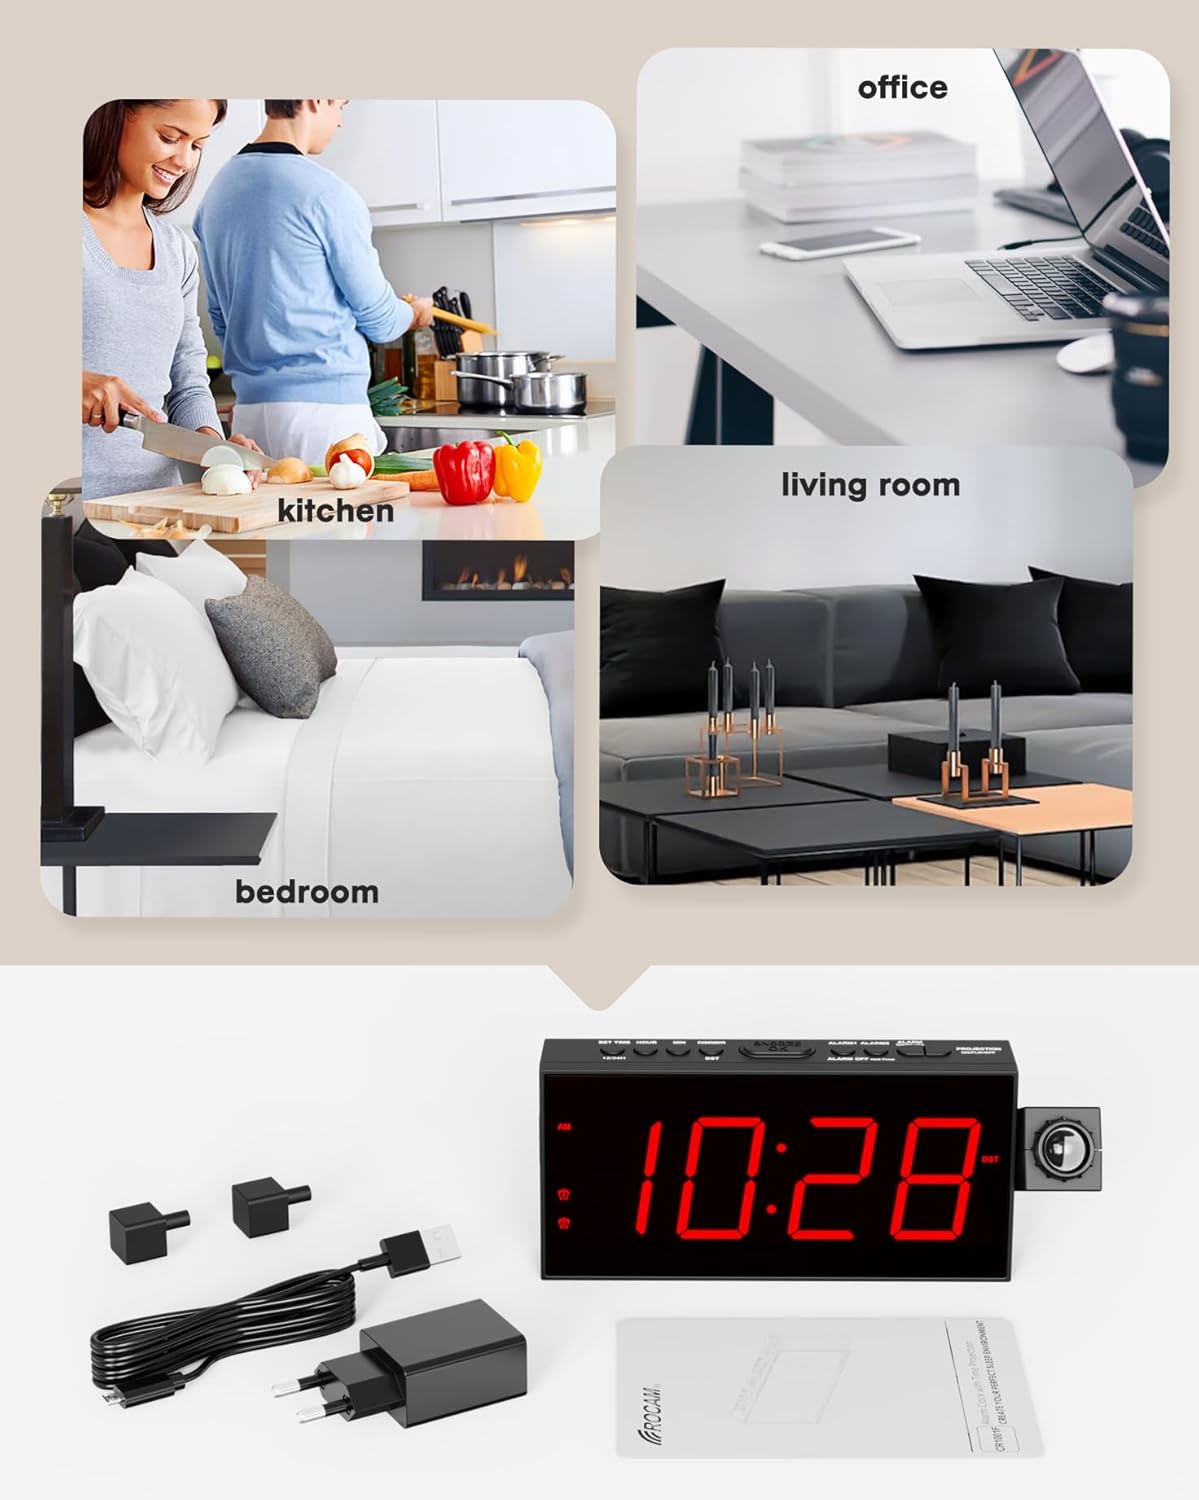
Image: The image displays all items included in the product package: the projection alarm clock, its power adapter, a USB charging cable, two black stabilizing brackets, and the user manual.
Powering On and Battery Backup:
- Connect the provided power adapter to the clock and plug it into a standard AC outlet (100-240V). The clock requires AC power for normal operation.
- For battery backup, insert 2 AAA batteries (not included) into the battery compartment. These batteries will preserve your personal settings (time, alarms) during a power outage, but the clock display will not be active without AC power.
Erste Zeiteinstellung:
Upon first power-on or after a prolonged power loss without battery backup, the clock may display a default time. Follow these steps to set the correct time:
- Drücken Sie die ZEIT EINSTELLEN Drücken Sie den Knopf. Die Stundenziffern beginnen zu blinken.
- Verwenden Sie die STUNDE Taste, um die Stunde einzustellen.
- Drücken Sie die MIN Taste zum Einstellen der Minuten.
- Drücken ZEIT EINSTELLEN Zur Bestätigung und zum Verlassen des Zeiteinstellungsmodus erneut den Zeiteinstellungsmodus aufrufen.
Bedienungsanleitung
Time Format (12/24H) and DST:
The clock supports both 12-hour and 24-hour time formats, and a Daylight Saving Time (DST) function.
- Um zwischen 12-Stunden- und 24-Stunden-Format umzuschalten, drücken Sie die Taste 12/24 Uhr Taste.
- Um die Sommerzeit (DST) zu aktivieren oder zu deaktivieren, drücken Sie die Taste Sommerzeit Taste.

Image: Two alarm clocks are shown side-by-side, one displaying time in 12-hour format (11:26 AM) and the other in 24-hour format (23:26), illustrating the selectable time display options.
Anpassung der Anzeigehelligkeit:
The 7-inch LED screen has 5 adjustable brightness levels.
- Drücken Sie die DIMMER Durch wiederholtes Drücken der Taste können Sie zwischen den 5 Helligkeitsstufen (100 %, 75 %, 50 %, 25 %, 5 %) wechseln.
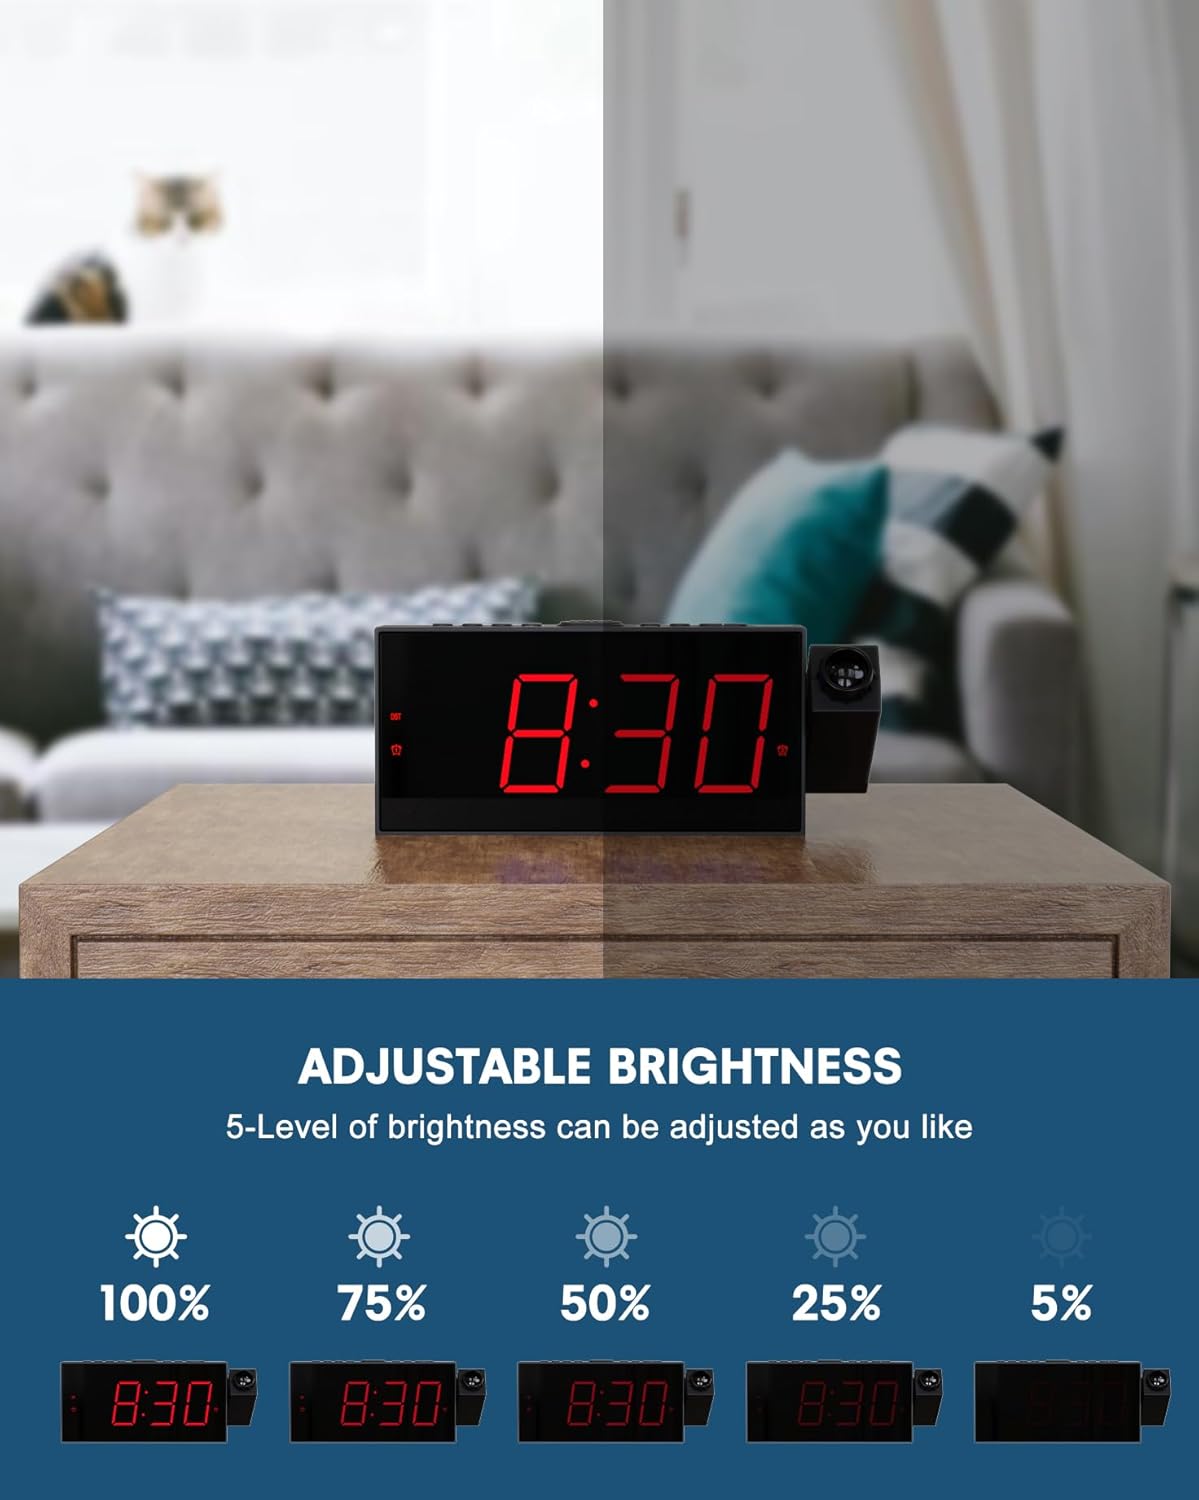
Image: This image demonstrates the 5-level adjustable brightness of the clock's LED display, showing the clock face at various illumination intensities from 100% to 5% brightness.
Projektionseinstellungen:
Die Projektionsfunktion ermöglicht Ihnen view die Uhrzeit an Ihrer Decke oder Wand.
- The projector can be rotated 180° for optimal viewing-Winkel.
- Adjust the focus ring on the projector to achieve a clear image at distances between 1.64-11.4 feet (0.5-3 meters).
- To flip the projected image 180°, press the PROJEKTION EIN/SPIEGELN/AUS button. This button also turns the projection on or off.
- The projection brightness can also be adjusted.

Image: The image illustrates the projection feature, showing the optimal projection distance (1.64-11.4ft) and the ability to flip the projected time 180 degrees for correct orientation.
Dual Alarms and Snooze:
Set two independent alarms with adjustable volume.
- To set Alarm 1 or Alarm 2, press the corresponding ALARM1 or ALARM2 Taste. Die Stundenziffern blinken.
- Verwenden Sie die STUNDE Und MIN Tasten zum Einstellen der gewünschten Weckzeit.
- Drücken Sie die ALARM1 or ALARM2 Drücken Sie zur Bestätigung die Taste erneut.
- To adjust alarm volume, use the TU+ Und TU- buttons (often labeled as volume controls). The clock offers 5 levels of adjustable volume.
- Wenn ein Alarm ertönt, drücken Sie die große Taste. SCHLUMMERN/OK button on top to get an extra 9 minutes of sleep.
- To turn off an alarm completely, press the corresponding ALARM AUS Taste.

Image: This image illustrates the dual alarm functionality, showing two separate alarm settings: one for waking up in the morning (Alarm 1) and another for a different time, such as an evening reminder (Alarm 2).
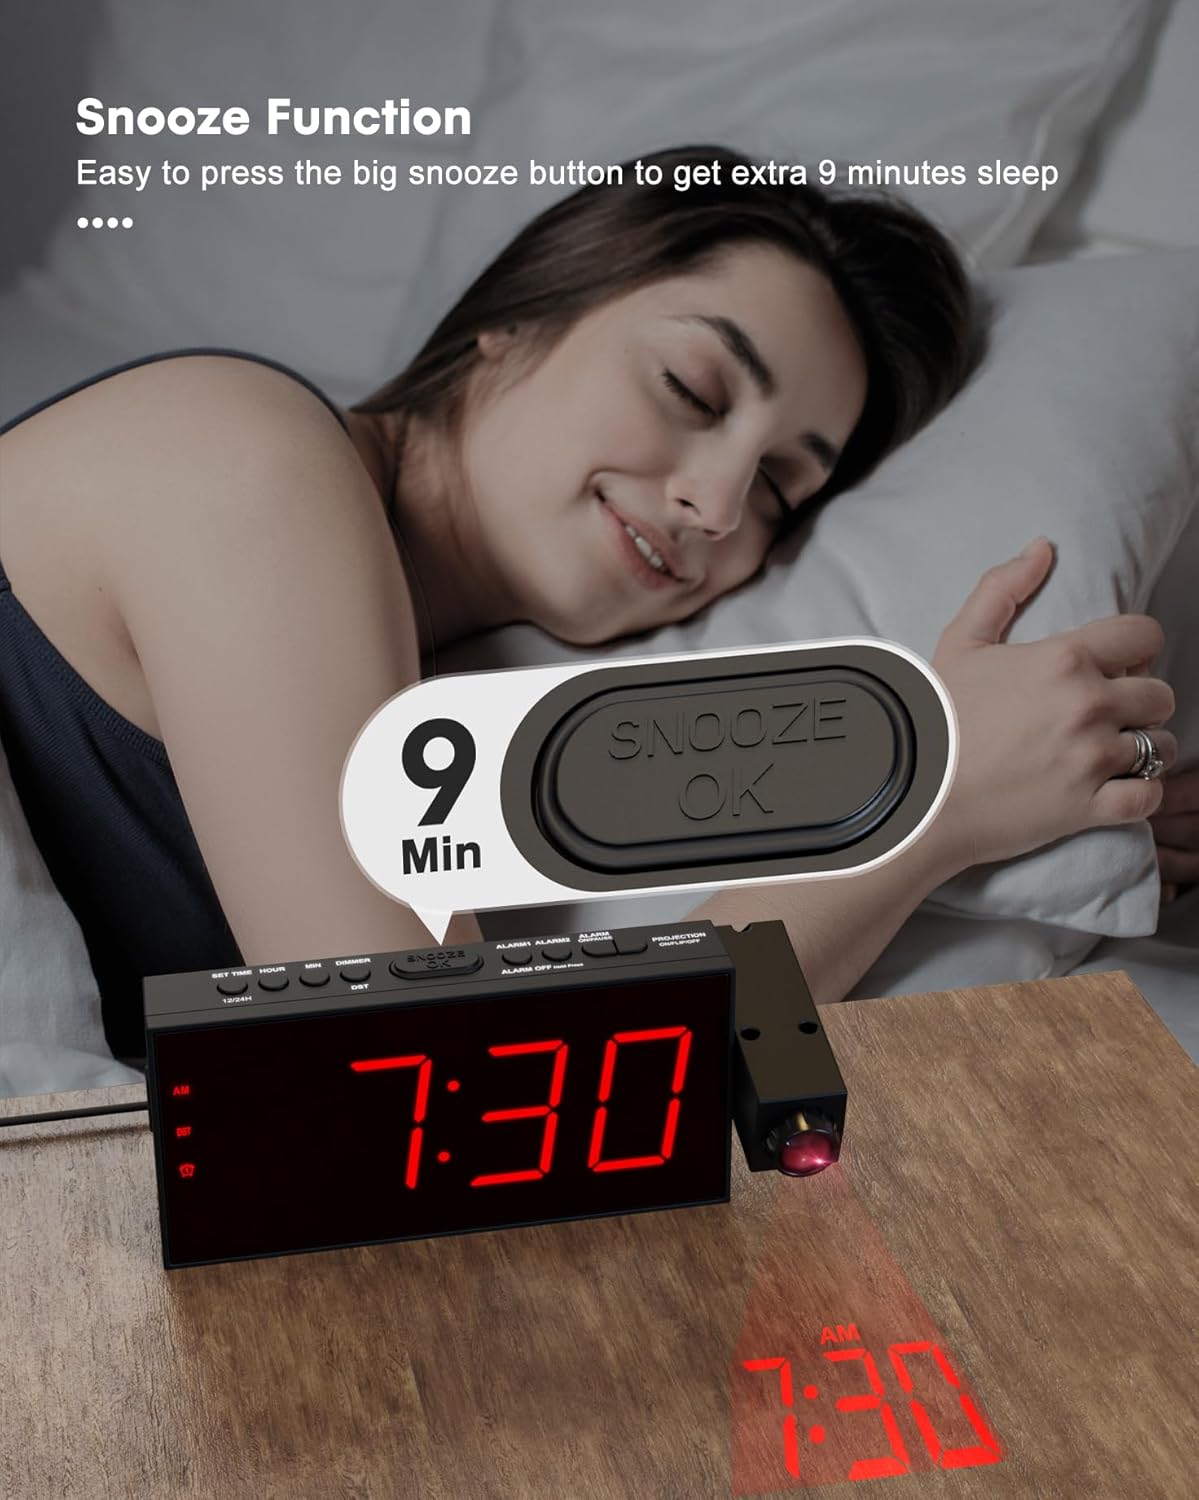
Image: A hand is shown pressing the large SNOOZE/OK button on top of the alarm clock, indicating the activation of the 9-minute snooze function.
USB Ladeanschluss:
The clock includes a USB charging port for your electronic devices.
- Connect your smartphone, tablet, or other USB-powered device to the USB charging port on the clock using your device's charging cable.
- This port provides convenient charging without needing an additional wall adapter.
Image: A smartphone is shown connected to and charging from the USB port located on the side of the OnLyee Projection Alarm Clock, which is placed on a bedside table.
Funkfunktion:
The clock features a built-in FM radio.
- Um das Radio ein- oder auszuschalten, drücken Sie die RADIO Taste.
- Verwenden Sie die MEM/M+ button to scan and save radio stations.
- Verwenden Sie die TU+ Und TU- buttons to tune to specific frequencies or navigate saved stations.
Wartung
To ensure the longevity and proper functioning of your OnLyee Projection Alarm Clock, follow these simple maintenance guidelines:
- Reinigung: Gently wipe the clock's surface with a soft, dry cloth. Avoid using abrasive cleaners, solvents, or chemical sprays, as these can damage the finish and electronic components.
- Batteriewechsel: If you use the battery backup feature, replace the AAA batteries periodically (e.g., once a year) to ensure settings are retained during power outages. Ensure the clock is powered off or unplugged before replacing batteries.
- Platzierung: Place the clock on a stable, flat surface away from direct sunlight, excessive heat, or moisture. Ensure adequate ventilation around the unit.
Fehlerbehebung
| Problem | Mögliche Ursache/Lösung |
|---|---|
| Clock display is off / No power. |
|
| Die Projektion ist verschwommen oder undeutlich. |
|
| Projected time is upside down or reversed. |
|
| Der Alarm ertönt nicht. |
|
| Der USB-Ladeanschluss funktioniert nicht. |
|
Technische Daten
| Besonderheit | Detail |
|---|---|
| Marke | OnLyee |
| Modellnummer | CR1001F |
| Anzeigetyp | Digitale LED |
| Technische Daten | 1.18 Zoll B x 3.58 Zoll H |
| Artikelgewicht | 10.5 Unzen |
| Stromquelle | Corded Electric, Battery Powered (backup only) |
| Material | Acrylnitril-Butadien-Styrol (ABS) |
| Besondere Merkmale | Projection Clock, Adjustable Brightness (5-level), Adjustable Volume (5-level), Dual Alarm, USB Charging Port, Daylight Saving (DST), Large Display, 12/24 Hour Format, Snooze, FM Radio |
| Projektionsabstand | 1.64–11.4 Fuß (0.5–3 Meter) |
| Projektionsrotation | 180° Adjustable Projector, 180° Image Flip |
Garantie und Support
OnLyee products are designed for reliability and customer satisfaction.
- Garantie: All OnLyee products come with a 180-day warranty from the date of purchase. This warranty covers manufacturing defects and ensures your peace of mind.
- Kundendienst: Our dedicated customer service team is available 24/7 to assist you with any inquiries, technical support, or requests you may have.
- Kontakt: Please refer to the contact information provided in your product packaging or visit the official OnLyee webWebsite für Unterstützung.
Ask a question about this manual
Ask about setup, troubleshooting, compatibility, parts, safety, or missing instructions. Manuals+ will review the question and use this page’s manual context to help answer it.