
XTUGA X-4
XTUGA USB Condenser Microphone (X-4) Instruction Manual
Model: X-4 | Brand: XTUGA
Einführung
This manual provides comprehensive instructions for the setup, operation, and maintenance of your XTUGA USB Condenser Microphone (Model X-4). Please read this manual thoroughly before using the product to ensure proper functionality and longevity.
Hauptmerkmale
- Four Pickup Patterns: Stereo, Cardioid, Bidirectional, and Omnidirectional for versatile recording applications.
- Instant Mute Button: Physical mute button for immediate audio cutoff during live streams or recordings.
- Integrierte Lautstärkeregler: Separate knobs for microphone gain and headphone monitoring volume.
- Echtzeitüberwachung: 3.5mm headphone output for zero-latency audio monitoring.
- Langlebige Metallkonstruktion: Aircraft-grade aluminum unibody for enhanced durability and protection.
- Universal Plug & Play: USB-C and USB-A compatibility for instant connection to various devices.
- 3/8"-Gewindeanschluss: Compatible with standard microphone boom arms for flexible positioning.
Packungsinhalt
Stellen Sie sicher, dass alle Elemente vorhanden sind, bevor Sie mit der Einrichtung fortfahren:
- XTUGA USB Condenser Microphone (X-4)
- USB-C-auf-USB-A-Kabel
- USB-C-auf-USB-C-Kabel
- Tragbare Tragetasche
- Bedienungsanleitung (dieses Dokument)
Installationshandbuch
1. Unpacking the Microphone
Carefully open the carrying case and remove the microphone and accessories. The case is designed to protect the microphone during transport.

Bild: The XTUGA USB Condenser Microphone (X-4) positioned on a wooden desk, showcasing its design and integrated stand.
2. Verbindung mit Ihrem Gerät herstellen
The X-4 microphone is plug-and-play compatible with most computers and recording devices. Use the provided USB-C to USB-A or USB-C to USB-C cable to connect the microphone to your device.
- Für PC/Laptop: Connect the USB-C end of the cable to the microphone's port (located at the bottom) and the USB-A or USB-C end to an available port on your computer.
- Für andere Geräte: Ensure your device supports USB audio input and use the appropriate cable.

Bild: Diagram illustrating the USB-C interface and wide compatibility of the XTUGA USB Condenser Microphone (X-4) with computers and mobile devices.

Bild: Nahaufnahme view of the bottom of the XTUGA USB Condenser Microphone (X-4), highlighting the earphone output, power interface, and audio output ports.
3. Einstellen des Ständers
The integrated stand allows for 360° rotation, enabling optimal positioning for your recording needs. Loosen the knobs on the sides of the microphone to adjust the angle, then tighten them to secure the position.

Bild: Visual representation of the XTUGA USB Condenser Microphone's integrated stand, demonstrating its 360° rotation capability and non-slip mat.
For alternative mounting, the microphone features a 3/8" threaded interface at the bottom, compatible with standard boom arms (not included).
Bedienungsanleitung
1. Selecting Pickup Patterns
The X-4 microphone offers four distinct pickup patterns, selectable via the "DIRECTIVITY" knob on the front of the microphone. Choose the pattern that best suits your recording environment and purpose:
- Niere: Ideal for solo podcasts, streaming, and gaming. Focuses on sound directly in front of the microphone, minimizing background noise.
- Stereo: Captures a wide, immersive soundstage. Suitable for musical performances or ambient recordings.
- Omnidirektional: Picks up sound from all directions (360°). Best for conference calls, group discussions, or capturing room ambiance.
- Bidirektional: Records sound from the front and rear of the microphone, while rejecting side noise. Perfect for two-person interviews or duets.

Bild: Visual guide illustrating the four available pickup patterns (Stereo, Cardioid, Bidirectional, Omnidirectional) for the XTUGA USB Condenser Microphone (X-4).

Bild: Close-up of the XTUGA USB Condenser Microphone (X-4) highlighting the Four Pickup Patterns Switch and the Mute Button.
2. Stummschaltung
Press the physical Mute button on the front of the microphone to instantly cut off audio input. The button will illuminate or blink to indicate the mute status. Press again to unmute.

Bild: Promotional image demonstrating the one-click mute function of the XTUGA USB Condenser Microphone (X-4), showing the light flicker when muted.
3. Volume Controls and Monitoring
The microphone features two volume knobs on its front panel:
- Microphone Volume (Top Knob): Adjusts the input gain of the microphone. Turn clockwise to increase sensitivity, counter-clockwise to decrease.
- Headphone Volume (Bottom Knob): Controls the volume of the 3.5mm headphone output for real-time monitoring.
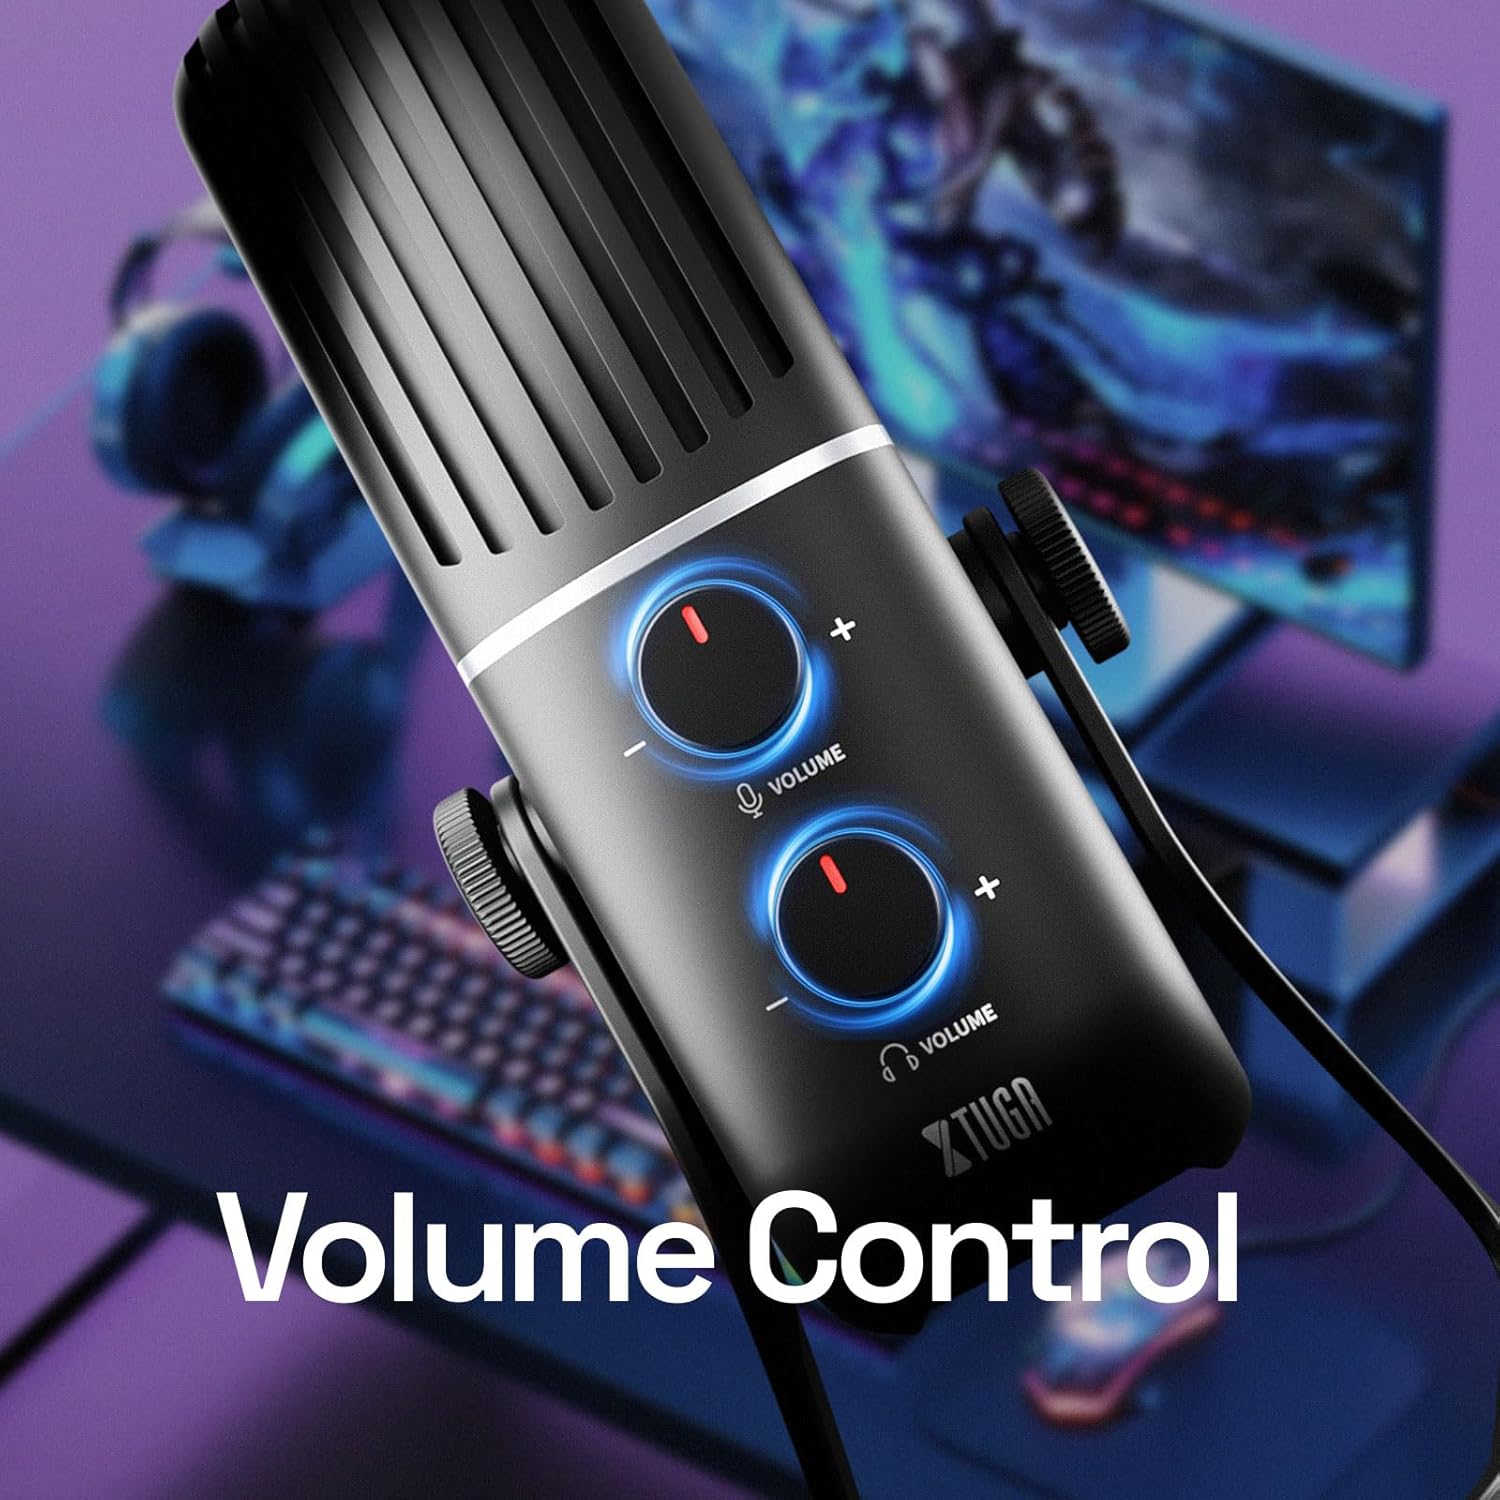
Bild: Close-up of the XTUGA USB Condenser Microphone (X-4) showing the two volume control knobs for microphone input and headphone output.

Bild: The XTUGA USB Condenser Microphone (X-4) with headphones connected, illustrating the real-time monitoring feature for zero-latency audio feedback.
Wartung
- Reinigung: Reinigen Sie das Mikrofongehäuse mit einem weichen, trockenen Tuch. Vermeiden Sie die Verwendung von scharfen Chemikalien oder Scheuermitteln.
- Lagerung: When not in use, store the microphone in its provided carrying case to protect it from dust, moisture, and physical damage.
- Handhabung: Behandeln Sie das Mikrofon vorsichtig. Vermeiden Sie es, es fallen zu lassen oder extremen Temperaturen oder hoher Luftfeuchtigkeit auszusetzen.
Fehlerbehebung
| Problem | Mögliche Ursache | Lösung |
|---|---|---|
| Kein Ton vom Mikrofon. | Mikrofon ist stummgeschaltet. Falsches Eingabegerät ausgewählt. Lose Kabelverbindung. | Press the Mute button to unmute. Check your computer's sound settings and select "XTUGA X-4" as the input device. Ensure USB cable is securely connected to both microphone and computer. |
| Kein Ton aus den Kopfhörern. | Headphone volume is too low. Loose headphone connection. Incorrect output device selected. | Increase the Headphone Volume knob. Stellen Sie sicher, dass die Kopfhörer vollständig in die 3.5-mm-Klinkenbuchse eingesteckt sind. Check your computer's sound settings and ensure "XTUGA X-4" is selected as the output device for monitoring. |
| Sound is distorted or too quiet/loud. | Microphone gain is too high/low. Proximity to microphone. | Stellen Sie den Mikrofon-Lautstärkeregler ein. Adjust your distance from the microphone. Speak 6-12 inches away for optimal sound. |
| Background noise is prominent. | Falsches Aufnahmemuster ausgewählt. Umgebungslärm. | Switch to Cardioid pattern for single-source recording. Reduce ambient noise in your recording environment. |
Technische Daten
| Besonderheit | Detail |
|---|---|
| Modellnummer | X-4 |
| Mikrofontyp | Kondensator |
| Richtcharakteristik | Stereo, Cardioid, Omnidirectional, Bidirectional |
| Konnektivität | USB Typ C |
| Frequenzgang | 18000 Hz (up to 48 KHz maximum frequency) |
| Signal-Rausch-Verhältnis | 66 dB |
| Geräuschpegel | 85 dB |
| Impedanz | 16 Ohm |
| Material | Metal (Aircraft-grade aluminum unibody) |
| Artikelgewicht | 4.2 Pfund |
| Kompatible Geräte | PC, Laptop, Gaming Console, Audio Interface, Audio Mixer |
Garantie und Support
For warranty information and technical support, please visit the official XTUGA webBesuchen Sie die Website oder kontaktieren Sie direkt den Kundenservice. Bewahren Sie Ihren Kaufbeleg für Garantieansprüche auf.
XTUGA Official Store: Visit XTUGA Store on Amazon
Ask a question about this manual
Ask about setup, troubleshooting, compatibility, parts, safety, or missing instructions. Manuals+ will review the question and use this page’s manual context to help answer it.