1. Einleitung
This manual provides detailed instructions for the installation, operation, and maintenance of your EVTSCAN Digital Thermoregulator. This device is designed to precisely control heating equipment, such as wall-mounted boilers and gas boilers, ensuring a stable and energy-efficient temperature environment. Please read this manual thoroughly before installation and use to ensure proper function and safety.
2. Sicherheitshinweise
Beachten Sie stets die folgenden Sicherheitsvorkehrungen, um Schäden am Gerät oder Verletzungen zu vermeiden:
- Stellen Sie vor der Installation oder Wartung sicher, dass die Stromversorgung unterbrochen ist.
- Die Installation sollte von einem qualifizierten Fachmann durchgeführt werden, wenn Sie sich bezüglich der elektrischen Verkabelung unsicher sind.
- Das Gerät darf weder Wasser noch übermäßiger Feuchtigkeit ausgesetzt werden.
- Verwenden Sie ausschließlich den angegebenen Batterietyp (2 AA-Batterien) und achten Sie auf die richtige Polarität.
- Halten Sie das Gerät von brennbaren Materialien fern.
3. Produktüberschreitungview
The EVTSCAN Digital Thermoregulator features a clear LCD display for easy monitoring and a simple interface for temperature control. Its compact design allows for discreet integration into your living space.

Abbildung 3.1: Vorderseite view of the Digital Thermoregulator. The LCD screen displays current settings and room temperature, with a rotary knob below for adjustments.
Schlüsselkomponenten:
- LCD Anzeige: Shows set temperature, room temperature, time, and operational icons.
- Bedienknopf/Taste: Dient zur Navigation in Menüs und zur Anpassung von Einstellungen.
- Batteriefach: Located on the rear or side for 2 AA batteries.
- Verdrahtungsklemmen: For connection to the heating system.
4. Spezifikationen
| Besonderheit | Spezifikation |
|---|---|
| Modell | EVTSCANok0g9ct2zq |
| Power-Modus | 2 AA-Batterien (nicht im Lieferumfang enthalten) |
| Screen Accuracy | 0.5 ℃ |
| Sondensensor | NTC (10) 1 % |
| Kontaktkapazität | Greater than 30-230 V DC working voltage, lower current. Reference: 5 A 30 V (HF relay) or 2 A 30 V (NEC relay) |
| Temperaturanzeigebereich | 1 bis 40 ℃ |
| Default Temperature Adjustment Range | 5 bis 35 ℃ |
| Betriebstemperaturbereich | 0 bis 50 ℃ |
| Laufendes Programm | Set once a week |
| Ausgabe | Schaltrelais |
| Material | Flammhemmendes Polycarbonat |
| Gewicht | 170 g |
5. Einrichtung und Installation
The EVTSCAN Digital Thermoregulator is designed for simple installation. Follow these steps carefully:
5.1. Auspacken und Inspektion
Nehmen Sie alle Komponenten vorsichtig aus der Verpackung. Prüfen Sie, ob alle im Packungsinhalt aufgeführten Artikel vorhanden und unbeschädigt sind.
- 1 Digital Temperature Controller
- 2 Schrauben
5.2. Einlegen der Batterie
The device requires 2 AA batteries for operation. These are not included in the package.
- Locate the battery compartment on the back of the thermoregulator.
- Öffnen Sie die Abdeckung des Batteriefachs.
- Legen Sie 2 AA-Batterien ein und achten Sie dabei auf die richtige Polarität (+/-).
- Schließen Sie den Batteriefachdeckel fest.

Abbildung 5.1: Schräg view of the thermoregulator, illustrating its compact size and potential location for battery access or mounting points.
5.3. Montage und Verkabelung
The thermoregulator is designed for wall mounting. Ensure the power to your heating system is turned off before proceeding with wiring.
- Wählen Sie einen geeigneten Standort an einer Innenwand, fern von direkter Sonneneinstrahlung, Zugluft oder Wärmequellen, die die Temperaturmessungen beeinflussen könnten.
- Mount the backplate (if detachable) to the wall using the provided screws.
- Connect the thermoregulator to your boiler or heating system according to the wiring diagram provided with your boiler and the thermoregulator's terminal markings. This typically involves connecting the switching relay output to the boiler's control input.
- Secure the thermoregulator onto the mounted backplate.
Notiz: For wiring, consult a qualified electrician if you are unfamiliar with electrical installations.
6. Bedienungsanleitung
The EVTSCAN Digital Thermoregulator uses a microcomputer control technology to maintain your desired temperature efficiently.
6.1. Einschalten und erste Anzeige
Once batteries are installed, the LCD display will illuminate, showing the current room temperature, set temperature, and time.
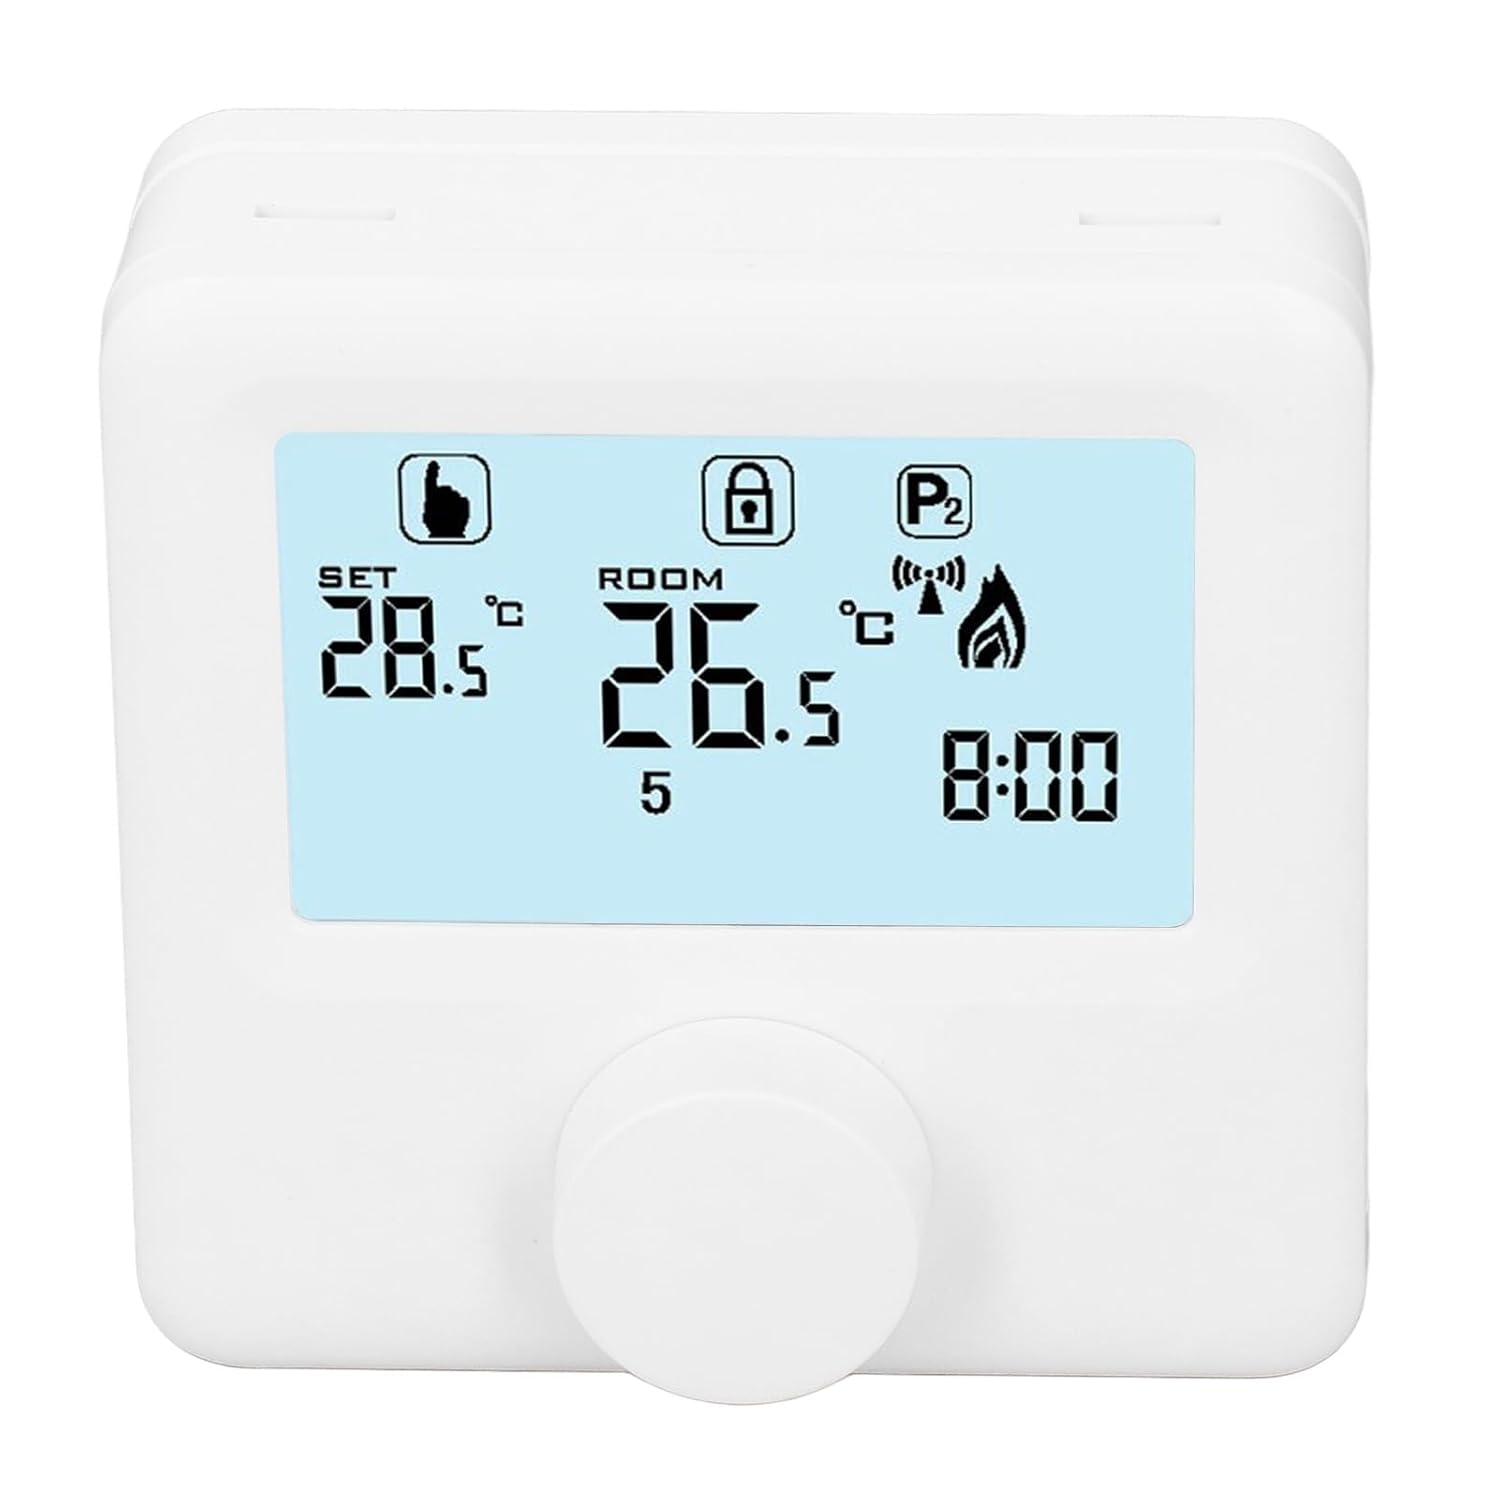
Abbildung 6.1: Ausführlich view of the LCD display. It shows the set temperature (SET), room temperature (ROOM), a lock icon, a program icon (P2), a signal icon, a flame icon indicating heating, and the current time.
6.2. Temperatur einstellen
So stellen Sie die gewünschte Temperatur ein:
- Rotate the control knob to increase or decrease the set temperature. The "SET" value on the display will change accordingly.
- The device will automatically activate or deactivate the heating system to maintain the set temperature within the range of 1 to 40 ℃. The default adjustment range is 5 to 35 ℃.
6.3. Wöchentlicher Programmplan
The thermoregulator supports a weekly programming schedule. This allows you to set different temperatures for various times of the day across the week.
- Press and hold the control knob (or a designated button, if available) to enter programming mode.
- Use the control knob to navigate through days of the week and time slots.
- Adjust the desired temperature for each programmed period.
- Confirm your settings to save the weekly program. The device will then operate according to this schedule.
6.4. Understanding Display Icons
- EINSTELLEN: Indicates the target temperature you have set.
- ZIMMER: Zeigt die aktuelle Raumtemperatur an.
- Flammensymbol: Leuchtet auf, wenn die Heizungsanlage in Betrieb ist.
- Schlosssymbol: May indicate a keypad lock feature to prevent accidental changes.
- P1/P2 Icon: Indicates the current program mode (e.g., P1 for comfort, P2 for economy, or specific weekly program segments).
- Signalsymbol: May indicate wireless communication status if applicable.
7. Wartung
Regular maintenance ensures the longevity and optimal performance of your thermoregulator.
- Reinigung: Reinigen Sie das Gerät mit einem weichen, trockenen Tuch. Verwenden Sie keine Scheuermittel oder Lösungsmittel.
- Batteriewechsel: Replace batteries when the low battery indicator appears on the display. Always replace both batteries simultaneously with new AA batteries.
- Sensorbereich: Ensure the temperature sensor area (usually a small vent on the device) is free from dust and obstructions for accurate readings.
8. Fehlerbehebung
If you encounter issues with your EVTSCAN Digital Thermoregulator, refer to the following common problems and solutions:
- Anzeige ist leer:
- Prüfen Sie, ob die Batterien richtig eingesetzt sind.
- Ersetzen Sie alte Batterien durch neue.
- Heizungsanlage reagiert nicht:
- Ensure the thermoregulator is powered on and the flame icon is displayed when heating is expected.
- Verify wiring connections to the boiler are secure and correct.
- Check the boiler's power supply and status.
- Stellen Sie sicher, dass die eingestellte Temperatur höher ist als die aktuelle Raumtemperatur.
- Ungenaue Temperaturmesswerte:
- Ensure the device is not exposed to direct sunlight, drafts, or heat sources.
- Clean any dust or debris from the sensor area.
- Einstellungen können nicht geändert werden:
- Check if the lock icon is displayed. If so, refer to the operating instructions to unlock the keypad.
Wenn das Problem weiterhin besteht, wenden Sie sich an den Kundendienst.
9. Garantie und Support
Specific warranty information for this product is not provided in the available data. Please refer to the product packaging or the retailer's webWebsite für Garantiedetails.
For technical support or further assistance, please contact EVTSCAN customer service through their official channels or the retailer from whom you purchased the product.
You can visit the EVTSCAN store on Amazon for more information: EVTSCAN Store