1. Einleitung
This manual provides instructions for the safe and effective use of your LLAVETOR Digital Torque Adapter. This device converts any standard ratchet wrench into a precise digital torque wrench, suitable for various applications including bicycles, motorcycles, automotive repair, and industrial use.
Zu den Hauptmerkmalen gehören:
- High-definition LED backlight display for easy reading in dark environments.
- Accuracy of ±2% clockwise and ±3% counter-clockwise.
- Four selectable torque units: N.m, ft-lb, in-lb, kg.cm.
- Kompaktes und leichtes Design für Mobilität.
- Includes 1/2", 3/8", and 1/4" adapters for versatility.
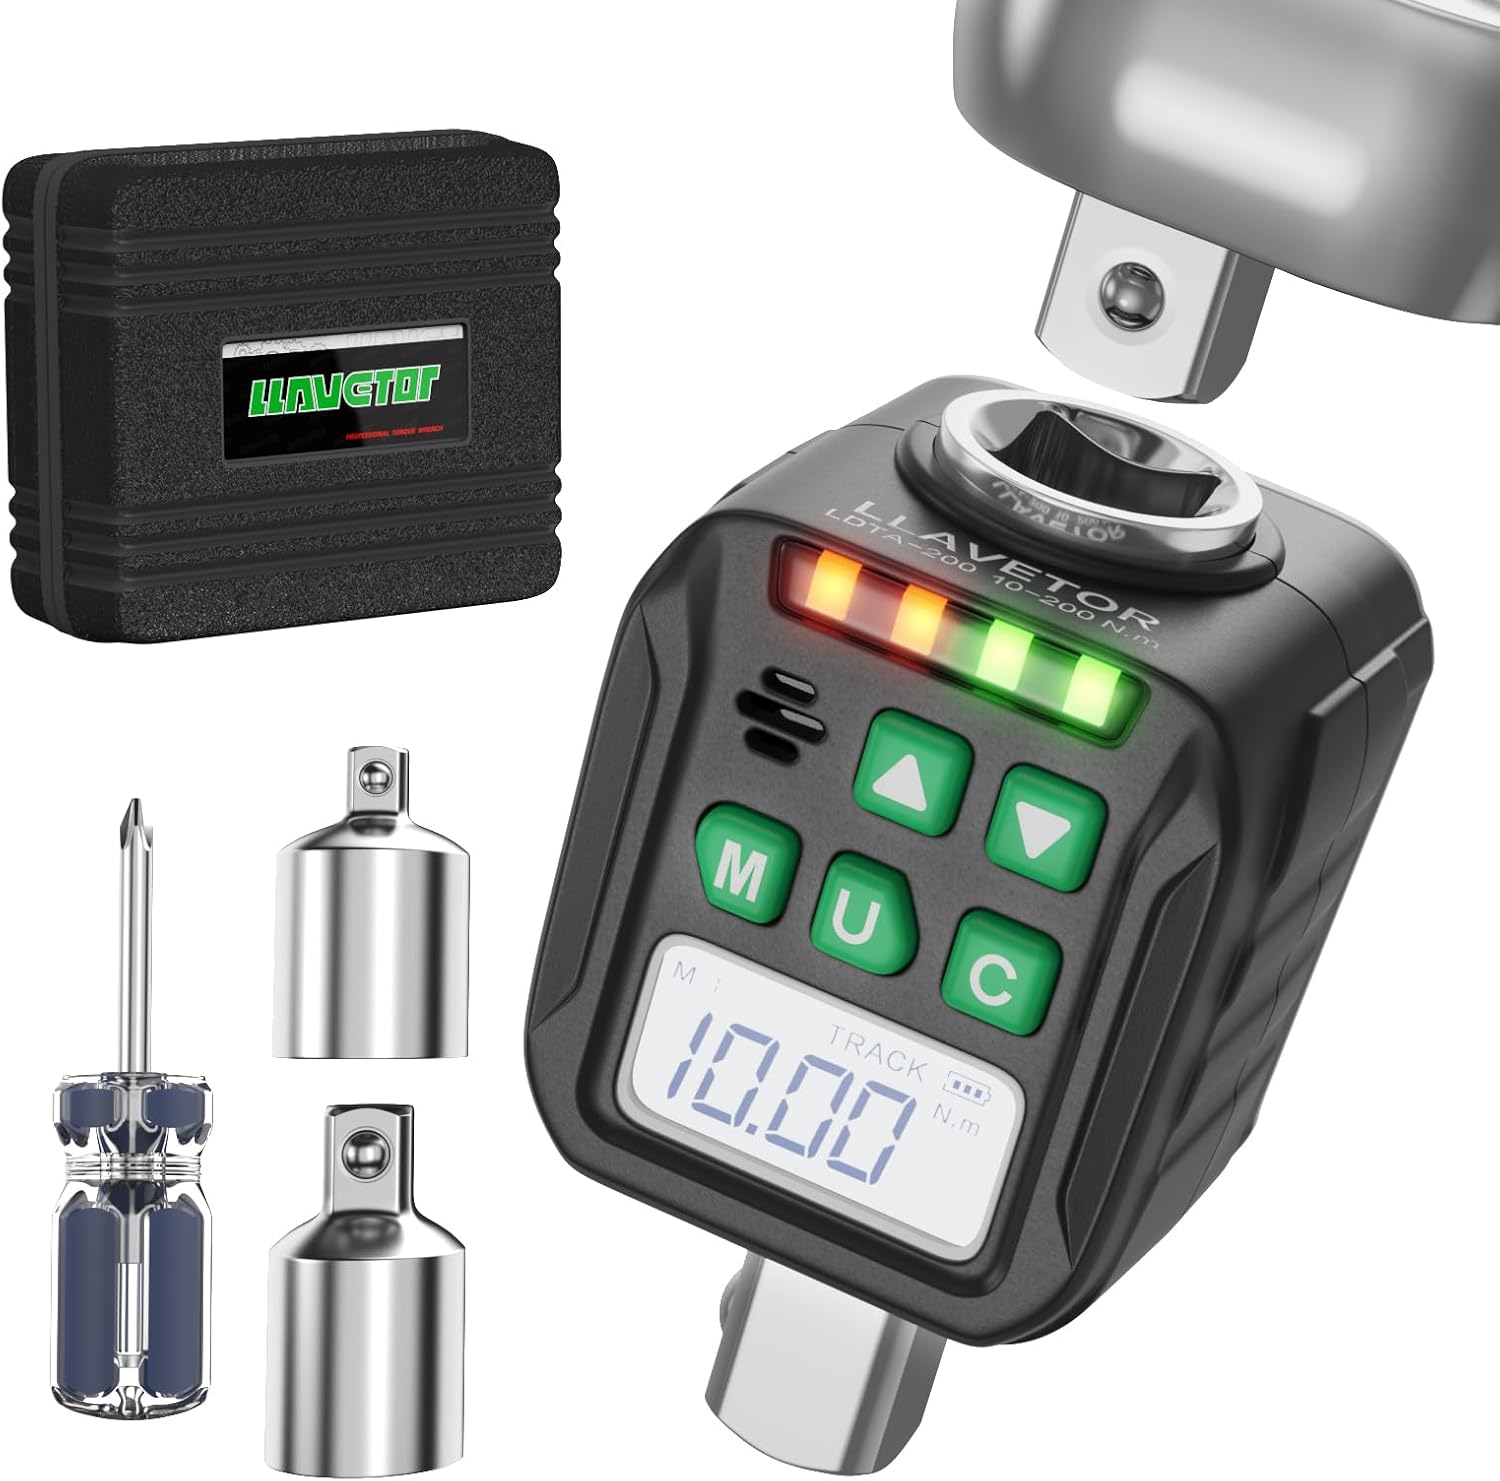
Image 1: LLAVETOR Digital Torque Adapter. This image shows the compact design of the digital torque adapter, ready for use with a ratchet.
2. Einrichtung
2.1 Packungsinhalt
Überprüfen Sie, ob alle Artikel im Paket vorhanden sind:
- 1 x 1/2" Digital Torque Adapter
- 1 x 3/8" Adapter
- 1 x 1/4" Adapter
- 2 x AA-Batterien
- 1 x Schraubendreher
2.2 Einlegen der Batterie
The digital torque adapter requires two AA batteries for operation.
- Suchen Sie die Abdeckung des Batteriefachs auf der Rückseite des Geräts.
- Verwenden Sie den mitgelieferten Schraubendreher, um das Batteriefach zu öffnen.
- Legen Sie zwei AA-Batterien ein und achten Sie dabei auf die richtige Polarität (+/-).
- Schließen Sie den Batteriefachdeckel und befestigen Sie ihn mit der Schraube.
2.3 Anbringen von Adaptern
The digital torque adapter comes with 1/2", 3/8", and 1/4" adapters to fit various drive sizes.
- Select the appropriate adapter (e.g., 3/8" or 1/4") if your ratchet or socket is not 1/2".
- Insert the adapter into the 1/2" square drive of the digital torque adapter.
- Attach your ratchet wrench to the input square drive of the digital torque adapter.
- Attach the desired socket to the output square drive of the digital torque adapter (or the attached adapter).
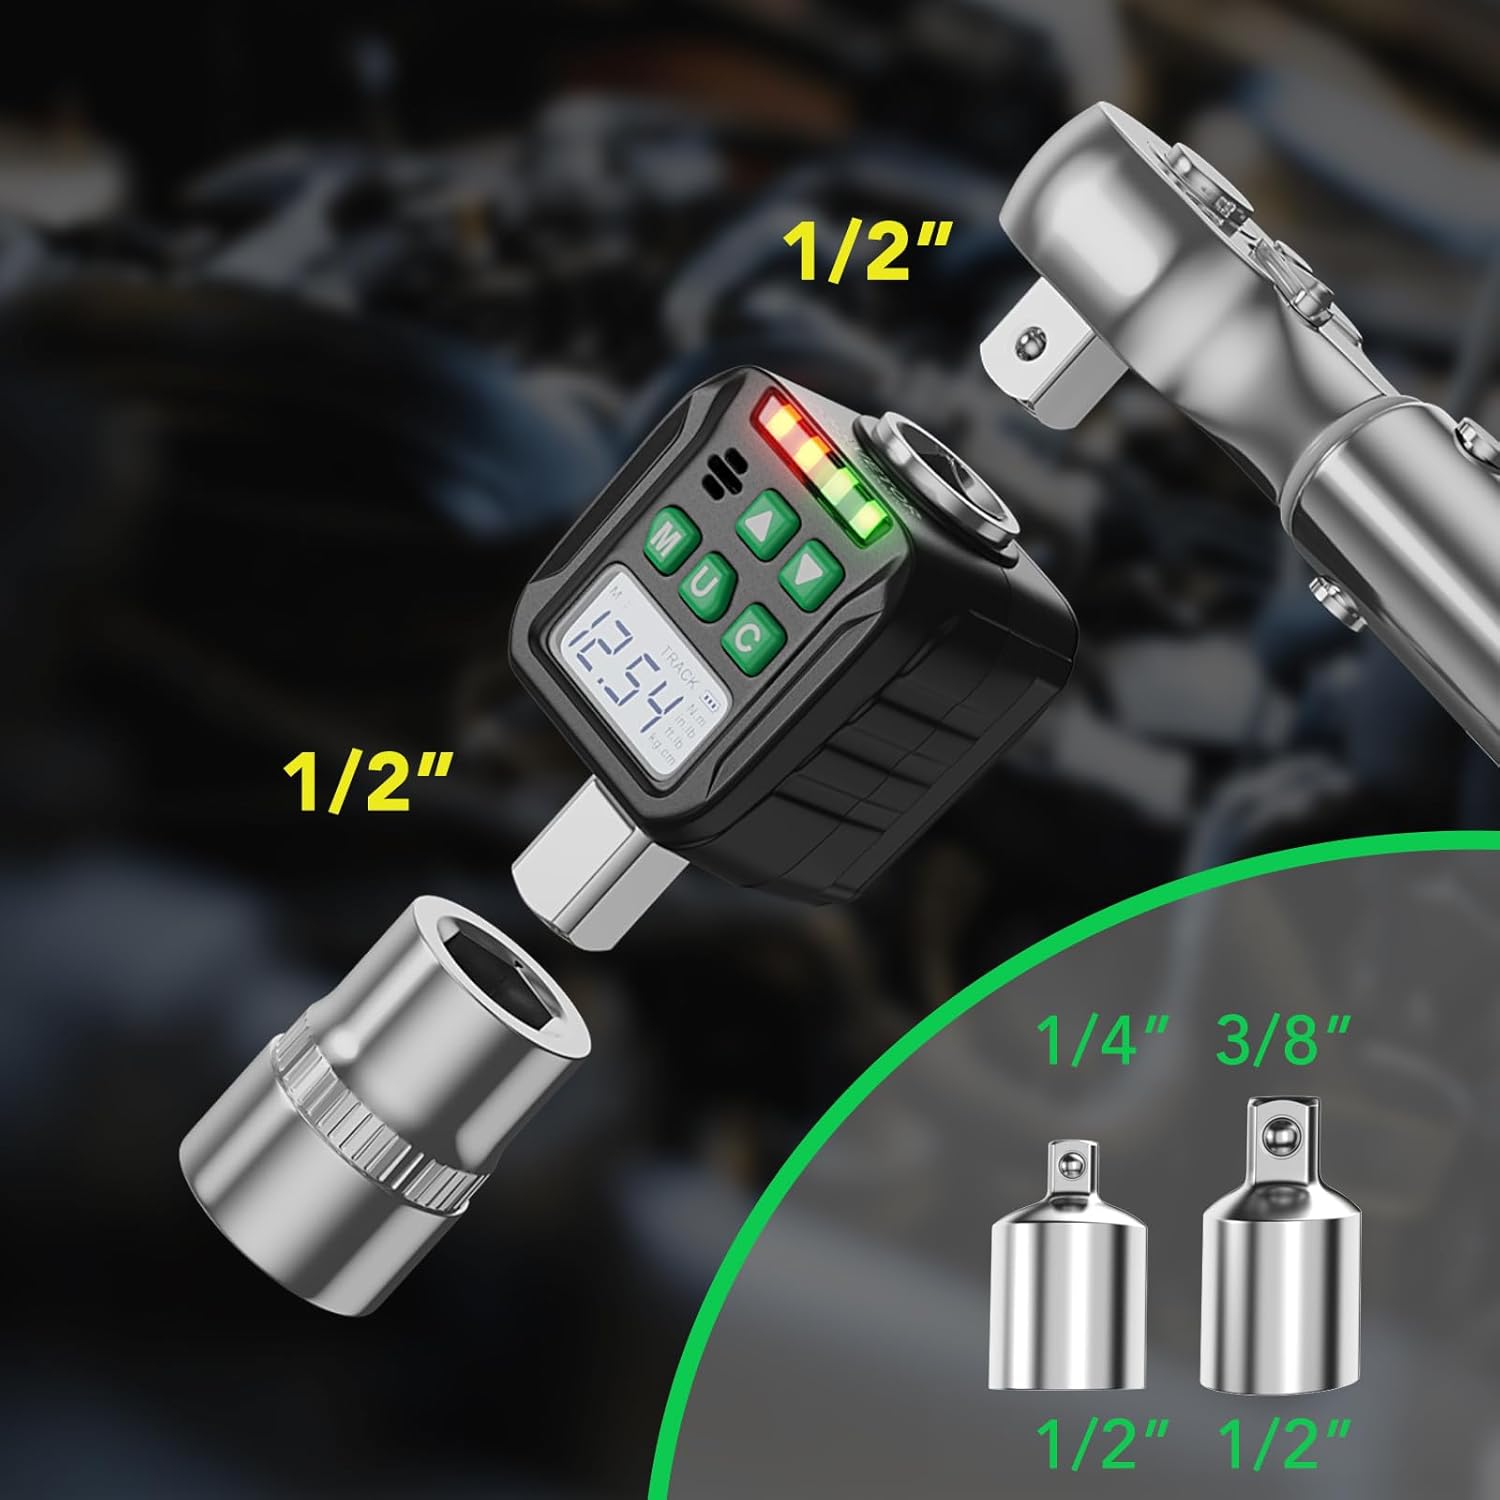
Image 2: Adapter Connections. This image illustrates how to connect the digital torque adapter to a ratchet and how to use the included 3/8" and 1/4" adapters for different socket sizes.
3. Bedienungsanleitung
3.1 Ein-/Ausschalten
- Drücken Sie die M button to power on the device. The LED display will illuminate.
- Halten Sie zum Ausschalten die Taste gedrückt M button for 3 seconds. The device will also automatically power off after a period of inactivity to conserve battery.
3.2 Einheitenauswahl
The device supports four torque units: N.m, ft-lb, in-lb, and kg.cm.
- Drücken Sie die U Mit dieser Taste können Sie durch die verfügbaren Einheiten blättern. Die ausgewählte Einheit wird auf dem Bildschirm angezeigt.

Image 3: Four Measurement Modes. This image displays the digital torque adapter's screen, highlighting the four selectable measurement units: Newton-meters (N.m), foot-pounds (ft-lb), inch-pounds (in-lb), and kilogram-centimeters (kg.cm).
3.3 Mode Selection (Track Mode / Peak Mode)
The adapter features two operating modes: Track Mode and Peak Mode.
- Um zwischen den Modi zu wechseln, halten Sie die Taste gedrückt. U button for 3 seconds. Use the Up (▲) and Down (▼) buttons to select the desired mode.
Track-Modus
In Track Mode, the device displays the torque value in real-time as force is applied. This is useful for monitoring torque during tightening.
Peak-Modus
In Peak Mode, the device captures and displays the maximum torque value achieved during the tightening process. This value remains on the screen until reset or a higher peak is reached.

Image 4: Track and Peak Modes. This image illustrates the difference between Track Mode, which shows real-time torque, and Peak Mode, which displays the maximum torque applied.
3.4 Setting Target Torque (Preset Value Mode)
The device allows you to set a target torque value. When the applied torque approaches the target, the device will provide visual and audible alerts.
- Drücken Sie die M button to enter the preset value setting mode.
- Use the Up (▲) and Down (▼) buttons to adjust the target torque value.
- Drücken Sie die M Drücken Sie erneut die Taste, um die Einstellung zu bestätigen und zu speichern.
The device can store up to 6 groups of preset values and 500 groups of stored data.

Image 5: Preset Values and Data Storage. This image highlights the device's ability to store 6 groups of preset torque values and up to 500 groups of measurement data.
3.5 Torque Application and Indication
As torque is applied, the LED indicator lights will illuminate, and a buzzer will sound to indicate proximity to the target torque.
- Grüne Lichter: Indicate that the applied torque is approaching the target value.
- Rote Lichter: Indicate that the target torque has been reached or exceeded.
- Summer: Sounds when the target torque is reached.

Image 6: LED Indicators and Buzzer. This image shows the digital torque adapter in use, with its LED indicator lights and an icon representing the audible buzzer, which alert the user when the target torque is reached.
3.6 Clockwise and Counter-Clockwise Torque
The adapter can measure torque in both clockwise and counter-clockwise directions with specified accuracy.

Image 7: Accuracy and Mode Switching. This image emphasizes the device's accuracy of ±3% and visually differentiates between Peak Mode and Track Mode displays, which can be switched by holding the 'U' button.
4. Wartung
4.1 Reinigung
- Reinigen Sie das Gerät mit einem weichen, trockenen Tuch. Verwenden Sie keine Scheuermittel oder Lösungsmittel.
4.2 Speicherung
- Store the digital torque adapter in a dry place, away from direct sunlight and extreme temperatures.
- Wenn das Gerät längere Zeit nicht verwendet wird, entfernen Sie die Batterien, um ein Auslaufen zu verhindern.
4.3 Kalibrierung
- For optimal accuracy, periodic calibration by a qualified technician is recommended.
5. Fehlerbehebung
5.1 Device does not power on
- Überprüfen Sie die Installation und Polarität der Batterie.
- Ersetzen Sie sie durch neue AA-Batterien.
5.2 Inaccurate readings
- Ensure the adapter is securely attached to the ratchet and socket.
- Verify the correct unit of measurement is selected.
- Ziehen Sie eine professionelle Kalibrierung in Betracht, falls die Probleme weiterhin bestehen.
5.3 Display is dim or unreadable
- Batterien ersetzen.
- Stellen Sie sicher, dass das Gerät keinen extremen Temperaturen ausgesetzt ist.
6. Spezifikationen
| Besonderheit | Detail |
|---|---|
| Modell | LDTA |
| Laufwerksgröße | 1/2 inch (includes 3/8" and 1/4" adapters) |
| Drehmomentbereich | 10-200 Nm (7.38-147.5 Ft-lb) |
| Genauigkeit | ±2% Clockwise, ±3% Counter-clockwise |
| Drehmomenteinheiten | N.m, ft-lb, in-lb, kg.cm |
| Anzeige | LED-Hintergrundbeleuchtung |
| Datenspeicherung | 500 Gruppen |
| Preset Values | 6 Gruppen |
| Stromquelle | 2 x AA-Batterien |
| Material | Eisen |
| Farbe | Chrom |
| Betriebsmodus | Mechanical (Digital Readout) |
Hinweis: Technische Daten können ohne vorherige Ankündigung geändert werden.
7. Garantie und Support
7.1 Garantieinformationen
This product is covered by a standard manufacturer's warranty against defects in materials and workmanship. Please refer to the packaging or contact LLAVETOR customer service for specific warranty terms and duration.
7.2 Kundendienst
For technical assistance, troubleshooting, or warranty claims, please contact LLAVETOR customer support.
Visit the official LLAVETOR webWebsite für Kontaktinformationen und weitere Ressourcen.