
1. Produktüberschreitungview
The Cuifati ITX Computer Motherboard H6 ME is designed for compact computing systems, offering essential features for a reliable and efficient build. This motherboard supports LGA 1155 CPUs and DDR3 memory, providing a stable foundation for various applications.
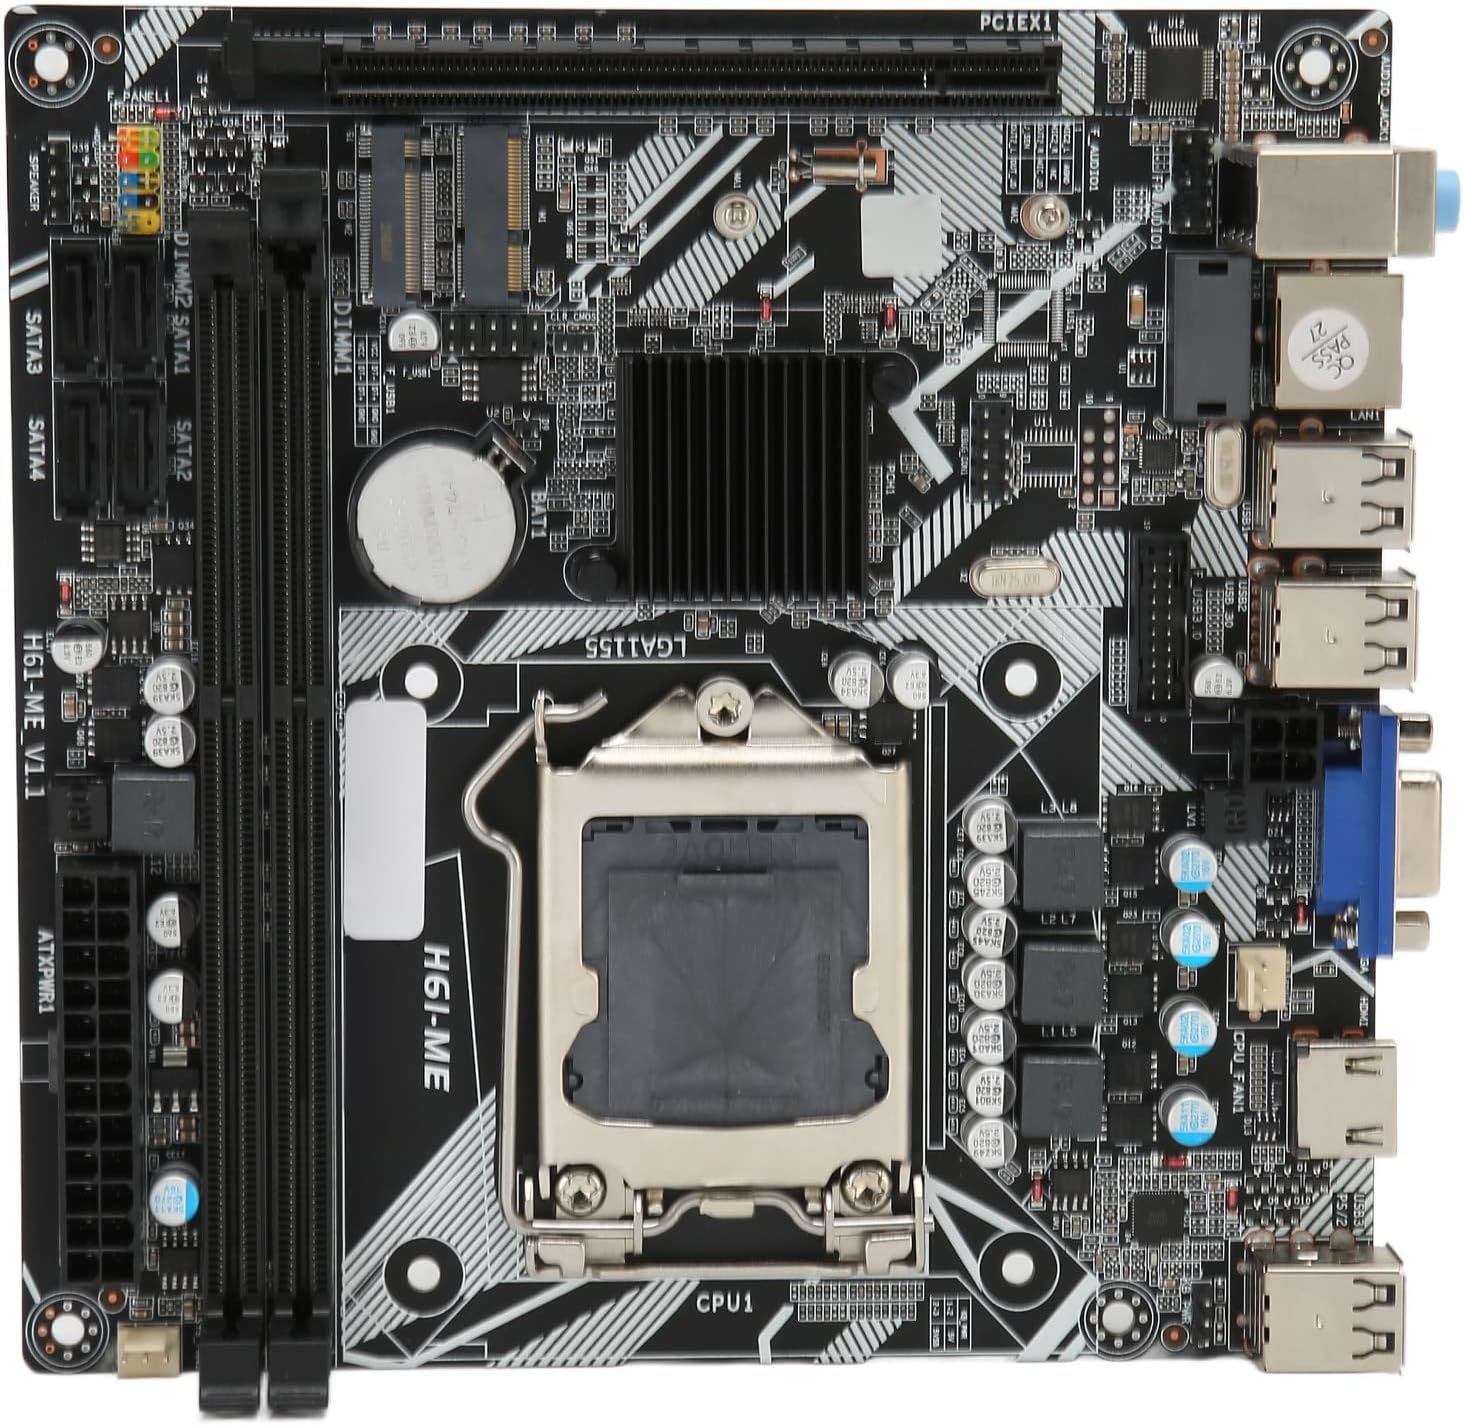
Figure 1: Cuifati ITX Computer Motherboard H6 ME (Top View)
2. Hauptmerkmale
- LGA 1155 CPU Slot: Supports LGA 1155 processors for stable performance.
- Multiphase Power Design: Features stable and accurate multiphase power delivery for improved CPU performance.
- HD Video Output: Equipped with VGA and HD Multimedia Interface (HDMI) for digital high-definition video output.
- Dual Channel DDR3 Memory: Incorporates two DDR3 memory slots, supporting up to 16GB, enhancing overall system performance.
- Multiple USB2.0 Interfaces: Provides 10 USB2.0 interfaces (4 front, 6 rear) for extensive peripheral connectivity.
- Speicheroptionen: Includes 4 SATA2.0 ports and M.2 NVME support for various storage solutions.
- PCIe 16X-Steckplatz: Features a PCIe 16X slot for dedicated graphics cards or other expansion cards.
3. Packungsinhalt
Bitte prüfen Sie vor der Installation, ob alle Artikel im Paket enthalten sind.
- 1 x Cuifati LGA 1155 Motherboard (H6 ME)
- 1 x Metal I/O Plate
- 1 x SATA Connecting Cable

Figure 2: Motherboard and Included Accessories
4. Einrichtung und Installation
This section provides instructions for installing the Cuifati H6 ME motherboard into your computer system. Ensure your system is powered off and unplugged before beginning any installation.
4.1. Komponentenidentifikation
Familiarize yourself with the layout of the motherboard and its various connectors.

Figure 3: Motherboard Component Diagram
- CPU-Steckplatz (LGA 1155): For installing your Intel LGA 1155 processor.
- DDR3-Steckplätze: Zwei Steckplätze für DDR3-Speichermodule.
- PCIe 16X-Steckplatz: Für Grafikkarten oder andere Erweiterungskarten.
- SATA2.0-Anschlüsse: Four ports for connecting SATA storage devices (HDDs/SSDs).
- NVME M.2-Steckplatz: For high-speed NVME M.2 SSDs.
- Frontplattenanschlüsse: Pins for power switch, reset switch, HDD LED, and power LED.
- USB2.0 Headers: For front panel USB ports.
- 24-poliger ATX-Stromanschluss: Hauptstromanschluss vom Netzteil.
- 4-Pin CPU Power Connector: Zusätzliche Leistung für die CPU.
- Hintere I/O-Ports: USB, VGA, HDMI, LAN, Audio ports.
4.2. Installationsschritte
- Bereiten Sie den Fall vor: Stellen Sie sicher, dass Ihr Computergehäuse für den Einbau des Motherboards bereit ist. Installieren Sie gegebenenfalls Abstandshalter.
- Installieren Sie die I/O-Blende: Snap the metal I/O plate into the corresponding opening in your computer case.
- Installieren Sie die CPU:
- Öffnen Sie den Hebel des CPU-Sockels und entfernen Sie die Schutzabdeckung.
- Carefully align your LGA 1155 CPU with the socket, ensuring the notches on the CPU match the keys on the socket.
- Setzen Sie die CPU vorsichtig in den Sockel ein. Wenden Sie keine Gewalt an.
- Schließen Sie den Sockelhebel, um die CPU zu sichern.
- Installieren Sie den CPU-Kühler: Apply thermal paste (if not pre-applied) and install your CPU cooler according to its manufacturer's instructions. Connect the CPU fan cable to the "CPU FAN" header on the motherboard.
- Arbeitsspeicher (RAM) einbauen:
- Öffnen Sie die Klemmen an beiden Enden der DDR3-Speichersteckplätze.
- Richten Sie die Kerbe am DDR3-Speichermodul an der entsprechenden Aussparung im Steckplatz aus.
- Drücken Sie beide Enden des Speichermoduls fest nach unten, bis die Klammern einrasten.
- Montage des Motherboards: Setzen Sie das Motherboard vorsichtig in das Gehäuse ein und richten Sie die Schraubenlöcher an den Abstandshaltern aus. Befestigen Sie das Motherboard mit Schrauben.
- Netzteilkabel anschließen:
- Connect the 24-pin ATX power cable from your power supply to the main power connector on the motherboard.
- Connect the 4-pin CPU power cable to the CPU power connector.
- Speichergeräte installieren: Connect your SATA HDDs/SSDs to the SATA2.0 ports using the provided SATA cable. If using an NVME M.2 SSD, install it into the M.2 slot and secure it with the screw.
- Grafikkarte installieren (optional): If using a dedicated graphics card, insert it into the PCIe 16X slot and secure it. Connect any necessary PCIe power cables from your power supply.
- Frontpanel-Kabel anschließen: Connect the power switch, reset switch, HDD LED, and power LED cables from your case to the corresponding pins on the motherboard's front panel header. Refer to the motherboard diagram (Figure 3) for pin assignments.
- USB- und Audiokabel anschließen: Connect front panel USB and audio cables to their respective headers on the motherboard.

Figure 4: PCIe 16X Slot for Expansion Cards
5. Bedienungsanleitung
Sobald alle Komponenten installiert und angeschlossen sind, können Sie Ihr System einschalten.
5.1. Erstes Einschalten
- Schließen Sie Monitor, Tastatur und Maus an die entsprechenden Anschlüsse auf der Rückseite des I/O-Panels an.
- Plug in the power cable to your power supply and turn on the power supply switch.
- Drücken Sie den Netzschalter an Ihrem Computergehäuse.
- Das System sollte hochfahren, und Sie sollten eine Ausgabe auf Ihrem Monitor sehen.
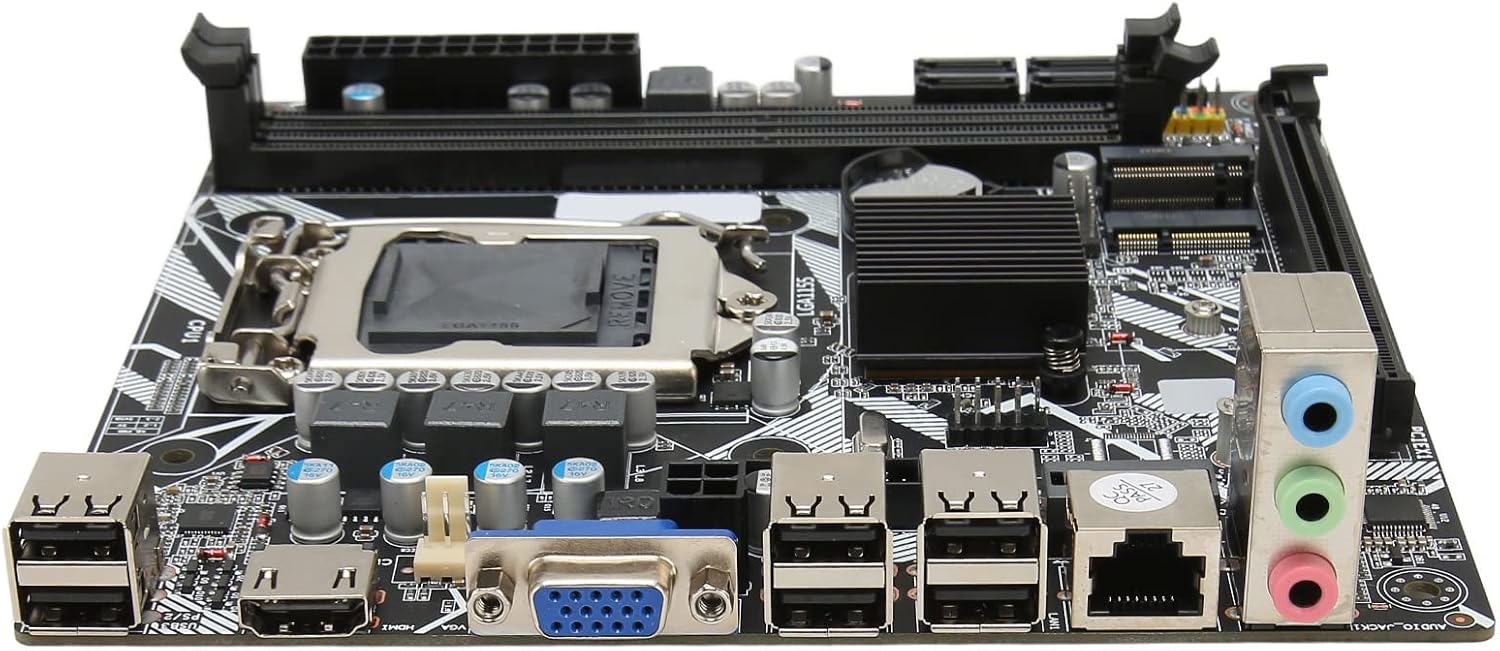
Abbildung 5: Rückseitige E/A-Anschlüsse
5.2. BIOS/UEFI-Einrichtung
To access the BIOS/UEFI setup utility, press the designated key (usually DEL or F2) repeatedly during the initial boot sequence. From the BIOS, you can configure system settings, boot order, and monitor hardware status.
5.3. Installation des Betriebssystems
Once the system is stable, you can proceed with installing your preferred operating system (e.g., Windows, Linux) from a bootable USB drive or DVD.
6. Wartung
Durch sachgemäße Wartung kann die Lebensdauer Ihres Motherboards verlängert und eine optimale Leistung sichergestellt werden.
- Staubentfernung: Reinigen Sie regelmäßig das Innere Ihres Computergehäuses, insbesondere Lüfter und Kühlkörper, mit Druckluft von Staub. Stellen Sie sicher, dass das System vor der Reinigung ausgeschaltet und vom Stromnetz getrennt ist.
- Kabelmanagement: Sorgen Sie für eine ordentliche Kabelführung, um die Luftzirkulation zu verbessern und Störungen zu vermeiden.
- BIOS-Updates: Überprüfen Sie regelmäßig die Herstellerangaben. website for BIOS updates. Update the BIOS only if necessary and follow the instructions carefully to avoid system instability.
- Umgebungsbedingungen: Operate the motherboard in a well-ventilated area, away from direct sunlight, excessive heat, and moisture.
7. Fehlerbehebung
In diesem Abschnitt werden häufig auftretende Probleme behandelt.
- Kein Strom:
- Check if the power supply is plugged in and switched on.
- Verify that the 24-pin and 4-pin power cables are securely connected to the motherboard.
- Stellen Sie sicher, dass das Netzschalterkabel an der Vorderseite korrekt an den Anschluss auf dem Motherboard angeschlossen ist.
- Kein Bildschirm:
- Confirm that the monitor is connected to the correct video output (VGA or HDMI) on the motherboard or graphics card.
- Setzen Sie die RAM-Module neu ein. Versuchen Sie, den Computer mit nur einem installierten RAM-Modul zu starten.
- Setzen Sie die Grafikkarte gegebenenfalls neu ein.
- Ensure the CPU is properly seated and the CPU cooler is installed correctly.
- Systeminstabilität/Abstürze:
- Prüfen Sie auf Überhitzung. Stellen Sie sicher, dass der CPU-Kühler und die Gehäuselüfter funktionieren.
- Prüfen Sie die Speichermodule mithilfe von Diagnosetools auf Fehler.
- Stellen Sie sicher, dass alle Treiber (Chipsatz, Grafikkarte usw.) auf dem neuesten Stand sind.
- Periphere Verbindungen nicht erkannt:
- Versuchen Sie, das Peripheriegerät an einen anderen USB-Anschluss anzuschließen.
- Ensure necessary drivers are installed for the peripheral.
- Überprüfen Sie die BIOS-Einstellungen, um sicherzustellen, dass die USB-Anschlüsse aktiviert sind.
8. Spezifikationen
| Besonderheit | Beschreibung |
|---|---|
| Motherboard-Modell | H6 ME |
| Motherboard-Typ | ITX |
| CPU Slot Type | LGA 1155 |
| Memory Slots | DDR3 x 2 |
| Maximale Speicherkapazität | Bis zu 16 GB |
| SATA-Anschlüsse | SATA2.0 x 4 |
| Grafikkartensteckplatz | PCIe 16X |
| USB Schnittstellen | USB2.0 x 10 (4 Front, 6 Rear) |
| Erweiterungsschnittstellen | VGA x 1, HD Multimedia Interface (HDMI) x 1, M.2, NVME M.2, DEBUG Pin x 1 |
| Sound Audio Card | Realtek ALC662 Sound Chip |
| Netzwerkkarte | 100M Network Card |
| Eingebauter Akku | 240mAh CR2032 x 1 |
| Artikelgewicht | 1.13 Pfund |
| Verpackungsabmessungen | 8.27 x 7.87 x 1.97 Zoll |
| Modellnummer | CUIFATI6wgctin4bz |
9. Garantie und Support
For warranty information or technical support, please refer to the retailer where the product was purchased or visit the official Cuifati webBewahren Sie Ihren Kaufbeleg für Garantieansprüche auf.
Hersteller: CUIFATI
Datum der Erstveröffentlichung: 19. Dezember 2023
For additional assistance, you may contact Cuifati customer service through their official channels.