MMUNNA STC-3029/STC-3030/STC-3031
MMUNNA STC-3029/STC-3030/STC-3031 Digital Humidity Controller User Manual
Modelle: STC-3029, STC-3030, STC-3031
1. Einleitung
This manual provides instructions for the installation, operation, and maintenance of the MMUNNA STC-3029, STC-3030, and STC-3031 series Digital Humidity Controllers. These devices are designed for precise humidity control in various applications, including water-saving irrigation, greenhouses, plant culture, and more.
The STC-3029 is a single-channel controller with one soil sensor. The STC-3030 is a dual-channel controller with two soil sensors, offering independent control. The STC-3031 is a single-channel controller with two soil sensors.
2. Spezifikationen
| Besonderheit | STC-3029 | STC-3030 | STC-3031 |
|---|---|---|---|
| Versorgungsvolumentage | Wechselstrom 110-220 V | Wechselstrom 110-220 V | DC12V/DC24V/AC110-220V |
| Relais | 10 A | 10 A | 10A (Optional) |
| Ausgangsleistung | 1500 W | 1500 W | 120 W/240 W/1500 W |
| Feuchtigkeitsbereich | 0-100 % relative Luftfeuchtigkeit | 0-100 % relative Luftfeuchtigkeit | 0-100 % relative Luftfeuchtigkeit |
| Kontrollgenauigkeit | 0.1 % relative Luftfeuchtigkeit | 0.1 % relative Luftfeuchtigkeit | 0.1 % relative Luftfeuchtigkeit |
| Länge des Sensorkabels | 1 Meter | 1 Meter (jeweils) | 1 Meter (jeweils) |
| Produktgröße (L*B*H) | 75*34.5*85 mm | 75*34.5*85 mm | 75*34.5*85 mm |
| Installationsgröße | 71 x 29 mm | 71 x 29 mm | 71 x 29 mm |
| Anzahl der Sensoren | 1 | 2 | 2 |
| Kontrollkanäle | Einzel | Dual | Einzel |
| Gewicht | 50g | 50g | 142g |

Image: Detailed product information and dimensions for the STC-3031 model, including its physical size and sensor connections.
3. Produktmerkmale
- Zuverlässige Leistung: High working efficiency and accurate sensing capabilities.
- Breites Anwendungsspektrum: Suitable for water-saving irrigation, greenhouses, flowers and vegetables cultivation, and general plant culture.
- Schnelle Antwort: Quick detection and response to humidity changes.
- Präzise Steuerung: Automatic start and stop functions for accurate moisture management.
- Fortschrittliche Sensortechnologie: Utilizes a chip for low power consumption, high sensitivity, and stable signal transmission.
- Großbildanzeige: High-definition screen for clear and accurate real-time readings.
- Einfache Verbindung: Simplified back-line connections for straightforward operation.
- Waterproof Soil Sensor: Durable and reliable sensors for various soil types.
- Multi-directional Detection: Two detection probes (STC-3030/3031) for maintaining numerical accuracy.

Image: Visual representation of the wide range of applications for the humidity controller, including water-saving irrigation, greenhouses, flowers and vegetables, plant culture, and scientific training.

Bild: Nahaufnahme view highlighting key features such as the large HD screen for accurate testing, the simple back-line connections for ease of use, and the two detection probes for multi-directional accuracy.
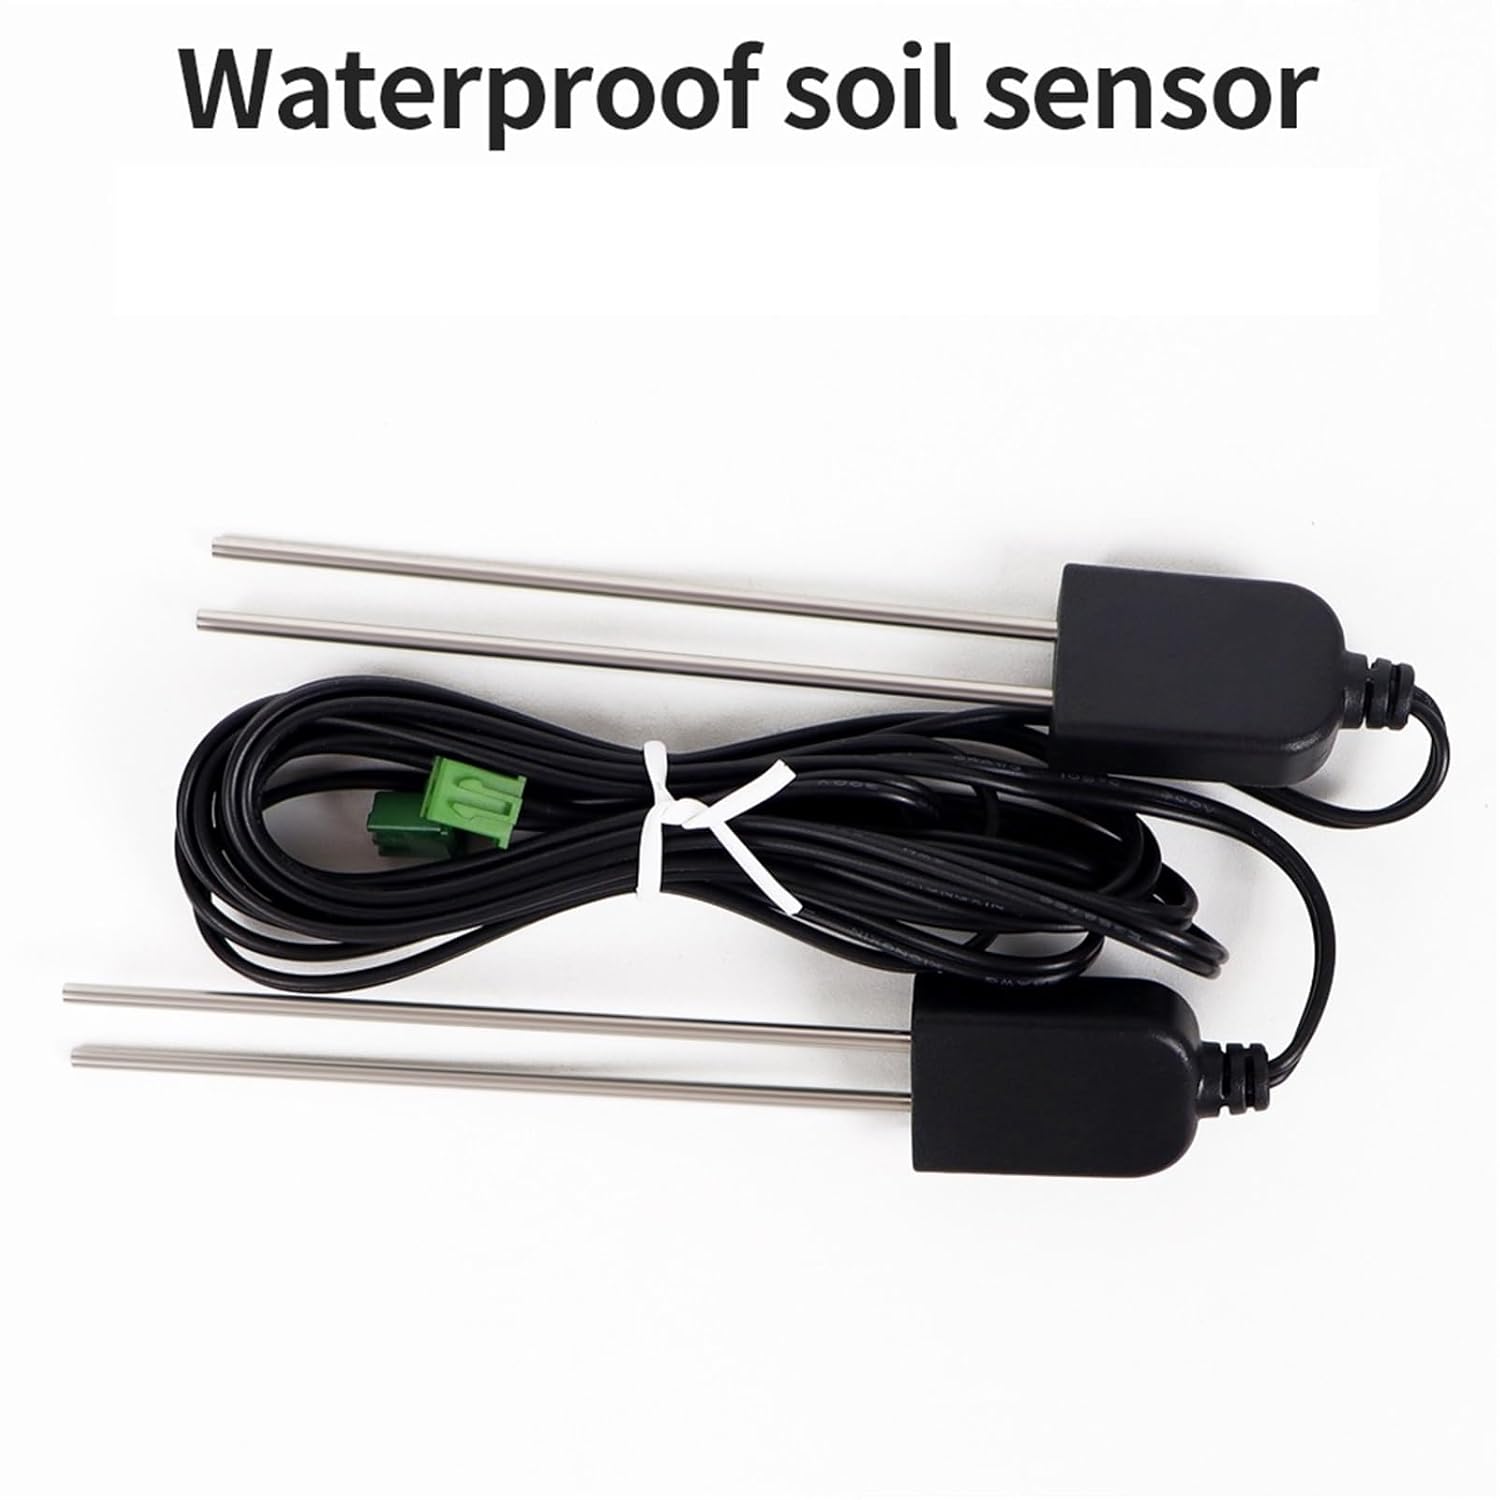
Bild: Eine detaillierte view of the waterproof soil sensor, showing its two probes and connecting cable, designed for reliable soil moisture detection.
4. Produktlayout und Bedienelemente

Image: Diagram illustrating the front and back panels of the STC-3031 model. The front panel shows the dual real-time displays, 'Out' and 'Set' indicators, 'Set' key, 'Up' key, 'Shutdown' key, and 'Down' key. The back panel indicates 'Exportation' and 'Sensor' connection ports.
Bedienelemente auf der Vorderseite:
- Echtzeitanzeige: Shows current humidity readings.
- Output Light (Out): Indicates when the output relay is active.
- Set Light (Set): Indicates when the device is in setting mode.
- Schlüssel einstellen (S): Dient zur Eingabe und Bestätigung von Parametereinstellungen.
- Aufwärtstaste (▲): Wird verwendet, um Werte zu erhöhen oder durch Menüoptionen zu navigieren.
- Abwärtstaste (▼): Wird verwendet, um Werte zu verringern oder durch Menüoptionen zu navigieren.
- Shutdown Key (Power Symbol): Used to power on/off or exit setting mode.
Anschlüsse auf der Rückseite:
- Exportation Ports: Terminals for connecting external devices (e.g., humidifiers, dehumidifiers, pumps).
- Sensoranschlüsse: Terminals for connecting the soil humidity sensor cables.
5. Einrichtung und Installation
- Montage: Install the controller into a panel cutout of 71x29mm. Ensure adequate ventilation around the unit.
- Wiring Power: Connect the AC110-220V power supply to the designated power input terminals on the back of the controller. For STC-3031, ensure the correct DC12V/DC24V/AC110-220V input is used based on your model.
- Sensoren anschließen: Connect the soil humidity sensor cable(s) to the 'Sensor' ports on the back panel. Ensure a secure connection.
- STC-3029: Connect one sensor.
- STC-3030/STC-3031: Connect two sensors.
- Anschluss von Ausgabegeräten: Connect your external humidity control devices (e.g., humidifier, dehumidifier, water pump) to the 'Exportation' ports. Ensure the total power consumption does not exceed the controller's maximum output power (1500W for most models, refer to specifications for STC-3031).
- Sensorplatzierung: Insert the soil sensor probes into the soil at the desired depth and location for accurate moisture detection. Ensure the probes are fully in contact with the soil.
- Erstes Einschalten: After all connections are secure, apply power to the controller. The display should light up, showing the current humidity reading.
Wichtiger Sicherheitshinweis: All wiring should be performed by a qualified professional to prevent electrical hazards. Disconnect power before making any connections or disconnections.
6. Bedienungsanleitung
6.1. Ein-/Ausschalten
Drücken Sie die Abschaltschlüssel (power symbol) to turn the device on or off.
6.2. Viewing Current Humidity
Upon powering on, the large screen display will show the real-time humidity detected by the sensor(s).
6.3. Setting Humidity Parameters
- Rufen Sie den Einstellungsmodus auf: Halten Sie die Schlüssel einstellen (S) for approximately 3 seconds until the 'Set' light illuminates and the display starts flashing.
- Adjust Set Point: Verwenden Sie die Aufwärtstaste (▲) Und Abwärtstaste (▼) to adjust the desired humidity set point. This is the target humidity level you want to maintain.
- Einstellung bestätigen: Drücken Sie die Schlüssel einstellen (S) again to confirm the value and move to the next parameter (if applicable) or exit setting mode.
- Einstellungsmodus verlassen: If no further parameters need adjustment, press the Abschaltschlüssel or wait for approximately 10 seconds for the device to automatically exit setting mode.
Note: For STC-3030 (dual-channel), you may have separate set points for each output channel. Refer to the specific model's detailed instructions for dual-channel configuration.
6.4. Calibration (Advanced)
If calibration is required, consult the full product manual or manufacturer's support. Typically, calibration involves adjusting an offset value to match a known reference humidity.
7. Wartung
- Reinigung: Regularly wipe the controller's display and casinMit einem weichen, trockenen Tuch abwischen. Keine Scheuermittel oder Lösungsmittel verwenden.
- Sensorpflege: Periodically inspect the soil sensors for dirt, debris, or corrosion. Gently clean the probes with water and a soft brush if necessary. Ensure they are dry before re-inserting into soil.
- Verbindungsprüfung: Annually check all electrical connections for tightness and signs of wear or corrosion.
- Umgebungsbedingungen: Ensure the controller is operated within its specified environmental limits (temperature, humidity) to prolong its lifespan.
8. Fehlerbehebung
| Problem | Mögliche Ursache | Lösung |
|---|---|---|
| Der Controller lässt sich nicht einschalten. | Keine Stromversorgung oder falsche Verkabelung. | Überprüfen Sie die Stromanschlüsse und stellen Sie die korrekte Spannung sicher.tage (AC110-220V or DC for STC-3031). Verify power outlet is functional. |
| Das Display zeigt „HHH“ oder „LLL“ an. | Sensor error, disconnected, or out of range. | Check sensor cable connections. Ensure sensor is properly inserted into the soil. Replace sensor if damaged. |
| Output device (e.g., pump) does not activate. | Incorrect set point, output wiring issue, or device malfunction. | Verify humidity set point. Check wiring to the output device. Test the output device independently. Ensure the 'Out' light on the controller is illuminated when it should be active. |
| Ungenaue Feuchtigkeitsmesswerte. | Sensor dirty, damaged, or improperly placed. | Clean the sensor probes. Ensure good contact with the soil. Consider calibration if available and necessary. |
9. Garantie und Support
For warranty information or technical support, please contact your retailer or the manufacturer directly. Keep your purchase receipt for warranty claims.
Ask a question about this manual
Ask about setup, troubleshooting, compatibility, parts, safety, or missing instructions. Manuals+ will review the question and use this page’s manual context to help answer it.