
ROBOTIME LK506
ROBOTIME LK506 Offen/Geschlossen-Schild 3D-Puzzle Bedienungsanleitung
Model: LK506 | Brand: ROBOTIME
Einführung
This manual provides detailed instructions for assembling and operating your ROBOTIME LK506 Open Closed Sign 3D Puzzle. Designed for beginners, this mechanical wooden model offers an enjoyable and educational building experience, culminating in a functional and aesthetic decor piece. It is suitable for ages 14 and up.

Figure 1: The completed ROBOTIME LK506 Open Closed Sign 3D Puzzle.
Im Leistungsumfang enthalten
Your ROBOTIME LK506 package contains all the necessary components for assembly. Please verify that all items are present before beginning the assembly process.
- Bedienungsanleitung
- Laser Cut Wood Pieces (52 pieces)
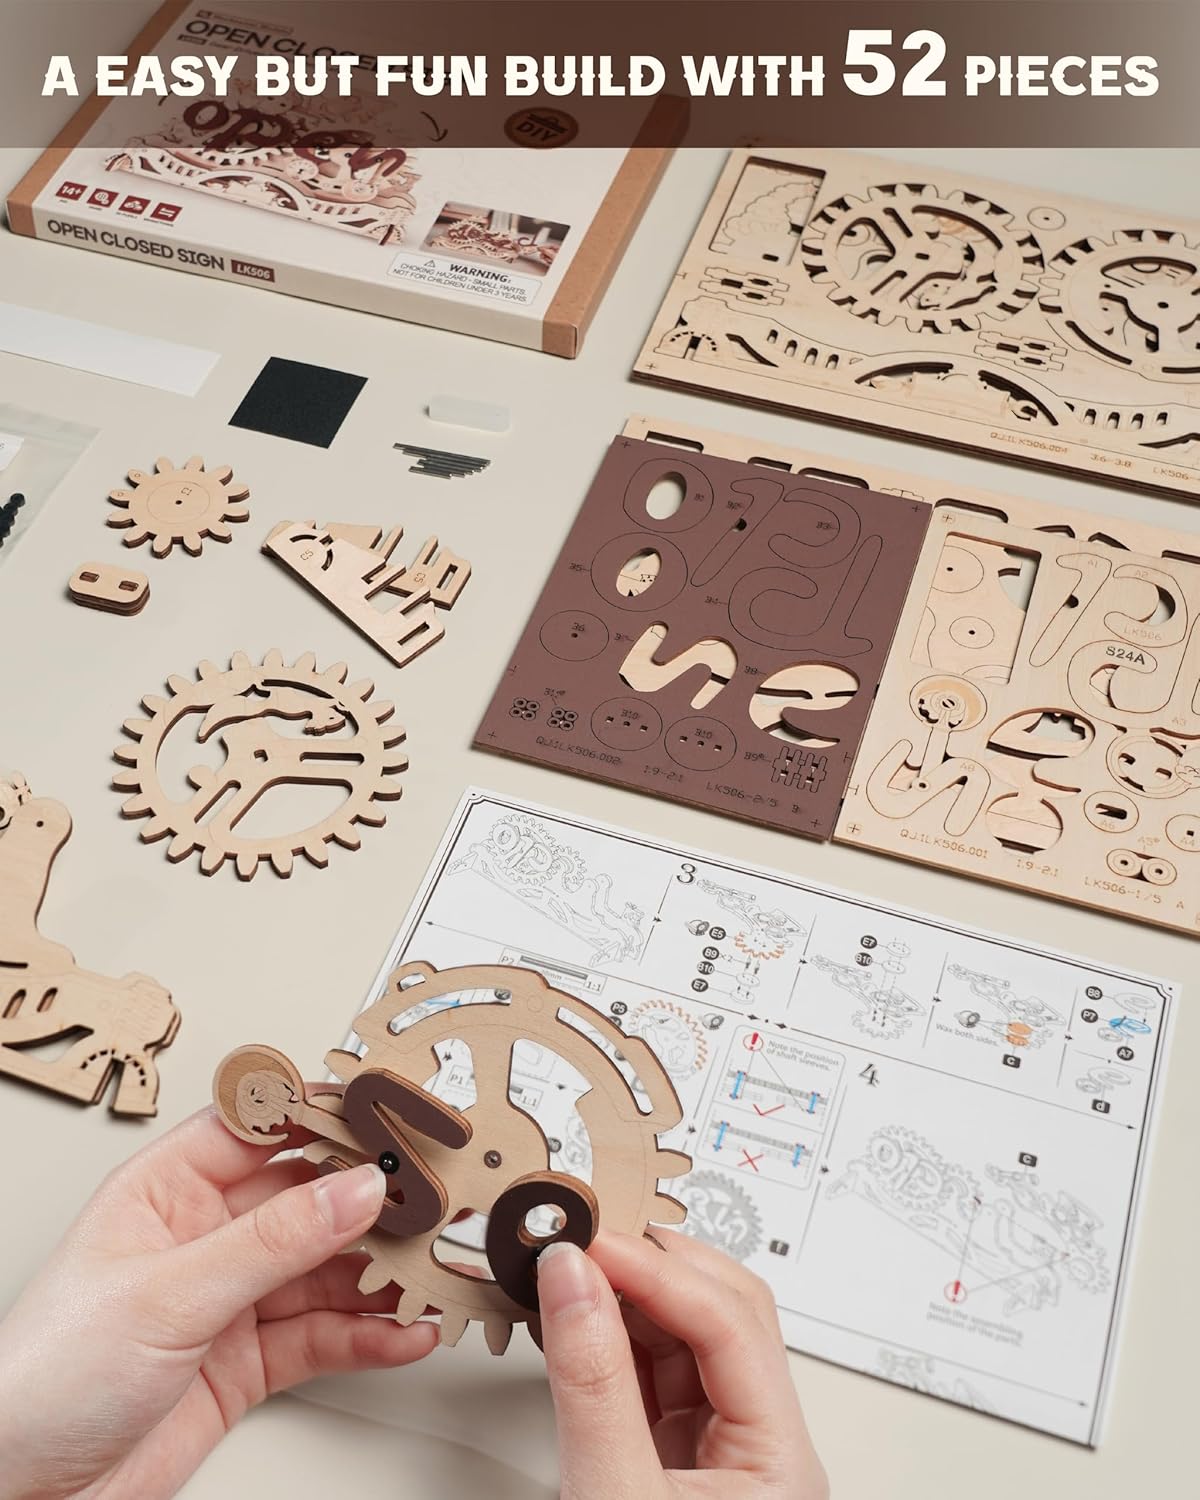
Figure 2: Unpacked components of the LK506 kit, showing the laser-cut wooden sheets and the instruction manual.
Montageanleitung
The assembly process for the LK506 model is designed to be straightforward for beginners, with an estimated completion time of approximately 1 hour. Follow the detailed steps provided in the included instruction book. Handle all wooden pieces with care to prevent breakage.
Schritt 1: Die Teile vorbereiten
Carefully detach all laser-cut wooden pieces from their sheets. Use a small tool or your fingers to gently push them out. Organize the pieces by their designated numbers or shapes as indicated in the instruction book.

Figure 3: Organized wooden pieces and tools on a workspace, ready for assembly.
Step 2: Follow the Instruction Book
The included instruction book provides step-by-step diagrams and guidance for connecting each piece. Pay close attention to the orientation and connection points. Some joints may require gentle pressure to fit securely.

Figure 4: A close-up of hands assembling a wooden component, demonstrating the precision required.
Step 3: Assemble the Gear Mechanism
The core of the LK506 is its gear-driven mechanism. Ensure all gears are aligned correctly and rotate smoothly as you assemble them. This is crucial for the proper functioning of the "Open" and "Closed" display.

Figure 5: Detailed diagram illustrating the internal gear mechanism and how it transitions between "Open" and "Closed" states.
Step 4: Final Assembly and Testing
Once all pieces are connected, perform a final check to ensure stability and smooth operation of the mechanism. Gently rotate the handle to confirm the "Open" and "Closed" signs transition correctly.
Bedienungsanleitung
The ROBOTIME LK506 Open Closed Sign is simple to operate. Once assembled, place the model on a flat, stable surface.
- To switch the sign, locate the designated handle on the side of the model.
- Gently rotate the handle. The internal gears will engage, causing the display to smoothly transition from "Open" to "Closed" or vice versa.
- Ensure the handle is rotated fully to lock the sign into either the "Open" or "Closed" position.

Figure 6: A hand demonstrating the rotation of the handle to switch the sign's display.
Wartung
To ensure the longevity and smooth operation of your ROBOTIME LK506 sign, follow these simple maintenance guidelines:
- Reinigung: Dust the model regularly with a soft, dry cloth. Avoid using abrasive cleaners or excessive moisture, which can damage the wood.
- Lagerung: Store the model in a dry environment, away from direct sunlight or extreme temperature fluctuations, to prevent warping or cracking of the wood.
- Joint Stability: While the kit includes adhesive, some users may find additional wood glue beneficial for long-term stability of certain joints, especially if the sign is frequently handled. Apply sparingly to connection points if needed.
- Mechanismuspflege: If the gear mechanism feels stiff over time, a very small amount of dry lubricant (e.g., graphite powder) can be applied to the gear teeth, but this is rarely necessary for this model.
Fehlerbehebung
If you encounter any issues during assembly or operation, consider the following common solutions:
| Problem | Mögliche Ursache/Lösung |
|---|---|
| Teile passen nicht zusammen | Ensure you are using the correct pieces as indicated in the instruction book. Check for any burrs on the laser-cut edges that might prevent a smooth fit; these can often be gently removed. |
| Mechanism is stiff or not moving smoothly | Verify that all gears are correctly aligned and seated. Ensure no pieces are rubbing against each other unnecessarily. Re-check the assembly steps for the gear mechanism. |
| Sign does not fully switch between "Open" and "Closed" | Confirm that the handle is rotated completely. Check for any obstructions in the gear path or if any pieces are loose, preventing full rotation. |
| Beim Zusammenbau brechen Teile. | Wooden pieces, especially thin ones, can be fragile. Apply gentle, even pressure when assembling. If a piece breaks, contact ROBOTIME support for possible replacements. |
Technische Daten
| Besonderheit | Detail |
|---|---|
| Technische Daten | 9 x 6 x 0.04 Zoll |
| Artikelgewicht | 8.8 Unzen |
| Artikelmodellnummer | RBT-LK506 |
| Vom Hersteller empfohlenes Alter | Ab 14 Jahren |
| Geschätzte Montagezeit | 1 Stunde |
| Stückzahl | 52 |
| Ursprungsland | China |
| Hersteller | ROBOTIME |
Garantie und Support
ROBOTIME is committed to providing high-quality products and comprehensive customer support. If you encounter any challenges during the assembly process, have questions about your product, or require assistance with missing or broken parts, please do not hesitate to contact ROBOTIME customer service. Your satisfaction is our utmost priority.
For support, please visit the official ROBOTIME webBesuchen Sie die Website oder konsultieren Sie die Kontaktinformationen auf Ihrer Produktverpackung.
Zugehörige Dokumente - LK506
 |
ROKR AMK52 Secret Garden DIY Mechanische Spieluhr – Montageanleitung Ausführliche Montageanleitung für die mechanische Spieluhr ROKR AMK52 Secret Garden von Robotime. Diese Anleitung bietet eine detaillierte Schritt-für-Schritt-Anleitung für den Zusammenbau, inklusive Teileliste, hilfreichen Tipps für ein gelungenes Ergebnis. |
 |
Jason's Kitchen DG105 Assembly Instructions Comprehensive assembly guide for the Jason's Kitchen (DG105) miniature dollhouse kit by Robotime. Includes step-by-step instructions for furniture, lighting, and decor. |
 |
Sweet Dream (DS016) Miniature Room Assembly Manual Comprehensive assembly instructions for the Robotime Sweet Dream (DS016) miniature room kit. Includes material lists, painting guides, and step-by-step construction procedures. |
 |
Cathy's Flower House (DG104) Assembly Instructions Official assembly manual for the Robotime Cathy's Flower House (DG104) DIY miniature kit. Includes detailed instructions for furniture, plants, lighting, and structural assembly. |
 |
Cathys Blumenhaus DG104: Miniatur-DIY-Montageanleitung Ausführliche Bauanleitung für den Miniatur-Bastelbausatz „Cathy's Flower House DG104“ von Robotime. Diese Anleitung enthält detaillierte Schritte, Tipps und Teilelisten, die Ihnen beim Bau Ihres eigenen bezaubernden Blumenhauses helfen. |
 |
Olivias Küchenmontageanleitung - ROBOTIME WCF09 Detaillierte Montageanleitung für das ROBOTIME Spielset „Olivias Küche“ (Modell WCF09). Enthält eine Teileliste, eine Schritt-für-Schritt-Anleitung und Sicherheitshinweise für den Aufbau dieser Holzspielküche. |
Ask a question about this manual
Ask about setup, troubleshooting, compatibility, parts, safety, or missing instructions. Manuals+ will review the question and use this page’s manual context to help answer it.