1. Einleitung
This manual provides detailed instructions for the installation, operation, and maintenance of your ELUSH 100A MPPT Solar Charge Controller. This advanced controller is designed to efficiently manage power from your solar panels to your battery bank, ensuring optimal charging and system protection. It automatically recognizes 12V, 24V, 36V, and 48V systems and features dual USB 5V charging ports.
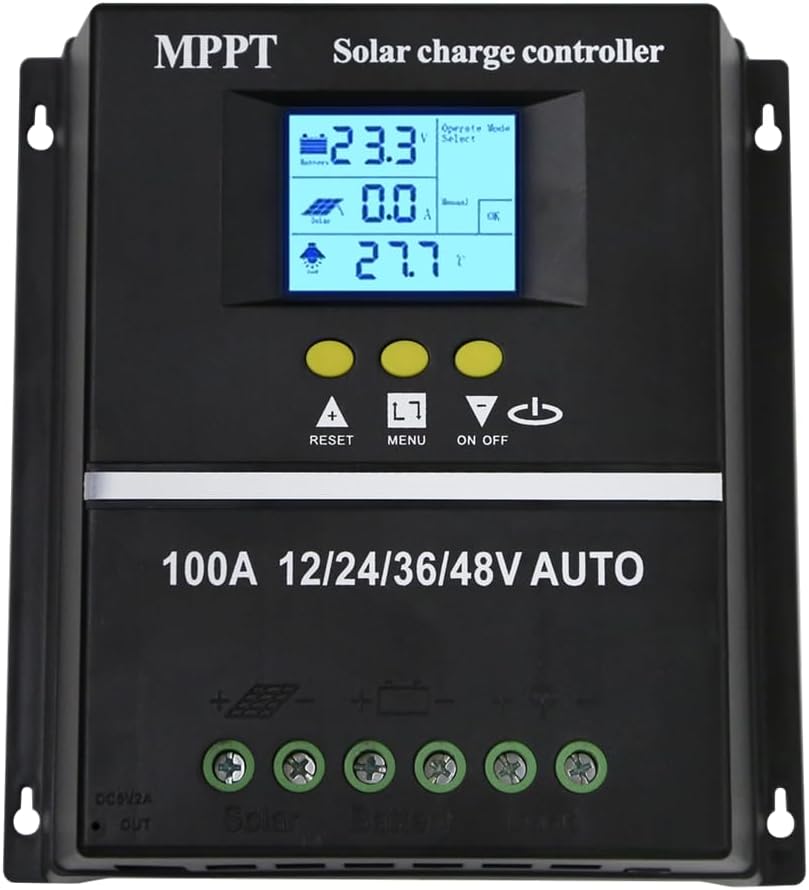
Abbildung 1.1: Vorderseite view of the ELUSH 100A MPPT Solar Charge Controller.
2. Sicherheitshinweise
Bitte lesen Sie vor der Installation und Inbetriebnahme alle Anweisungen sorgfältig durch. Die Nichtbeachtung dieser Anweisungen kann zu Schäden am Gerät, Verletzungen oder Sachschäden führen.
- Stellen Sie sicher, dass alle Verbindungen sicher und korrekt sind, bevor Sie das System einschalten.
- Zerlegen Sie den Controller nicht und versuchen Sie nicht, ihn selbst zu reparieren. Wenden Sie sich zur Reparatur an qualifiziertes Fachpersonal.
- Installieren Sie den Controller in einem gut belüfteten Bereich, fern von brennbaren Materialien und direkter Sonneneinstrahlung.
- The controller provides comprehensive voltage protection, including safeguards against battery over-voltage, over-current, power failure, overcharge, deep discharge, reverse connection, and overheating.
- Device Startup Reminder: When connecting the equipment, first connect the rechargeable battery and ensure it has power. After successful startup, then connect the solar panel. This sequence ensures proper operation.
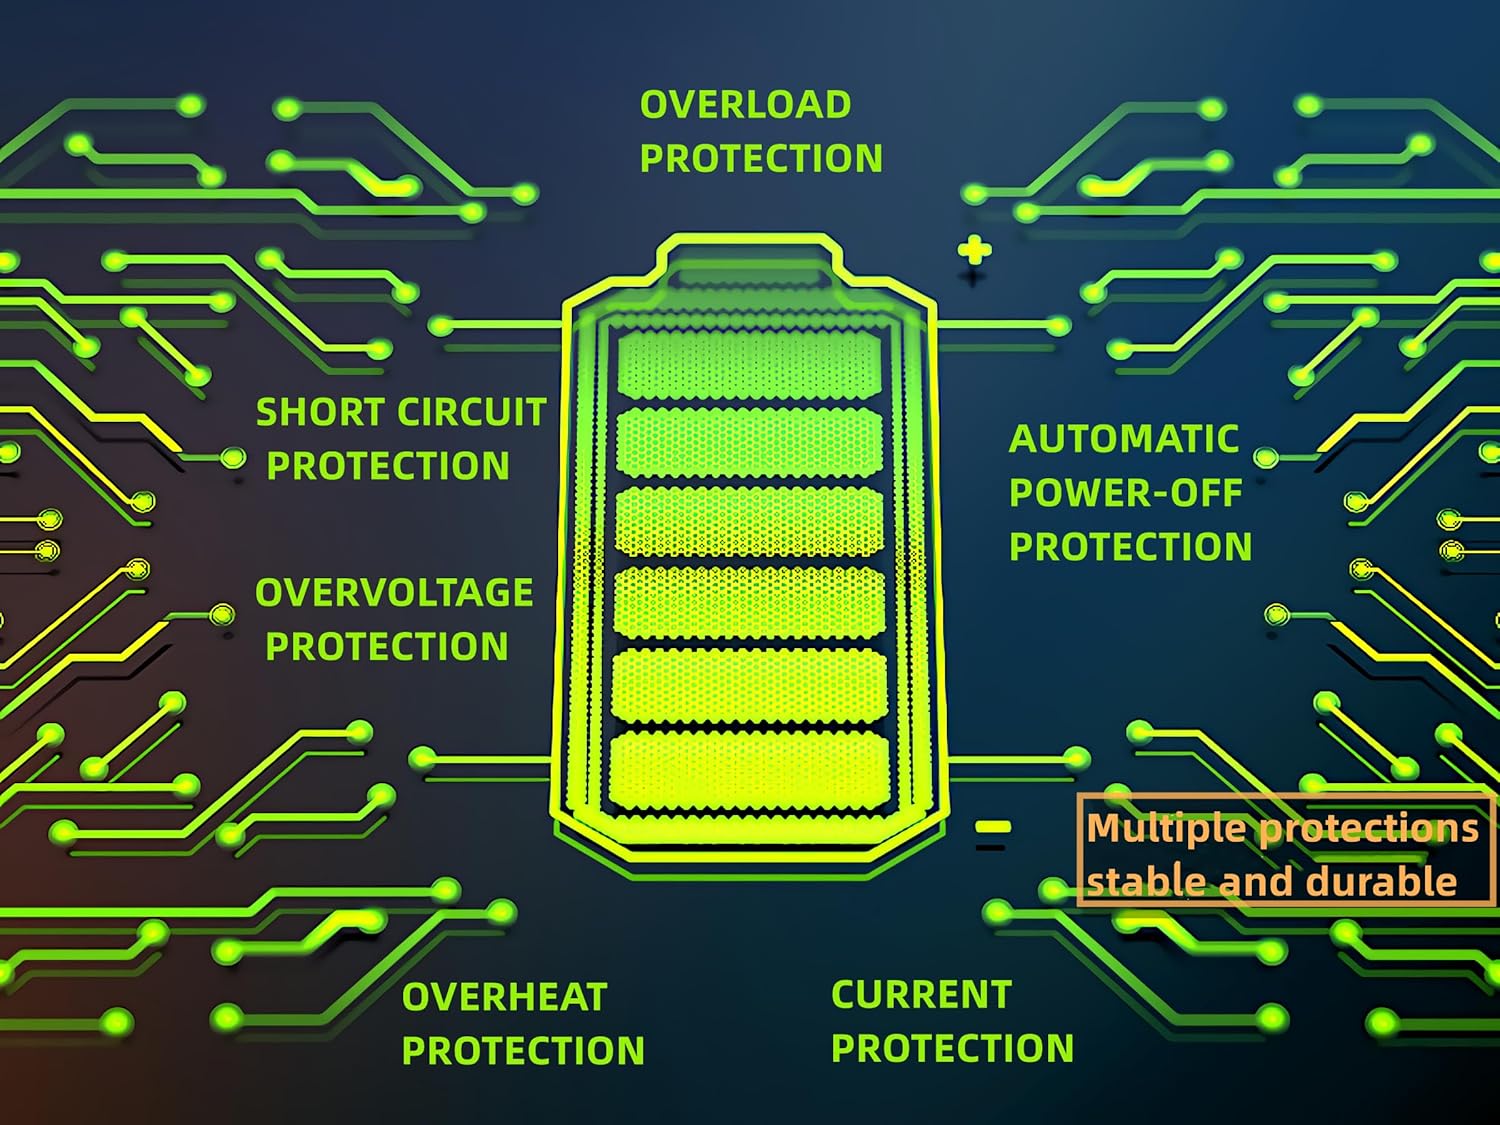
Figure 2.1: Built-in protection features for enhanced safety and durability.
3. Produktmerkmale
The ELUSH MPPT Solar Charge Controller offers a range of features designed for efficient and reliable solar power management:
- Superior MPPT Technology: Equipped with an advanced Maximum Power Point Tracking algorithm, ensuring tracking efficiency of no less than 99.5% for enhanced energy utilization.
- Automatic System Recognition: Automatically recognizes 12V, 24V, 36V, and 48V battery systems.
- Vielseitige Betriebsarten: Features seven operating modes including charging mode, light control mode, light control + time delay control mode, universal control mode, manual control mode, and timing control mode.
- Multifunktions-LCD-Display: Dynamically displays operational data such as working mode, battery voltage, PV-Ladestrom, Batterieentladestrom, Produktbetriebstemperatur und Verzögerungszeit.
- Dual USB Ports: Includes dual USB 5V charging ports for convenient device charging.
- Breite Akkukompatibilität: Compatible with various battery types, including Sealed, GEL, Flooded, and LifePO4.
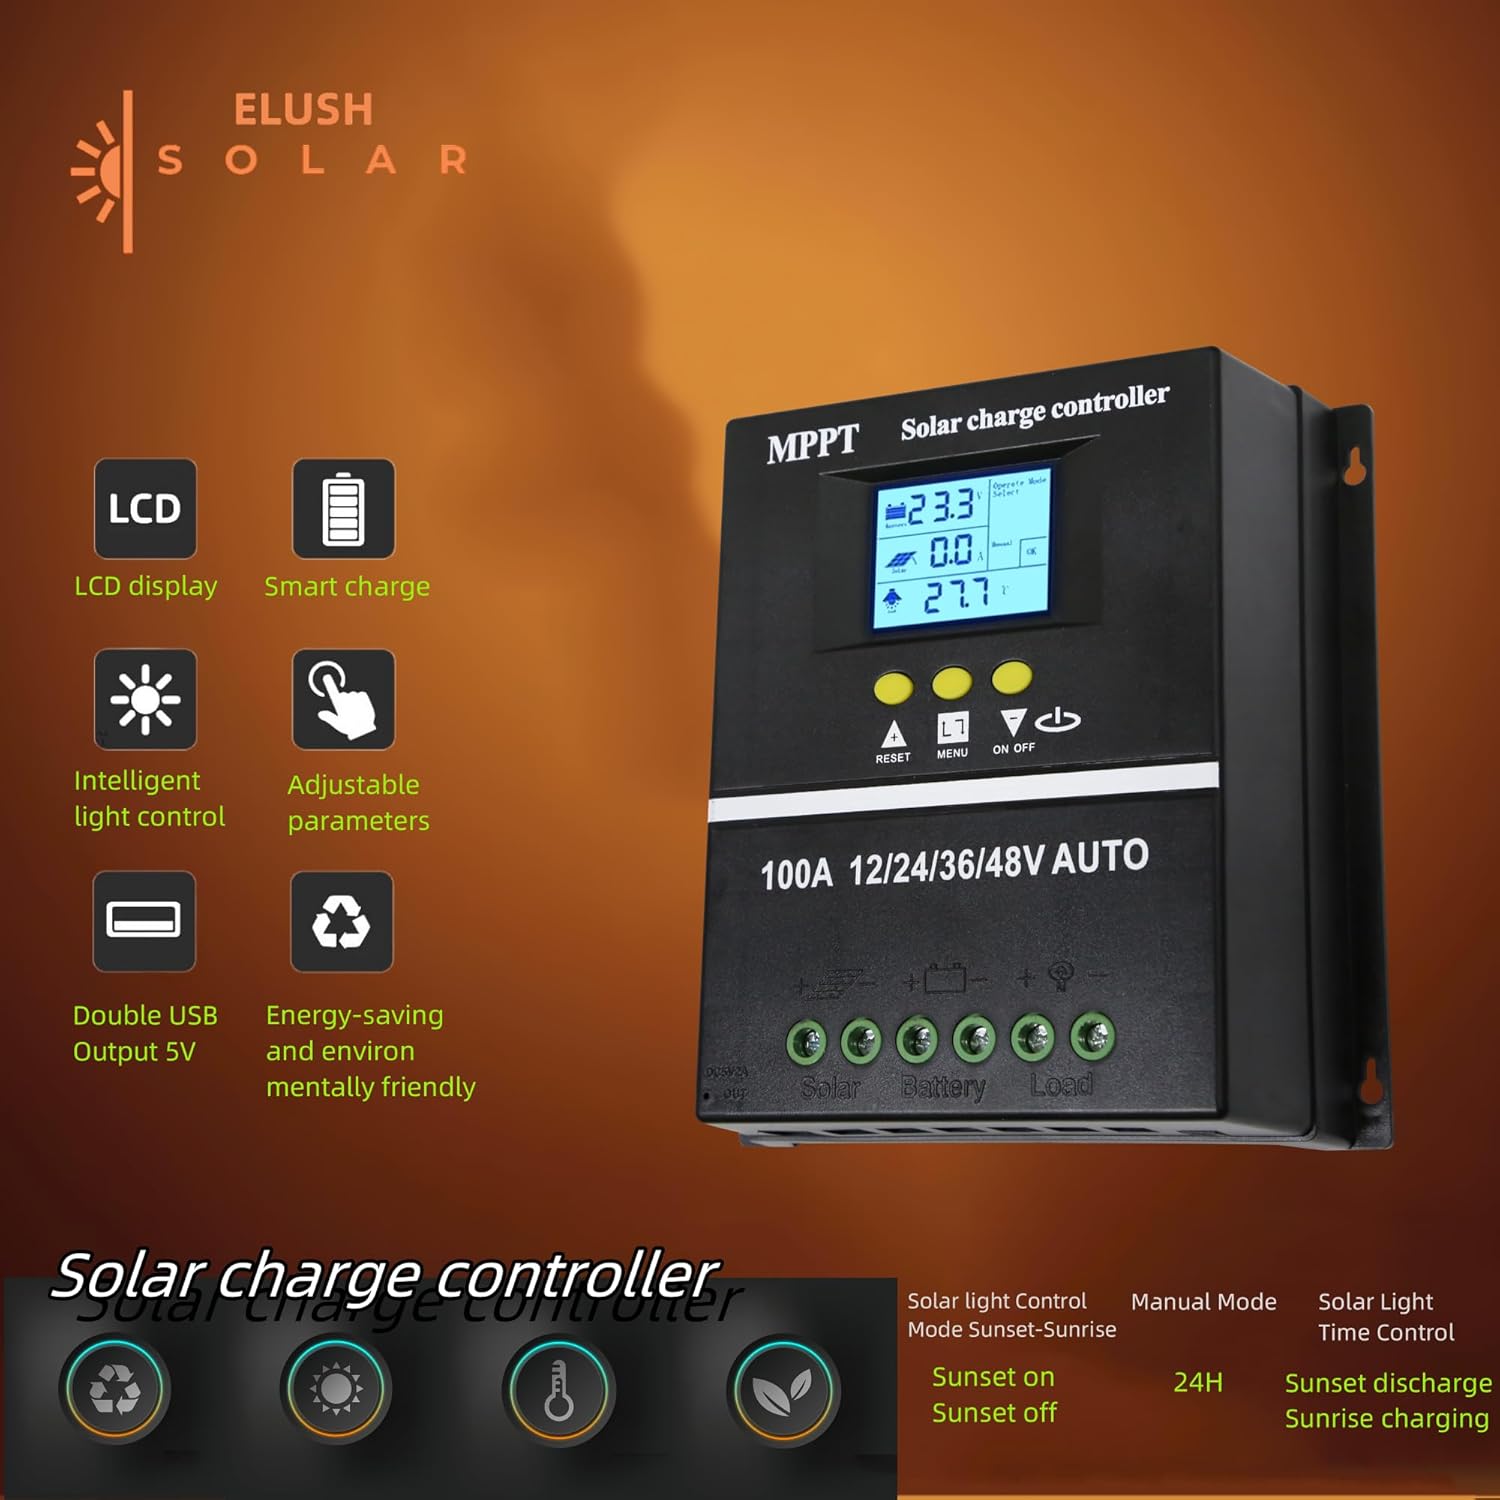
Figure 3.1: Key features of the ELUSH Solar Charge Controller.

Abbildung 3.2: Ausführlich view of connection ports and heat dissipation design.
4. Einrichtung und Installation
Befolgen Sie diese Schritte für die ordnungsgemäße Installation Ihres Solarladereglers:
- Bereiten Sie den Montageort vor: Choose a dry, well-ventilated area, protected from direct sunlight and moisture. Ensure there is enough space around the controller for proper heat dissipation.
- Schließen Sie die Batterie an: First, connect the positive and negative terminals of your battery to the corresponding battery terminals on the controller. Ensure the battery has sufficient charge to power the controller's display.
- Schließen Sie die Solarpaneele an: Next, connect the positive and negative terminals of your solar panel array to the corresponding solar panel terminals on the controller.
- Last anschließen (optional): If you are connecting a DC load directly to the controller, connect its positive and negative terminals to the load terminals on the controller.
- Überprüfen Sie die Verbindungen: Überprüfen Sie alle Verbindungen sorgfältig, um sicherzustellen, dass sie sicher und korrekt polarisiert sind.

Figure 4.1: Typical connection diagram for the solar charge controller.
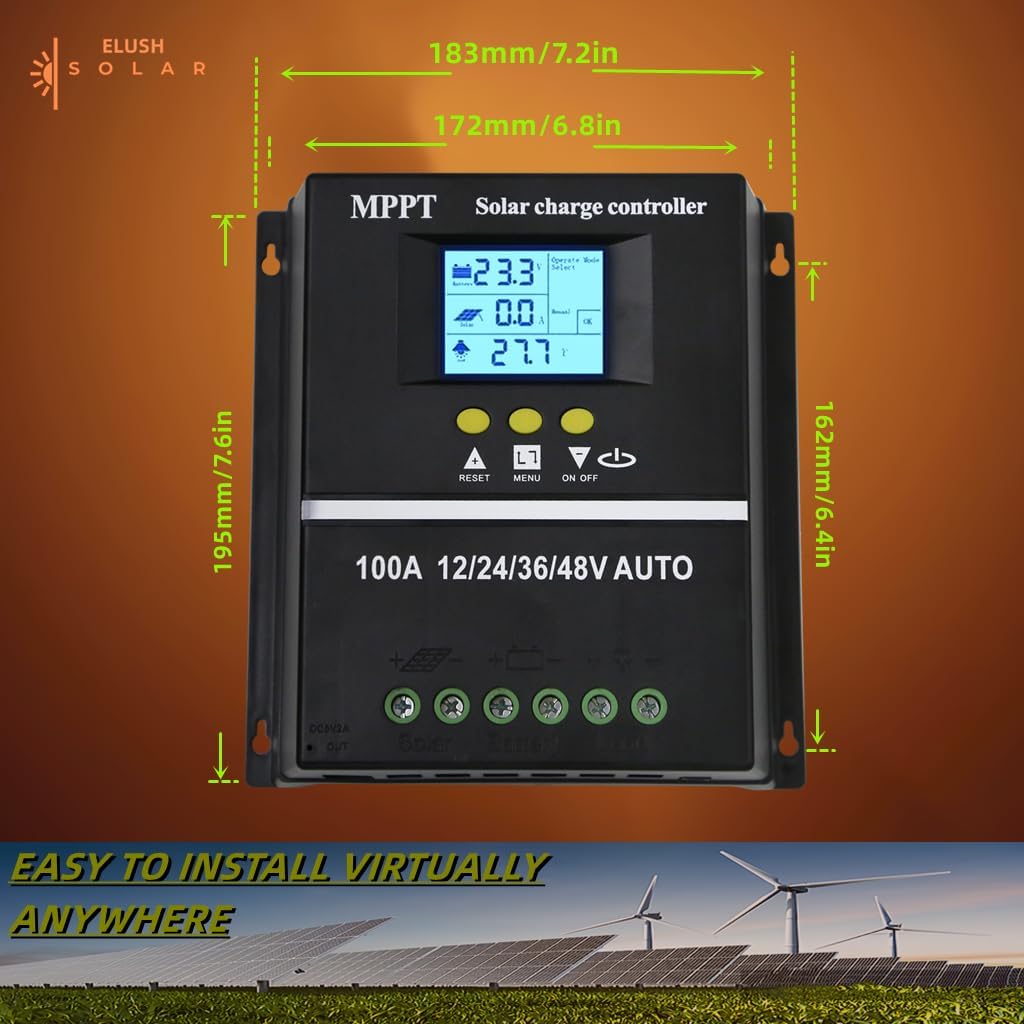
Abbildung 4.2: Produktabmessungen für die Installationsplanung.
5. Bedienungsanleitung
The controller's LCD display provides real-time information and allows for configuration of various settings.
5.1 LCD-Display und Tasten
The LCD dynamically displays operational data. Use the buttons below the screen to navigate menus and adjust settings:
- ZURÜCKSETZEN: Resets certain parameters or enters settings mode.
- SPEISEKARTE: Navigates through different display screens and settings.
- AUF-/AB-Pfeile: Adjust values or select options within menus.
- EIN/AUS: Controls the DC load output.
5.2 Lademodi
The controller supports a rapid, efficient, and safe battery charging algorithm with four stages:
- Sammelladung: Anfangs-stage where the battery receives maximum current.
- Boost-Ladung: Lädt den Akku auf eine höhere Spannung auftage, um eine vollständige Aufladung zu gewährleisten.
- Erhaltungsladung: Hält die Batterie auf einer konstanten Spannungtage, um Überladung zu vermeiden.
- Ausgleichsladung: Lädt die Batterie periodisch über, um das Zellvolumen auszugleichen.tages (for certain battery types).

Figure 5.1: Four-stage battery charging process.
5.3 Auswahl des Batterietyps
The controller is compatible with Sealed, GEL, Flooded, and LifePO4 batteries. Ensure you select the correct battery type in the settings for optimal charging and battery longevity.

Figure 5.2: Compatible battery types.
5.4 Anwendungsszenarien
The ELUSH MPPT Solar Charge Controller is suitable for various applications, including:
- Residential solar power systems
- RV and marine solar setups
- Off-grid cabins and remote power solutions
- Portable solar power kits
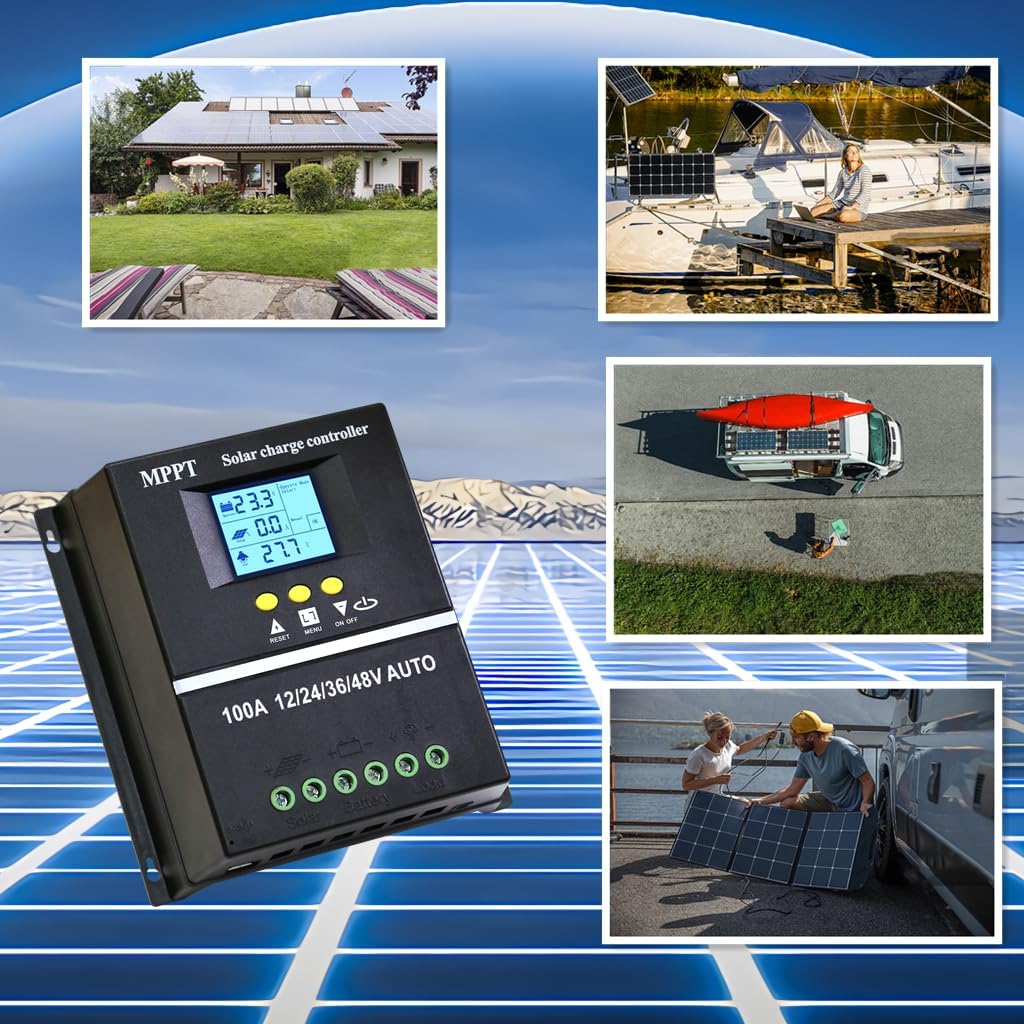
Figure 5.3: Diverse application scenarios for the solar charge controller.
6. Wartung
Regelmäßige Wartung gewährleistet die Langlebigkeit und optimale Leistung Ihres Solarladereglers:
- Sauberkeit: Halten Sie den Controller sauber und frei von Staub und Schmutz. Verwenden Sie zum Reinigen ein trockenes, weiches Tuch.
- Verbindungen: Überprüfen Sie regelmäßig alle Kabelverbindungen auf festen Sitz und Korrosion. Lose Verbindungen können zu Stromausfall oder Überhitzung führen.
- Belüftung: Ensure the installation area remains well-ventilated to prevent overheating, especially during peak operation.
- Firmware-Updates: Überprüfen Sie die Angaben des Herstellers webAuf dieser Website finden Sie alle verfügbaren Firmware-Updates, um sicherzustellen, dass Ihr Controller über die neuesten Funktionen und Fehlerbehebungen verfügt.
7. Fehlerbehebung
Sollten Sie Probleme mit Ihrem Solarladeregler haben, beachten Sie bitte die folgenden häufig auftretenden Probleme und Lösungen:
| Problem | Mögliche Ursache | Lösung |
|---|---|---|
| Controller lässt sich nicht einschalten / Keine Anzeige | Battery not connected or insufficient battery voltage. | Ensure battery is connected first and has adequate charge (minimum 9V for 12V systems). Charge battery externally if completely depleted. |
| No solar charging current | Solar panels not connected, insufficient sunlight, or panel issues. | Check solar panel connections. Ensure panels are receiving direct sunlight. Verify panel voltage. |
| Akku wird nicht vollständig geladen | Incorrect battery type setting, insufficient solar input, or battery degradation. | Verify battery type setting on the controller. Increase solar panel capacity if needed. Test battery health. |
| Laden funktioniert nicht | Load output disabled, overload, or low battery voltage. | Check load output setting (ON/OFF button). Reduce load if overloaded. Charge battery. |
| Überhitzung | Poor ventilation or excessive load/charging current. | Ensure adequate airflow around the controller. Reduce load or check for short circuits. |
8. Spezifikationen
Detailed technical specifications for the ELUSH 100A MPPT Solar Charge Controller:
| Parameter | Wert |
|---|---|
| Batterie Voltage | 12V/24V/36V/48V Automatisch |
| Ladestrom | 100 A |
| Max Solar Input (Voc) | 15-25V (12V Battery); 30-50V (24V Battery); 45-75V (36V Battery); 60-100V (48V Battery) |
| Maximale PV-Eingangsleistung | 1200W (12V Battery); 2400W (24V Battery); 3600W (36V Battery); 4800W (48V Battery) |
| USB-Anschluss | DC 5V/1.5A x 2 USB |
| Betriebstemperatur | -25°C bis 55°C |
| Hersteller | ELUSH |
| Artikelgewicht | 1.79 Pfund |
| Verpackungsabmessungen | 8.11 x 8.03 x 2.91 Zoll |

Figure 8.1: Detailed specifications of the 100A model.
9. Garantie und Support
ELUSH offers a 1-year warranty for this product. For technical support or any issues you may encounter, please feel free to contact our team. Our engineers are available to provide advice and solutions.
Für weitere Informationen und Produkte besuchen Sie die ELUSH Store.