
1. Zu Endeview
The Jennov K2-P52-V18 is a fully wireless outdoor solar security camera system designed for comprehensive surveillance. It features a 400-megapixel camera with Pan-Tilt-Zoom (PTZ) capabilities, offering 360° rotation and a 130° wide-angle view. The system includes a 4K-compatible monitor for direct viewing and supports remote monitoring via the Eseecloud app. Key features include AI human detection, color night vision, IP66 waterproof and dustproof rating, and efficient H.265+ video compression with built-in HDD storage.
2. Packungsinhalt
Bitte prüfen Sie, ob alle unten aufgeführten Artikel in Ihrem Paket enthalten sind. Sollten Artikel fehlen oder beschädigt sein, kontaktieren Sie bitte unseren Kundenservice.
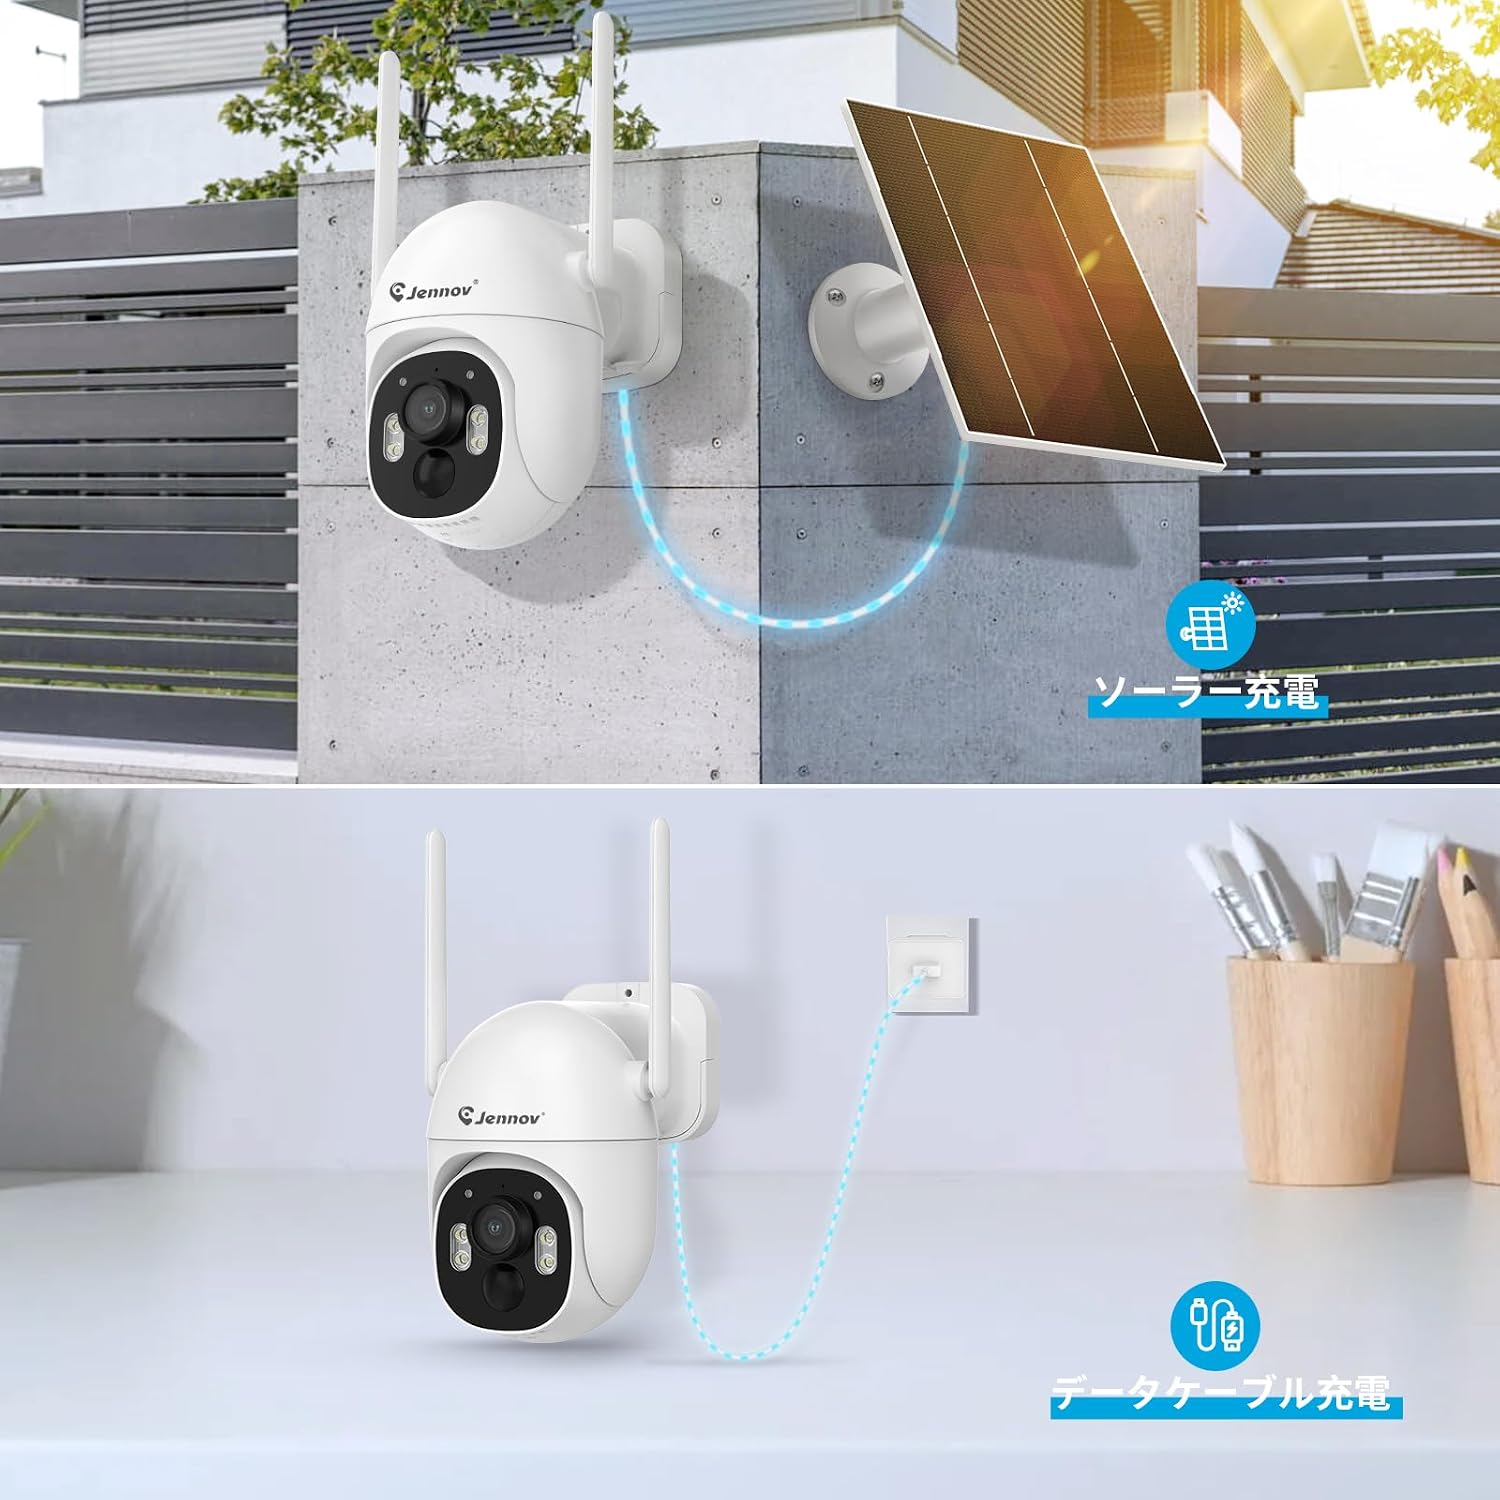
Image: Contents of the Jennov K2-P52-V18 security camera system package.
- 400MP Wireless Security Camera (2 units)
- 800MP Compatible Monitor with Built-in HDD (1 unit)
- Solarmodul (2 Einheiten)
- NVR-Netzteil (1 Stück)
- HDMI-Kabel (1 Stück)
- USB-Maus (1 Stück)
- Security Sticker (1 unit)
- Bedienungsanleitung (1 Stück)
- Camera Mounting Screws (2 sets)
- LAN-Kabel (1 Stück)
3. Einrichtung
3.1 Erstaufladung
Before installation, it is recommended to fully charge the camera using a Type-C cable for at least 6 hours to ensure optimal performance. The camera can also be charged via the solar panel once installed.

Image: The camera supports both solar charging and Type-C cable charging.
3.2 Physische Installation
The cameras are designed for outdoor use with an IP66 waterproof and dustproof rating. Choose a location that provides a clear view des Bereichs, den Sie überwachen möchten, und dass das Solarpanel ausreichend Sonnenlicht erhält.
Video: This video demonstrates the general method for installing the security camera.
- Bohrpunkte markieren: Use the mounting template to mark the positions for drilling on the wall or ceiling.
- Bohrlöcher: Bohren Sie an den markierten Stellen Löcher.
- Anker einfügen: Stecken Sie die Kunststoffdübel in die Bohrlöcher.
- Kamera montieren: Richten Sie die Kamerabasis an den Ankern aus und befestigen Sie sie mit Schrauben.
- Solarpanel anschließen: Connect the solar panel to the camera. Position the solar panel to maximize sunlight exposure.

Image: Drilling holes into the wall for mounting the camera.

Image: Inserting plastic anchors into the drilled holes to secure the camera mount.

Image: Attaching the camera to the wall using screws and anchors.

Image: The IP66 waterproof camera installed outdoors with its solar panel for continuous power.
3.3 Systemanschluss
The system is designed for easy plug-and-play setup. The monitor and cameras connect wirelessly. You can connect the monitor to a larger display via HDMI or to your network via LAN/Wi-Fi for remote access.
Video: This video illustrates the simple setup and plug-and-play functionality of the system.
- Einschalten: Connect the NVR power adapter to the monitor and plug it into an electrical outlet. The cameras will automatically connect to the monitor.
- Monitor Ports: The monitor features ports for power, USB (for mouse), HDMI (for external display), LAN (for wired network connection), a reset button, and an SD card slot.
- Netzwerkverbindung (optional): Für Fernbedienung viewing, connect the monitor to your router via the LAN port or Wi-Fi.

Image: The monitor connected to a power source and an external TV display, showing multiple camera feeds.

Bild: Nahaufnahme view of the monitor's various ports, including power, USB, HDMI, LAN, reset button, and SD card slot.
3.4 Einrichtung der Eseecloud-App
To enable remote monitoring and control, download the Eseecloud app on your smartphone or tablet. Follow the in-app instructions to add your camera system.
Video: This video provides a guide on connecting and operating a security camera system via an app.

Image: The Eseecloud mobile application interface, showing live camera feed and control options.
4. Bedienung
4.1 Viewing Live Feed & PTZ Control
Du kannst view live camera feeds directly on the included monitor or remotely via the Eseecloud app. The camera supports Pan-Tilt-Zoom (PTZ) functionality, allowing you to adjust the viewing-Winkel.
- Die Kamera bietet einen 130°-Weitwinkel. view and can rotate 355° horizontally (pan) and 90° vertically (tilt), eliminating blind spots.
- Use the controls on the monitor or within the Eseecloud app to remotely adjust the camera's pan and tilt.

Image: The camera's 130° wide-angle view, demonstrating its 355° pan and 90° tilt capabilities for comprehensive coverage.
4.2 Aufnahmemodi
The system offers three recording modes to suit your surveillance needs:
- 24-Stunden-Daueraufzeichnung: Records continuously. This mode requires the camera battery to be above 80% charge.
- Aufnahme mit Bewegungserkennung: Records only when motion is detected. This mode helps conserve storage space and battery life. You can adjust the motion detection area to avoid unnecessary alerts.
- Optimal Power Saving Mode: Records only when motion is detected, with customizable recording durations and rest periods after detection.

Image: Illustration of the three available recording modes: 24-hour continuous, motion detection, and optimal power-saving mode.
4.3 KI-gestützte Personenerkennung und Warnmeldungen
The camera features advanced AI human detection, which accurately identifies human movement while minimizing false alarms from non-human sources like insects, rain, or swaying leaves. When a person is detected, the system can trigger various alerts:
- Audioalarm: The built-in buzzer can sound an alarm (default is off, can be enabled in settings).
- Lichtalarm: LED lights on the camera can flash to deter intruders.
- Benachrichtigung: Receive instant alerts on your smartphone via the Eseecloud app.
- E-Mail-Benachrichtigung: Receive email notifications with snapshots or video clips.

Image: The AI human detection feature highlighting a person within the surveillance area, indicating accurate detection.

Image: Various alarm modes including audio, light, and app notifications, triggered upon detection of suspicious activity.
4.4 Zwei-Wege-Audio
The camera includes a built-in microphone and speaker, enabling two-way audio communication. This allows you to speak to visitors, delivery personnel, or deter unwanted individuals directly through the Eseecloud app.

Image: Illustration of the two-way audio feature, showing a user communicating through the camera with someone at the monitored location.
4.5 Nachtsicht
The camera provides clear surveillance even in low-light conditions with multiple night vision modes:
- Farbnachtsicht: Utilizes white LEDs to provide full-color images at night.
- Infrarot Nachtsicht: Uses infrared LEDs for clear black-and-white images in complete darkness, with a range of up to 30 meters.
Video: This video demonstrates the actual day and night image quality of the camera, showcasing its performance in various lighting conditions.

Image: Comparison of day vision, color night vision, and infrared night vision modes provided by the camera.
5. Wartung
5.1 Energieverwaltung
The camera is primarily powered by a solar panel, ensuring continuous operation without external wiring. It also has an internal battery and can be charged via a Type-C cable if needed.
- Ensure the solar panel is positioned in an area that receives direct sunlight for most of the day to maintain battery charge.
- In prolonged periods of low sunlight, the camera can be temporarily charged using a Type-C cable.

Image: The camera connected to a solar panel for continuous power and an alternative Type-C cable for charging.
5.2 Speicherverwaltung
The system includes a built-in HDD for video storage. It utilizes H.265+ compression technology to maximize storage efficiency without compromising video quality. When the HDD is full, the oldest recordings are automatically overwritten to ensure continuous recording.
- The H.265+ compression allows for extended recording times, such as 15 days of continuous recording.
- No SD card is required as the monitor has an internal HDD.

Image: Illustration showing the internal HDD and the efficiency of H.265+ video compression for extended recording.
5.3 Reinigung
Reinigen Sie das Kameraobjektiv und das Solarpanel regelmäßig mit einem weichen Tuch.amp Für eine klare Bildqualität und effizientes Aufladen mit Solarenergie verwenden Sie bitte ein Tuch. Vermeiden Sie die Verwendung aggressiver Chemikalien oder scheuernder Materialien.
6. Fehlerbehebung
If you encounter issues with your Jennov security camera system, refer to the following common troubleshooting steps:
| Problem | Mögliche Ursache | Lösung |
|---|---|---|
| Die Kamera lässt sich nicht einschalten. | Low battery, solar panel obstruction, power adapter issue. | Ensure solar panel is clean and receiving direct sunlight. Charge camera via Type-C cable for several hours. Check power adapter connection to monitor. |
| Kein Bild auf dem Monitor. | Camera not connected, monitor power off, HDMI cable issue. | Verify camera is powered on. Check monitor power. If using external display, ensure HDMI cable is securely connected and input is correct. Cameras should automatically pair with the monitor. |
| Verbindung zur Eseecloud-App nicht möglich. | Network issue, incorrect app settings, camera not paired. | Ensure monitor is connected to your home network (wired or Wi-Fi). Verify correct network password in app. Re-add the camera system in the Eseecloud app if necessary. Check router signal strength. |
| Frequent false motion alarms. | Sensitive motion detection, environmental factors. | Adjust the motion detection sensitivity and detection area in the camera settings via the monitor or app. Avoid placing the camera where trees or bushes frequently move in the wind. |
| Schlechte Nachtsichtqualität. | Obstruction, dirty lens, insufficient ambient light for color mode. | Clean the camera lens. Ensure no obstructions are blocking the infrared or white LEDs. Switch between color and infrared night vision modes to see which provides better clarity for the environment. |
If these steps do not resolve the issue, please contact Jennov customer support for further assistance.
7. Spezifikationen
| Besonderheit | Detail |
|---|---|
| Marke | Jennov |
| Modellname | K2-P52-V18 |
| Videoauflösung | 400 Megapixels (1600p / 2560x1600) |
| Viewing-Winkel | 130 Grad |
| PTZ-Rotation | Pan 355 °, Neigung 90 ° |
| Konnektivitätstechnologie | Wireless (Wi-Fi), Wired (LAN), HDMI |
| Stromquelle | Solar Powered, Battery Powered, Corded Electric (Type-C) |
| Wasserbeständigkeit | IP66 (wasserdicht und staubdicht) |
| Betriebstemperatur | -20°C bis 60°C |
| Nachtsichtbereich | Bis zu 30 Meter |
| Nachtsichttyp | Color Night Vision, Monochrome Infrared Night Vision |
| Bewegungserkennung | AI Human Detection (PIR sensor) |
| Audio | Two-Way Audio, Audio Alarm |
| Videokomprimierung | H.264+/H.265+ |
| Lagerung | Built-in HDD (capacity not specified, but mentioned 15 days recording) |
| Erweiterbarkeit | Up to 10 channels (cameras) |
| Kompatible Geräte | Smartphone, Tablet, TV, Desktop, Laptop |
| App-Unterstützung | Eseecloud |
| Technische Daten | 25 x 28 x 12 cm |
| Produktgewicht | 90 Gramm |
| Zertifizierungen | Japanese Technical Conformity Certification, PSE Certified Power Adapter |
8. Garantie und Support
Jennov provides comprehensive support for your security camera system:
- 12-Monatsgarantie: A 12-month quality warranty is provided from the date of purchase.
- 30-Tage-Rückgabe-/Umtauschrecht: In case of initial defects or natural malfunctions, returns or exchanges are possible within 30 days without requiring a detailed explanation.
- Lebenslanger technischer Support: Lifetime technical support is included for assistance with setup, operation, and any technical inquiries.
If you have any questions or require assistance during setup or operation, please do not hesitate to contact us.
Kontaktinformationen:
- Telefon: 05050509046
- WebWebsite: www.jennov.com
- E-Mail: supportjp@jennov.com

Image: Jennov customer support team ready to assist with inquiries.