
1. Einleitung
This manual provides essential information for the safe and efficient operation, maintenance, and troubleshooting of your DayPlus 18V Cordless Impact Wrench. Please read these instructions carefully before using the tool and retain them for future reference.
The DayPlus Cordless Impact Wrench is designed for tightening and loosening nuts, bolts, and screws, offering high torque and versatility for various applications, including automotive work and construction projects.
2. Sicherheitshinweise
WARNUNG: Lesen Sie alle Sicherheitswarnungen, Anweisungen, Abbildungen und Spezifikationen, die mit diesem Elektrowerkzeug geliefert werden. Die Nichtbeachtung aller unten aufgeführten Anweisungen kann zu elektrischem Schlag, Brand und/oder schweren Verletzungen führen.
- Sicherheit am Arbeitsplatz: Halten Sie Ihren Arbeitsbereich sauber und gut beleuchtet. Unordnung oder Dunkelheit erhöhen die Unfallgefahr. Betreiben Sie Elektrowerkzeuge nicht in explosionsgefährdeten Bereichen, z. B. in der Nähe von brennbaren Flüssigkeiten, Gasen oder Stäuben.
- Elektrische Sicherheit: Vermeiden Sie Körperkontakt mit geerdeten Oberflächen wie Rohren, Heizkörpern, Herden und Kühlschränken. Es besteht ein erhöhtes Risiko eines Stromschlags, wenn Ihr Körper geerdet ist.
- Persönliche Sicherheit: Always wear eye protection. Use appropriate safety equipment such as dust masks, non-skid safety shoes, hard hats, or hearing protection when necessary. Dress properly. Do not wear loose clothing or jewelry. Keep your hair and clothing away from moving parts.
- Werkzeuggebrauch und -pflege: Wenden Sie beim Elektrowerkzeug keine Gewalt an. Verwenden Sie das für Ihren Anwendungszweck geeignete Elektrowerkzeug. Es erledigt die Arbeit besser und sicherer mit der dafür vorgesehenen Leistung. Trennen Sie den Akku vom Elektrowerkzeug, bevor Sie Einstellungen vornehmen, Zubehör wechseln oder Elektrowerkzeuge lagern.
- Verwendung und Pflege des Akkus: Nur mit dem vom Hersteller vorgeschriebenen Ladegerät aufladen. Ein Ladegerät, das für einen Akkutyp geeignet ist, kann ein Brandrisiko darstellen, wenn es mit einem anderen Akkupack verwendet wird. Verwenden Sie Elektrowerkzeuge nur mit speziell dafür vorgesehenen Akkus.
3. Produktkomponenten
Familiarize yourself with the parts of your DayPlus Cordless Impact Wrench for proper operation and maintenance.

Bild 3.1: Überview of the DayPlus Cordless Impact Wrench components. Key parts include the sleeve, brushless motor, heat dissipation vent, forward and reverse switch, stepless speed regulation button, soft rubber coated handle, mode adjustment and power quantity display, battery removal button, and large capacity battery.
- Ärmel: The attachment point for sockets and other accessories.
- Bürstenlosen Motor: Sorgt für effiziente Stromversorgung und längere Werkzeuglebensdauer.
- Heat Dissipation Vent: Sorgt für eine ordnungsgemäße Kühlung während des Betriebs.
- Vorwärts- und Rückwärtsschalter: Steuert die Drehrichtung.
- Stepless Speed Regulation Button: Allows for variable speed control based on trigger pressure.
- Soft Rubber Coated Handle: Bietet einen komfortablen und sicheren Halt.
- Mode Adjustment and Power Quantity Display: Shows current power level and allows selection of operating modes.
- Battery Removal Button: Löst den Akkupack vom Werkzeug.
- Batterie mit großer Kapazität: Versorgt das Werkzeug mit Strom.
4. Spezifikationen
| Besonderheit | Spezifikation |
|---|---|
| Abtriebswelle | 1/2"-Vierkantantrieb |
| Nenndrehmoment | 420 Nm |
| Leerlaufdrehzahl | 0-3200 U/min |
| Akku-Typ | Li-ion 6000 mAh (18V) |
| Ladezeit | 1.5 - 2 hours for full charge |
| Aufprallhäufigkeit | 0-4400 Bilder/Minute |
| Mitgelieferte Steckdosen | 14 mm, 17 mm, 19 mm, 22 mm |
| Material | Acrylnitril-Butadien-Styrol (ABS) |
| Farbe | Blau |
5. Einrichtung
5.1. Laden des Akkus
- Stellen Sie sicher, dass der Akkupack fest im Ladegerät sitzt.
- Stecken Sie das Ladegerät in eine normale Steckdose.
- Allow 1.5 to 2 hours for a full charge. The charger's indicator light will typically change color or turn off when charging is complete.
- Sobald der Akku geladen ist, trennen Sie das Ladegerät von der Steckdose und entnehmen Sie den Akku.
Note: Always use the original DayPlus charger provided with the tool. Do not attempt to charge damaged batteries.
5.2. Anbringen/Entfernen des Akkus
- Befestigen: Richten Sie den Akku an der Basis des Schlagschraubers aus und schieben Sie ihn hinein, bis er hörbar einrastet.
- So entfernen Sie: Press the battery removal button (refer to Image 3.1) and slide the battery pack out.
5.3. Attaching Sockets and Accessories
- Stellen Sie sicher, dass das Gerät ausgeschaltet und der Akku entfernt ist, bevor Sie Zubehör anbringen oder entfernen.
- Align the square drive of the socket with the 1/2" square drive shaft of the impact wrench.
- Push the socket firmly onto the shaft until it locks into place.
- To remove, pull the socket off the shaft. Some sockets may require a slight twist or a release pin mechanism if present.
6. Bedienungsanleitung
6.1. Ein-/Ausschalten und Drehzahlregelung
The tool is powered on by pressing the trigger switch. The speed of the impact wrench is controlled by the pressure applied to the trigger. Pressing gently results in lower speed, while pressing harder increases the speed up to the maximum 3200 rpm.
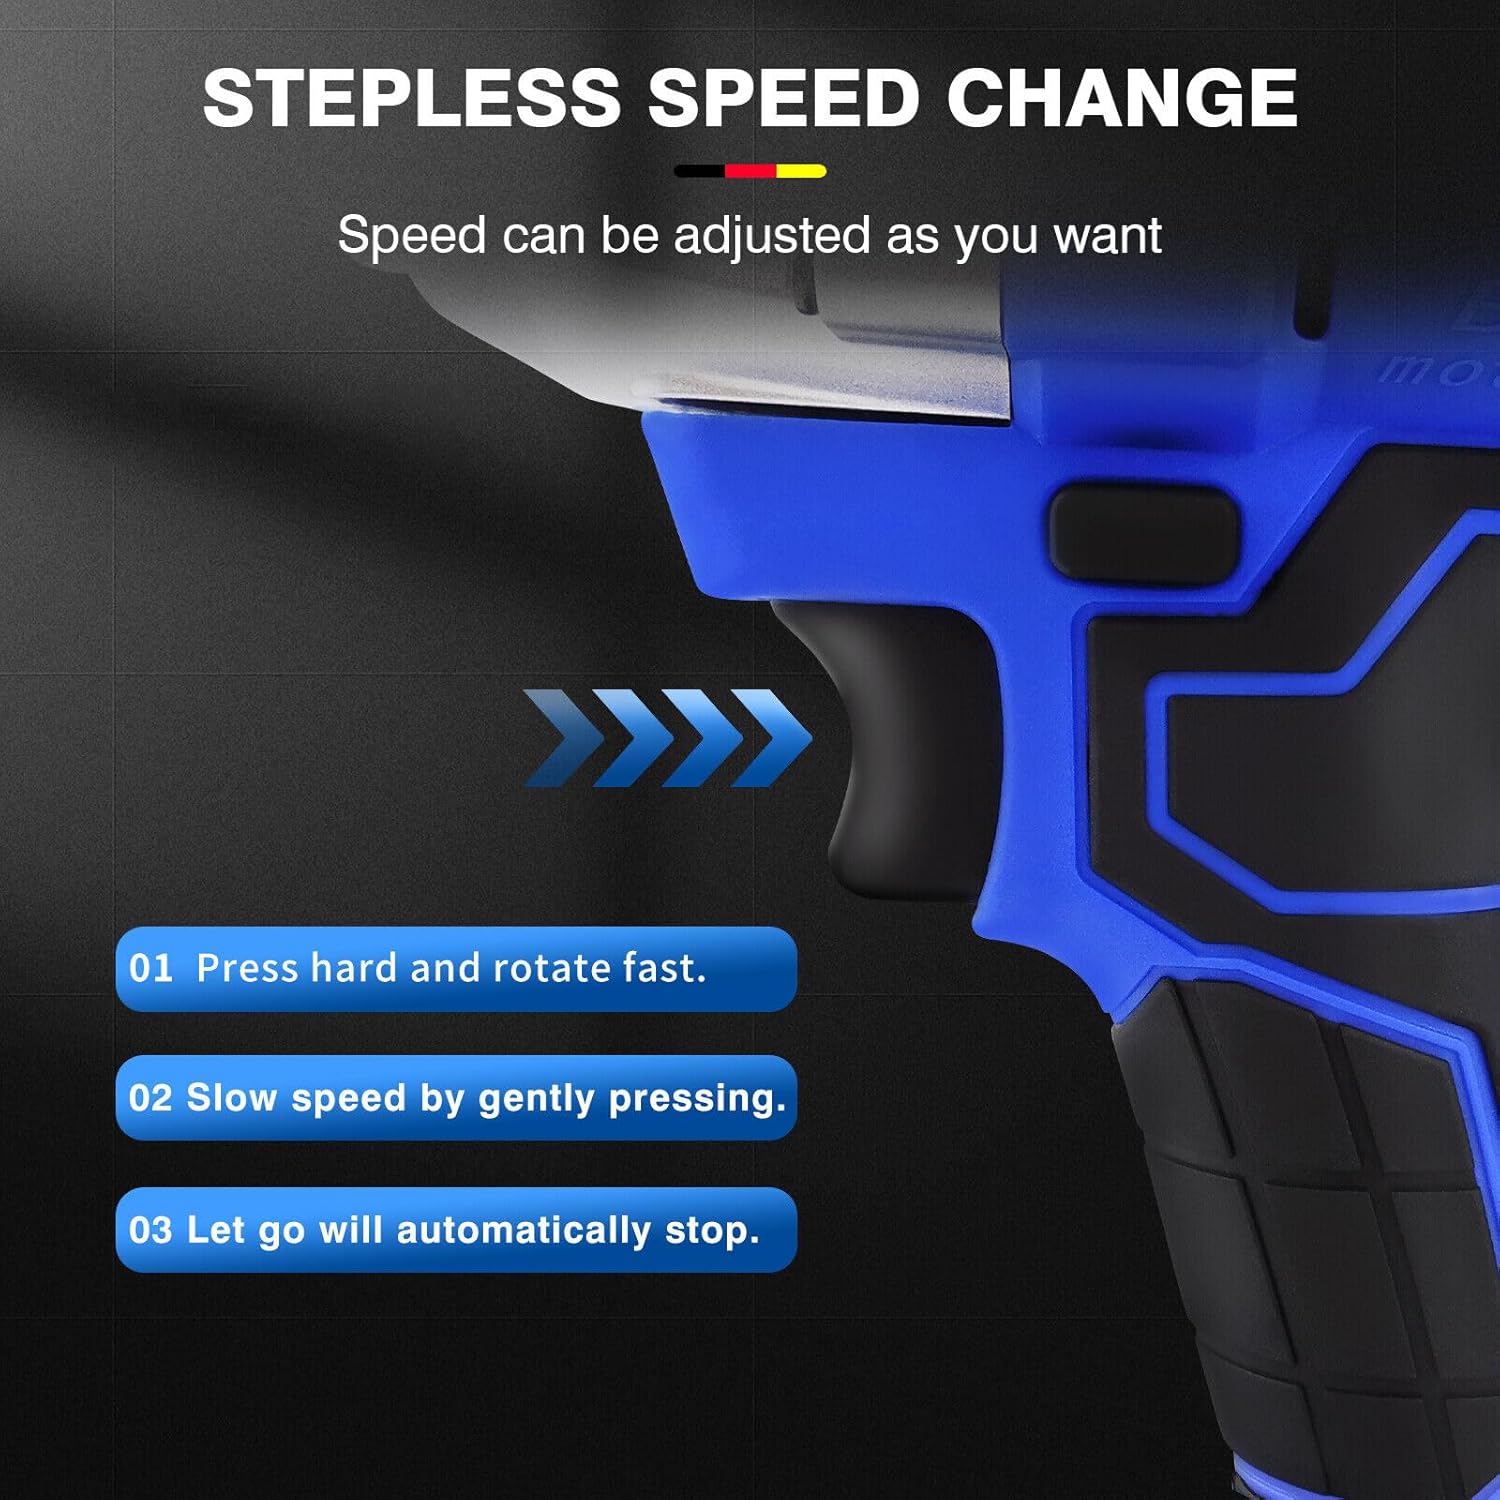
Bild 6.1: Illustration of the stepless speed change. Pressing hard rotates fast, pressing gently slows speed, and releasing the trigger stops the tool.
- Drücken Sie fest: For fast rotation and maximum torque.
- Sanft drücken: For slower speed and controlled operation.
- Loslassen: The tool will automatically stop.
6.2. Vorwärts- und Rückwärtsschalter
The forward/reverse switch controls the direction of rotation, allowing for both tightening and loosening applications.

Bild 6.2: The forward button is used for screwing (tightening), and the reverse button is used for removing screws (loosening).
- Vorwärts-Taste: Push the switch to the left for clockwise rotation (tightening).
- Rückwärtstaste: Push the switch to the right for counter-clockwise rotation (loosening).
- Ensure the switch is in the central (locked) position when not in use to prevent accidental starting.
6.3. Mode Adjustment and Power Display
The tool features a display for real-time power indication and mode adjustment.

Bild 6.3: Close-up of the mode adjustment and power quantity display. This allows users to monitor battery life and select appropriate torque settings.
- The display shows the remaining battery charge, allowing you to plan your work effectively.
- Use the mode adjustment button (if present, typically integrated with the display) to select between different torque settings or operating modes for various tasks.
6.4. Integrated Work Light
The impact wrench is equipped with a scattering light feature to illuminate the work area, especially useful in low-light conditions.

Bild 6.4: The integrated work light provides illumination for dark corners, enabling one-hand operation without an additional flashlight.
- The light typically activates when the trigger is pressed and remains on for a short period after release.
- This feature enhances visibility and safety during operation in dimly lit environments.
6.5. Versatile Applications (Drill/Wrench)
The DayPlus impact wrench can be adapted for various tasks, functioning as both an electric drill and an electric wrench with appropriate accessories.
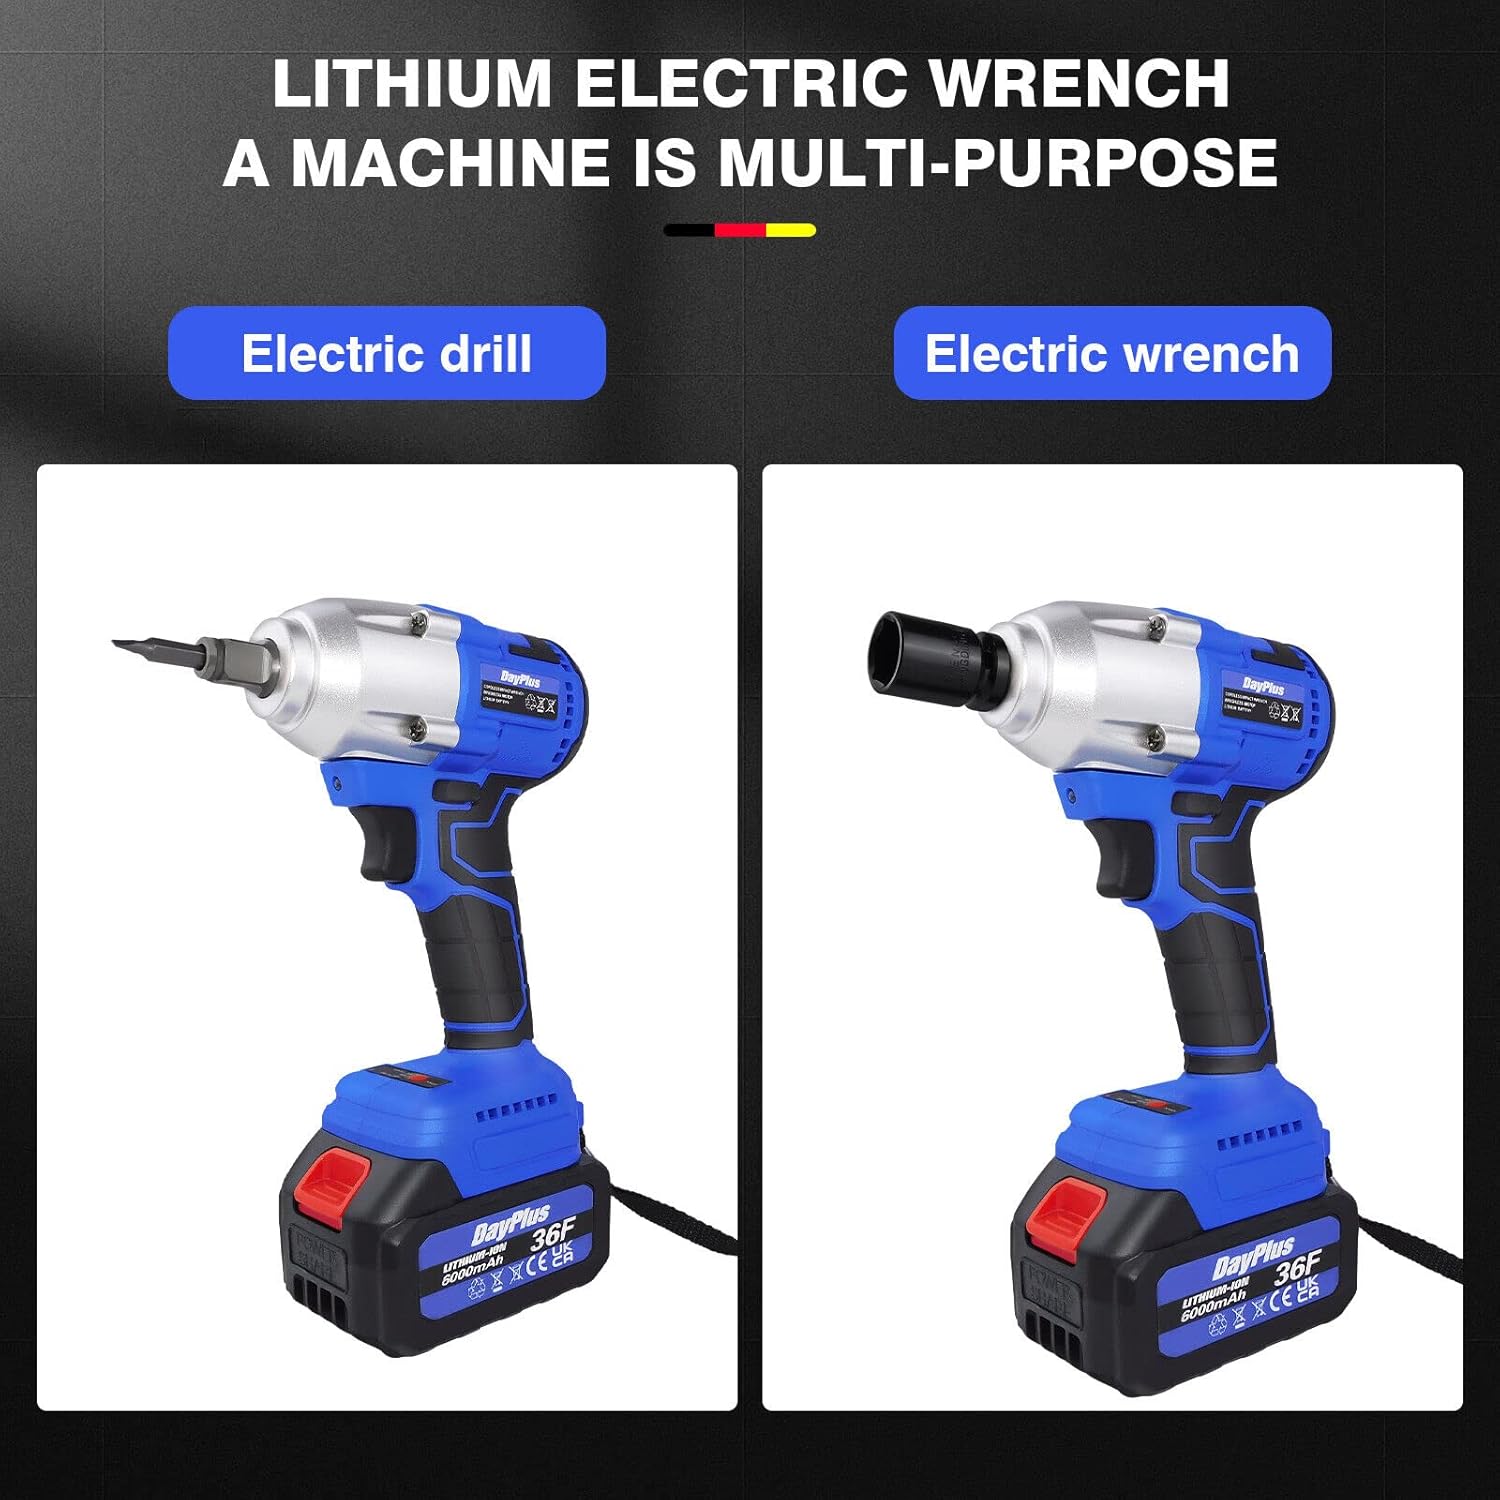
Bild 6.5: The tool's versatility allows it to be used as an electric drill with a drill bit adapter or as an electric wrench with sockets.
- Electric Wrench: Use with square drive sockets for tightening and loosening nuts and bolts.
- Elektrische Bohrmaschine: Attach a drill chuck adapter (sold separately) and drill bits for drilling applications.
7. Wartung
Regelmäßige Wartung gewährleistet die Langlebigkeit und optimale Leistung Ihres Schlagschraubers.
- Reinigung: Halten Sie die Lüftungsöffnungen des Werkzeugs sauber, um eine Überhitzung zu vermeiden. Verwenden Sie ein weiches, trockenes Tuch.amp cloth to clean the housing. Do not use solvents or abrasive cleaners.
- Lüftungsschlitze zur Wärmeableitung: Regularly check and clear the heat dissipation vents to ensure effective cooling during continuous operation.
- Batteriepflege: Bewahren Sie Batterien an einem kühlen, trockenen Ort und vor direkter Sonneneinstrahlung geschützt auf. Lagern Sie vollständig entladene Batterien nicht über längere Zeit.
- Lagerung: When not in use, store the impact wrench and its accessories in a dry, secure location out of reach of children.
- Inspektion: Überprüfen Sie das Werkzeug regelmäßig auf Beschädigungen, lose Schrauben oder Verschleißteile. Verwenden Sie kein beschädigtes Werkzeug.

Bild 7.1: The air outlet design facilitates effective heat dissipation, crucial for continuous work without overheating the machine.
8. Fehlerbehebung
| Problem | Mögliche Ursache | Lösung |
|---|---|---|
| Werkzeug startet nicht | Battery not charged or improperly inserted. Forward/reverse switch in central (locked) position. | Charge battery fully and ensure it is securely inserted. Move the forward/reverse switch to either forward or reverse position. |
| Reduzierte Leistung oder Geschwindigkeit | Niedriger Batteriestand. Überlastungsschutz aktiviert. | Recharge the battery. Reduce the load on the tool; allow it to cool down if it has been used continuously. |
| Übermäßige Hitze während des Betriebs | Blocked ventilation vents. Continuous heavy use. | Clean ventilation vents. Allow the tool to cool down periodically during heavy use. |
| Steckdose lässt sich nicht sicher befestigen | Incorrect socket size. Debris on the square drive. | Ensure the socket is 1/2" square drive. Clean the square drive and the socket. |
9. Garantie und Support
DayPlus products are manufactured to high-quality standards. For information regarding warranty coverage, please refer to the warranty card included with your purchase or contact DayPlus customer support.
For technical assistance, spare parts, or service, please contact your retailer or the DayPlus customer service department. Keep your purchase receipt as proof of purchase.