
Hlisoundy JH-338-C
Hlisoundy Rechargeable BTE Hearing Aids User Manual
Model: JH-338-C
1. Einleitung
This manual provides comprehensive instructions for the safe and effective use of your Hlisoundy Rechargeable BTE (Behind-The-Ear) Hearing Aids. These devices are designed to amplify sound for individuals experiencing severe hearing loss, featuring noise-cancelling capabilities and a mini, invisible design for comfortable wear. Please read this manual thoroughly before operating the device to ensure proper function and longevity.

Figure 1: Hlisoundy BTE Hearing Aids in their charging dock.
2. Was ist in der Box?
Prüfen Sie nach dem Öffnen der Verpackung, ob alle Komponenten vorhanden und in einwandfreiem Zustand sind:
- 2 x Hearing Amplifiers (Left and Right)
- 1 x Bedienungsanleitung (evtl. nicht in deutscher Sprache).
- 1 x Aufbewahrungsbox
- 8 x Ear Domes (various sizes)
- 1 x Cleaning Tool/Brush
- 1 x USB-Ladekabel

Figure 2: Contents of the Hlisoundy Hearing Aid package.
3. Einrichtung und erste Verwendung
3.1. Aufladen des Geräts
Before first use, fully charge the hearing aids. The devices run on NiMH batteries, offering enhanced safety and environmental sustainability.
- Connect the provided USB charging cable to the charging dock.
- Stecken Sie das andere Ende des USB-Kabels in eine kompatible USB-Stromquelle (z. B. USB-Anschluss am Computer, USB-Netzteil).
- Place the hearing aids into their respective slots in the charging dock. Ensure they are seated correctly.
- The indicator light on the charging dock will illuminate to show charging status.
- Eine vollständige Aufladung dauert etwa 8.5 Stunden und ermöglicht eine Betriebszeit von bis zu 18 Stunden.

Figure 3: Charging and working time overview.

Figure 4: USB direct charging method.
3.2. Selecting and Fitting Ear Domes
Proper fit is crucial for comfort and sound quality. The hearing aids come with multiple sizes of ear domes. Experiment to find the size that provides a comfortable and secure fit in your ear canal.
- Gently remove the pre-installed ear dome if it does not fit.
- Select an ear dome size that feels snug but not painful.
- Carefully push the chosen ear dome onto the sound guide tube of the hearing aid until it is securely attached.

Figure 5: Adjusting ear wires for a comfortable fit.

Abbildung 6: Bspample of hearing aid placement with curved ear wires.
3.3. Inserting the Hearing Aid
- Hold the hearing aid with the ear dome pointing towards your ear canal.
- Gently insert the ear dome into your ear canal.
- Place the main body of the hearing aid behind your ear, ensuring the ear hook rests comfortably over the top of your ear.
- Adjust the ear wire and ear dome until the device feels secure and comfortable.
4. Bedienung des Geräts
Familiarize yourself with the controls on your Hlisoundy hearing aids:

Figure 7: Main functional components of the hearing aid.
4.1. Ein-/Ausschalten
- Locate the "ON/OFF" switching key on the side of the hearing aid.
- To turn on, slide the switch to the "ON" position.
- To turn off, slide the switch to the "OFF" position.
4.2. Lautstärkeregelung
The hearing aids feature an adjustable volume control to tailor your listening experience.
- Locate the volume keys on the side of the hearing aid.
- To increase volume, slide the control upward.
- To decrease volume, slide the control downward.

Figure 8: Volume control operation.
4.3. Rauschunterdrückungsfunktion
These hearing aids incorporate a high-definition digital chip and double noise reduction technology to provide clear sound quality without jamming or delay.
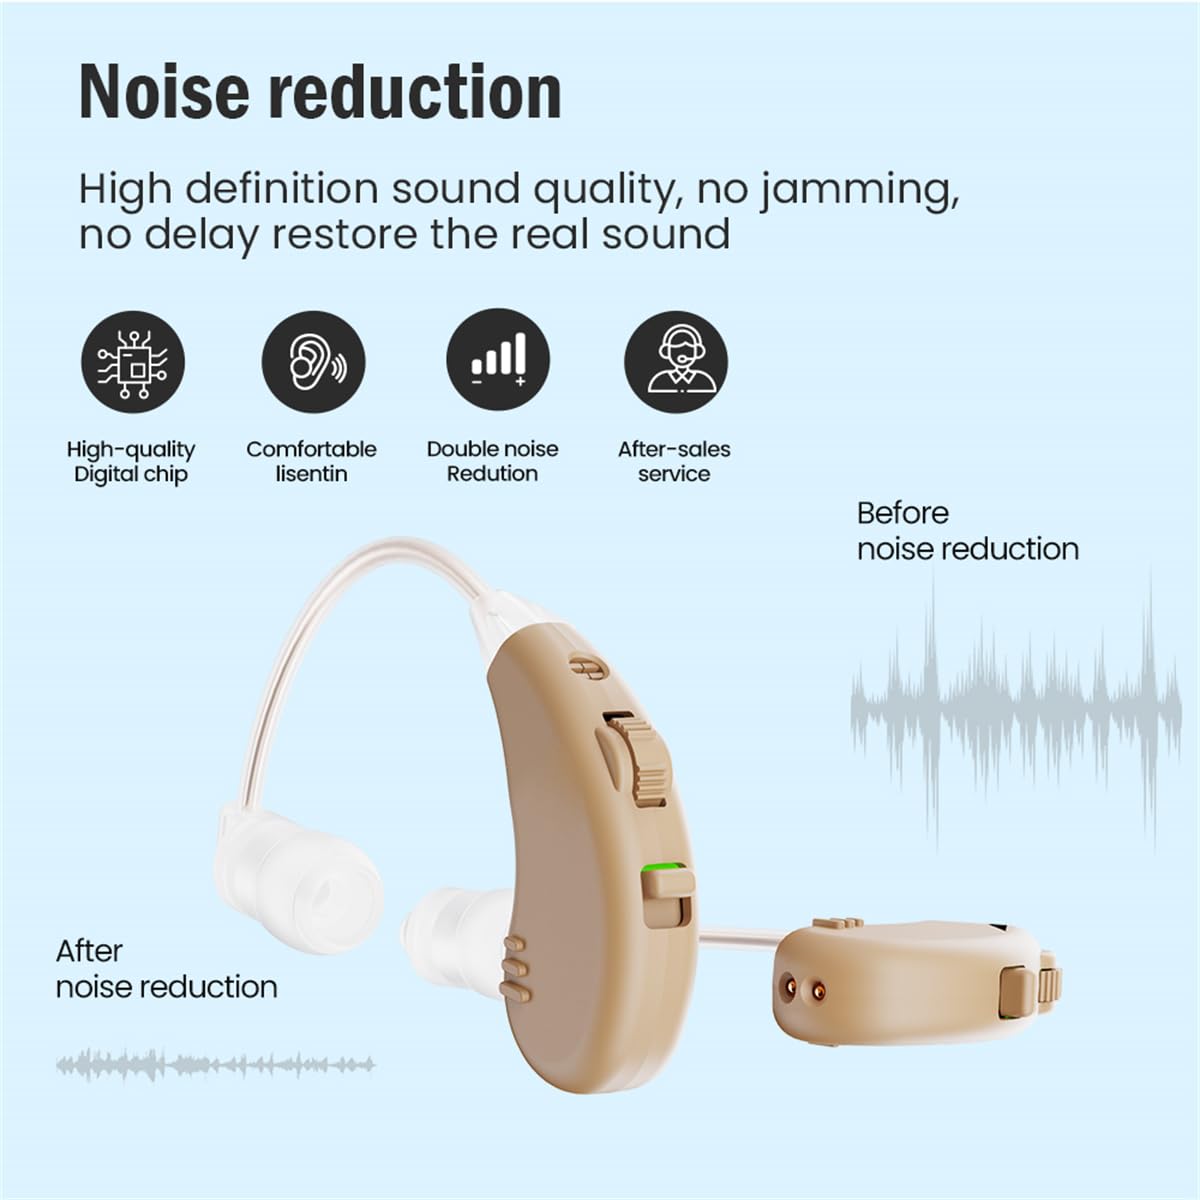
Figure 9: Illustration of noise reduction effect.
5. Wartung und Pflege
Regular cleaning and proper care will extend the life of your hearing aids and ensure optimal performance.
5.1. Tägliche Reinigung
- After each use, gently wipe the hearing aid body and ear dome with a soft, dry cloth.
- Use the provided cleaning brush to remove any earwax or debris from the ear dome and sound guide tube.
- Ensure the sound guide tube is clear of obstructions.
5.2. Speicherung
- When not in use, store the hearing aids in the provided storage box.
- Store in a cool, dry place away from direct sunlight, heat, and moisture.
- Außerhalb der Reichweite von Kindern und Haustieren aufbewahren.
5.3. Wichtige Vorsichtsmaßnahmen
- Do not immerse the hearing aids in water or any liquid.
- Vermeiden Sie es, die Geräte fallen zu lassen oder starken Stößen auszusetzen.
- Do not use alcohol, solvents, or abrasive cleaners on the hearing aids.
- Nehmen Sie Ihre Hörgeräte vor dem Duschen, Schwimmen oder der Verwendung von Haarspray/Parfüm ab.
6. Fehlerbehebung
If you experience issues with your hearing aids, refer to the following common problems and solutions:
| Problem | Mögliche Ursache | Lösung |
|---|---|---|
| No Sound or Weak Sound |
|
|
| Whistling or Feedback Noise |
|
|
| Verzerrter Klang |
|
|
| Hörgerät lädt nicht |
|
|
7. Spezifikationen
| Besonderheit | Detail |
|---|---|
| Modellname | JH-338-BEIGE-FBA |
| Artikelmodellnummer | JH-338-C |
| Marke | Hlisoundy |
| Farbe | Beige |
| Material | Acrylonitrile Butadiene Styrene (ABS) Silicone |
| Stil | Both Ear (BTE) |
| Batterien | 3 Produktspezifische Batterien erforderlich. (im Lieferumfang enthalten) |
| Technische Daten | 5.08 x 1.78 x 0.1 cm |
| Gewicht | 240 Gramm |
| Hersteller | Jinghao |
| Ladezeit | Ca. 8.5 Stunden |
| Arbeitszeit | Bis zu 18 Stunden |
8. Garantie und Support
Specific warranty information is not provided in this manual. For details regarding warranty coverage, returns, or technical support, please refer to the product packaging, the retailer's website where the product was purchased, or contact Hlisoundy customer service directly.
Always ensure you purchase from authorized sellers to guarantee product authenticity and access to support.
Ask a question about this manual
Ask about setup, troubleshooting, compatibility, parts, safety, or missing instructions. Manuals+ will review the question and use this page’s manual context to help answer it.