1. Einleitung
This manual provides detailed instructions for the proper setup, operation, and maintenance of your SmallRig AD-50 Heavy Duty Carbon Fiber Video Tripod. Please read this manual thoroughly before using the product to ensure optimal performance and longevity.
2. Packungsinhalt
Verify that all items listed below are included in your package. If any items are missing or damaged, please contact SmallRig customer support.
- 1 x SmallRig AD-50 Carbon Fiber Video Tripod
- 1 x Inbusschlüssel
- 1 x Smartphone-Halter
- 1 x Aufbewahrungstasche

3. Hauptmerkmale
The SmallRig AD-50 tripod is designed for stability and portability, featuring:
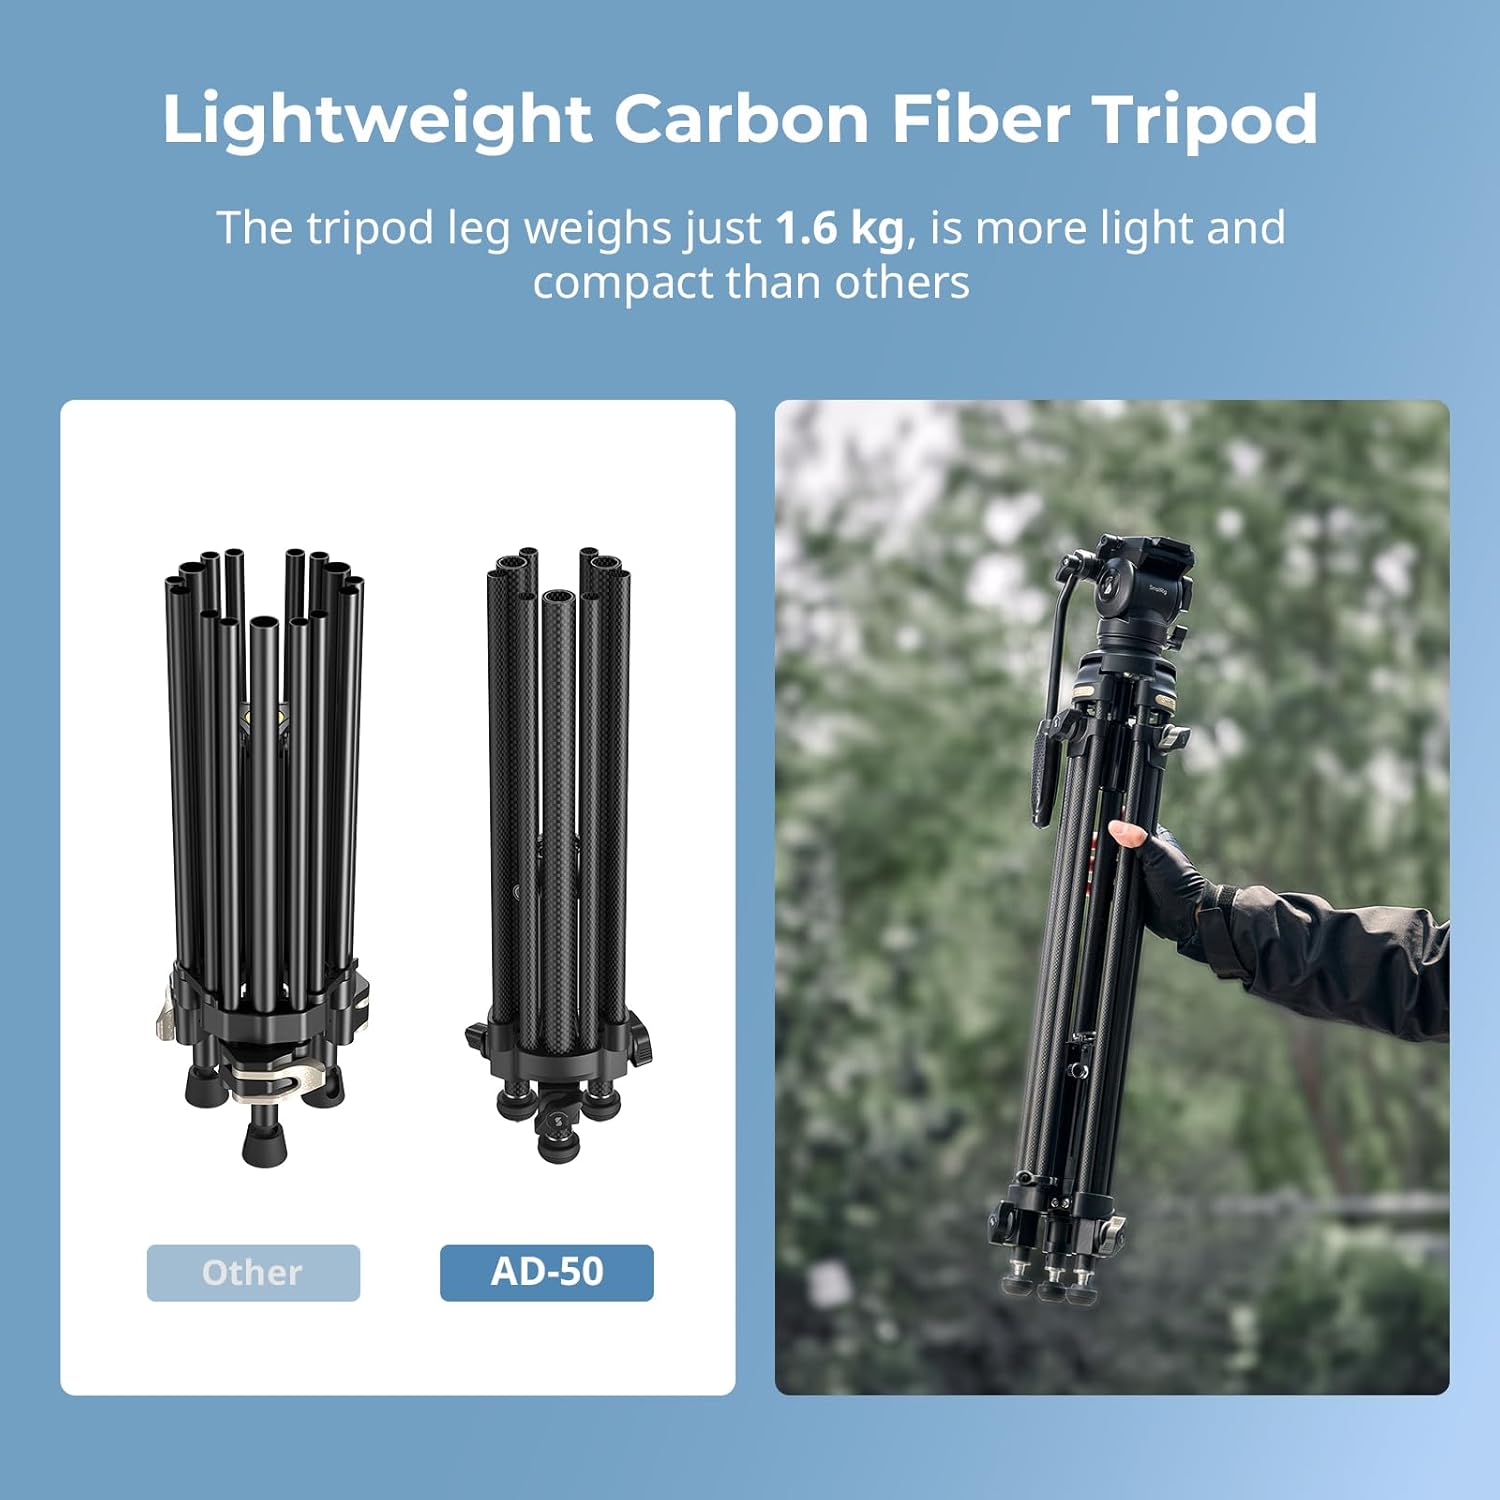
- Lightweight Carbon Fiber Construction: Weighs approximately 6.2 lbs (2.8 kg) with a 2-1-1 carbon fiber leg structure, offering durability and portability.
- Hohe Tragfähigkeit: Supports equipment up to 13.2 lbs (6 kg).
- One-touch Center Drawstring Design: Allows for rapid tripod contraction and expansion.
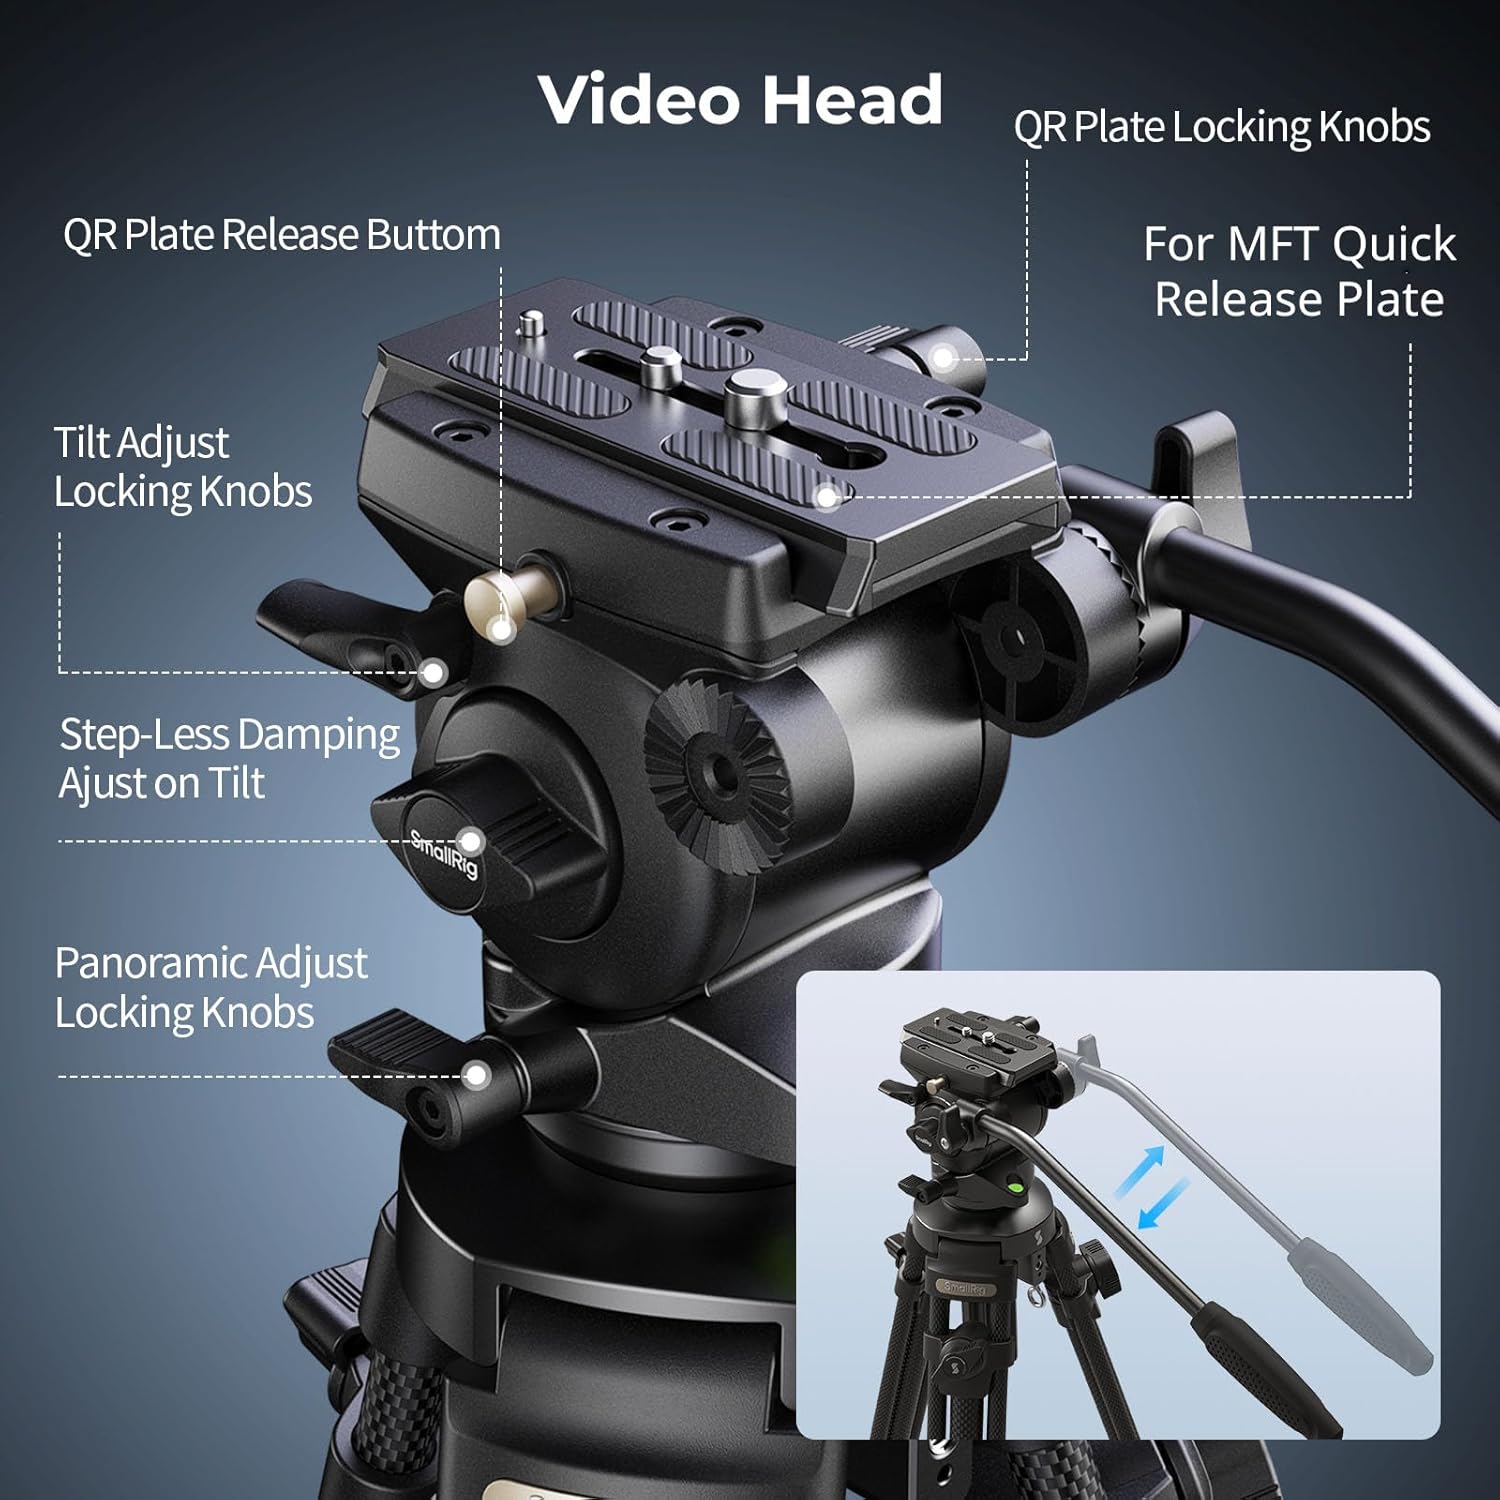
- Step-Less Damping Fluid Head: Provides smooth, adjustable damping for precise panning (360°) and tilting (+90°/-50°) movements.
- Adjustable Mid-level Spreader: Enhances stability on various terrains and includes a 1/4"-20 anti-deflection thread for accessory mounting.
- Versatile Feet: Features hidden retractable spikes for secure grip on soft surfaces like mud, sand, or grass.
- Universal Bowl Base: 65mm bowl base for compatibility with various fluid heads.

4. Montage und Einrichtung
- Aufklappen des Stativs: Release the leg locks. Pull the center drawstring to quickly extend the tripod legs. Ensure all leg sections are fully extended and locked.
- Adjusting Leg Angle and Spreader: Adjust the leg angles as needed. The mid-level spreader can be extended to increase the tripod's footprint and stability. Ensure the spreader is securely locked in position.
- Attaching the Fluid Head: The fluid head is typically pre-attached. If not, secure it to the 65mm bowl base.
- Montage Ihrer Kamera: Attach your camera to the quick-release plate. Ensure the plate is securely fastened to your camera. Then, slide the quick-release plate with your camera into the fluid head and lock it in place using the QR plate locking knobs.
- Adjusting Pan Handle: The detachable pan handle can be mounted on either the left or right side of the fluid head for user preference.
- Spiked Feet Mode: For enhanced grip on soft terrain, rotate the rubber feet to expose the retractable spikes.


5. Bedienung
- Höhenverstellung: Adjust the height of the tripod by extending or retracting the leg sections. The tripod offers a minimum height of 73 cm (28.7 in) and a maximum height of 163 cm (64.1 in). Secure each section with its respective lock.
- Einstellungen des Flüssigkeitskopfes:
- Neigung Damping: Use the step-less damping adjustment knob on the fluid head to control the resistance for tilting movements (+90°/-50°). Adjust for smooth, cinematic camera movements.
- Versprechenamping: The fluid head provides fixed damping for 360° panoramic movements, ensuring consistent smoothness.
- Tilt and Pan Locks: Use the dedicated locking knobs to secure the camera in a desired tilt or pan position.
- Zubehörmontage: The mid-level spreader includes a 1/4"-20 anti-deflection threaded hole, allowing for the attachment of accessories such as magic arms, microphones, or monitors.


6. Pflege und Wartung
- Reinigung: Wischen Sie das Stativ nach jedem Gebrauch mit einem weichen, trockenen Tuch ab. Bei hartnäckigem Schmutz verwenden Sie ein leicht dämpfendes Tuch.amp Mit einem Tuch und milder Seife abwischen und anschließend gründlich trocknen. Scharfe Chemikalien oder scheuernde Materialien vermeiden.
- Lagerung: Store the tripod in its provided storage bag in a cool, dry place away from direct sunlight and extreme temperatures.
- Schmierung: The fluid head is factory-lubricated and generally does not require additional lubrication. If movements become stiff, consult SmallRig customer support.
- Inspektion: Periodically check all screws, knobs, and leg locks to ensure they are secure. Tighten any loose components using the provided Allen wrench.
7. Fehlerbehebung
- Instabilität des Stativs: Ensure all leg locks are fully engaged and the mid-level spreader is extended and locked. Check that the tripod feet are making firm contact with the ground. Use spiked feet on soft surfaces.
- Stiff Fluid Head Movement: Verify that the tilt and pan locking knobs are fully disengaged. Adjust the step-less damping knob to a lighter setting if movement is too restricted.
- Kamera nicht sicher: Ensure the quick-release plate is correctly attached to your camera and fully inserted into the fluid head. Confirm that the QR plate locking knobs are tightened.
- Schwierigkeiten bei der Höhenverstellung: Check for any obstructions in the leg sections. Ensure leg locks are properly released before attempting to adjust height.
8. Spezifikationen
| Besonderheit | Spezifikation |
|---|---|
| Modellname | SmallRig AD-50 |
| Material | Carbon Fiber, Aluminum Alloy, ABS, Stainless Steel, Silicone |
| Produktabmessungen (gefaltet) | 79.0 x 14.5 x 14.5 cm (31.1 x 5.71 x 5.71 Zoll) |
| Produktgewicht | 2.80 kg |
| Gewichtsbeschränkung | 6 kg |
| Mindesthöhe | 73 cm (28.7 Zoll) |
| Maximale Höhe | 163 cm (64.1 Zoll) |
| Beinabschnitte | 3 |
| Beindurchmesser | 14mm / 24mm / 20mm (0.55in / 0.94in / 0.79in) |
| Stativkopftyp | Pan Head (Fluid Head) |
| Bowl Adapter Diameter | 65 mm (2.56 Zoll) |
| Neigungsbereich | +90° / -50° |
| Schwenkbereich | 360° |
| Neigung ziehen | Continuously adjustable from 0 to max level |
| Schwenken und Ziehen | Behoben |
| Gegengewichtssystem | Behoben |
| Länge der Schnellwechselplatte | 10.5 cm (4.1 Zoll) |
| Mittelspinne mit erweiterter Distanz | 8 cm (3.15 Zoll) |

9. Garantie und Support
SmallRig products are manufactured to high-quality standards. For warranty information, product support, or service inquiries, please refer to the official SmallRig webBesuchen Sie die Website oder kontaktieren Sie direkt den Kundenservice. Bewahren Sie Ihren Kaufbeleg als Kaufnachweis für Garantieansprüche auf.