
Einführung
This manual provides essential information for the setup, operation, maintenance, and troubleshooting of your GIGABYTE MO34WQC2 34-inch QD-OLED Curved Gaming Monitor. Please read this manual thoroughly before using the product to ensure correct usage and optimal performance.
The GIGABYTE MO34WQC2 monitor features a 34-inch curved QD-OLED display, offering a 0.03ms GTG response time and a 240 Hz refresh rate for smooth visual experiences. It includes Type-C KVM functionality, allowing seamless switching between multiple devices.
Hauptmerkmale:
- 3rd Gen QD-OLED Panel: Delivers high image quality and gaming performance.
- GIGABYTE OLED Care: AI-based algorithm to minimize burn-in risks with adjustable settings.
- 240 Hz Bildwiederholfrequenz & 0.03 ms Reaktionszeit: Ensures ultra-smooth motion clarity and responsiveness.
- Life-Like Colors: Features 1.5M:1 contrast ratio, 99% DCI-P3 color gamut, and 10-bit color depth.
- VESA DisplayHDR True Black 400 & ClearMR 13000: Provides realistic contrast and top-tier motion clarity.
- AMD FreeSync Premium Pro: Reduces screen tearing and stuttering, especially in HDR content.
- Taktische Merkmale: Includes Game Assist (timer, crosshairs, PIP/PBP), Black Equalizer 2.0, and Dashboard for enhanced gameplay.
- 3 Jahr Garantie: Covers panel burn-in (terms may vary by region).
Installationsanweisungen
1. Auspacken und Zusammenbau
Nehmen Sie den Monitor und alle Komponenten vorsichtig aus der Verpackung. Legen Sie den Monitor mit dem Bildschirm nach unten auf eine weiche, saubere Unterlage, um Kratzer zu vermeiden.

This image shows the GIGABYTE MO34WQC2 monitor with its stand, viewed from the front. The monitor is curved and displays a vibrant, colorful image.
Anbringen des Ständers:
- Befestigen Sie den Stativhals am Monitorpanel. Achten Sie darauf, dass er hörbar einrastet.
- Befestigen Sie den Stativfuß am Stativhals und ziehen Sie die Schraube an der Unterseite des Fußes fest.
Alternatively, the monitor supports VESA 100x100mm wall mounts. Refer to the image below for VESA mounting points.

This image illustrates the adjustable stand of the GIGABYTE MO34WQC2 monitor, showing its tilt range (-5° to +20°) and height adjustment (130mm). A close-up inset highlights the VESA 100x100mm mounting area on the back of the monitor.
2. Verbindungskabel
Connect the necessary cables to the monitor's I/O ports. Ensure all connections are firm.

This diagram shows the input/output ports on the back of the GIGABYTE MO34WQC2 monitor. Ports include HDMI 2.1 (in), DP 1.4 (in), USB Type-C (DP Alt), Mic, Headphone, USB 3.2 (Upstream), and USB 3.2 (Downstream).
- Stromkabel: Verbinden Sie das Netzkabel mit dem Monitor und einer Steckdose.
- Video-Eingang: Connect your PC or gaming console using an HDMI 2.1, DisplayPort 1.4, or USB Type-C cable.
- USB-Upstream: For KVM functionality and USB hub use, connect a USB 3.2 Upstream cable from your PC to the monitor.
- Audio: Connect headphones or external speakers to the Headphone jack if desired.
Bedienungsanleitung
1. Ein-/Ausschalten
Drücken Sie den Netzschalter, der sich üblicherweise auf der Rück- oder Unterseite des Monitors befindet, um ihn ein- oder auszuschalten. Die Betriebsanzeige leuchtet, wenn der Monitor eingeschaltet ist.
2. On-Screen Display (OSD)-Navigation
The monitor features a joystick control for navigating the OSD menu. This joystick is typically located on the back of the monitor.
- Drücken: OSD-Menü aufrufen / Auswahl bestätigen.
- Oben unten: Navigieren Sie durch die Menüoptionen.
- Links rechts: Adjust settings / Navigate sub-menus.
3. KVM-Funktionalität
The built-in KVM (Keyboard, Video, Mouse) switch allows you to control multiple devices (e.g., a desktop PC and a laptop) with a single keyboard and mouse connected to the monitor. To use KVM, ensure both devices are connected to the monitor via video input (HDMI/DP/USB-C) and the USB Upstream cable from the primary device.

This image shows the GIGABYTE MO34WQC2 monitor connected to a desktop PC via HDMI/DP and a laptop via USB Type-C, illustrating how the Type-C KVM feature allows switching between devices with a single button press.
Switch between connected devices using the dedicated KVM button or through the OSD menu.
4. Anzeigeeinstellungen
Über das OSD-Menü können Sie verschiedene Anzeigeeinstellungen anpassen:
- Bild: Helligkeit, Kontrast, Schärfe, Farbtemperatur.
- Farbe: Gamma, Farbton, Sättigung.
- Spielen: Overdrive, FreeSync Premium Pro, Black Equalizer 2.0, Crosshair, Timer.
- Eingang: Select input source (HDMI, DisplayPort, USB-C).
- System: Language, OSD Timeout, Power LED.
5. GIGABYTE OLED Care
The monitor includes AI-based OLED Care features to prevent burn-in. These settings can be accessed and adjusted via the OSD menu. It is recommended to keep these features enabled for optimal panel longevity.
Wartung
1. Monitor reinigen
- Vor der Reinigung den Monitor immer ausschalten und das Netzkabel abziehen.
- Benutzen Sie ein weiches, fusselfreies Tuch, dampmit Wasser oder einem nicht scheuernden Bildschirmreiniger abspülen.
- Sprühen Sie den Reiniger nicht direkt auf den Bildschirm.
- Vermeiden Sie die Verwendung von aggressiven Chemikalien, Lösungsmitteln oder Schleifmitteln.
2 Pflege von OLED-Panels
To prolong the life of your QD-OLED panel and minimize the risk of burn-in, utilize the GIGABYTE OLED Care features available in the OSD menu. These features include pixel shift, static image detection, and pixel refresh cycles. Regular use of these functions is recommended.
Fehlerbehebung
Sollten Sie Probleme mit Ihrem Monitor haben, beachten Sie bitte die folgenden häufig auftretenden Probleme und Lösungen:
| Problem | Mögliche Lösung |
|---|---|
| Kein Bild auf dem Bildschirm | Ensure the power cable is securely connected and the monitor is powered on. Verify the video input cable (HDMI, DP, USB-C) is properly connected to both the monitor and the source device. Select the correct input source via the OSD menu. |
| Bildflimmern oder -verzerrung | Check video cable connections. Ensure the graphics card drivers are up to date. Try a different video cable or port. Disable or adjust FreeSync Premium Pro settings in the OSD if experiencing issues. |
| Farben werden falsch angezeigt | Adjust color settings (brightness, contrast, color temperature) in the OSD menu. Ensure HDR is correctly configured on your source device and monitor. |
| Burn-in or image retention | Utilize the GIGABYTE OLED Care features in the OSD menu, such as Pixel Refresh or Static Image Detection, to mitigate these issues. Avoid displaying static images for extended periods. |
| KVM not switching devices | Ensure the USB Upstream cable is connected from the primary device to the monitor. Verify all video inputs are correctly connected. Check KVM settings in the OSD menu. |
Technische Daten
| Besonderheit | Detail |
|---|---|
| Marke | GIGABYTE |
| Modellnummer | MO34WQC2-SA |
| Bildschirmgröße | 34 Zoll |
| Auflösung | WQHD 3440 x 1440 |
| Seitenverhältnis | 21:9 |
| Anzeigetyp | OLED-Displays |
| Bildwiederholrate | 240 Hz |
| Ansprechzeit | 0.03 Milliseconds (GtG) |
| Kontrastverhältnis | 1,500,000:1 |
| Farbumfang | 99 % DCI-P3 |
| HDR-Unterstützung | VESA DisplayHDR True Black 400 |
| Adaptive Synchronisierung | AMD FreeSync Premium Pro |
| Konnektivität | 2x HDMI 2.1, 1x DisplayPort 1.4, 1x USB Type-C (DP Alt Mode), 2x USB 3.2 (Downstream), 1x USB 3.2 (Upstream), Headphone Jack |
| Anpassungen | Höhe, Neigung |
| VESA-Montierung | 100 x 100 mm |
| Abmessungen (B x T x H) | 31.96" x 9.65" x 23.42" (mit Ständer) |
| Gewicht | 21.7 Pfund |
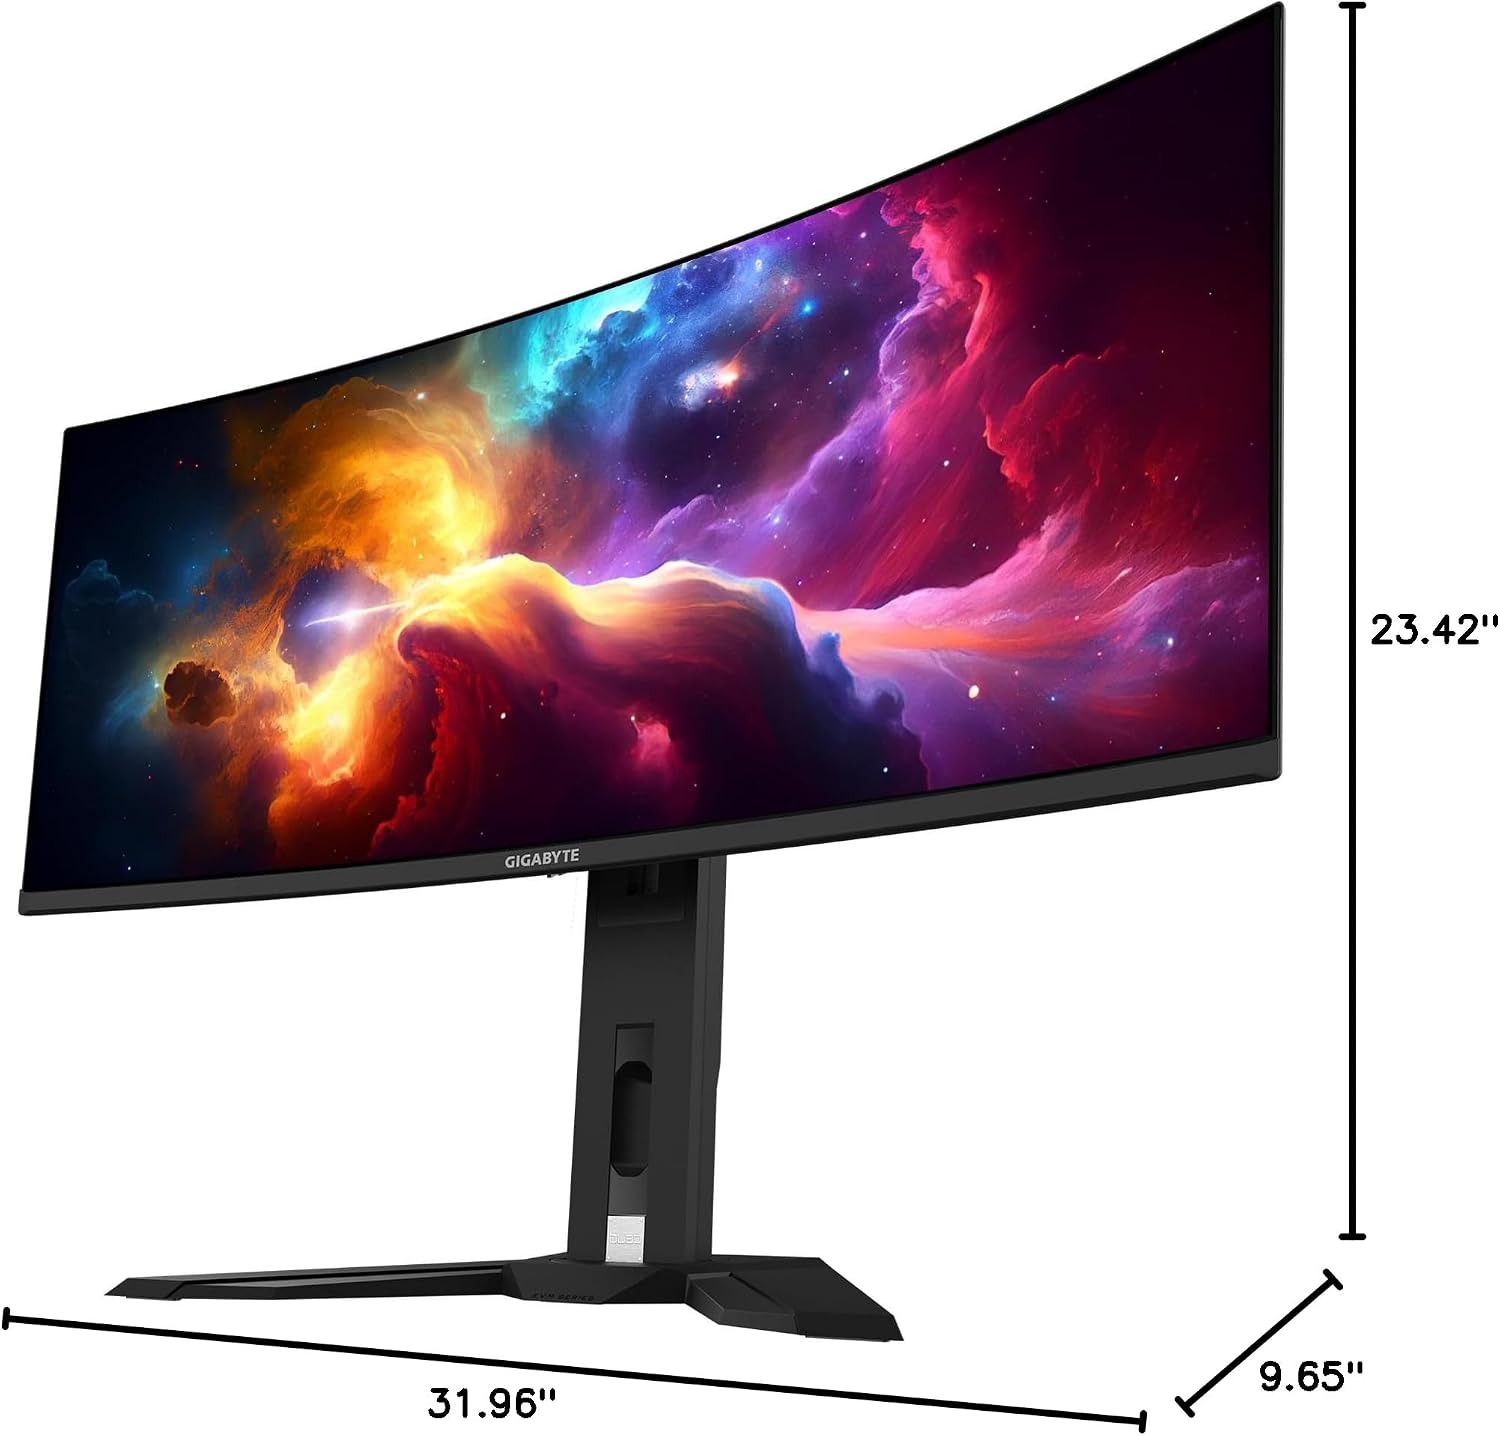
This image provides a diagram of the GIGABYTE MO34WQC2 monitor's dimensions, showing a width of 31.96 inches, a depth of 9.65 inches, and a height of 23.42 inches (including the stand).
Garantie und Support
Garantieinformationen
Your GIGABYTE MO34WQC2 monitor comes with an extended 3-year manufacturer warranty. This warranty includes coverage for panel burn-in, supported by the AI-based GIGABYTE OLED Care protection. Please note that warranty terms may vary by region.
Kundenservice
For technical assistance, warranty claims, or further inquiries, please visit the official GIGABYTE support website or contact their customer service department. Refer to the product packaging or GIGABYTE's official website for specific contact details and support resources in your region.