1. Einleitung
This manual provides detailed instructions for the installation, operation, and maintenance of your MZZYG Dash Cam Auto DVR Camera. Please read this manual thoroughly before using the product to ensure proper function and safety. Keep this manual for future reference.
2. Produktüberschreitungview
2.1 Package Contents (Set A)
- 1 x Driving Recorder (Dash Cam Unit)
- 1 x Auto-Ladekabel
2.2 Hauptmerkmale
- Smooth operation and stable performance.
- Waterproof, anti-fog, and anti-vibration design.
- Real-time monitoring capabilities.
- Loop recording for continuous operation without missing seconds, ensuring cyclic storage.
- G-Sensor (Collision Sensor) for automatic emergency recording and video saving upon sudden shocks or collisions.
- 3-inch high-definition display.
- 170° HD wide-angle night vision lens.
- Support for dual recording (front and rear camera, depending on set).
- H.264 video compression.
2.3 Produktkomponenten und Views

Abbildung 2.3.1: Front view of the MZZYG Dash Cam, showing the main camera lens and mounting bracket.

Abbildung 2.3.2: Illustration of WDR (Wide Dynamic Range) technology, demonstrating how it improves image clarity in varying light conditions, especially at night or in high contrast environments. The dash cam automatically adjusts brightness for optimal recording.
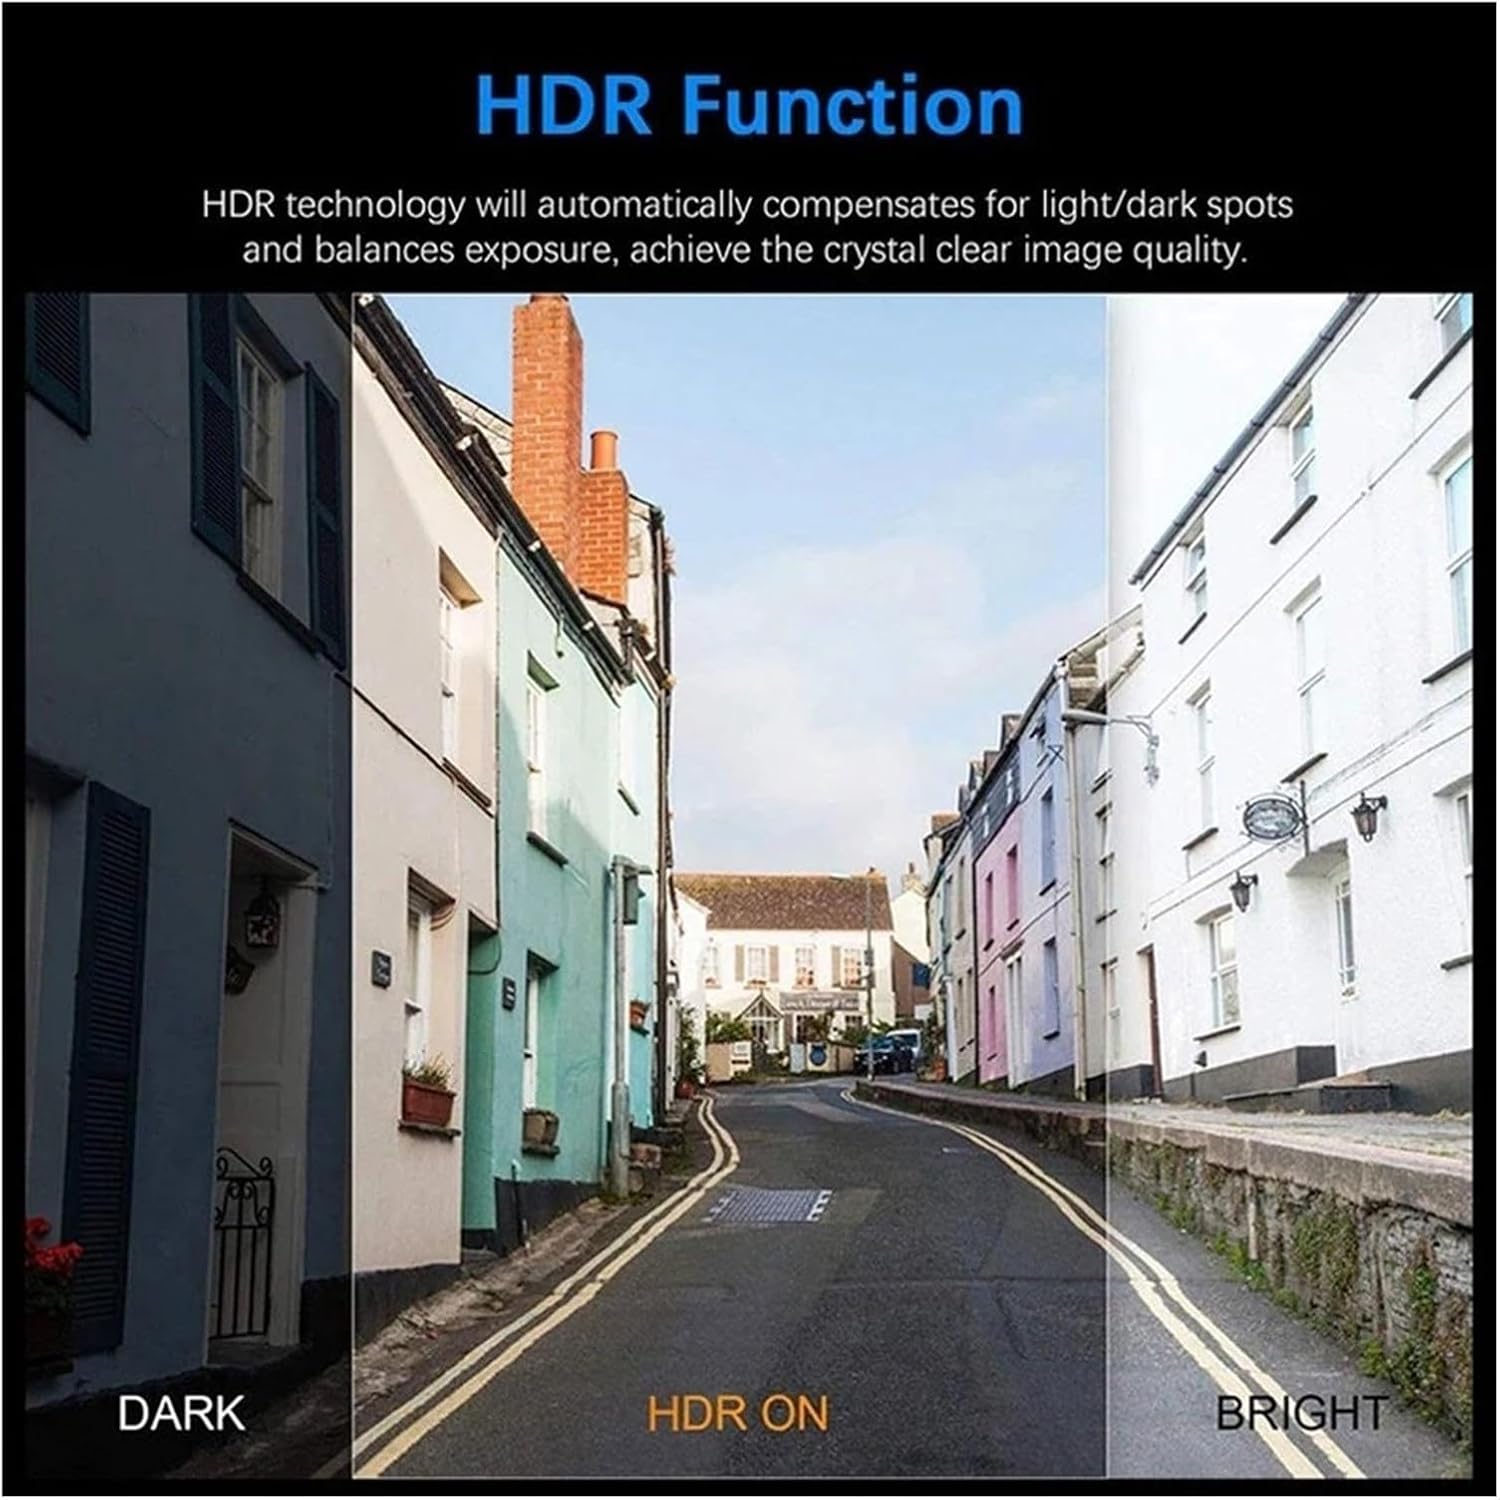
Abbildung 2.3.3: Explanation of HDR (High Dynamic Range) function. HDR technology compensates for light and dark spots and balances exposure to achieve crystal clear image quality, as shown in the comparison of dark, HDR on, and bright scenes.

Abbildung 2.3.4: The MZZYG Dash Cam mounted on the windshield of a car, positioned near the rearview mirror. This image shows the compact size and discreet placement of the device within the vehicle's interior.

Abbildung 2.3.5: A driver's perspective inside a car, with the MZZYG Dash Cam visible on the windshield. The dash cam's screen displays the live camera feed, providing real-time monitoring of the road ahead.
3. Spezifikationen
| Besonderheit | Spezifikation |
|---|---|
| Produktname | 3-inch Screen High-Definition Dual-Recording Driving Recorder |
| Produktfarbe | Schwarz |
| Schalenmaterial | ABS |
| Linse | A+ grade 170° HD Wide-Angle Night Vision Lens |
| Fotoformat | JPEG |
| Maximale Fotoauflösung | 12 M (4032 * 3024) |
| Anzeige | 3-inch High-Definition Screen |
| Effective Pixels (Front Lens) | 1080*720 |
| Videokomprimierung | H.264 |
| Audiokomprimierung | Unterstützte Kommunikation |
| Videobildrate | 1080P/30f/s |
| In-Car Camera (if applicable) | 720P |
| Kollisionssensor | Three-axis Stereo Collision Detection |
| Aufnahmemethode | AVI format, Loop Recording |
| Video Interruption | 0 ms |
| Startzeit | Ungefähr 2 Sekunden |
| Arbeitsvolumentage | Gleichstrom 5 V, 1 A |
| Ruhestrom | 200 uA |
| Lagertemperatur | -20 °C bis 70 °C (-4 °F bis 158 °F) |
| Betriebstemperatur | 0 °C bis 60 °C (32 °F bis 140 °F) |
| Arbeitsfeuchtigkeit | 15–60 % relative Luftfeuchtigkeit |
| Akku-Typ | Built-in Heat-Resistant Polymer Lithium Battery 180mAH |
| Artikelgewicht | 50 Gramm |
| Modellnummer | 1005005057656993 |
4. Einrichtung
The MZZYG Dash Cam is designed for easy installation. Follow these steps for optimal setup:
- Bereiten Sie den Montageort vor: Wählen Sie eine Stelle an Ihrer Windschutzscheibe, die Ihre Sicht nicht behindert. view der Straße. Normalerweise befindet sich dies hinter dem Heck.view mirror. Clean the windshield surface thoroughly to ensure proper adhesion.
- Befestigen Sie die Halterung: Secure the dash cam's mounting bracket to the chosen location on the windshield. Ensure it is firmly attached.
- Insert MicroSD Card (Not Included): Before powering on, insert a compatible MicroSD card (Class 10 or higher, up to 32GB recommended) into the designated slot on the dash cam. Ensure the card is inserted correctly until it clicks into place.
- Strom anschließen: Connect the provided car charging cable to the dash cam's power input port. Plug the other end of the cable into your vehicle's 12V power outlet (cigarette lighter socket).
- Verlegen Sie das Kabel: Carefully route the power cable along the edge of your windshield and dashboard to keep it tidy and out of the way of driving controls.
- Kamerawinkel anpassen: Once powered on, adjust the camera lens angle to ensure it captures the road ahead clearly, covering the desired field of view. The 3-inch display will show the live feed to assist with adjustment.
- Erstes Einschalten: The dash cam should automatically power on when your vehicle starts. Follow any on-screen prompts for initial setup, such as setting date and time.
Note: For optimal performance, format the MicroSD card within the dash cam's settings before first use and periodically thereafter.
5. Bedienungsanleitung
Your MZZYG Dash Cam is designed for automatic operation, but understanding its key functions will enhance your experience.
5.1 Automatische Aufnahme
The dash cam will automatically start recording when it receives power (i.e., when you start your car). Recording will stop automatically when the power is cut off (i.e., when you turn off your car).
5.2 Loop-Aufnahme
Die Dashcam zeichnet Videos in Endlosschleifen auf (z. B. 1-, 3- oder 5-Minuten-Abschnitte). Wenn die Speicherkarte voll ist, wird das älteste entsperrte Video automatisch gelöscht. files will be overwritten automatically to make space for new recordings. This ensures continuous recording without manual intervention.
5.3 G-Sensor (Notfallaufzeichnung)
The built-in G-Sensor detects sudden movements, impacts, or rapid deceleration. When triggered, the current video segment is automatically locked and saved to a protected folder on the memory card, preventing it from being overwritten by loop recording. This ensures critical event footage bleibt erhalten.
5.4 Parking Monitoring (if applicable)
If your dash cam supports parking monitoring (requires continuous power or a dedicated hardwire kit, not included), it can detect impacts or motion while your vehicle is parked and automatically record short video clips. Refer to the on-screen menu for specific settings.
5.5 Menünavigation
Use the physical buttons on the dash cam to navigate through the on-screen menu. Common settings include:
- Auflösung: Adjust video recording quality (e.g., 1080P, 720P).
- Dauer der Loop-Aufnahme: Set the length of video segments.
- G-Sensor-Empfindlichkeit: Adjust the sensitivity of the collision detection.
- Datum/Uhrzeit: Stellen Sie Datum und Uhrzeit richtig ein, um eine genaue Uhrzeit zu erhalten.amps auf Aufnahmen.
- SD-Karte formatieren: Löschen Sie alle Daten auf der MicroSD-Karte.
6. Wartung
Durch sachgemäße Wartung wird die Langlebigkeit und optimale Leistung Ihrer Dashcam sichergestellt.
- Reinigen Sie die Linse: Regularly clean the camera lens with a soft, lint-free cloth to ensure clear video recordings. Avoid abrasive materials that could scratch the lens.
- Reinigen Sie den Bildschirm: Use a soft, dry cloth to clean the 3-inch display.
- MicroSD-Karte formatieren: It is recommended to format the MicroSD card every 2-4 weeks to prevent data corruption and ensure smooth loop recording. This can be done through the dash cam's menu settings.
- Betriebsumgebung: Avoid exposing the dash cam to extreme temperatures outside its specified operating range (0°C to 60°C). Prolonged exposure to direct sunlight in a parked car can generate high temperatures; consider removing the dash cam or parking in shade if possible.
- Kabelmanagement: Ensure all cables are securely routed and not pinched or damaged, which could affect power supply.
7. Fehlerbehebung
Sollten Sie Probleme mit Ihrer Dashcam haben, beachten Sie bitte die folgenden häufig auftretenden Probleme und Lösungen:
Problem: Dash cam does not power on.
- Lösung: Check if the car charging cable is securely connected to both the dash cam and the car's 12V power outlet. Ensure the car's power outlet is functioning. Try a different power outlet or cable if available.
Problem: Dash cam stops recording or shows "Card Full" error.
- Lösung: Format the MicroSD card through the dash cam's menu. Ensure you are using a high-quality (Class 10 or higher) MicroSD card. If the issue persists, the card may be faulty and require replacement.
Problem: Video footage ist verschwommen oder undeutlich.
- Lösung: Clean the camera lens with a soft cloth. Ensure the protective film (if any) has been removed from the lens. Check if the windshield area in front of the camera is clean.
Problem: G-Sensor is too sensitive or not sensitive enough.
- Lösung: Adjust the G-Sensor sensitivity setting in the dash cam's menu. Lower sensitivity for fewer false triggers, higher sensitivity for more responsive detection.
Problem: Date and time are incorrect.
- Lösung: Manually set the date and time through the dash cam's menu settings. Ensure the internal battery is charged (by keeping the dash cam powered for some time) to retain settings when disconnected from power.
8. Garantie und Support
MZZYG is committed to providing high-quality products. For any product-related inquiries, technical support, or warranty claims, please contact your retailer or the MZZYG customer service team through the platform where you purchased the product.
Bitte halten Sie Ihre Modellnummer (1005005057656993) und die Kaufdetails bereit, wenn Sie sich an den Support wenden.