Einführung
This manual provides detailed instructions for the safe and effective use of your SHALL Portable Car Jump Starter with Air Compressor. This multi-functional device combines a car jump starter, tire inflator, tire pressure detector, emergency light, and power bank into one portable unit. Please read this manual thoroughly before operation and retain it for future reference.

Image: The SHALL Portable Car Jump Starter and Air Compressor, showcasing dank seines kompakten Designs und der verschiedenen Anschlüsse.
Sicherheitshinweise
Beachten Sie stets die folgenden Sicherheitsvorkehrungen, um Verletzungen oder Schäden am Gerät zu vermeiden:
- Setzen Sie das Gerät weder Regen noch Nässe aus.
- Das Gerät darf nicht bedient werden, wenn es heruntergefallen oder beschädigt ist.
- Außerhalb der Reichweite von Kindern aufbewahren.
- Sorgen Sie während der Verwendung und des Ladevorgangs für ausreichende Belüftung.
- Das Gerät darf nicht auseinandergebaut werden. Alle Wartungsarbeiten dürfen nur von qualifiziertem Fachpersonal durchgeführt werden.
- Vermeiden Sie einen Kurzschluss des Starthilfekabels.amps.
- Do not use the air compressor continuously for extended periods without allowing it to cool down.
- The device incorporates 9 safety features including protection against short circuits, over-temperature, over-charge, and over-discharge.
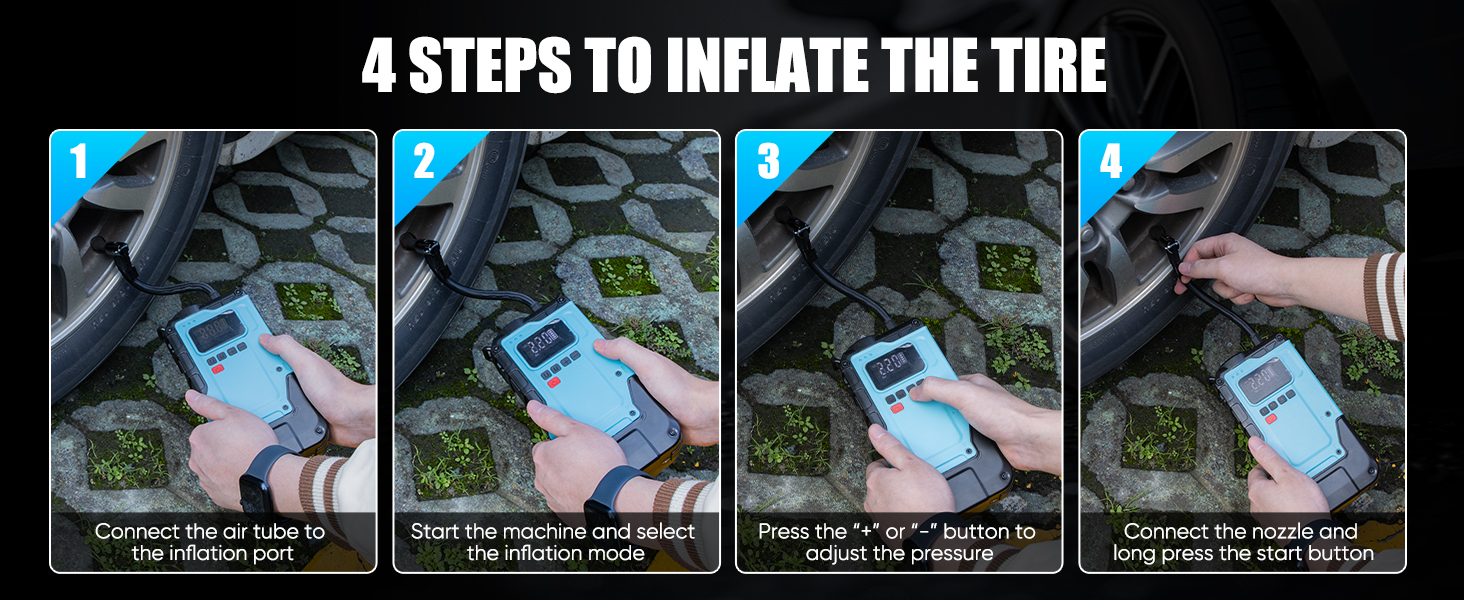
Image: Diagram illustrating the 9 safety protection features of the device, including reverse polarity, short circuit, over-charge, over-discharge, over-temperature, low temperature, reverse charge, over current, and low voltage Schutz.
Aufstellen
Packungsinhalt
Überprüfen Sie, ob alle Artikel im Paket vorhanden sind:
- Car Jump Starter (1 unit)
- Booster Cable Clamp (1 Satz)
- Air Tube (1 unit)
- Ball Inflation Needle (1 unit)
- Swimming Ring Nozzle (1 unit)
- Cigarette Lighter Interface Cable (1 unit)
- Nozzle (2 units)
- Type-C Charge Cable (1 unit)
- Benutzerhandbuch (1 Stück)
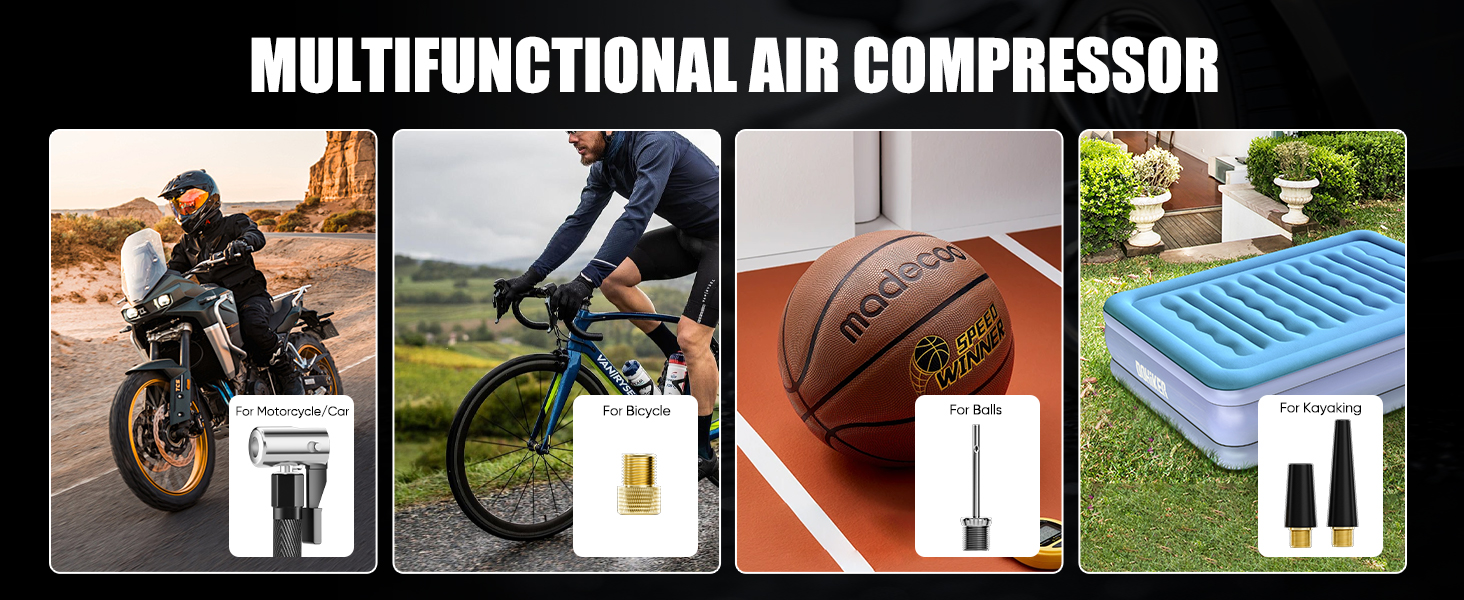
Image: The product packaging, showing the SHALL brand and key features like start, mobile power, lighting, air pump, electricity display, and emergency power start.
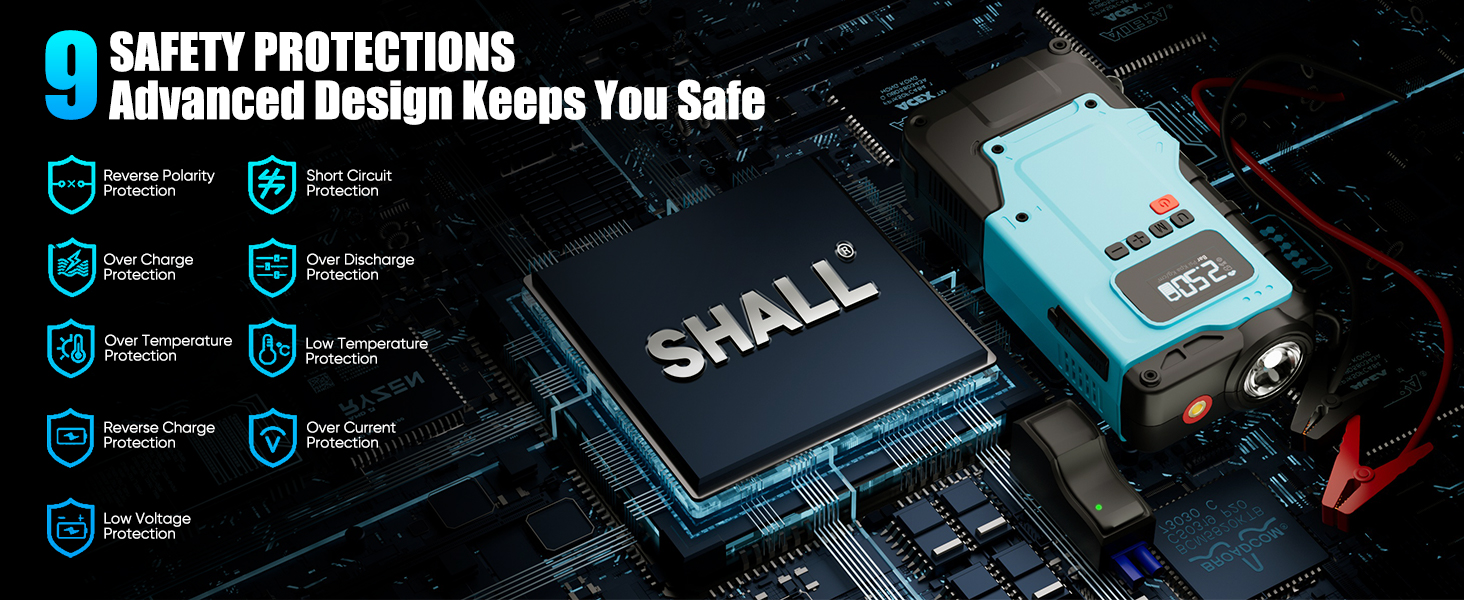
Image: The back of the product box, detailing product features and specifications including model number SH112013 and UPC 762983170926.
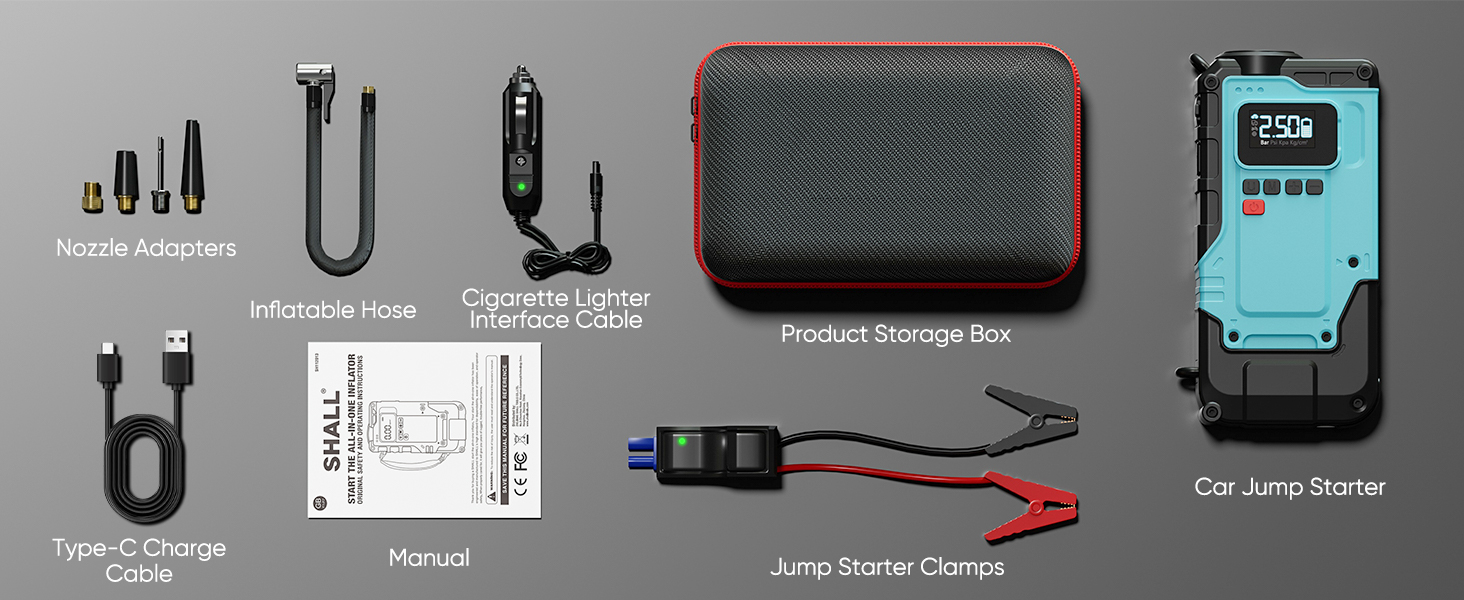
Image: The side of the product box, displaying manufacturer information and compliance marks like CE, FC, and RoHS.
Produkt überview
Familiarize yourself with the components and controls of the device:
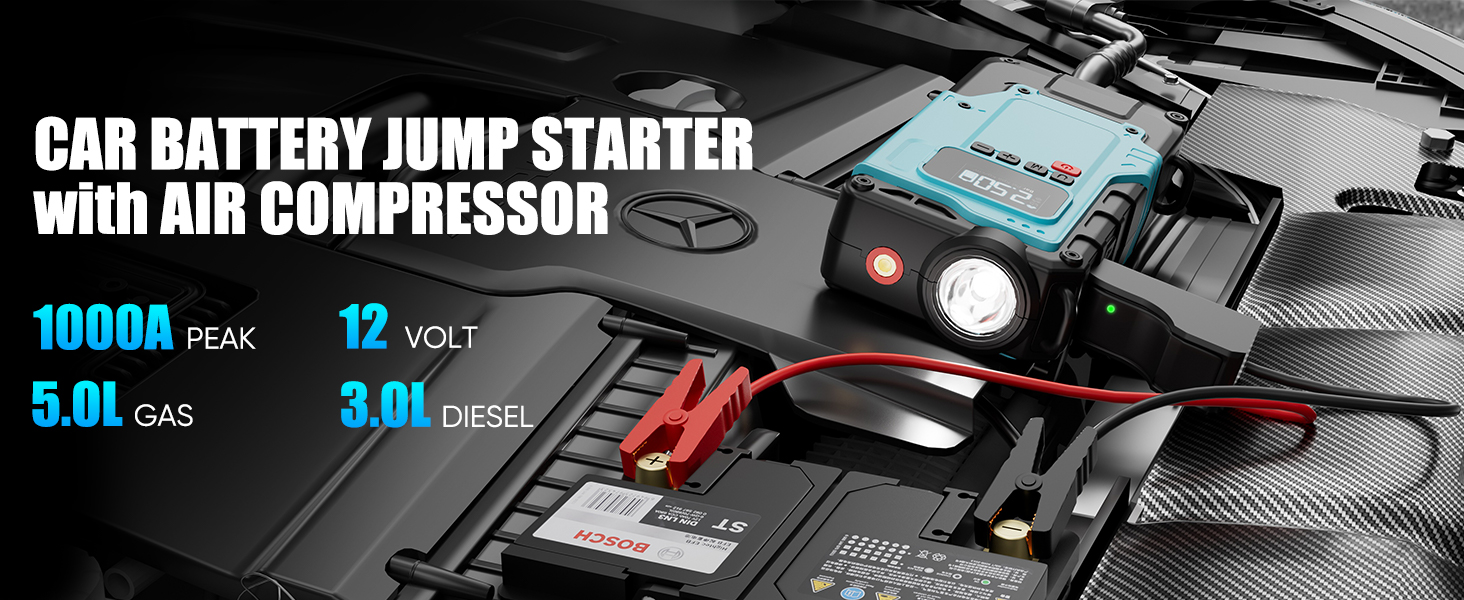
Bild: Ein überview of the SHALL Car Jump Starter with Air Compressor, highlighting its multi-functionality.
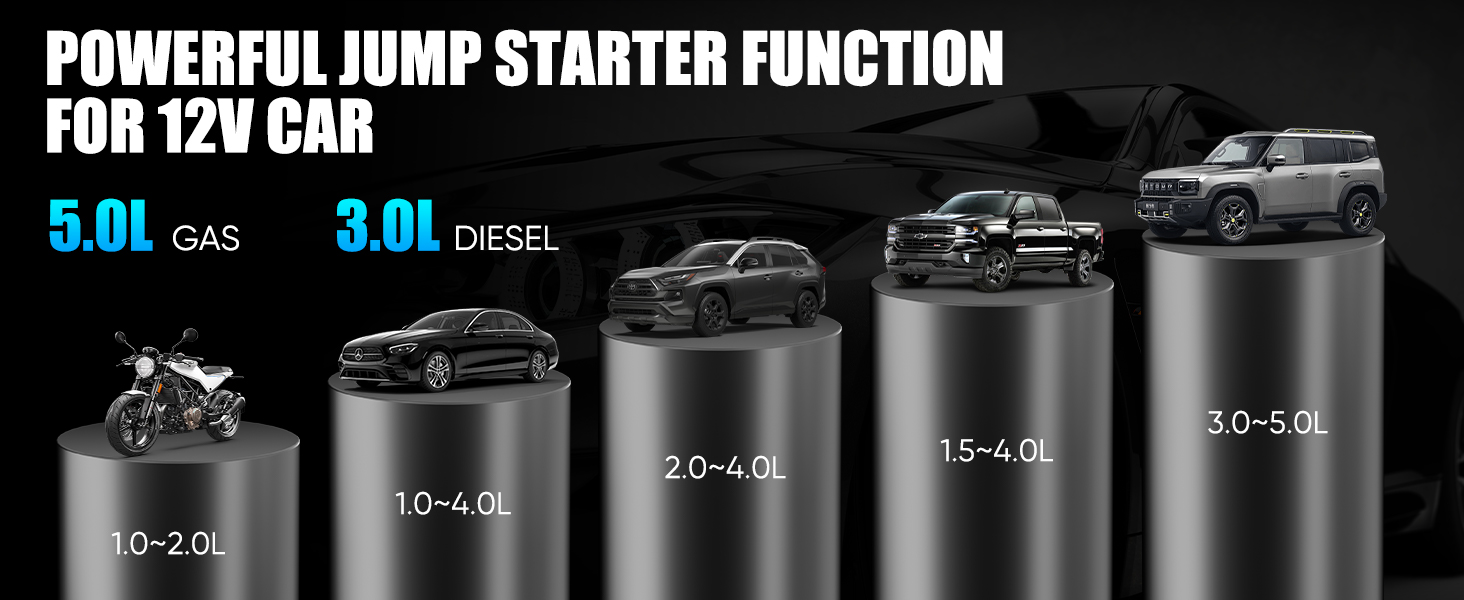
Image: A detailed diagram showing the device's display, buttons (Power Switch, Switch Vehicle Mode, Switch Units, Increase/Decrease Pressure), and ports (USB output, Type-C input, LED lighting, Inflator interface, Start output port).
Aufladen des Geräts
Before first use, fully charge the jump starter. It is recommended to recharge the device every 3 months to maintain battery health, especially during long standby periods (up to one year).
- Connect the provided Type-C charge cable to the device's Type-C input port.
- Connect the other end of the Type-C cable to a suitable USB power adapter (not included) or a car cigarette lighter interface cable.
- Das Display zeigt den Ladestatus an. Laden Sie den Akku, bis die Akkuanzeige „voll“ anzeigt.
Bedienungsanleitung
Starthilfe für ein Fahrzeug
This jump starter is designed for 12V vehicles with up to 5.0L gas or 3.0L diesel engines. It operates effectively in temperatures from -4°F to 140°F (-20°C to 60°C).
- Verbinden Clamps: Verbinden Sie die rote (+) Klamp an den Pluspol der Fahrzeugbatterie und den schwarzen (-) Steckeramp zum Minuspol.
- Anschluss an Starthilfegerät: Insert the booster cable clamp connector into the jump starter's dedicated output port. Ensure a secure connection.
- Starte den Motor: Enter the vehicle and start the engine. If the engine does not start immediately, wait 30 seconds before attempting again. Do not crank for more than 3 seconds per attempt.
- Cl entfernenamps: Once the vehicle starts, immediately remove the booster cable clamp from the jump starter, then disconnect the black (-) clamp von der Fahrzeugbatterie, gefolgt von der roten (+)-Tasteamp.
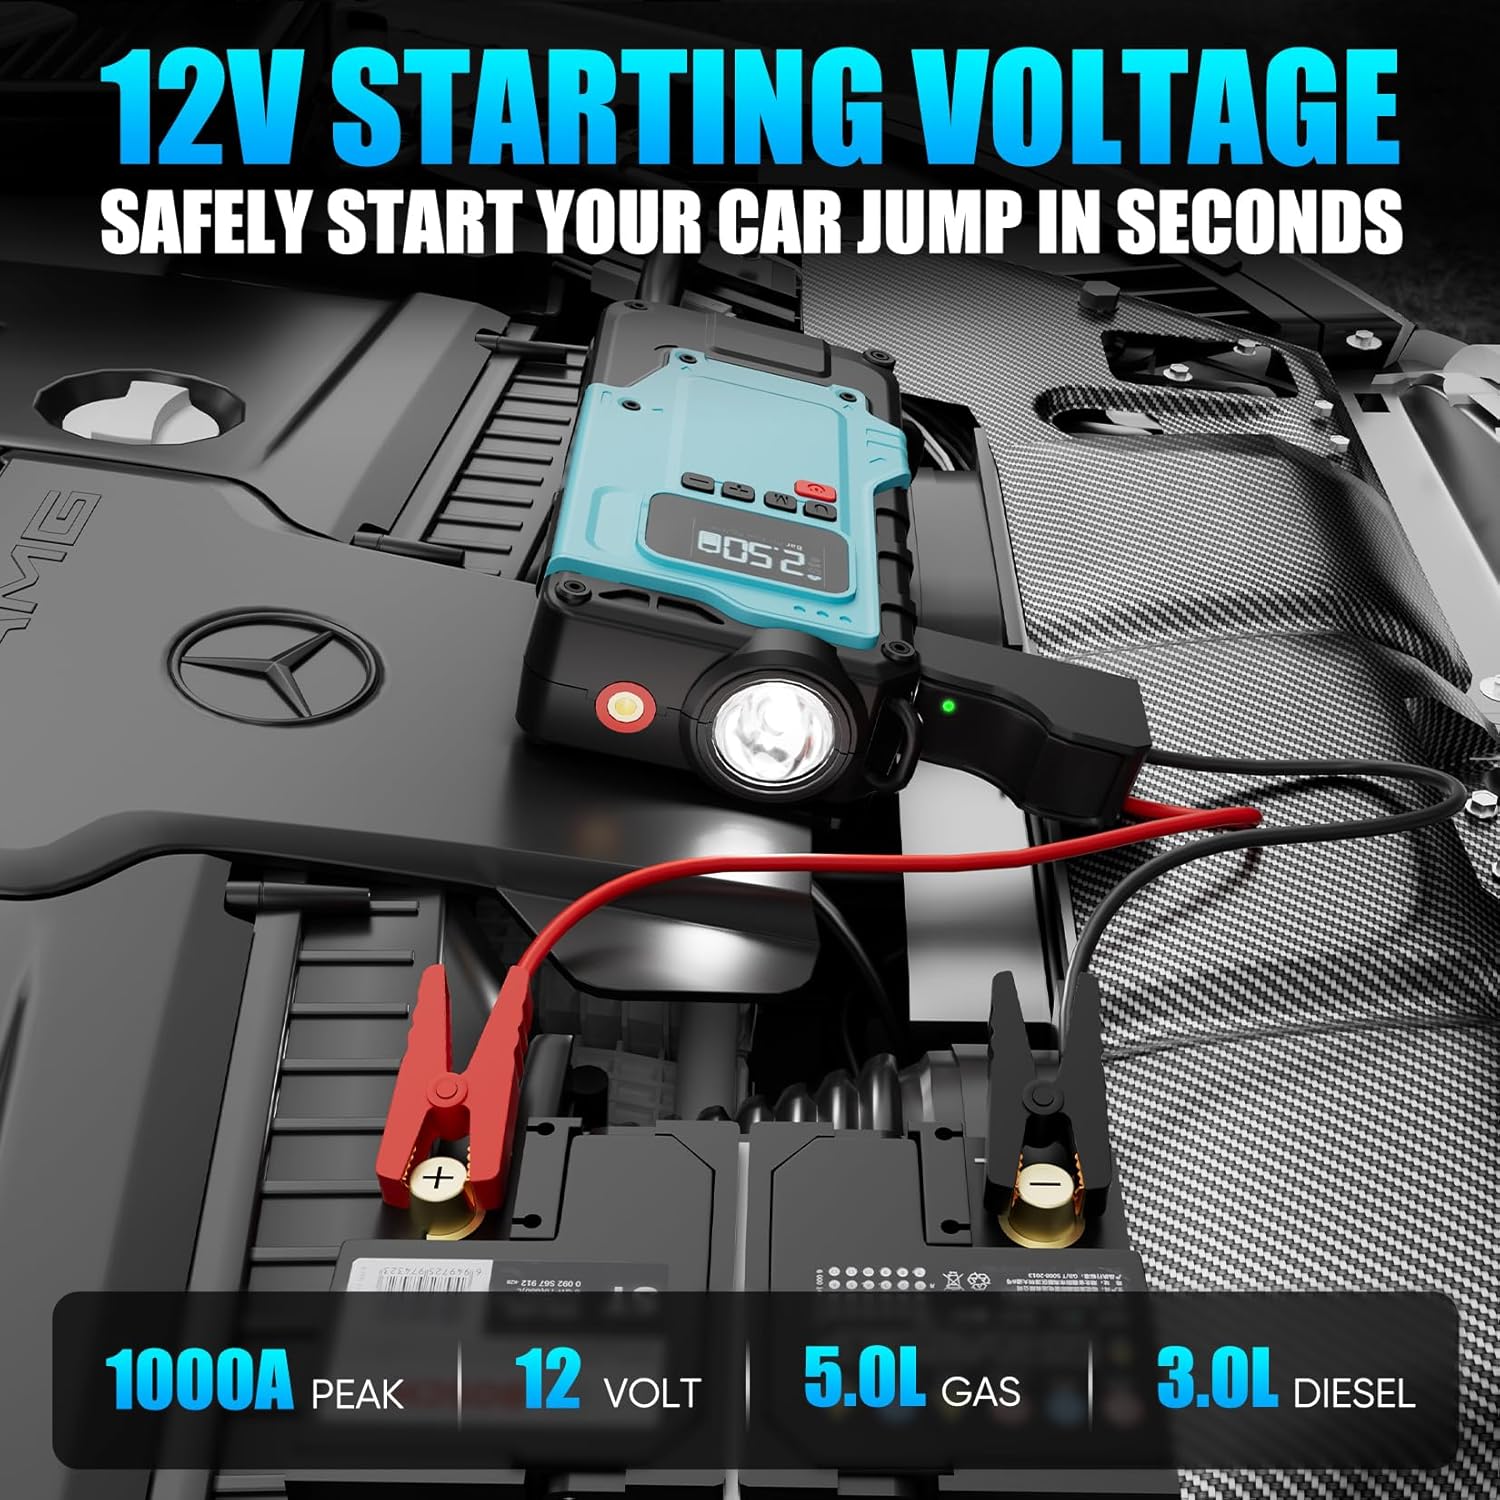
Image: The jump starter connected to a car battery, illustrating the process of safely starting a vehicle.
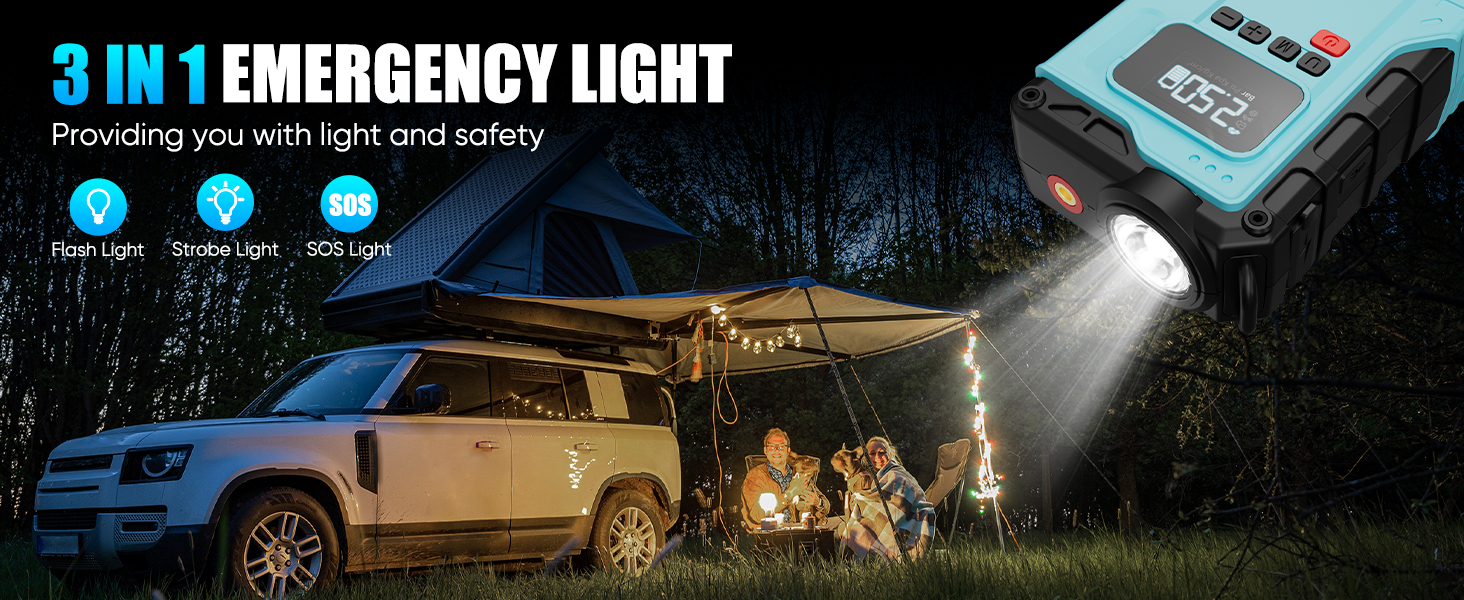
Image: A visual guide showing the four steps to jump start a car: connect positive/negative terminals, connect cable clip to jump starter, start engine, and remove clamps.
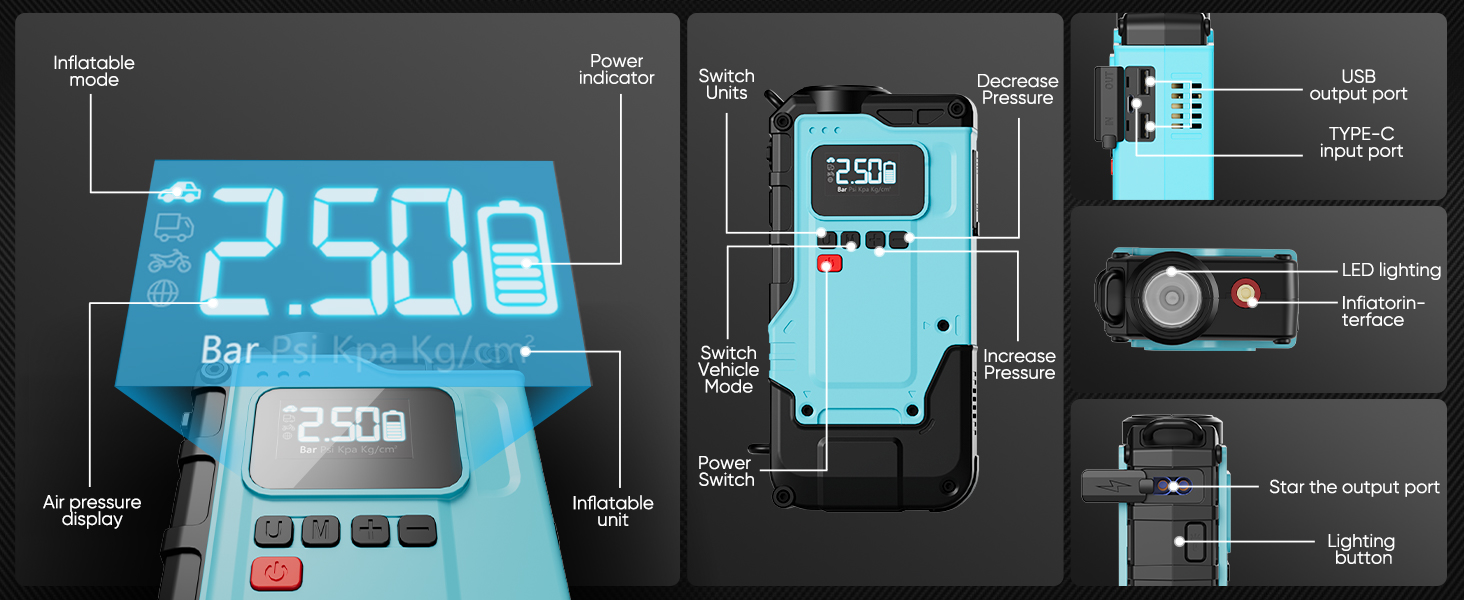
Image: A chart indicating the jump starter's compatibility with various engine displacements for gas and diesel vehicles.
Verwendung des Luftkompressors
The integrated air compressor can inflate tires up to 150 PSI and is suitable for various items including car tires, bicycle tires, motorcycle tires, swimming rings, kayaks, and most balls. It features real-time pressure detection and preset inflation functions.
- Luftschlauch anschließen: Attach the detachable air tube to the inflator port on the device. Select the appropriate nozzle adapter for the item to be inflated and connect it to the air tube.
- Einschalten und Modus auswählen: Turn on the device. Use the "Switch Vehicle Mode" button to select the desired inflation mode (e.g., car, motorcycle, bicycle, ball).
- Druck anpassen: Use the "+" and "-" buttons to set the target pressure. The LCD display will show the current and target pressure. You can also switch units (Bar, Psi, Kpa, Kg/cm²) using the "Switch Units" button.
- Inflation starten: Connect the nozzle to the item's valve. Long press the start button to begin inflation. The compressor will automatically stop once the preset pressure is reached.
- Kontinuierliche Leistung: For prolonged inflation tasks, connect the device to your car's cigarette lighter using the provided interface cable for continuous and stable power.
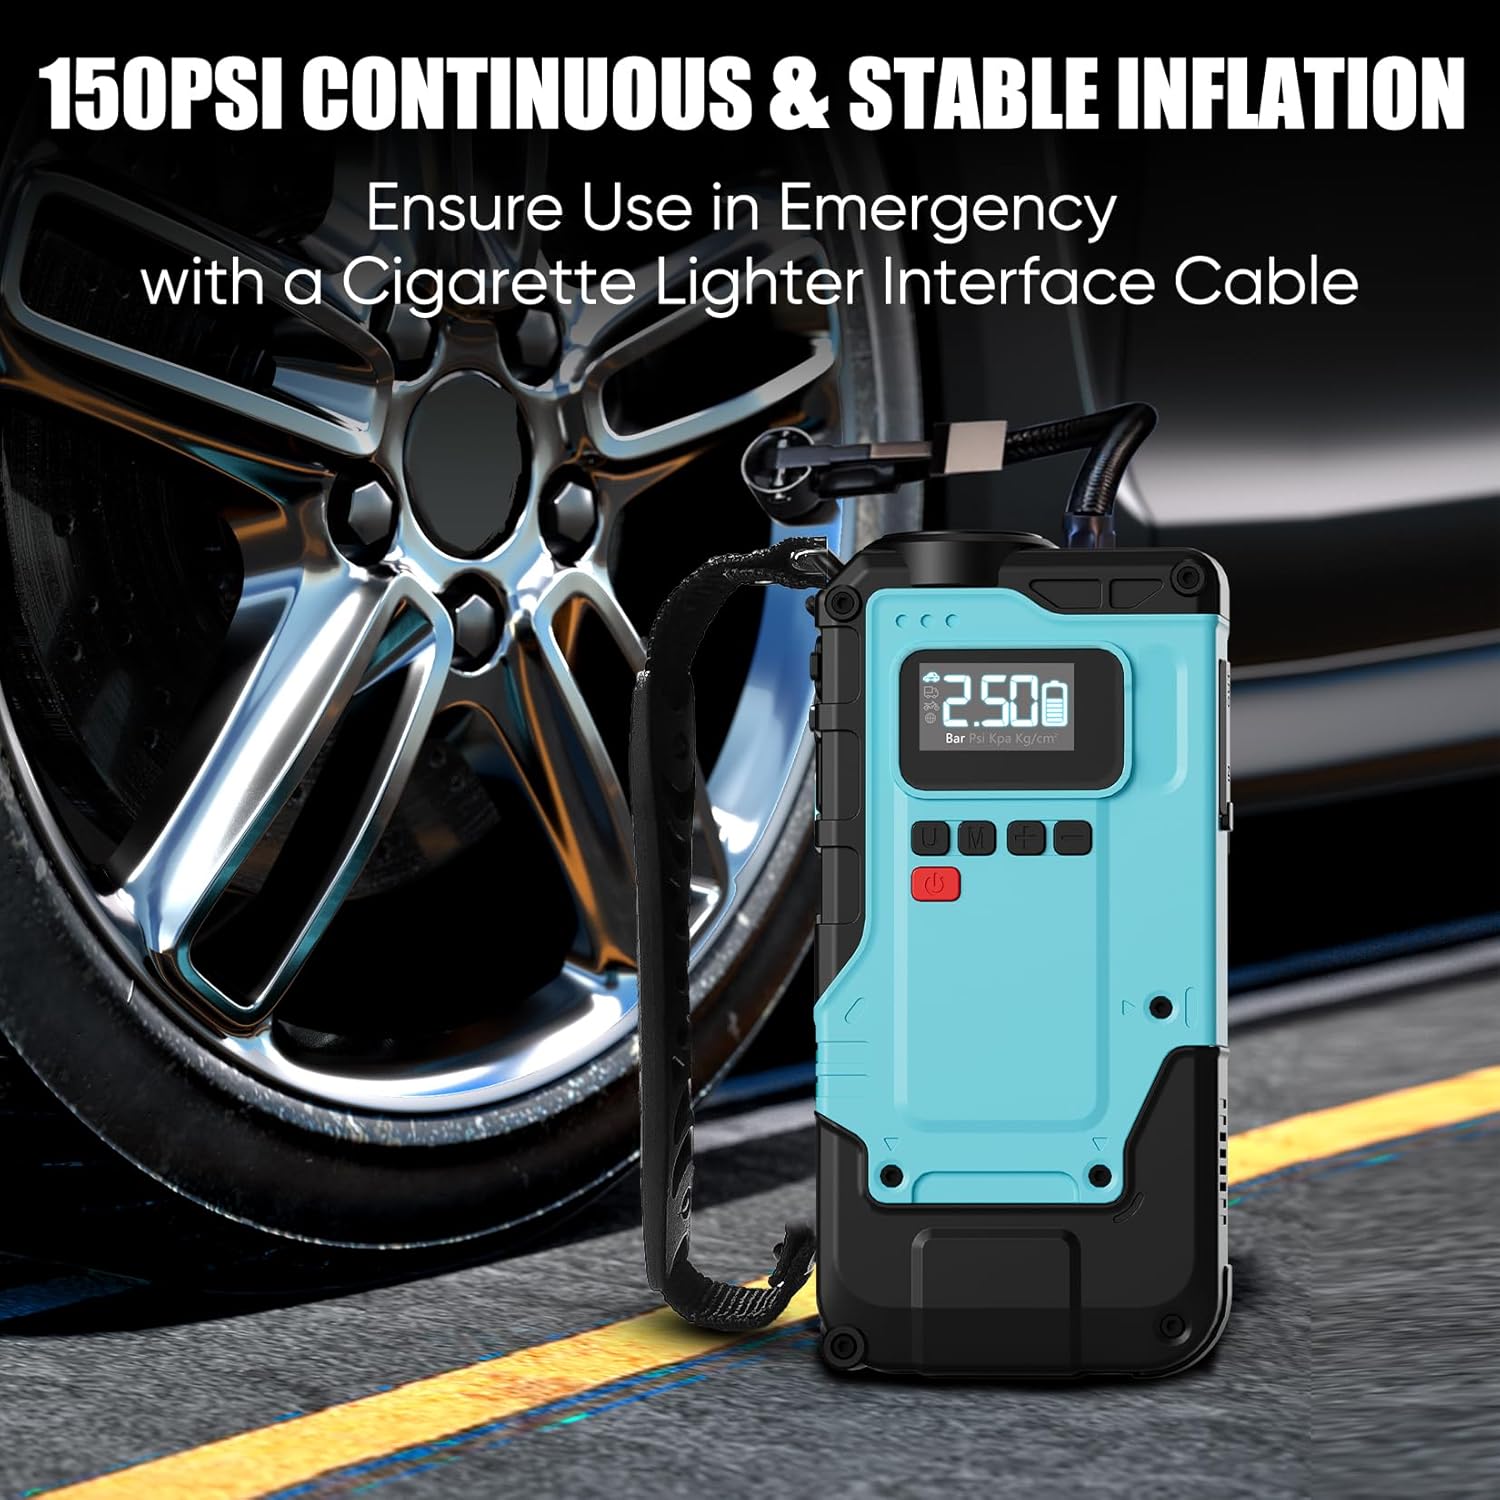
Image: The device's air compressor connected to a car tire, demonstrating its inflation capability.
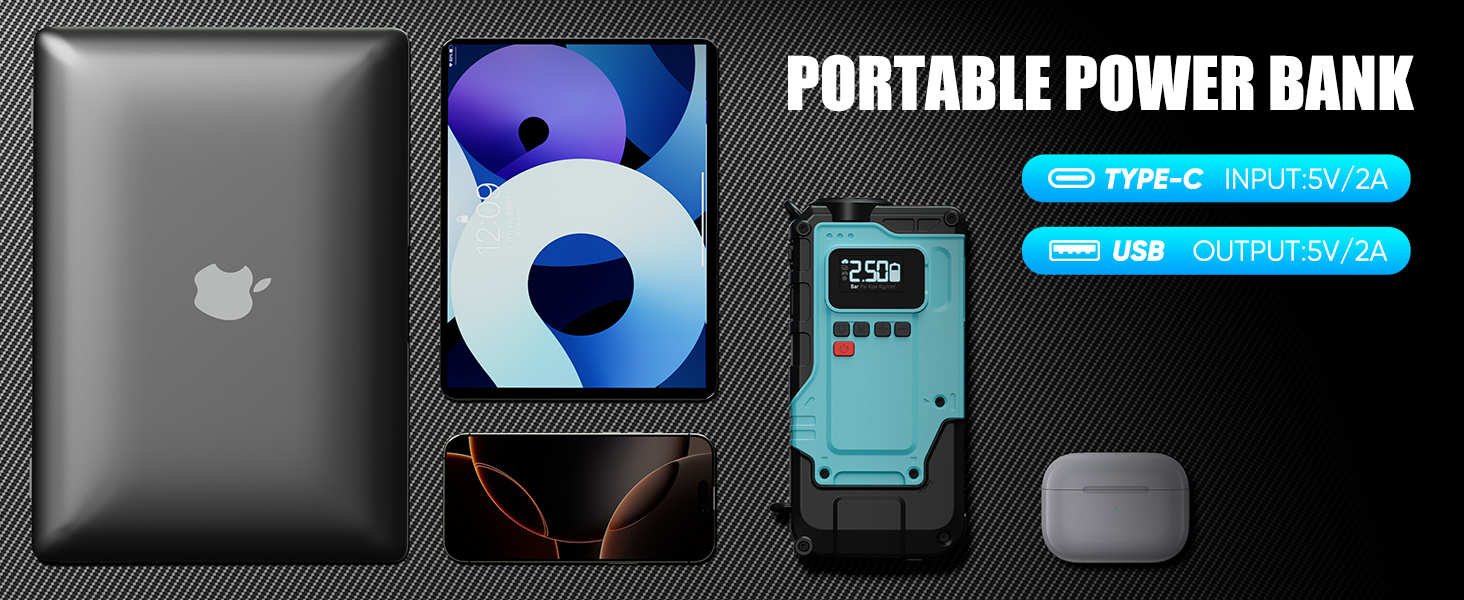
Image: A visual guide showing the four steps to inflate a tire: connect air tube, start machine and select mode, adjust pressure, and connect nozzle to start inflation.
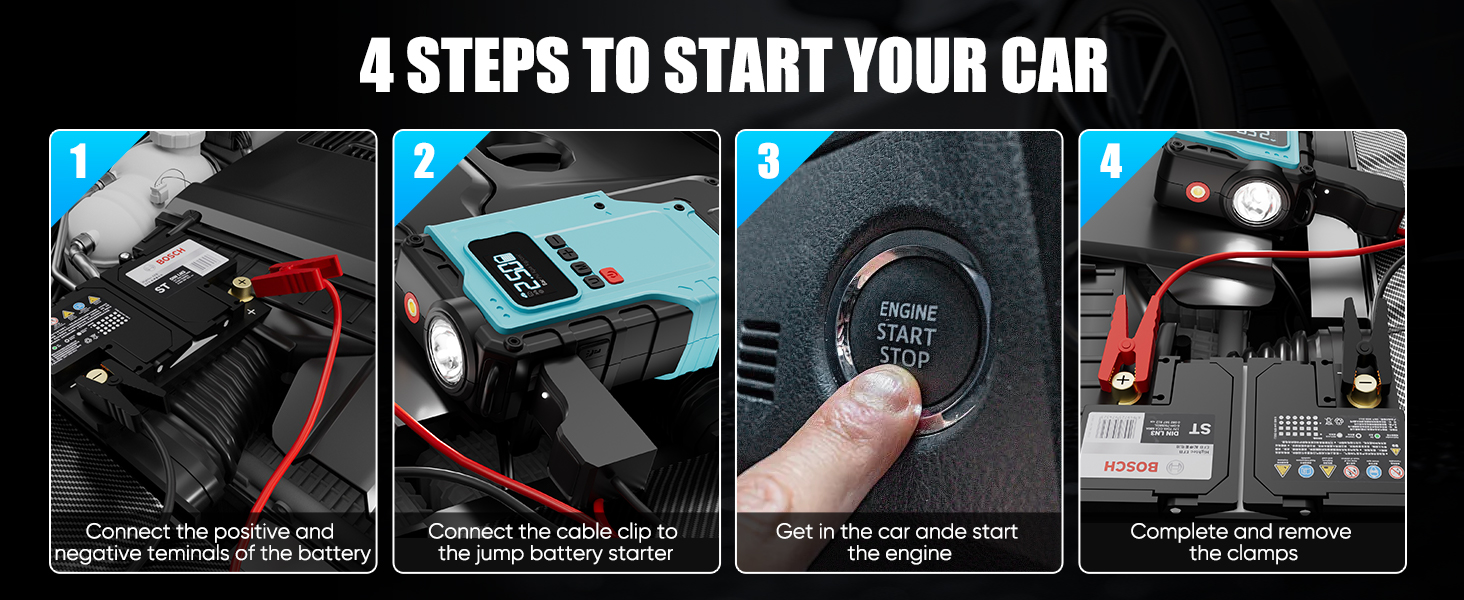
Bild: Examples of items that can be inflated with the air compressor, including motorcycles, bicycles, balls, and kayaks, along with various nozzle adapters.
Verwendung als Powerbank
The device can serve as a power bank to charge your digital devices.
- Connect your device's charging cable to the USB output port (5V/2A) on the jump starter.
- Der Starthilfe-Booster beginnt nun mit dem Aufladen Ihres Geräts.
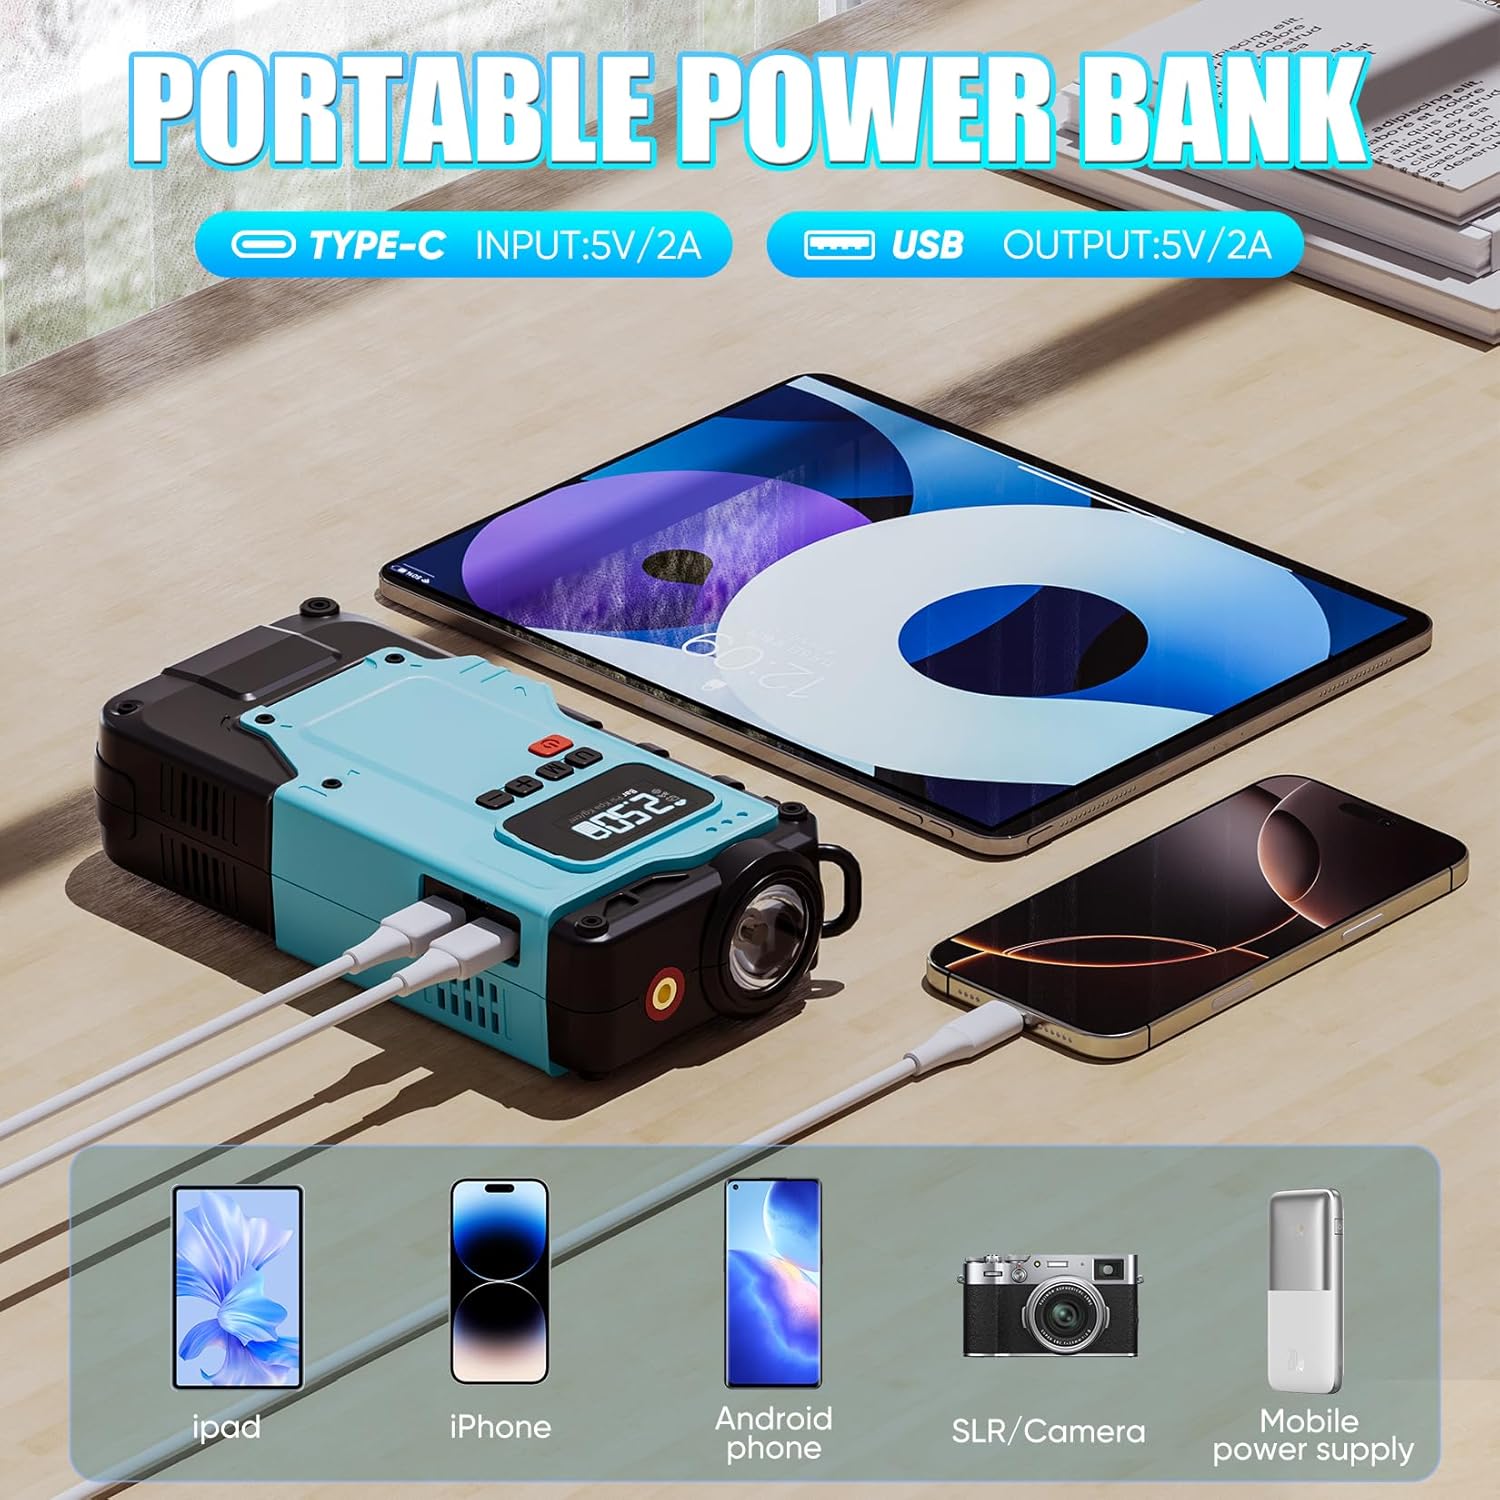
Image: The jump starter functioning as a power bank, charging an iPad, iPhone, and Android phone via its USB output port.
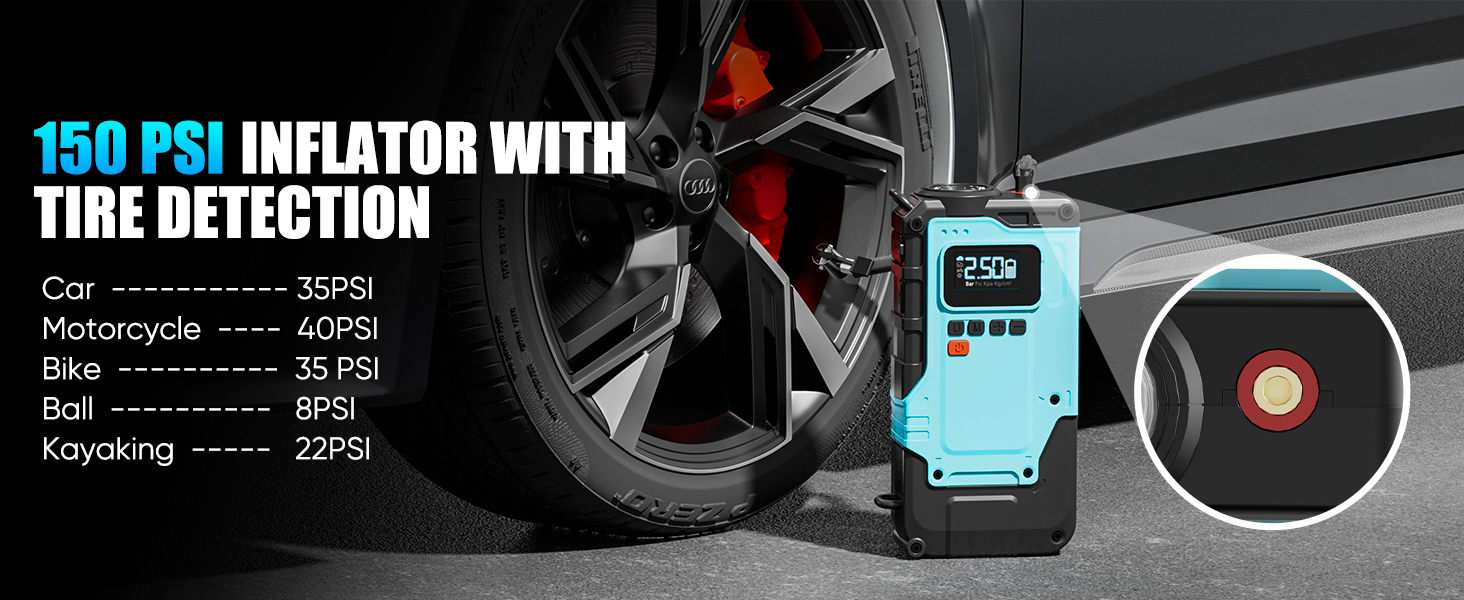
Image: A visual representation of the portable power bank feature, showing Type-C input (5V/2A) and USB output (5V/2A) for charging various electronic devices.
Notbeleuchtung
The device includes an emergency light with multiple modes.
- Press the light button to cycle through modes: Flashlight (steady on), Strobe Light, and SOS Light.
- Drücken Sie erneut, um das Licht auszuschalten.

Image: The device's emergency light illuminating a campsite, demonstrating its flashlight, strobe, and SOS light functions.
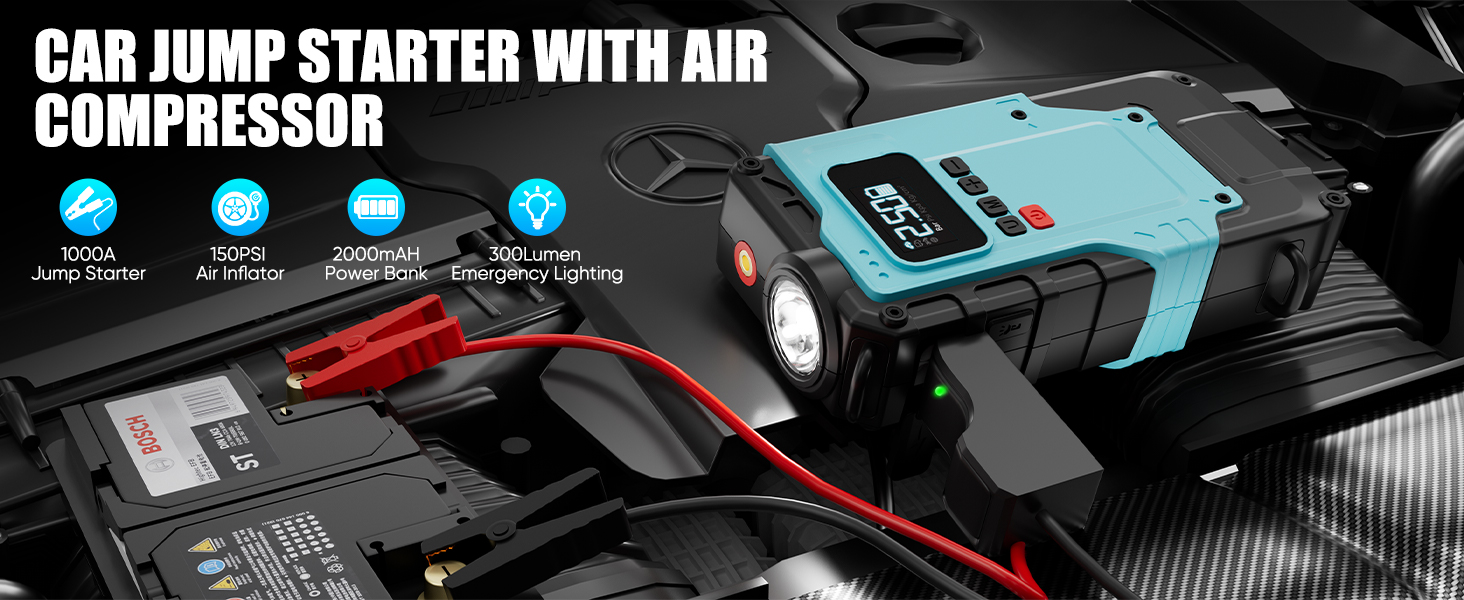
Image: A visual representation of the 3-in-1 emergency light feature, highlighting flashlight, strobe light, and SOS light modes.
Wartung
- Reinigen Sie das Gerät mit einem trockenen, weichen Tuch. Verwenden Sie keine Scheuermittel oder Lösungsmittel.
- Bewahren Sie das Gerät an einem kühlen, trockenen Ort fern von direkter Sonneneinstrahlung und extremen Temperaturen auf.
- Recharge the device at least once every three months to maintain optimal battery performance, even if not in use.
- Kabel und Anschlüsse prüfenampVor jedem Gebrauch auf eventuelle Schäden prüfen.
Fehlerbehebung
| Problem | Mögliche Ursache | Lösung |
|---|---|---|
| Gerät lässt sich nicht einschalten. | Batterie ist leer. | Laden Sie das Gerät vollständig auf. |
| Das Fahrzeug lässt sich nicht überbrücken. | Falsche Klamp connection; Vehicle battery severely discharged; Engine displacement exceeds device capacity. | Stellen Sie sicher, dass clamps are connected correctly (red to positive, black to negative). Ensure device is fully charged. Verify vehicle engine size is within specifications (5.0L Gas / 3.0L Diesel). |
| Der Luftkompressor pumpt nicht auf. | Air tube not securely connected; Target pressure not set; Device battery low. | Check air tube and nozzle connections. Set target pressure on the display. Charge the device. |
| Das Gerät überhitzt während des Gebrauchs. | Längerer Dauerbetrieb. | Allow the device to cool down before further use. The device has over-temperature protection. |
Technische Daten
| Besonderheit | Detail |
|---|---|
| Marke | SOLL |
| Modellnummer | SH112013 (Item model number: HS-A-01) |
| Spitzenausgangsstrom | 1000 Amps |
| Nennvolumentage | 12V (for jump starting), 16.8V (internal) |
| Motorkompatibilität | Bis zu 5.0 l Benzin / 3.0 l Diesel |
| Maximaler Druck des Luftkompressors | 150 PSI |
| AmpAlter | 7 Amps |
| Energie Bank Ausgang | USB-Ausgang: 5 V/2 A |
| Ladeeingang | Typ C-Eingang: 5V / 2A |
| Betriebstemperatur | -4°F bis 140°F (-20°C bis 60°C) |
| Technische Daten | 5.51"T x 9.85"B x 4.05"H |
| Artikelgewicht | 3.1 Pfund |
| Batterien | 1 Lithium-Polymer-Akku (im Lieferumfang enthalten) |
| UPC | 762983170926 |
| Hersteller | Zhejiang Hangshuai Technology Co., Ltd |
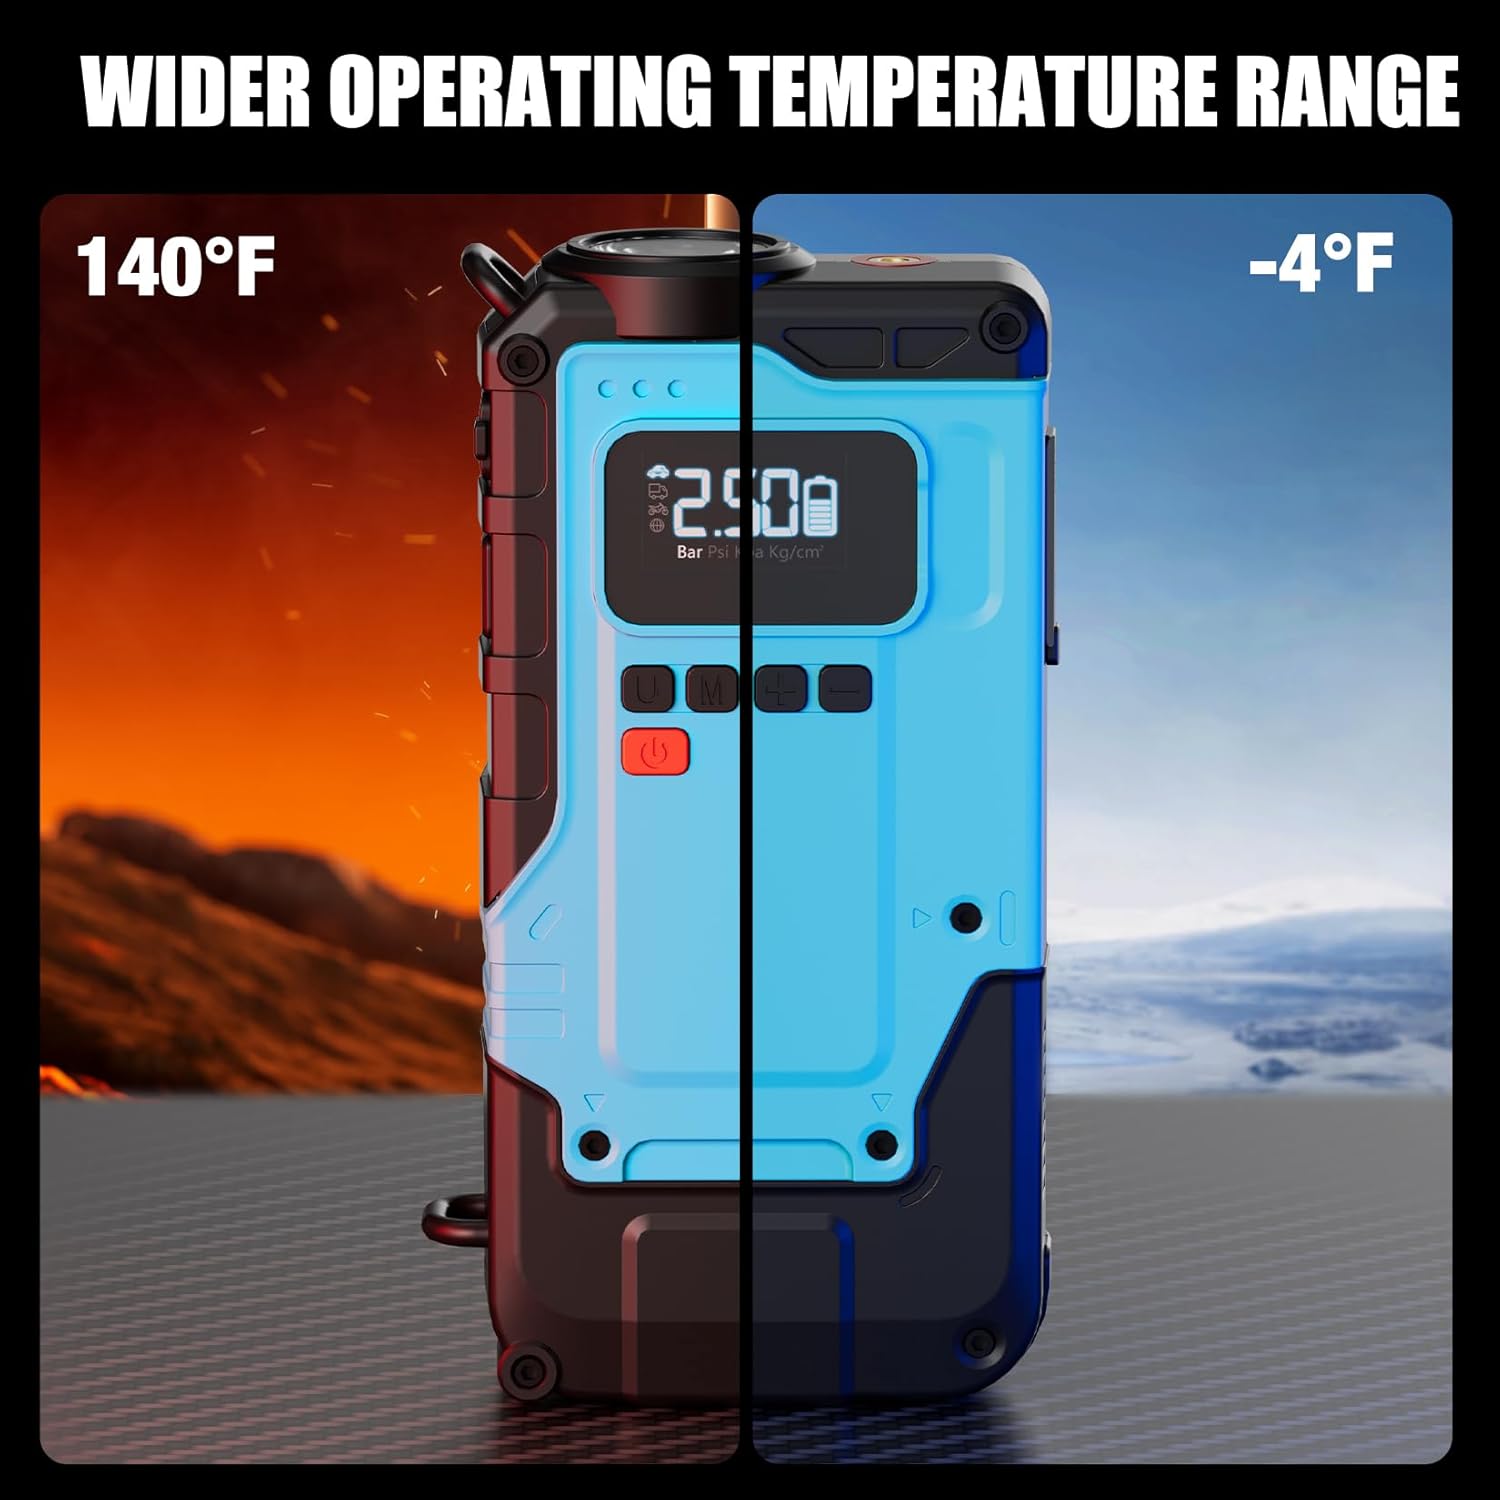
Image: The device operating effectively across a wide temperature range, from -4°F to 140°F.
Garantie und Support
For warranty information or technical support, please contact the manufacturer or your retailer. Keep your purchase receipt as proof of purchase.
Manufacturer: Zhejiang Hangshuai Technology Co., Ltd
UPC: 762983170926