AFEXOA ZH083K
AFEXOA ZH083K Digitaler Sonnenaufgangswecker – Benutzerhandbuch
Modell: ZH083K
Einführung
Vielen Dank für Ihren Einkauf.asing the AFEXOA ZH083K Digital Sunrise Alarm Clock. This device is designed to enhance your waking and sleeping experience with its natural sunrise simulation, customizable alarm sounds, multi-color night light, and sleep aid features. Please read this manual carefully to ensure proper use and optimal performance of your new alarm clock.
Packungsinhalt
- AFEXOA ZH083K Digital Sunrise Alarm Clock
- USB-Stromkabel
- Bedienungsanleitung
Produkt überview
Familiarize yourself with the components and controls of your AFEXOA ZH083K alarm clock.

Bild 1: Front view of the AFEXOA ZH083K Digital Sunrise Alarm Clock, showing the digital time display and control buttons on the top panel. The light dome is visible above the fabric-covered speaker base.
Bedientasten:
- DIMMER: Adjusts the brightness of the clock display.
- ZEIT: Wird zur Einstellung der aktuellen Uhrzeit verwendet.
- ALARM: Used for setting and activating the alarm.
- ALARM EIN/AUS: Schaltet die Alarmfunktion ein und aus.
- SCHLAF-TIMER: Activates and adjusts the sleep timer function.
- +/-: Adjusts values (time, brightness, volume) up or down.
- Glühbirnen-Symbol: Controls the night light/mood light.
- Schlummertaste: Located on the bottom, activated by pressing down the clock.
Aufstellen
1. Stromanschluss
Connect the provided USB power cable to the alarm clock and plug it into a suitable USB power adapter (not included) or a USB port. The clock display will illuminate.
2. Einstellen der aktuellen Uhrzeit
- Halten Sie die ZEIT Drücken Sie die Taste, bis die Stundenanzeige zu blinken beginnt.
- Verwenden Sie die +/- Tasten zum Einstellen der Stunde.
- Drücken Sie die ZEIT Drücken Sie erneut die Taste, um die Stunde zu bestätigen und zur Minuteneinstellung zu wechseln.
- Verwenden Sie die +/- Tasten zum Einstellen der Minuten.
- Drücken Sie die ZEIT Drücken Sie erneut die Taste, um die Zeiteinstellung zu speichern.
Bedienungsanleitung
1. Einstellen des Weckers und der Sonnenaufgangssimulation

Bild 2: Illustration of the sunrise simulation feature, showing the light gradually changing from dim red to bright yellow over a period, with time indications of 6:00, 6:30, and 7:00.
- Halten Sie die ALARM Drücken Sie die Taste so lange, bis die Alarmzeitanzeige zu blinken beginnt.
- Verwenden Sie die +/- Tasten zum Einstellen der gewünschten Weckzeit.
- Drücken Sie die ALARM Mit dieser Taste können Sie die Stunde bestätigen und zur Minuteneinstellung wechseln.
- Verwenden Sie die +/- Tasten zum Einstellen der gewünschten Alarmminuten.
- Drücken Sie die ALARM button to confirm the minutes and proceed to sunrise duration setting.
- Verwenden Sie die +/- buttons to select the sunrise simulation duration (10-60 minutes). This is the period before your set alarm time when the light will gradually brighten.
- Drücken Sie die ALARM button to confirm the duration and proceed to alarm sound selection.
- Verwenden Sie die +/- buttons to cycle through the 7 available alarm sounds or select "OFF" for light-only alarm.
- Drücken Sie die ALARM button to confirm the sound and proceed to volume adjustment.
- Verwenden Sie die +/- buttons to set the alarm volume (10 levels).
- Drücken Sie die ALARM button once more to save all alarm settings.
Zum Aktivieren oder Deaktivieren des Alarms drücken Sie die Taste ALARM EIN / AUS Taste. Beim Aktivieren erscheint ein Alarmsymbol auf dem Display.

Bild 3: A visual representation of the seven built-in wake-up ringtones, including icons for Beep, Bell, Birds, and four types of Soft Music. It also shows a 10-level volume adjustment bar.
2. Schlummerfunktion
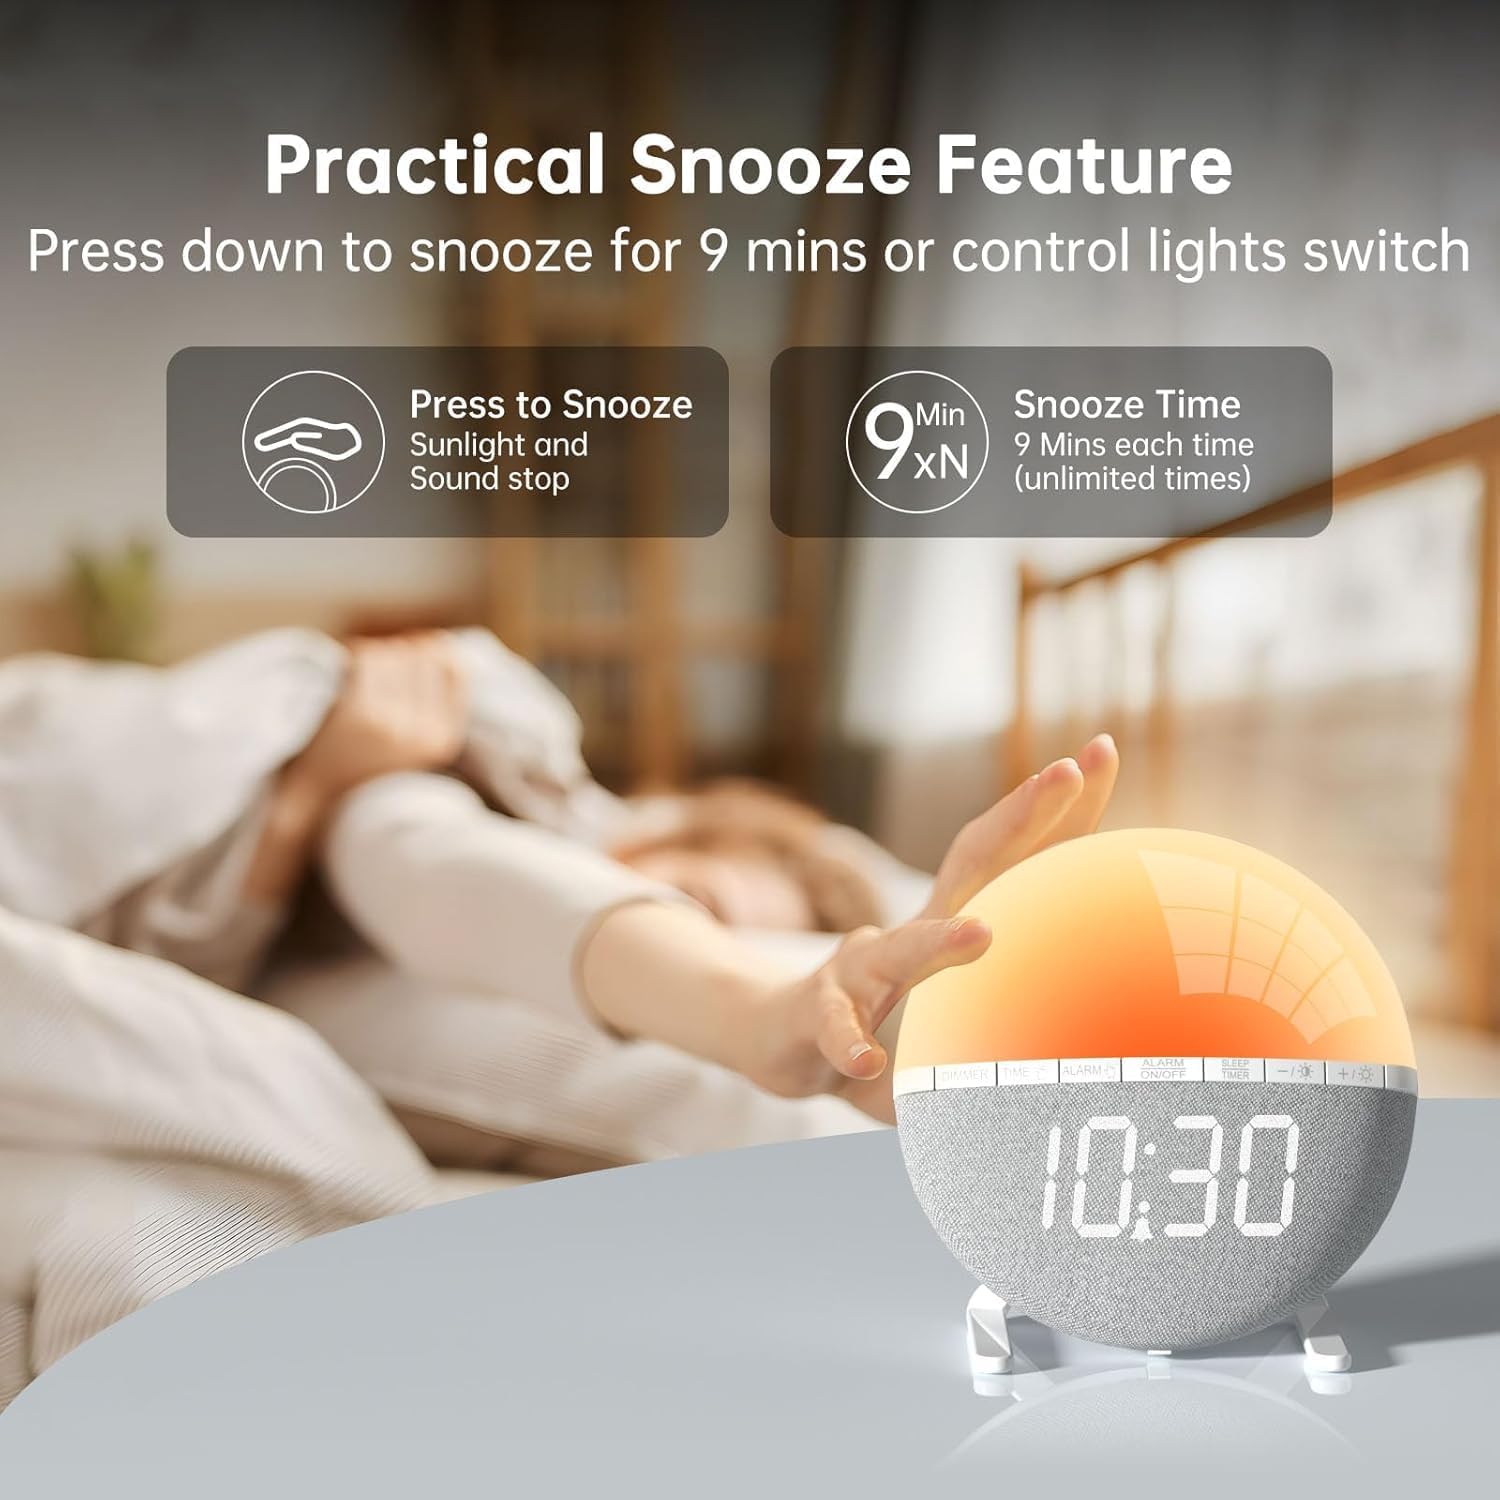
Bild 4: A hand pressing down on the top of the alarm clock to activate the snooze function. Text indicates that pressing down snoozes for 9 minutes and can also control the light switch.
When the alarm sounds, gently press down on the top of the alarm clock to activate the snooze function. The alarm will pause for 9 minutes and then sound again. This can be repeated an unlimited number of times.
3. Night Light / Mood Light

Bild 5: A display of the various solid color and RGB mood light options available on the alarm clock, shown as a spectrum of colors from light blue to purple, with the clock displaying each color.
- Drücken Sie die Glühbirnensymbol Taste, um das Nachtlicht einzuschalten.
- Drücken Sie die Glühbirnensymbol button repeatedly to cycle through the 7 solid colors and 2 mixed RGB mood light options.
- Verwenden Sie die +/- buttons to adjust the brightness of the selected light (10 levels).
- Halten Sie die Glühbirnensymbol Knopf zum Ausschalten des Nachtlichts.
4. Sleep-Timer

Bild 6: An image illustrating the sleep aid function with an auto-off timer, showing options for 15m, 30m, 60m, 90m, and 120m. The alarm clock is shown emitting a soft, warm light.
The sleep timer allows the light to gradually dim and turn off after a set period, aiding in sleep.
- Drücken Sie die EINSCHLAFTIMER Taste.
- Verwenden Sie die +/- buttons to select the desired sleep timer duration (15, 30, 60, 90, or 120 minutes). The light will gradually dim and turn off after the selected time.
- Um den Sleep-Timer abzubrechen, drücken Sie die EINSCHLAFTIMER button repeatedly until the timer is off, or press and hold the button.
5. Anpassung der Anzeigehelligkeit

Bild 7: Four images of the alarm clock demonstrating different display brightness levels, from off to full brightness, highlighting the dimmable and eye-caring features.
Drücken Sie die DIMMER button to cycle through the 4 display brightness levels: 0% (off), 5%, 50%, and 100%. This allows you to adjust the display visibility according to your preference, especially at night.
Wartung
- Reinigen Sie das Gerät mit einem weichen, trockenen Tuch. Verwenden Sie keine Scheuermittel oder Lösungsmittel.
- Halten Sie das Gerät von Wasser und hoher Luftfeuchtigkeit fern.
- Vermeiden Sie es, das Gerät fallen zu lassen oder starken Stößen auszusetzen.
- Versuchen Sie nicht, das Gerät selbst zu zerlegen oder zu reparieren. Wenden Sie sich bei Problemen an den Kundendienst.
Fehlerbehebung
| Problem | Mögliche Ursache | Lösung |
|---|---|---|
| Die Uhranzeige ist ausgeschaltet oder funktioniert nicht. | No power connection or power adapter issue. Display brightness set to 0%. | Ensure the USB cable is securely connected and the power adapter is working. Press the DIMMER button to increase display brightness. |
| Der Alarm ertönt nicht. | Alarm not activated. Alarm volume set to 0 or sound option set to "OFF". | Drücken ALARM EIN / AUS to activate. Check alarm settings to ensure a sound is selected and volume is not 0. |
| Die Sonnenaufgangssimulation funktioniert nicht. | Sunrise duration not set or set to 0. | Verify the sunrise duration is set to a value between 10-60 minutes in the alarm settings. |
| Das Nachtlicht geht nicht an. | Lichtfunktion nicht aktiviert. | Drücken Sie die Glühbirnensymbol Taste, um das Licht einzuschalten. |
Technische Daten
- Modell: ZH083K
- Marke: AFEXOA
- Abmessungen: 9.5 x 3.81 x 9.5 cm
- Gewicht: 400 g
- Material: Plastik
- Anzeigetyp: Digitales
- Energiequelle: Stromkabel (USB)
- Besondere Merkmale: Sunrise Simulation, Mood Light, Color-Changing Night Light, Loud Alarm, Snooze, Sleep Timer, Dimmable Display
Garantie und Support
The AFEXOA ZH083K Digital Sunrise Alarm Clock comes with a standard manufacturer's warranty. For detailed warranty information, please refer to the product packaging or contact your retailer. If you encounter any issues or have questions regarding your product, please contact AFEXOA customer support through the retailer's platform or the official brand webWebsite für Unterstützung.
Bitte bewahren Sie Ihren Kaufbeleg als Kaufnachweis für Garantieansprüche auf.
Ask a question about this manual
Ask about setup, troubleshooting, compatibility, parts, safety, or missing instructions. Manuals+ will review the question and use this page’s manual context to help answer it.