1. Wichtige Sicherheitshinweise
Read all instructions carefully before installing and operating the ceiling fan. Retain this manual for future reference.
- Vor der Installation oder Wartung muss sichergestellt werden, dass die Stromversorgung am Leistungsschalter unterbrochen ist.
- All electrical connections must comply with local codes and ordinances, and the National Electric Code (NEC). If you are unfamiliar with electrical wiring, consult a qualified electrician.
- The fan must be mounted to a structurally sound ceiling joist or outlet box capable of supporting a minimum of 35 lbs (15.9 kg).
- Halten Sie einen Mindestabstand von 2.1 Metern (7 Fuß) zwischen dem Boden und den Lüfterflügeln ein.
- Fügen Sie keine Objekte in den Bewegungsbereich der Lüfterflügel ein.
- Dieser Ventilator ist nur für die Verwendung in Innenräumen konzipiert.
2. Packungsinhalt
Vergewissern Sie sich vor Beginn der Installation, dass alle Komponenten vorhanden sind:
- Montage des Lüftermotors
- Lüfterblätter (3)
- LED-Licht-Kit
- Fernbedienung und Empfänger
- Montagehalterung und Hardware
- Bedienungsanleitung
3. Einrichtung und Installation
Follow these steps for a hassle-free installation:
- Vorbereitung für die Installation: Turn off power at the main circuit breaker. Secure the mounting bracket to the ceiling outlet box or joist.
- Kabelverbindungen: Connect the fan's electrical wires to the household wiring according to the wiring diagram provided in the separate installation guide. Ensure all connections are secure.
- Montieren Sie den Lüfter: Heben Sie die Lüftermotoreinheit vorsichtig an und befestigen Sie sie an der Montagehalterung.
- Ventilatorflügel anbringen: Securely fasten the three wooden fan blades to the motor housing.
- Beleuchtungsset installieren: Connect the LED light kit wires and attach the light kit to the bottom of the fan motor assembly.

Image: A person installing the ceiling fan, demonstrating the ease of the installation process.
4. Bedienungsanleitung
The ceiling fan is controlled by the included remote control. Ensure the remote control has working batteries.
4.1 Fernbedienungsfunktionen
- AUS: Schaltet sowohl den Ventilator als auch das Licht aus.
- Licht EIN/AUS: Toggles the LED light on or off independently.
- Fan Forward/Reversal Rotating: Ändert die Drehrichtung der Lüfterflügel für den Sommerbetrieb (Luftstrom nach unten) oder den Winterbetrieb (Luftstrom nach oben).
- Natürlicher Wind: Activates a mode that simulates natural breeze by varying fan speeds.
- Adjust 1-6 Speed of Fan: Wählt eine von sechs Lüfterstufen aus.
- Set the Fan Timer: Stellt ein, dass sich der Ventilator nach 1, 2 oder 4 Stunden automatisch ausschaltet.
- PAIR CODE/FAN OFF: Used for pairing the remote with the fan receiver or turning off the fan only.

Image: Illustration of the remote control and its various functions, including power, light, speed, direction, natural wind, and timer settings. The remote control range is up to 8 meters.
4.2 Lüfterdrehzahl und Luftdurchsatz
The fan offers 6 speed levels to suit different comfort needs:
- Level 1-2: Provide a comfortable, gentle breeze for sleeping or resting.
- Level 3-4: Offer natural wind for daily use.
- Level 5-6: Deliver strong cooling wind for warmer conditions.

Image: Visual representation of fan blade movement at different speed levels (1-2, 3-4, 5-6) and their corresponding airflow intensity, along with the integrated LED light kit.
4.3 Umkehrbare Motorfunktion
Der Ventilator verfügt über einen reversiblen Motor für ganzjährigen Komfort:
- Sommermodus (Vorwärtsrotation): Blades rotate counter-clockwise, pushing air downward to create a cooling effect.
- Wintermodus (Drehrichtungsumkehr): Blades rotate clockwise, drawing air upward to circulate warm air near the ceiling, helping to maintain a comfortable temperature.

Image: Diagram illustrating the two modes of the reversible motor: summer forward rotation for powerful, rapid cooling (downward arrows) and winter reversal rotation to maintain comfortable temperature (upward arrows).
4.4 Geräuscharmer Betrieb
The fan is designed with an advanced motor for ultra-quiet operation, providing airflow with minimal noise, approximately 55 decibels at its highest setting.
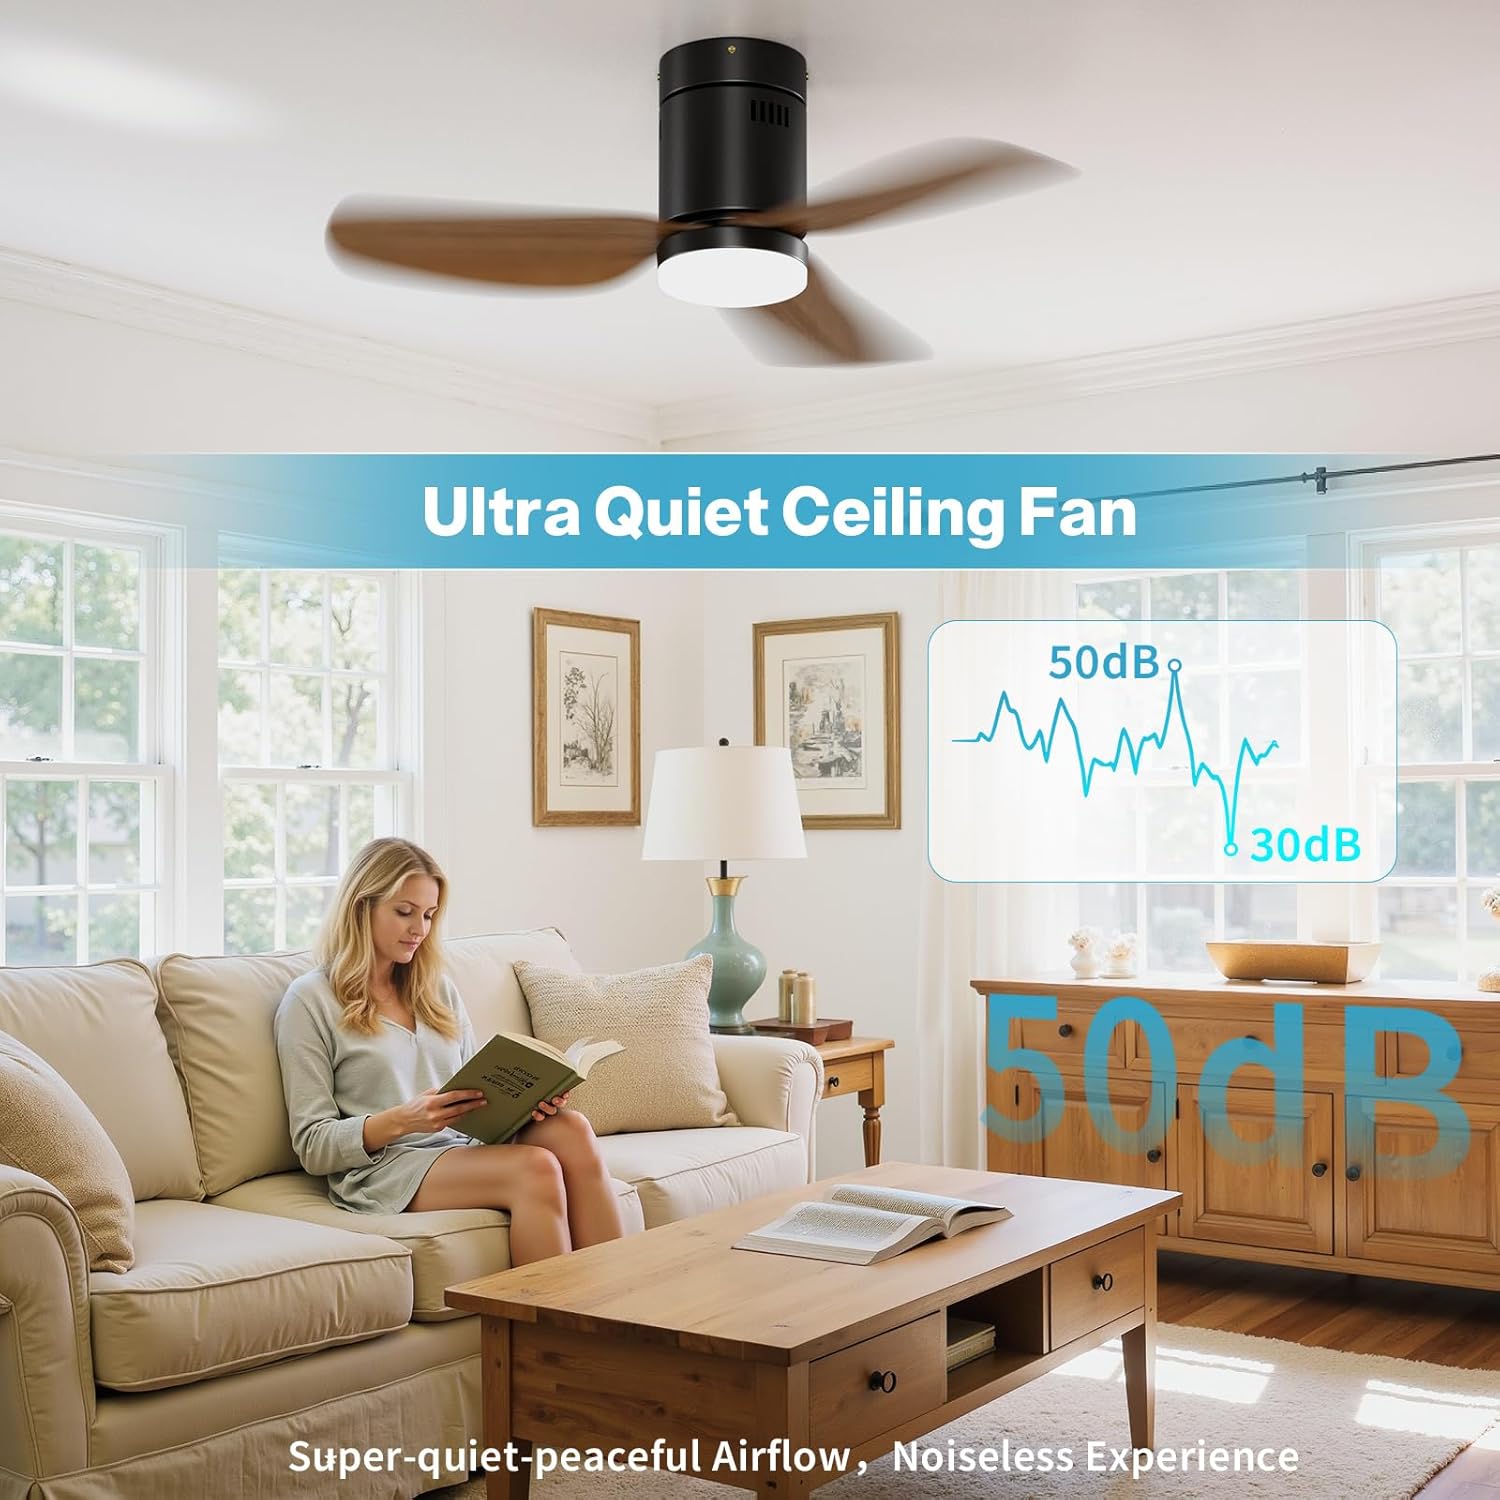
Image: A woman reading peacefully in a room with the ceiling fan operating, highlighting its ultra-quiet performance with a visual representation of low noise levels (50dB).
5. Wartung
Regelmäßige Wartung trägt dazu bei, die Langlebigkeit und optimale Leistung Ihres Deckenventilators zu gewährleisten.
- Reinigung: Um den Ventilator zu reinigen, wischen Sie die Flügel und das Motorgehäuse mit einem weichen, feuchten Tuch ab.amp cloth. Do not use abrasive cleaners or solvents. For the wooden blades, a gentle hand wipe is recommended.
- Befestigungselemente festziehen: Überprüfen Sie regelmäßig alle Schrauben und Befestigungselemente am Lüfter und an der Montagevorrichtung, um sicherzustellen, dass sie fest sitzen.
- Beleuchtungsset: The LED light kit has a long lifespan. If replacement is ever needed, consult the manufacturer for compatible parts.
6. Fehlerbehebung
Sollten Sie Probleme mit Ihrem Deckenventilator haben, beachten Sie bitte die folgenden häufigen Probleme und Lösungen:
| Problem | Mögliche Ursache | Lösung |
|---|---|---|
| Lüfter startet nicht | Der Ventilator erhält keinen Strom; Lose Kabelverbindungen; Batterie der Fernbedienung schwach oder nicht gekoppelt. | Prüfen Sie den Sicherungsautomaten; Überprüfen Sie alle Kabelverbindungen; Ersetzen Sie die Batterie der Fernbedienung oder koppeln Sie die Fernbedienung neu. |
| Licht funktioniert nicht | Loose wire connection to light kit; Faulty LED light kit; Remote control issue. | Check light kit wiring; Contact support for light kit replacement; Ensure remote is functioning. |
| Der Ventilator macht übermäßige Geräusche. | Loose fan blades; Loose mounting hardware; Motor issue. | Tighten all blade screws; Ensure mounting bracket is secure; Contact support if motor noise persists. |
| Lüfter wackelt | Loose fan blades; Uneven blade installation; Loose mounting hardware. | Ensure all blade screws are tight; Verify blades are installed evenly; Check mounting bracket security. |
| Fernbedienung reagiert nicht | Low battery; Not paired with fan; Obstruction between remote and receiver. | Replace remote battery; Re-pair remote with fan; Ensure clear line of sight. |
7. Spezifikationen
Detailed technical specifications for the Simple Deluxe 40" Ceiling Fan:
| Besonderheit | Spezifikation |
|---|---|
| Marke | Einfaches Deluxe |
| Modellname | Ceiling Fan with Light & Remote Control |
| Größe | 40 Inch Standard |
| Technische Daten | 13"T x 21.5"B x 10"H |
| Artikelgewicht | 10.85 Pfund |
| Farbe | Farmhouse Bronze |
| Anzahl der Klingen | 3 |
| Klingenlänge | 40 Zoll |
| Material | Metall+Holz |
| Bandtage | 90 bis 265 V |
| Wastage | 15 watts (Fan), 29W (Total) |
| Geräuschpegel | 55 Dezibel |
| Kontrollmethode | Fernbedienung |
| Anzahl der Leistungsstufen | 6 |
| Licht Kit | Integrated LED, 1500 Lumens, 3000K Warm White |
| Verwendung im Innen- und Außenbereich | Innenbereich |
| Besondere Merkmale | Remote Controlled, Reversible Motor, LED Light, Timer |

Image: Product dimensions (40" width, 10.8" height) and basic information including voltage (90-265V), color temperature (3000K), material (Metal+Wood), and wattage (29W).
8. Garantie und Support
8.1 Garantieinformationen
This Simple Deluxe ceiling fan is covered by a 2 Jahr Herstellergarantie Diese Garantie gilt ab Kaufdatum und deckt Material- und Verarbeitungsfehler bei normalem Gebrauch ab. Sie deckt keine Schäden ab, die durch unsachgemäße Installation, Unfälle, Missbrauch, unsachgemäße Verwendung oder unbefugte Änderungen entstehen.
8.2 Kundendienst
For technical assistance, warranty claims, or to inquire about replacement parts, please contact Simple Deluxe customer service. Refer to your purchase documentation or the Simple Deluxe official webWebsite für aktuelle Kontaktinformationen.