
XTUGA A140
XTUGA A140 4-Channel Wireless Microphone System & B-BURNER Recording Microphone Isolation Shield User Manual
Modell: A140
1. Einleitung
This manual provides detailed instructions for the setup, operation, and maintenance of your XTUGA A140 4-Channel Wireless Microphone System and B-BURNER Recording Microphone Isolation Shield. Please read this manual thoroughly before use to ensure proper functionality and to prevent damage.
2. Packungsinhalt
Bitte prüfen Sie, ob alle unten aufgeführten Artikel in Ihrem Paket enthalten sind. Sollten Artikel fehlen oder beschädigt sein, kontaktieren Sie bitte unseren Kundenservice.
- 1 x XTUGA A140 4-Channel Wireless Receiver
- 4 x Drahtlose Handmikrofone
- 1 x B-BURNER Recording Microphone Isolation Shield
- 1 x Netzteil für Empfänger
- 1 x Audio Cable (e.g., 1/4" to 1/4" or XLR to 1/4")
- Microphone Clips/Holders (quantity 4)
- Benutzerhandbuch (dieses Dokument)

Image: The complete XTUGA A140 4-Channel Wireless Microphone System and B-BURNER Recording Microphone Isolation Shield, showing the receiver, four microphones, and the isolation shield.
3. Produktmerkmale
3.1 XTUGA A140 4-Channel Wireless Microphone System
- Vier unabhängige Kanäle: Allows simultaneous use of four microphones without interference.
- UHF-Frequenzband: Provides stable signal transmission and reduces interference.
- Große Reichweite: Supports effective operation up to 80 meters (262 feet) in open areas.
- Übersichtliche Digitalanzeige: Receiver and microphones feature LCD screens for frequency and battery status.
- Robuste Konstruktion: Microphones are designed with durable metal housing.
- Cardioid Dynamic Microphones: Optimized for vocal clarity and feedback suppression.

Image: The XTUGA A140 wireless receiver unit with four handheld wireless microphones, each displaying its frequency on an LCD screen.

Image: Diagram illustrating the 80-meter (approximately 262 feet) effective operating range of the XTUGA A140 wireless microphone system, with the receiver and a microphone shown at a distance.

Bild: Nahaufnahme view of the XTUGA wireless microphone, highlighting features such as sturdy metal construction, cardioid dynamic pickup pattern, clear and robust sound, and UHF anti-howling capabilities.
3.2 B-BURNER Recording Microphone Isolation Shield
- Acoustic Foam Panels: Designed to absorb unwanted reflections and echoes.
- Faltbares Design: Allows for adjustable angles and portability.
- Mehrschichtige Konstruktion: Features reflective, filter, and absorbing layers for effective noise reduction.
- Reduces Ambient Noise: Creates a more controlled recording environment by minimizing room reflections and external noise.

Image: The B-BURNER Recording Microphone Isolation Shield in its folded, compact state, showcasing its acoustic foam interior.
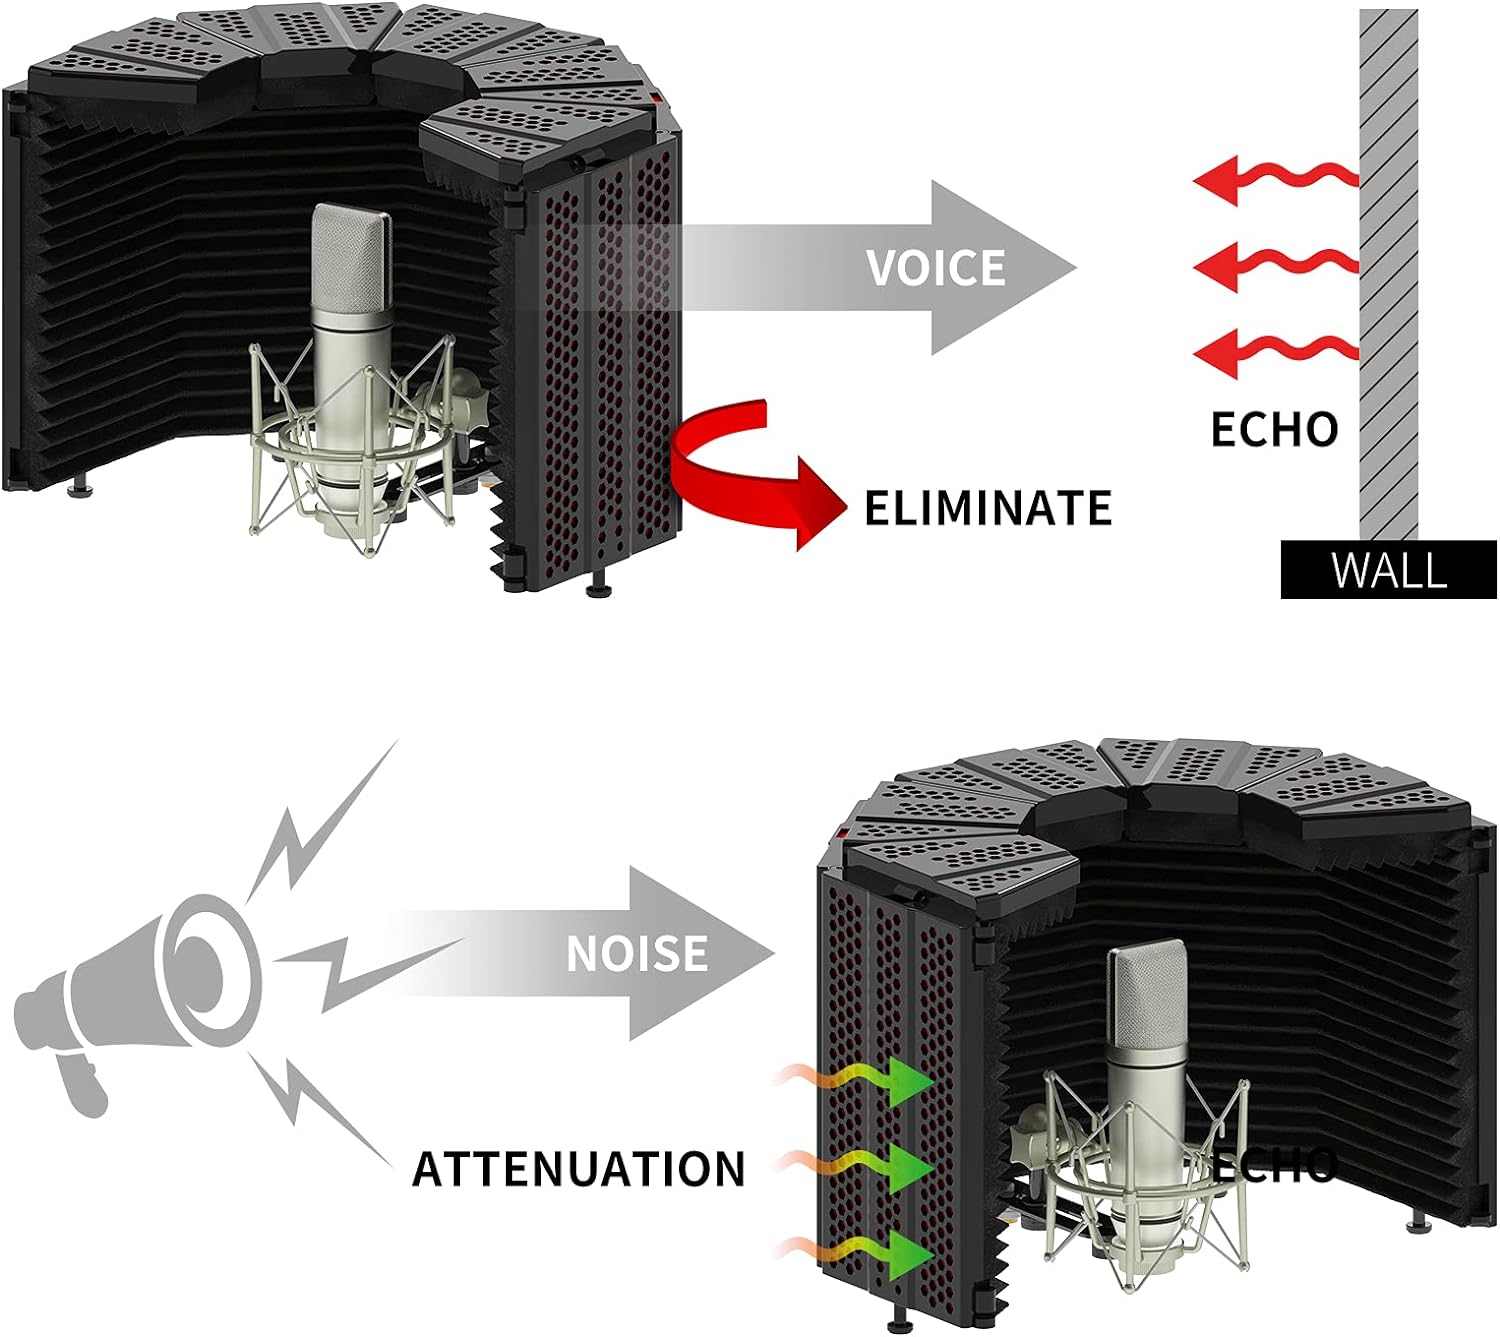
Image: Diagrams illustrating the adjustable closure angles (120° and 90°) and corresponding sound collection ranges (60° and 180°) of the B-BURNER Isolation Shield, along with how to bend the top panels to 45° and 90°.

Image: Visual representation of how the B-BURNER Isolation Shield eliminates voice echoes from walls and attenuates external noise, creating a cleaner sound input for the microphone.

Image: Cross-sectional diagram of the B-BURNER Isolation Shield, detailing its three layers: a reflective layer, a filter layer, and an absorbing layer, which work together to filter out noise and create a quiet recording environment.
4. Einrichtungsanweisungen
4.1 Wireless Microphone System Setup
- Komponenten auspacken: Carefully remove the receiver, microphones, power adapter, and audio cable from the packaging.
- Strom anschließen: Connect the provided power adapter to the DC IN port on the rear of the XTUGA A140 receiver. Plug the adapter into a standard electrical outlet.
- Audioausgang anschließen: Connect one end of the audio cable (e.g., 1/4" or XLR) to the appropriate output port on the receiver (e.g., MIX OUT or individual channel outputs). Connect the other end to the input of your mixer, ampVerstärker oder Audio-Interface.
- Mikrofonbatterien einlegen: Open the battery compartment of each handheld microphone and insert two AA batteries (not included), ensuring correct polarity.
- Einschalten:
- Turn on the receiver by pressing the power button. The display should illuminate.
- Turn on each microphone by pressing its power button. The microphone display should show its frequency.
- Frequenzsynchronisation: The microphones and receiver should automatically synchronize. If not, refer to the troubleshooting section or the specific pairing instructions in the full manual (if applicable, not detailed here). Ensure each microphone is assigned to a unique channel on the receiver.
- Lautstärkeregelung: Adjust the individual channel volume knobs on the receiver and the master volume on your connected audio device to an appropriate level.
4.2 Isolation Shield Setup
- Unfold the Shield: Gently unfold the B-BURNER Isolation Shield. The panels are hinged and can be adjusted to various angles.
- Montage: The shield typically mounts to a microphone stand. Attach the shield's mounting bracket to your microphone stand. Ensure it is securely tightened.
- Platzierung des Mikrofons: Attach your microphone (e.g., one of the XTUGA handheld microphones or a condenser microphone) to the internal mounting screw or clip within the isolation shield. Position the microphone centrally within the shield for optimal acoustic performance.
- Winkel anpassen: Adjust the side panels of the isolation shield to create the desired acoustic environment. A wider angle (e.g., 180° collection range) might be suitable for capturing more room ambiance, while a narrower angle (e.g., 60° collection range) will provide more isolation. Refer to the diagrams in Section 3.2 for visual guidance.
5. Bedienungsanleitung
5.1 Using the Wireless Microphone System
- Verwendung des Mikrofons: Hold the microphone approximately 2-6 inches from your mouth for optimal sound capture. Avoid covering the microphone grille with your hand, as this can affect sound quality and signal.
- Audioüberwachung: Listen to the audio output through your connected speakers or headphones to ensure proper levels and clarity.
- Adjusting Frequencies (if necessary): If you experience interference, you may need to change the operating frequency of a microphone and its corresponding receiver channel. Consult the receiver's manual or display for instructions on frequency scanning and selection.
- Batteriemanagement: Monitor the battery indicator on the microphone's display. Replace batteries promptly when they are low to avoid unexpected signal loss.
5.2 Using the Isolation Shield
- Positionierung: Place the microphone with the isolation shield in a quiet room. The shield is designed to reduce reflections from the immediate surroundings of the microphone, not to completely soundproof a noisy environment.
- Optimizing Isolation: Experiment with the angle of the shield's panels to find the best acoustic isolation for your specific recording space and microphone. A more enclosed angle will provide greater isolation.
- Aufnahme: Speak or sing directly into the microphone, ensuring your voice is directed towards the center of the shield for maximum benefit from its acoustic properties.
6. Wartung
- Reinigung:
- Empfänger und Mikrofone mit einem weichen, trockenen Tuch abwischen. Keine flüssigen Reinigungsmittel oder Scheuermittel verwenden.
- For the isolation shield, gently dust the foam panels with a soft brush or vacuum with a low setting. Avoid getting the foam wet.
- Lagerung: When not in use for extended periods, store the system and shield in a cool, dry place, away from direct sunlight and extreme temperatures. Remove batteries from microphones before long-term storage to prevent leakage.
- Batteriewechsel: Always replace all batteries in a microphone at the same time with new ones of the same type. Dispose of used batteries responsibly.
7. Fehlerbehebung
| Problem | Mögliche Ursache | Lösung |
|---|---|---|
| Kein Ton vom Mikrofon |
|
|
| Interference/Static/Dropouts |
|
|
| Poor sound quality (muffled, tinny) |
|
|
8. Spezifikationen
8.1 XTUGA A140 Wireless Microphone System
- Modell: A140
- Kanäle: 4
- Frequenzband: UHF
- Betriebsbereich: Up to 80 meters (262 feet) in optimal conditions
- Mikrofontyp: Dynamisch, Niere
- Mikrofonleistung: 2 x AA Batteries (per microphone)
- Empfängerausgang: Mixed 1/4" Jack, Individual XLR Outputs (check specific model for exact outputs)
8.2 B-BURNER Recording Microphone Isolation Shield
- Typ: Foldable Acoustic Isolation Shield
- Material: High-density acoustic foam, metal panels
- Schichten: Reflective, Filter, Absorbing
- Montage: Microphone stand mountable
- Verstellbarkeit: Adjustable panel angles for varying acoustic isolation
9. Sicherheitshinweise
- Setzen Sie das Produkt weder Regen noch Feuchtigkeit aus.
- Das Produkt darf nicht zerlegt oder verändert werden. Alle Wartungsarbeiten dürfen nur von qualifiziertem Fachpersonal durchgeführt werden.
- Use only the provided power adapter for the receiver.
- Außerhalb der Reichweite von Kindern aufbewahren.
- Avoid placing the receiver near strong electromagnetic fields or other wireless devices that may cause interference.
10. Garantie und Support
XTUGA products are designed for reliability and performance. For warranty information, technical support, or service inquiries, please contact your retailer or visit the official XTUGA webBitte bewahren Sie Ihren Kaufbeleg für Garantieansprüche auf.
Online-Hilfe: Visit the XTUGA Store on Amazon
Ask a question about this manual
Ask about setup, troubleshooting, compatibility, parts, safety, or missing instructions. Manuals+ will review the question and use this page’s manual context to help answer it.