
Einführung
Thank you for choosing the LEMNOI 7-inch Digital Calendar Clock (Model SG9). This device is designed to assist individuals, particularly those with memory loss or dementia, by clearly displaying the time, date, and day of the week. It features multiple alarm and medication reminder functions, adjustable brightness, and can also serve as a digital photo frame. Please read this manual carefully to ensure proper setup and operation.
Packungsinhalt
- LEMNOI 7-inch Digital Calendar Clock (SG9)
- Netzteil
- Bedienungsanleitung
- Stand (for tabletop use)

Produkt überview
The LEMNOI SG9 features a clear 7-inch HD display and intuitive controls. The front panel includes navigation buttons for easy menu interaction.

Aufstellen
1. Stromanschluss
- Connect the power adapter to the DC IN port on the back of the clock.
- Stecken Sie das Netzteil in eine normale Steckdose.
- The clock will power on automatically.
Notiz: The clock operates on AC power and does not use batteries for primary function. A built-in backup system saves settings during power outages.
2. Erste Sprachauswahl
- Upon first power-on, the clock may display a language selection screen.
- Verwenden Sie die Up Und Runter buttons to navigate through the language options (English, French, German, Italian, Spanish).
- Drücken Sie die OK , um Ihre Auswahl zu bestätigen.

3. Uhrzeit und Datum einstellen
- Drücken Sie die Menü/Zurück Taste, um auf das Hauptmenü zuzugreifen.
- Navigate to "Date & Time" using the Up/Runter Tasten und drücken Sie OK.
- Passen Sie Jahr, Monat, Tag, Stunde und Minute mithilfe der folgenden Funktion an: Up/Runter Tasten. Verwenden Links/Rechts to move between fields.
- Select 12-hour or 24-hour format as preferred.
- Drücken OK to save changes and Menü/Zurück , um zu beenden.
Bedienungsanleitung
1. Anzeigemodi
The clock offers 6 distinct display modes, including a unique floral surface mode that changes weekly. You can cycle through these modes by pressing the Links or Rechts buttons from the main display.

2. Brightness Adjustment and Auto-Dimming
The clock features 5 levels of adjustable brightness and an automatic dimming function to optimize visibility day and night.
- Manuelle Helligkeit: Access the "Brightness" setting in the menu to select a level from 1 to 5.
- Automatisches Dimmen: Enable "Auto Dimming" in the settings. You can customize the start and end times for dimming, and set the desired dimming brightness level (e.g., 0% for a completely dark screen at night).


3. Alarmeinstellungen
The clock supports up to 15 daily alarms and 15 medication reminders, each with customizable labels and frequencies.
- Einen Alarm einstellen:
- From the main menu, select "Alarm" or "Take Medicine".
- Choose an alarm slot (e.g., Alarm 1, Medication 1).
- Set the desired time (hour and minute).
- Select the frequency: Daily, Weekdays (Mon-Fri), Weekends (Sat-Sun), or Specific Dates.
- Choose an alarm label from the 12 available options (e.g., Wake Up, Drink Water, Meeting with Doctor, Dog Walking). These labels are displayed with vivid color images for easy comprehension.
- Select an alarm sound.
- Drücken OK um zu speichern.
- Erinnerung an Medikamente: Specifically designed for morning, afternoon, and evening medication alerts.
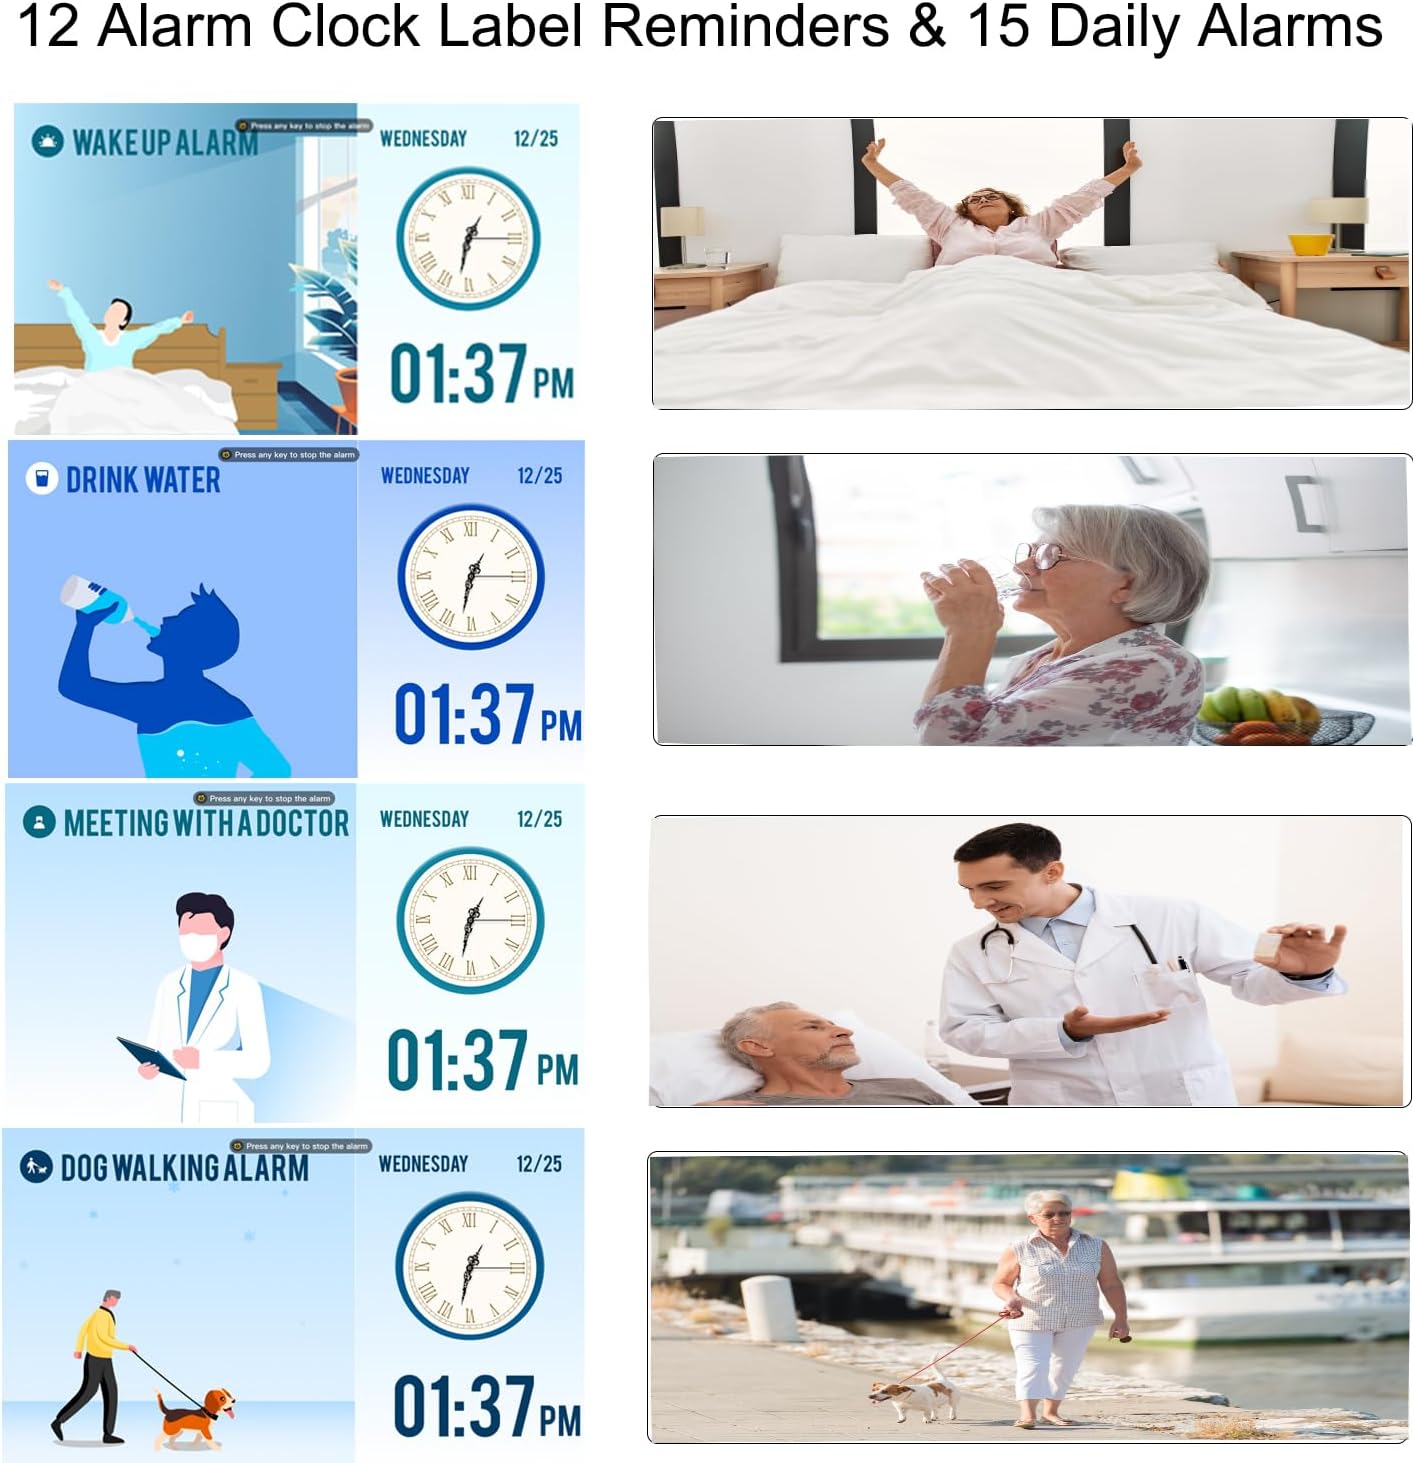

4. Sommerzeit (DST)
The clock supports automatic adjustment for Daylight Saving Time. Ensure this feature is enabled in the "Date & Time" settings for accurate time display.

5. Using as a Digital Photo Frame
The clock can function as a high-resolution digital photo and video frame. Insert a USB flash drive (not included) into the USB port on the side of the clock. Navigate to the "Photo Frame" option in the menu to play your media.

Wartung
- Reinigung: Use a soft, dry cloth to clean the screen and body of the clock. Do not use liquid cleaners or abrasive materials.
- Platzierung: Place the clock on a stable, flat surface or mount it securely on a wall. Avoid direct sunlight, high temperatures, or humid environments.
- Leistung: Always use the provided power adapter. Disconnect power during thunderstorms or when not in use for extended periods.

Fehlerbehebung
| Problem | Mögliche Ursache | Lösung |
|---|---|---|
| Die Uhr lässt sich nicht einschalten. | Kein Stromanschluss. | Ensure the power adapter is securely connected to the clock and a working electrical outlet. |
| Das Display ist zu dunkel oder zu hell. | Brightness settings are incorrect or auto-dimming is active. | Adjust manual brightness in settings or check auto-dimming schedule and brightness level. |
| Die Alarme ertönen nicht. | Alarm is disabled, volume is too low, or incorrect time/frequency set. | Verify alarm settings, ensure volume is audible, and check alarm time/frequency. |
| Die Uhrzeit ist nach einem Stromausfall falsch.tage. | Backup battery may be depleted or not functioning. | The clock has a backup system for settings. If time is incorrect, manually reset the time and date. |
| Cannot play photos/videos. | USB-Laufwerk nicht richtig eingesteckt oder nicht unterstützt file Format. | Ensure USB drive is fully inserted. Check that media files are in supported formats (e.g., JPEG for photos, common video formats). |
Technische Daten
| Besonderheit | Detail |
|---|---|
| Marke | LEMNOI |
| Modellnummer | SG9 |
| Anzeigetyp | Digitales |
| Bildschirmgröße | 7 Zoll |
| Auflösung | 1024 x 600 Pixel |
| Produktabmessungen (B x H) | 19 cm x 16 cm |
| Artikelgewicht | 290 Gramm |
| Material | Acrylnitril-Butadien-Styrol (ABS) |
| Stromquelle | Stromkabel |
| Besondere Merkmale | Auto-dimmable, Adjustable Brightness (5 levels), Temperature Indicator, 6 Display Modes, 15 Daily Alarms, 15 Medication Reminders, 12 Alarm Labels, Digital Photo Frame Function, Daylight Saving Time Auto-Adjust, Multi-language Support |
| Montagetyp | Tischplatte |
| Required Battery (Backup) | 1 CR123A (not included for primary operation) |
Garantie und Support
For warranty information or technical support, please refer to the contact details provided on the product packaging or the official LEMNOI webBewahren Sie Ihren Kaufbeleg als Kaufnachweis für eventuelle Garantieansprüche auf.