KEENSTAR ST-265TC
KEENSTAR ST-265TC Touch Screen 2-Slice Toaster
Model: ST-265TC
1. Wichtige Sicherheitsvorkehrungen
Beim Umgang mit Elektrogeräten sollten stets grundlegende Sicherheitsvorkehrungen getroffen werden, darunter die folgenden:
- Lesen Sie vor der Inbetriebnahme des Toasters alle Anweisungen sorgfältig durch.
- Berühren Sie keine heißen Oberflächen. Benutzen Sie Griffe oder Knöpfe.
- Zum Schutz vor Stromschlägen tauchen Sie Kabel, Stecker oder Toaster nicht in Wasser oder andere Flüssigkeiten.
- Bei der Benutzung von Geräten durch oder in der Nähe von Kindern ist eine genaue Aufsicht erforderlich.
- Bei Nichtgebrauch und vor der Reinigung den Stecker aus der Steckdose ziehen. Vor dem Anbringen oder Abnehmen von Teilen abkühlen lassen.
- Betreiben Sie kein Gerät, dessen Kabel oder Stecker beschädigt ist, oder wenn das Gerät eine Fehlfunktion aufweist oder auf sonstige Weise beschädigt wurde.
- Lassen Sie das Kabel nicht über die Tisch- oder Thekenkante hängen oder heiße Oberflächen berühren.
- Nicht auf oder in die Nähe eines heißen Gas- oder Elektrobrenners oder in einen beheizten Ofen stellen.
- Verwenden Sie den Toaster nicht zweckentfremdet.
- Oversize foods, metal foil packages, or utensils must not be inserted into a toaster as they may involve a risk of fire or electric shock.
- Ein Brand kann entstehen, wenn Toaster während des Betriebs abgedeckt sind oder brennbare Materialien wie Vorhänge, Gardinen, Wände usw. berühren.
- Versuchen Sie nicht, Lebensmittel herauszunehmen, wenn der Toaster eingesteckt ist.
- Dieses Gerät ist nur für den Hausgebrauch bestimmt.
2. Produktüberschreitungview
The KEENSTAR ST-265TC is a modern 2-slice toaster featuring a touch screen interface for precise control over your toasting preferences. It includes wide slots to accommodate various bread types and a removable crumb tray for easy cleaning.
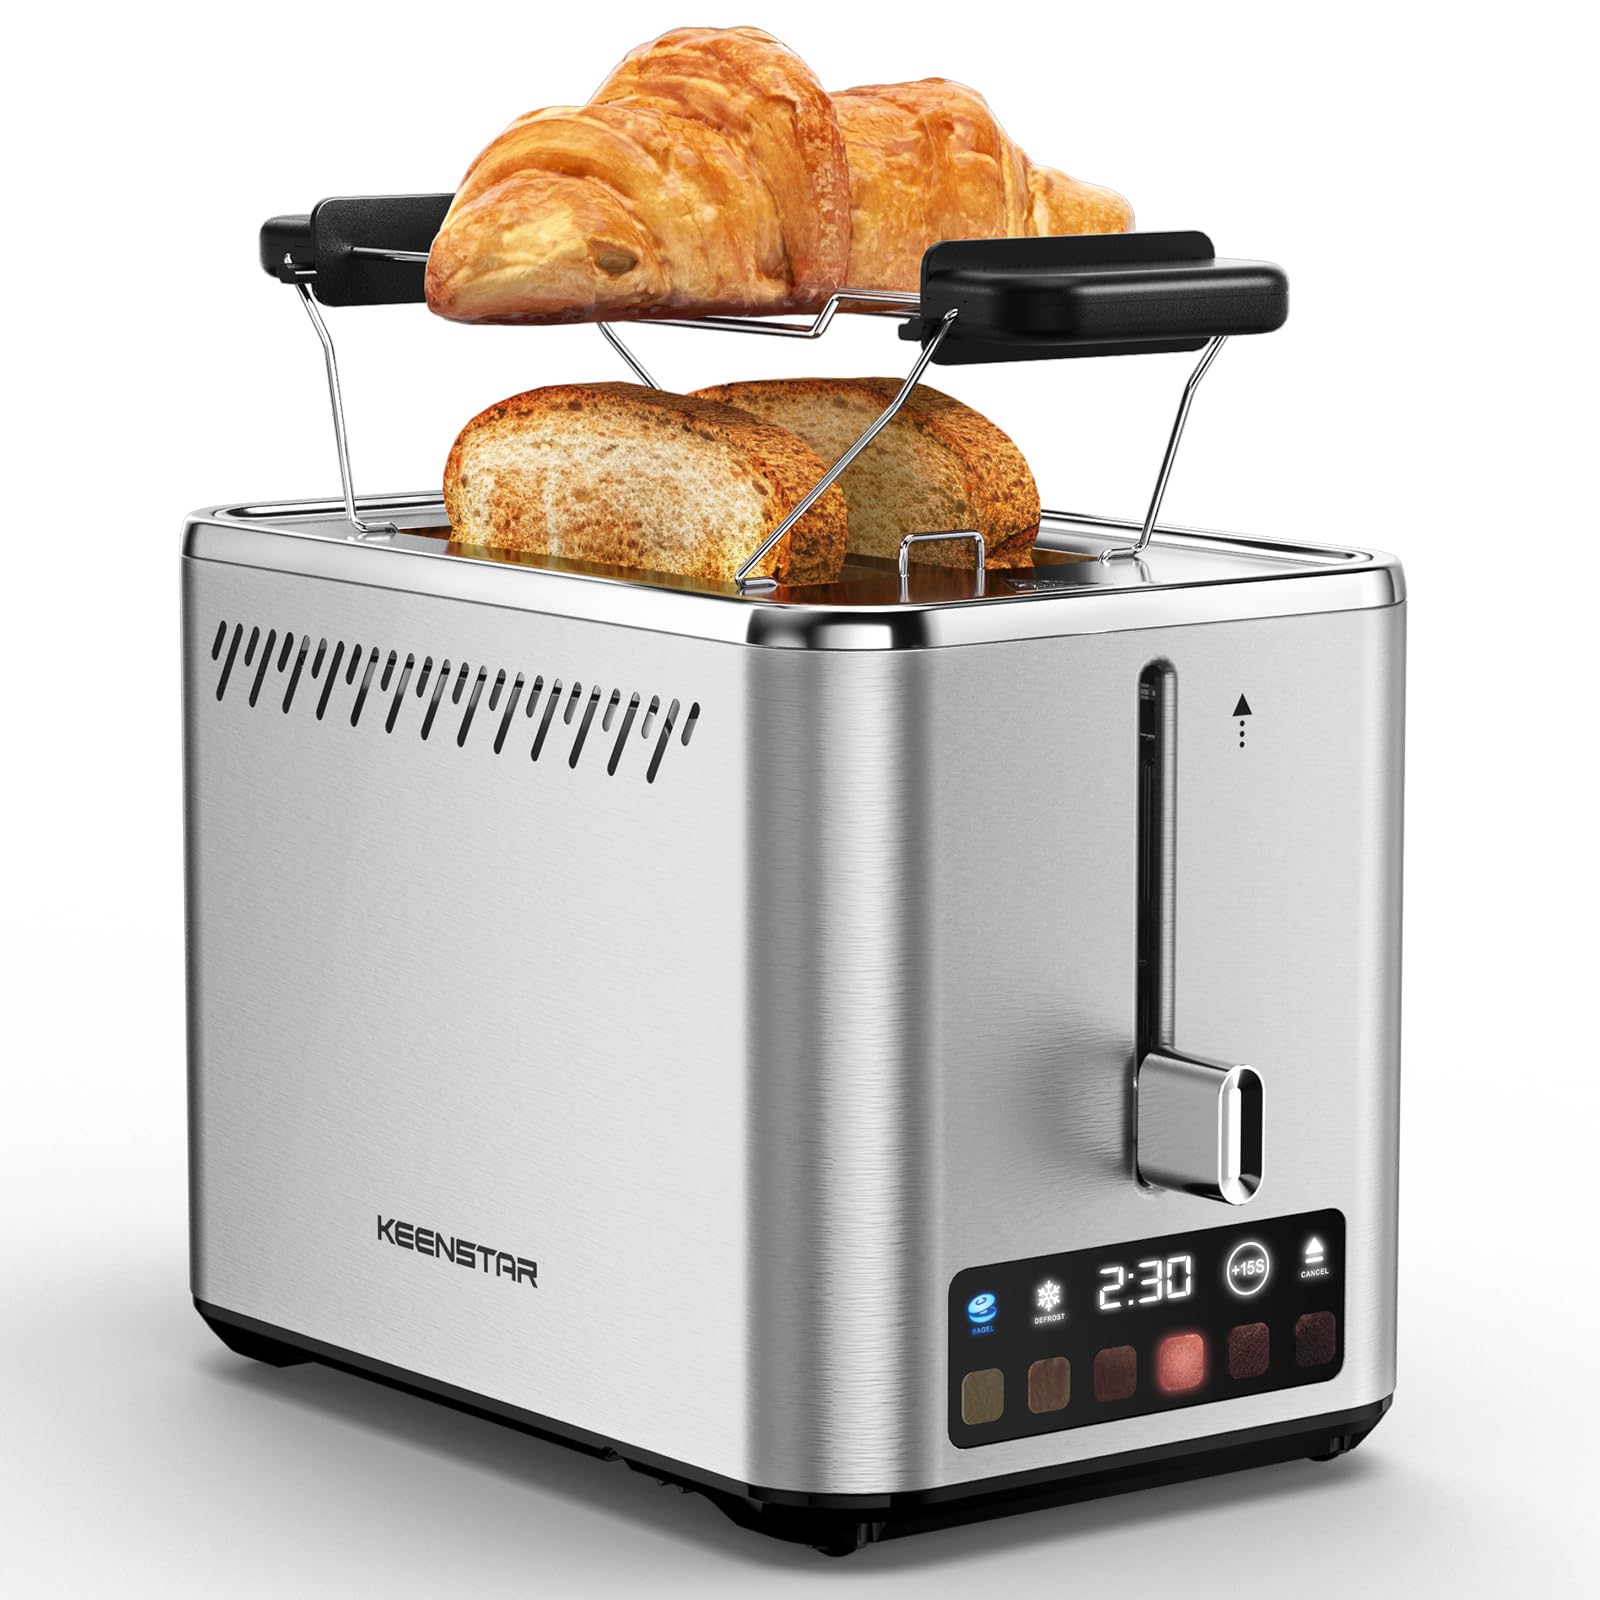
Image: KEENSTAR ST-265TC 2-Slice Toaster in silver stainless steel.
3. Einrichtung
Auspacken
Carefully remove the toaster and all packaging materials from the box. Ensure all accessories, including the warming rack, are present.
Platzierung
Stellen Sie den Toaster auf eine stabile, ebene und hitzebeständige Oberfläche, fern von brennbaren Materialien wie Vorhängen oder Wänden. Sorgen Sie für ausreichende Belüftung um das Gerät herum.
Erste Verwendung
Before toasting food for the first time, operate the toaster without bread on the highest browning setting (level 6) to burn off any manufacturing residues. A slight odor or smoke may be present; this is normal and will dissipate.
4. Bedienungsanleitung
Systemsteuerung überview

Image: The toaster's smart touch control display showing 6 browning levels and extra functions like Bagel, Defrost, +15S, and Cancel.
Grundlegendes Toasten
- Insert up to two slices of bread into the wide 1.5-inch slots.
- Select your desired browning level (1-6) by touching the corresponding icon on the display. Level 1 is the lightest, and Level 6 is the darkest.
- Press the lever down until it locks into place. The digital display will show a countdown timer.
- The toast will automatically pop up when the cycle is complete.

Image: Visual guide showing the steps for easy toaster operation: 1. Put bread in slots, 2. Select browning level and function, 3. Press the lever down, 4. Enjoy delicious bread.
Bagel-Funktion
This function is designed to toast the cut side of bagels while gently warming the outer side.
- Insert bagel halves into the slots with the cut side facing outwards.
- Wählen Sie den gewünschten Bräunungsgrad.
- Berühren Sie die BAGEL button on the display. It will illuminate.
- Press the lever down until it locks.

Image: The toaster's display showing the illuminated BAGEL mode. BAGEL mode toasts one side only; place the cut side facing outward.
Auftaufunktion
Use this function to toast frozen bread without pre-thawing.
- Insert frozen bread into the slots.
- Wählen Sie den gewünschten Bräunungsgrad.
- Berühren Sie die AUFTAUEN button on the display. It will illuminate.
- Press the lever down until it locks.

Image: The toaster's display showing the illuminated DEFROST mode. This mode allows you to cook frozen breads easily without guesswork.
+15S Function
If your toast is not quite browned enough after a cycle, you can add an additional 15 seconds of toasting time.
- After a toasting cycle, if more browning is desired, touch the +15 Sek. Taste.
- The toaster will initiate a 15-second toasting cycle.
Funktion abbrechen
To stop the toasting cycle at any time, simply touch the STORNIEREN button. The lever will automatically raise, and the heating elements will turn off.

Image: The toaster's display highlighting the +15S button to increase baking time by 15 seconds, and the Cancel button to stop heating.
Warmhalterost
The included warming rack can be used to warm pastries, croissants, or other items that cannot be placed directly into the toaster slots.
- Place the warming rack securely on top of the toaster, aligning it over the slots.
- Place the item to be warmed on the rack.
- Start a toasting cycle (without bread in the slots) to generate heat. The heat rising from the toaster will warm the item on the rack.
- Monitor the item closely to prevent over-warming or burning.

Image: The removable warming rack attached to the toaster, with a croissant placed on it for warming.
Produktvideos
Video: Demonstrates the touchscreen and warming tray features of the KEENSTAR toaster.
Video: Eine detaillierte Review of the KEENSTAR Smart 2-Slice Toaster, highlighting its touch screen and various functions.
Video: Explores the key features and functionalities of the KEENSTAR toaster.
5. Wartung und Reinigung
Allgemeine Reinigung
Always unplug the toaster from the power outlet and allow it to cool completely before cleaning. Wipe the exterior with a soft, damp Mit einem Tuch abwischen. Verwenden Sie keine Scheuermittel oder Metallschwämme, da diese die Edelstahloberfläche zerkratzen können.
Krümelablage
The removable crumb tray collects crumbs during toasting and should be emptied regularly to prevent fire hazards.
- Stellen Sie sicher, dass der Toaster vom Stromnetz getrennt und vollständig abgekühlt ist.
- Pull out the crumb tray located at the bottom rear of the toaster.
- Krümel entfernen und die Schale mit einem feuchten Tuch auswischen.amp Tuch.
- Schieben Sie die Krümelschublade wieder an ihren Platz, bis sie sicher einrastet.

Image: The toaster's convenient design showing the removable crumb tray being pulled out and the cord storage area on the bottom.
Kabelaufbewahrung
For neat storage, the power cord can be wrapped around the designated area on the underside of the toaster.
6. Fehlerbehebung
- Toaster schaltet sich nicht ein: Ensure the power cord is securely plugged into a working electrical outlet. Make sure the toast lever is fully pressed down.
- Ungleichmäßiges Rösten: Ensure bread slices are centered in the slots. Try adjusting the browning level. Different types of bread may require different settings.
- Brot steckt in Schlitzen: Unplug the toaster immediately and allow it to cool. Gently remove the bread using non-metallic tongs. Never use metal utensils.
- Rauch steigt aus dem Toaster auf: Unplug the toaster immediately. Remove any food particles or crumbs that may be lodged inside the slots or on the heating elements. Ensure the crumb tray is clean.
7. Spezifikationen
| Marke | KEENSTAR |
| Modell | ST-265TC |
| Leistung | 900 Watt |
| Bandtage | 120 Volt (Wechselstrom) |
| Anzahl der Scheiben | 2 |
| Material | Edelstahl |
| Produktabmessungen (T x B x H) | 10.39" x 7.1" x 6.1" |
| Schlitzbreite | 1.5 Zoll |
| Besondere Merkmale | Cancel Function, LED Indicator, Removable Crumb Tray, Touchscreen, Warming Rack |

Image: Diagram showing the dimensions of the KEENSTAR ST-265TC toaster: 9.4 inches (24cm) length, 6.1 inches (15.6cm) width, 7 inches (18cm) height, and 1.5 inch (3.8cm) wide slots.
8. Garantie und Support
Garantie
This KEENSTAR toaster comes with a 2-year warranty. Please refer to the warranty card included in the product packaging for detailed terms and conditions.
Kundenservice
For any questions, technical assistance, or warranty claims, please contact KEENSTAR customer support. Contact information can typically be found on the warranty card or the official KEENSTAR webWebsite.
Ask a question about this manual
Ask about setup, troubleshooting, compatibility, parts, safety, or missing instructions. Manuals+ will review the question and use this page’s manual context to help answer it.