
Primevolve TM-520
Primevolve Portable Oscillating Standing Fan
Modell: TM-520
Marke: Primevolve
1. Einleitung
Thank you for choosing the Primevolve Portable Oscillating Standing Fan. This manual provides essential information for the safe and efficient use of your new fan. Please read it thoroughly before operation and retain it for future reference.
This versatile fan is designed for both indoor and outdoor use, featuring a rechargeable battery, USB-C power option, adjustable height, oscillation, and remote control for convenience.

Bild 1.1: Überview of the fan's key features including portability, foldability, remote control, rechargeable battery, multiple speeds, and low noise operation.
2. Sicherheitshinweise
- Lesen Sie alle Anweisungen, bevor Sie den Ventilator verwenden.
- Führen Sie bei laufendem Lüfter weder Finger noch andere Gegenstände in das Lüftergitter ein.
- Um einen Stromschlag zu vermeiden, halten Sie den Ventilator von Wasser oder anderen Flüssigkeiten fern.
- Do not use the fan in excessively humid or dusty environments.
- Stellen Sie sicher, dass der Ventilator auf einer stabilen, ebenen Fläche steht, um ein Umkippen zu verhindern.
- Vor der Reinigung oder Durchführung von Wartungsarbeiten den Netzstecker des Ventilators ziehen.
- Außerhalb der Reichweite von Kindern und Haustieren aufbewahren.
- Verwenden Sie zum Aufladen ausschließlich das mitgelieferte USB-C-Kabel.
- Versuchen Sie nicht, den Lüfter selbst zu zerlegen oder zu reparieren. Wenden Sie sich an den Kundendienst.
3. Packungsinhalt
Bitte prüfen Sie das Paket auf folgende Artikel:
- 1 x Primevolve Portable Oscillating Standing Fan
- 1 x Fernbedienung
- 1 x USB-C Ladekabel
- 1 x Benutzerhandbuch (dieses Dokument)

Abbildung 3.1: Illustration der im Produktpaket enthaltenen Artikel.
4. Produktüberschreitungview
The Primevolve Portable Oscillating Standing Fan features a compact, foldable design that allows it to transform from a small desk fan to a full-sized standing fan. It includes a fan head, an adjustable telescopic rod, and a stable base housing the controls and battery.

Image 4.1: The fan displayed in its various adjustable forms: standing, table-top, and folded.
5. Aufbau und Montage
5.1 Den Fächer entfalten
- Stellen Sie den Ventilatorfuß auf eine ebene, stabile Oberfläche.
- Locate the 'OPEN' position indicator on the base. Gently twist the top part of the base counter-clockwise to unlock.
- Carefully pull the telescopic rod upwards from the base until it reaches the desired height.
- Adjust the angle of the fan head as needed. The fan head can tilt up to 180 degrees.

Image 5.1: Step-by-step visual guide for expanding the fan from its folded state.
5.2 Einstellen von Höhe und Winkel
- The fan's height can be adjusted from 3.93 inches (folded) to 39.3 inches (fully extended).
- The fan head can be manually tilted up to 180 degrees to direct airflow.

Image 5.2: The fan's adjustable height and foldaway design for versatile placement.
6. Bedienungsanleitung
6.1 Ein-/Ausschalten und Geschwindigkeitseinstellungen
The fan can be controlled via the touch buttons on the base or the included remote control.
- Netzschalter: Press once to turn on the fan. Press and hold to turn off.
- Geschwindigkeitstaste: Press repeatedly to cycle through 4 speed settings: Low, Mid, High, and Natural mode.

Image 6.1: The fan operating with an indication of its four speed settings and corresponding battery life.
6.2 Schwingungsfunktion
The fan features a 90° auto-oscillation function to distribute airflow across a wider area.
- Oszillationstaste: Press to activate or deactivate the 90° automatic oscillation.
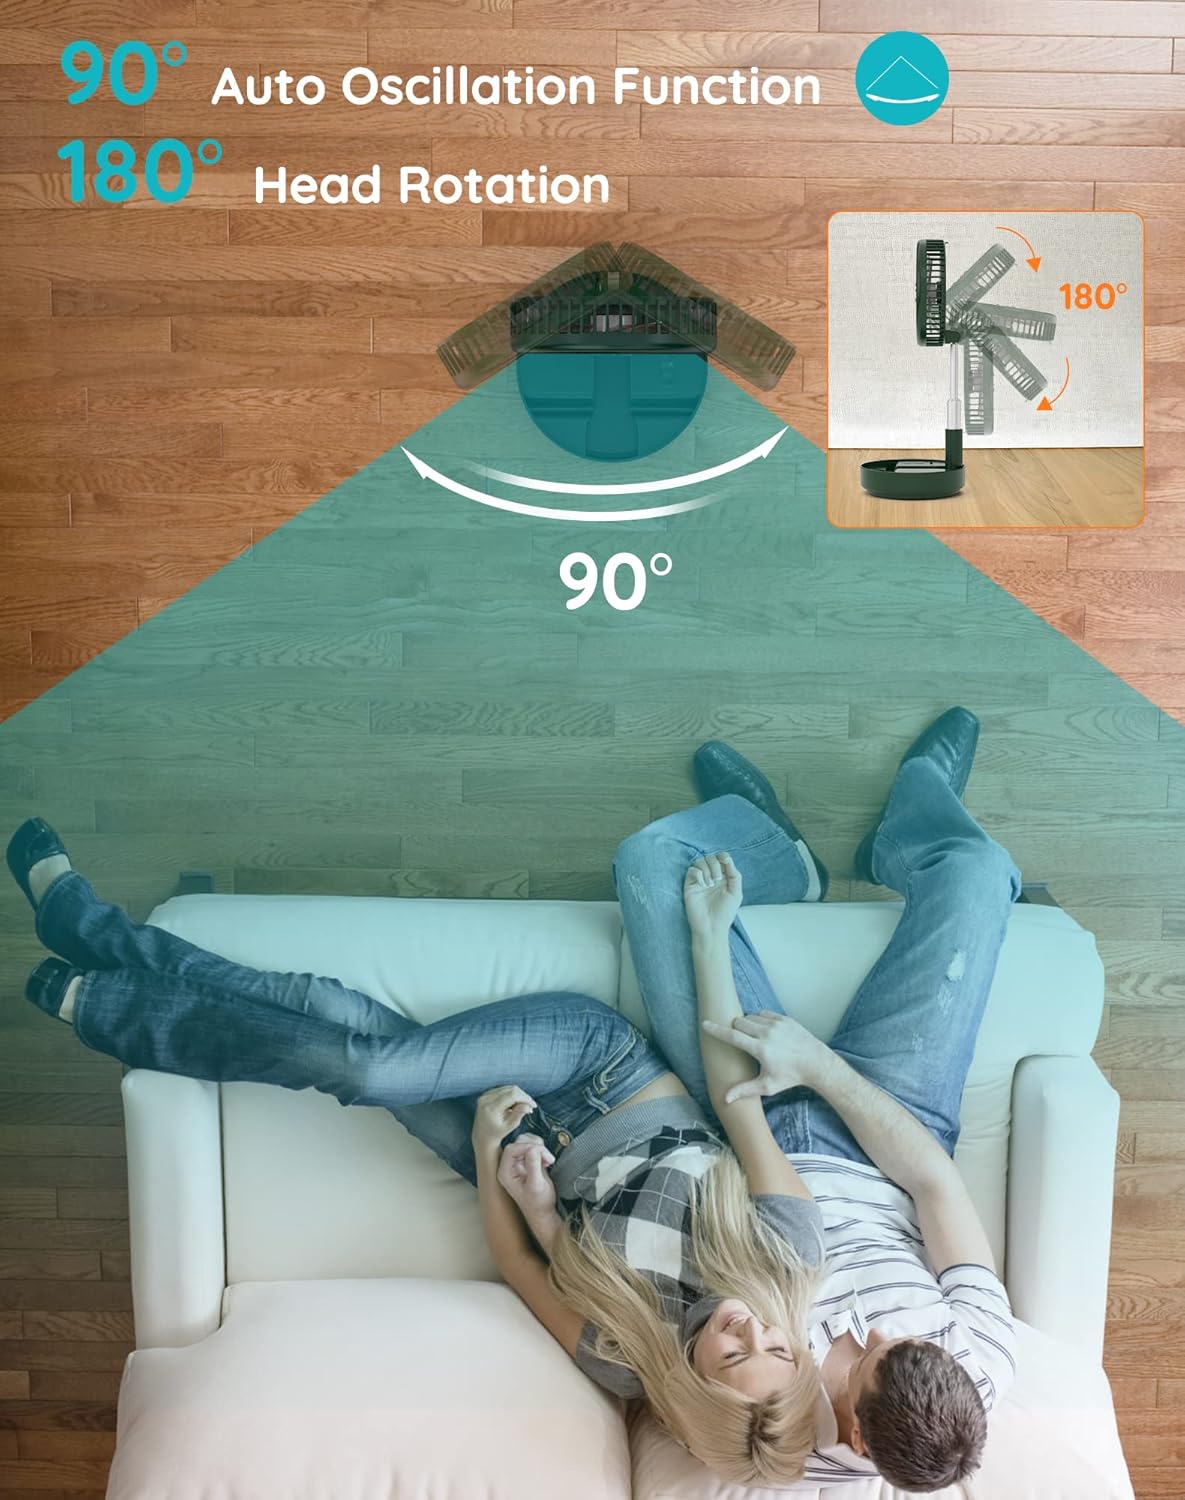
Image 6.2: Visual representation of the fan's 90-degree auto oscillation and 180-degree manual head rotation.
6.3 Fernbedienungsbetrieb
The infrared remote control allows you to operate all fan features from up to 13 feet away.
- The remote has buttons for Power, Speed, and Oscillation, mirroring the functions on the fan base.
- Ensure the remote control has a working AAAA battery (included).

Image 6.3: Details of the fan's control methods, including the remote and integrated buttons.
7. Lade- und Akkuinformationen
The fan is equipped with a large rechargeable battery and is powered by USB-C (5V/2A).
- Erste Verwendung: Please fully charge the fan before its first use.
- Ladezeit: Eine vollständige Aufladung dauert in der Regel etwa 5 Stunden.
- Akkulaufzeit: Provides 6 to 21 wireless working hours, depending on the speed setting and oscillation usage.
- Kompatibilität: Compatible with PC/laptop, power bank, AC adapter, car charger, and other USB-enabled power sources.

Image 7.1: The fan's USB-C charging port and exampweniger kompatible Stromquellen.
8. Wartung
8.1 Reinigen des Lüfters
- Stellen Sie vor der Reinigung sicher, dass der Lüfter ausgeschaltet und vom Netz getrennt ist.
- The front fan hood is detachable for easy cleaning. Gently twist and remove the front grille.
- Wischen Sie die Lüfterflügel und das Gitter mit einem weichen, fusselfreien Tuch ab.amp Tuch. Keine Scheuer- oder Lösungsmittel verwenden.
- Stellen Sie sicher, dass alle Teile vollständig trocken sind, bevor Sie den Ventilator wieder zusammenbauen und in Betrieb nehmen.

Image 8.1: Instructions for detaching the fan hood for cleaning and information on the aromatherapy feature.
8.2 Aromatherapie-Funktion
The fan includes a special scent box. You can place your favorite aromatherapy in this box to diffuse a pleasant fragrance while the fan operates.
9. Fehlerbehebung
| Problem | Mögliche Ursache | Lösung |
|---|---|---|
| Lüfter schaltet nicht ein | Batterie ist leer Not properly plugged in (if wired) | Charge the fan using the USB-C cable Ensure the USB-C cable is securely connected to a power source and the fan. |
| Schwacher Luftstrom | Niedrige Geschwindigkeitseinstellung Die Lüfterflügel sind schmutzig | Erhöhen Sie die Geschwindigkeitseinstellung Clean the fan blades and grille (refer to Maintenance section) |
| Oszillation funktioniert nicht | Die Oszillationsfunktion ist deaktiviert. | Press the oscillation button on the fan or remote to activate. |
| Fernbedienung funktioniert nicht | Batterie ist leer Hindernis zwischen Fernbedienung und Lüfter | Replace the AAAA battery in the remote Stellen Sie sicher, dass eine freie Sichtlinie zum Empfänger des Ventilators besteht. |
| Lüfter macht ungewöhnliche Geräusche | Verstopfung der Lüfterblätter Fan not on a stable surface | Turn off and unplug the fan, then check for and remove any obstructions Stellen Sie den Ventilator auf eine flache, stabile Oberfläche. |
10. Spezifikationen
| Besonderheit | Detail |
|---|---|
| Marke | Primevolve |
| Modellnummer | TM-520 (PF11S) |
| Farbe | Grün |
| Stromquelle | Battery Powered, USB-C (5V/2A) |
| Produktabmessungen (gefaltet) | 9.06"T x 4.33"B x 9.06"H |
| Einstellbare Höhe | 3.93" bis 39.3" |
| Neigung des Ventilatorkopfes | 180 Grad (manuell) |
| Schwingung | 90 degrees (auto) |
| Geschwindigkeitseinstellungen | 4 (Low, Mid, High, Natural) |
| Geräuschpegel | 30-40 dB (bei Höchstgeschwindigkeit) |
| Anzahl der Klingen | 5 |
| Kontrollmethode | Fernbedienung, berühren |
| Artikelgewicht | 2.75 Pfund |
| Fernbatterie | 1 AAAA-Batterie (im Lieferumfang enthalten) |
| Verwendung im Innen- und Außenbereich | Ja |
11. Garantie und Support
This Primevolve fan comes with a One-Year After-sales Service.
If you have any questions, concerns, or require assistance with your product, please do not hesitate to contact Primevolve customer support. We are committed to resolving your inquiries within 24 hours.
For support, please refer to the contact information provided on the product packaging or the official Primevolve webWebsite.
Ask a question about this manual
Ask about setup, troubleshooting, compatibility, parts, safety, or missing instructions. Manuals+ will review the question and use this page’s manual context to help answer it.