Bitte lesen und verstehen Sie alle Anweisungen sorgfältig, bevor Sie mit der Installation beginnen. Andernfalls besteht die Gefahr eines Stromschlags, eines Brandes oder anderer Verletzungen, die gefährlich oder sogar tödlich sein können. Bewahren Sie diese Anweisungen zum späteren Nachschlagen auf.
Always turn off the main power supply at the circuit breaker before installing or servicing the fixture.
Wenn Sie hinsichtlich des Installationsvorgangs unsicher sind, wenden Sie sich an einen qualifizierten Elektriker.
Verwenden Sie nur Glühbirnen des angegebenen Typs und der angegebenen Wattzahl.tage. Überschreiten Sie nicht die maximale Wattzahltage.
Stellen Sie sicher, dass alle elektrischen Anschlüsse sicher sind und den örtlichen Vorschriften und Verordnungen entsprechen.
Do not install this fixture in wet locations unless specifically rated for such use. This fixture is rated for indoor use only.
2. Packungsinhalt
Carefully unpack your fixture and check that all parts are included. Retain all packaging material until installation is complete to prevent loss of small parts.
Hinweis: Leuchtmittel sind nicht im Lieferumfang enthalten und müssen separat erworben werden.
3. Einrichtung und Installation
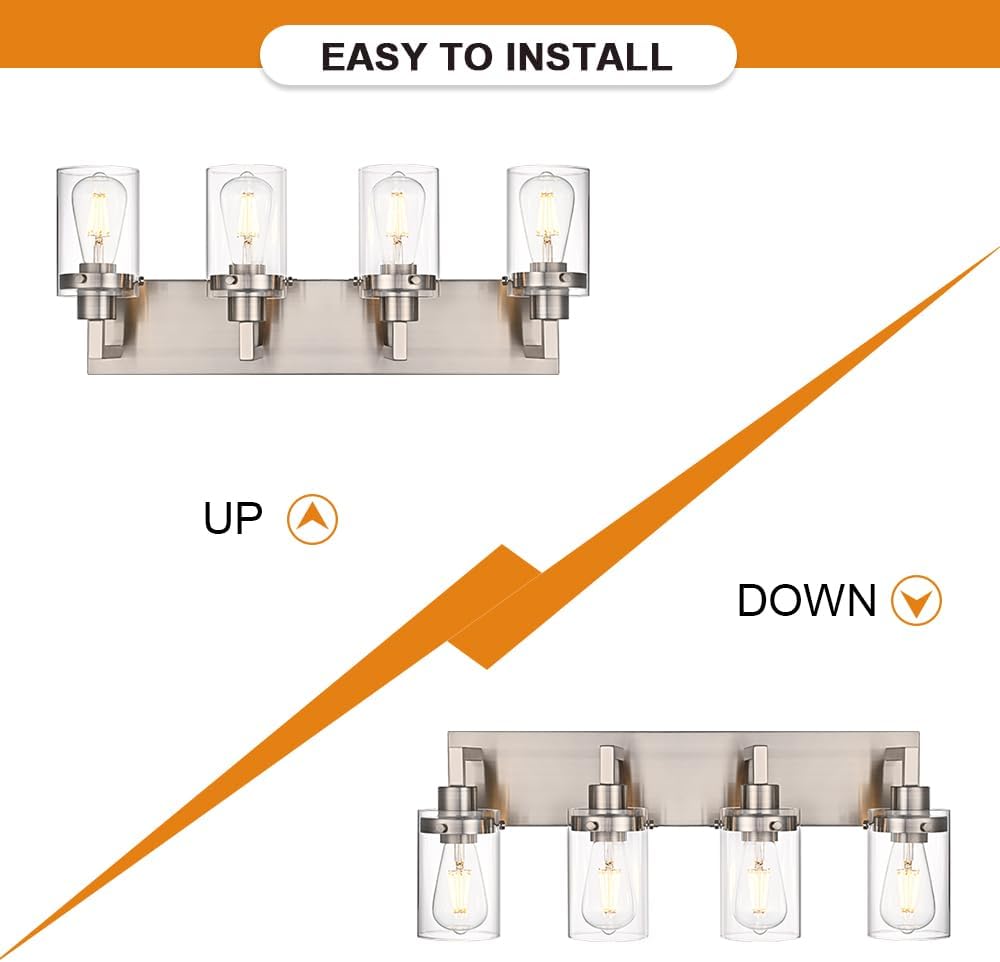
Before you begin, ensure the power is turned off at the circuit breaker. This fixture can be mounted with the lights facing up or down.
3.1 Benötigtes Werkzeug (nicht im Lieferumfang enthalten)
Schraubendreher (Kreuzschlitz und Schlitz)
Abisolierzangen
Isolierband
Zange
Schutzbrille
3.2 Installationsschritte
Strom ausschalten: Locate the circuit breaker controlling the light switch and turn it off. Verify power is off using a voltage Tester.
Montage vorbereiten: Befestigen Sie die Montage-Querstange mit den mitgelieferten Schrauben an der Anschlussdose. Achten Sie auf einen festen Sitz.
Drahtverbindungen:
Verbinden Sie den schwarzen Draht der Leuchte mit dem schwarzen (stromführenden) Draht des Hauses mithilfe einer Lüsterklemme.
Verbinden Sie den weißen Draht der Leuchte mit dem weißen (neutralen) Draht des Hauses mithilfe einer Drahtklemme.
Connect the fixture's ground wire (bare copper or green) to the house's ground wire and to the mounting crossbar's ground screw.
Secure all wire connections with electrical tape.
Montagevorrichtung: Carefully tuck all wires into the junction box. Align the fixture's back plate with the mounting screws on the crossbar and secure it with the decorative nuts.
Glasschirme installieren: Attach each clear glass shade to the fixture by screwing it onto the socket assembly. Ensure they are finger-tight.
Lampen installieren: Screw in the required E26 base bulbs (not included) into each socket. Do not exceed 60W per bulb.
Strom wiederherstellen: Schalten Sie den Strom am Schutzschalter wieder ein und testen Sie die Leuchte.
Image: The VINLUZ vanity light can be installed with the glass shades facing upwards or downwards, offering versatile aesthetic options.
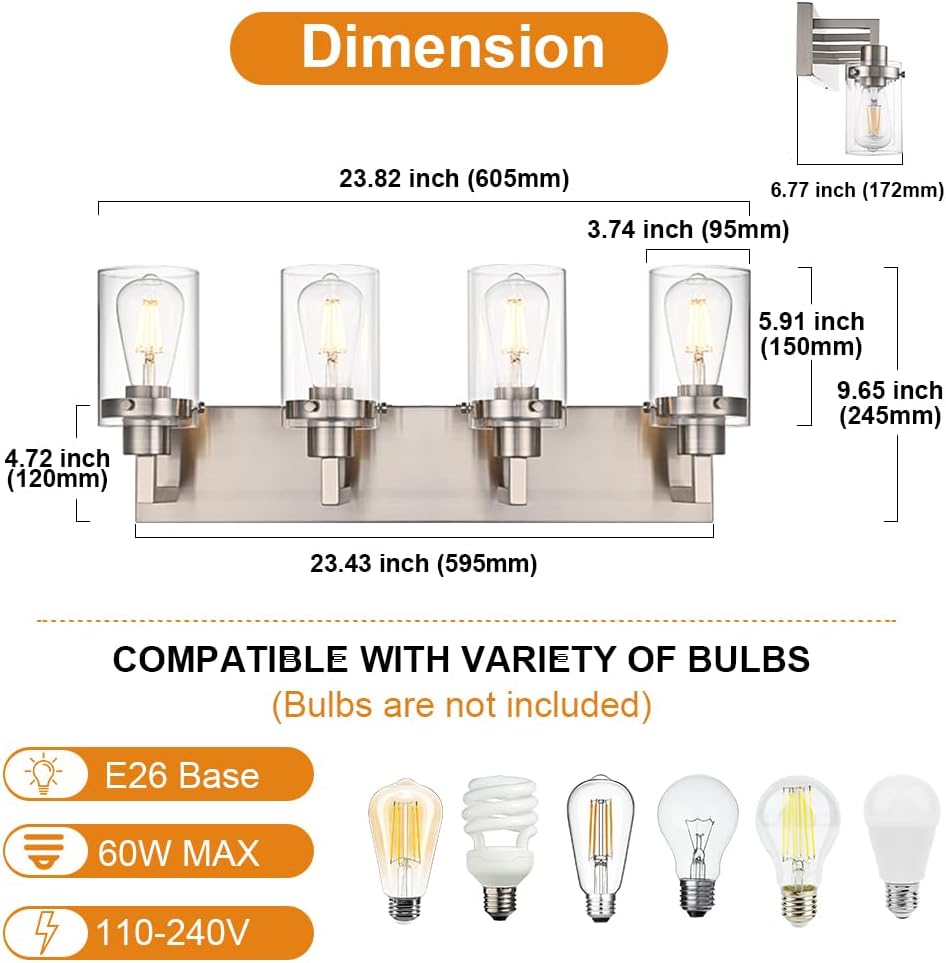
Image: Detailed dimensions of the fixture (23.82 inches wide, 9.65 inches high) and a visual guide to compatible E26 base bulbs (max 60W, 110-240V).
4. Bedienungsanleitung
This VINLUZ vanity light is designed for simple operation once installed.
Ein-/Ausschalten: Verwenden Sie Ihren üblichen Wandschalter, um die Leuchte ein- oder auszuschalten.
Anforderungen an die Glühbirne: The fixture uses E26 standard base bulbs. Each socket supports a maximum of 60 watts. Do not exceed this wattage.
Dimmbare Funktionalität: This fixture is compatible with a dimmer switch (not included). If you wish to use a dimmer, ensure you install a compatible E26 dimmable bulb and a suitable dimmer switch.
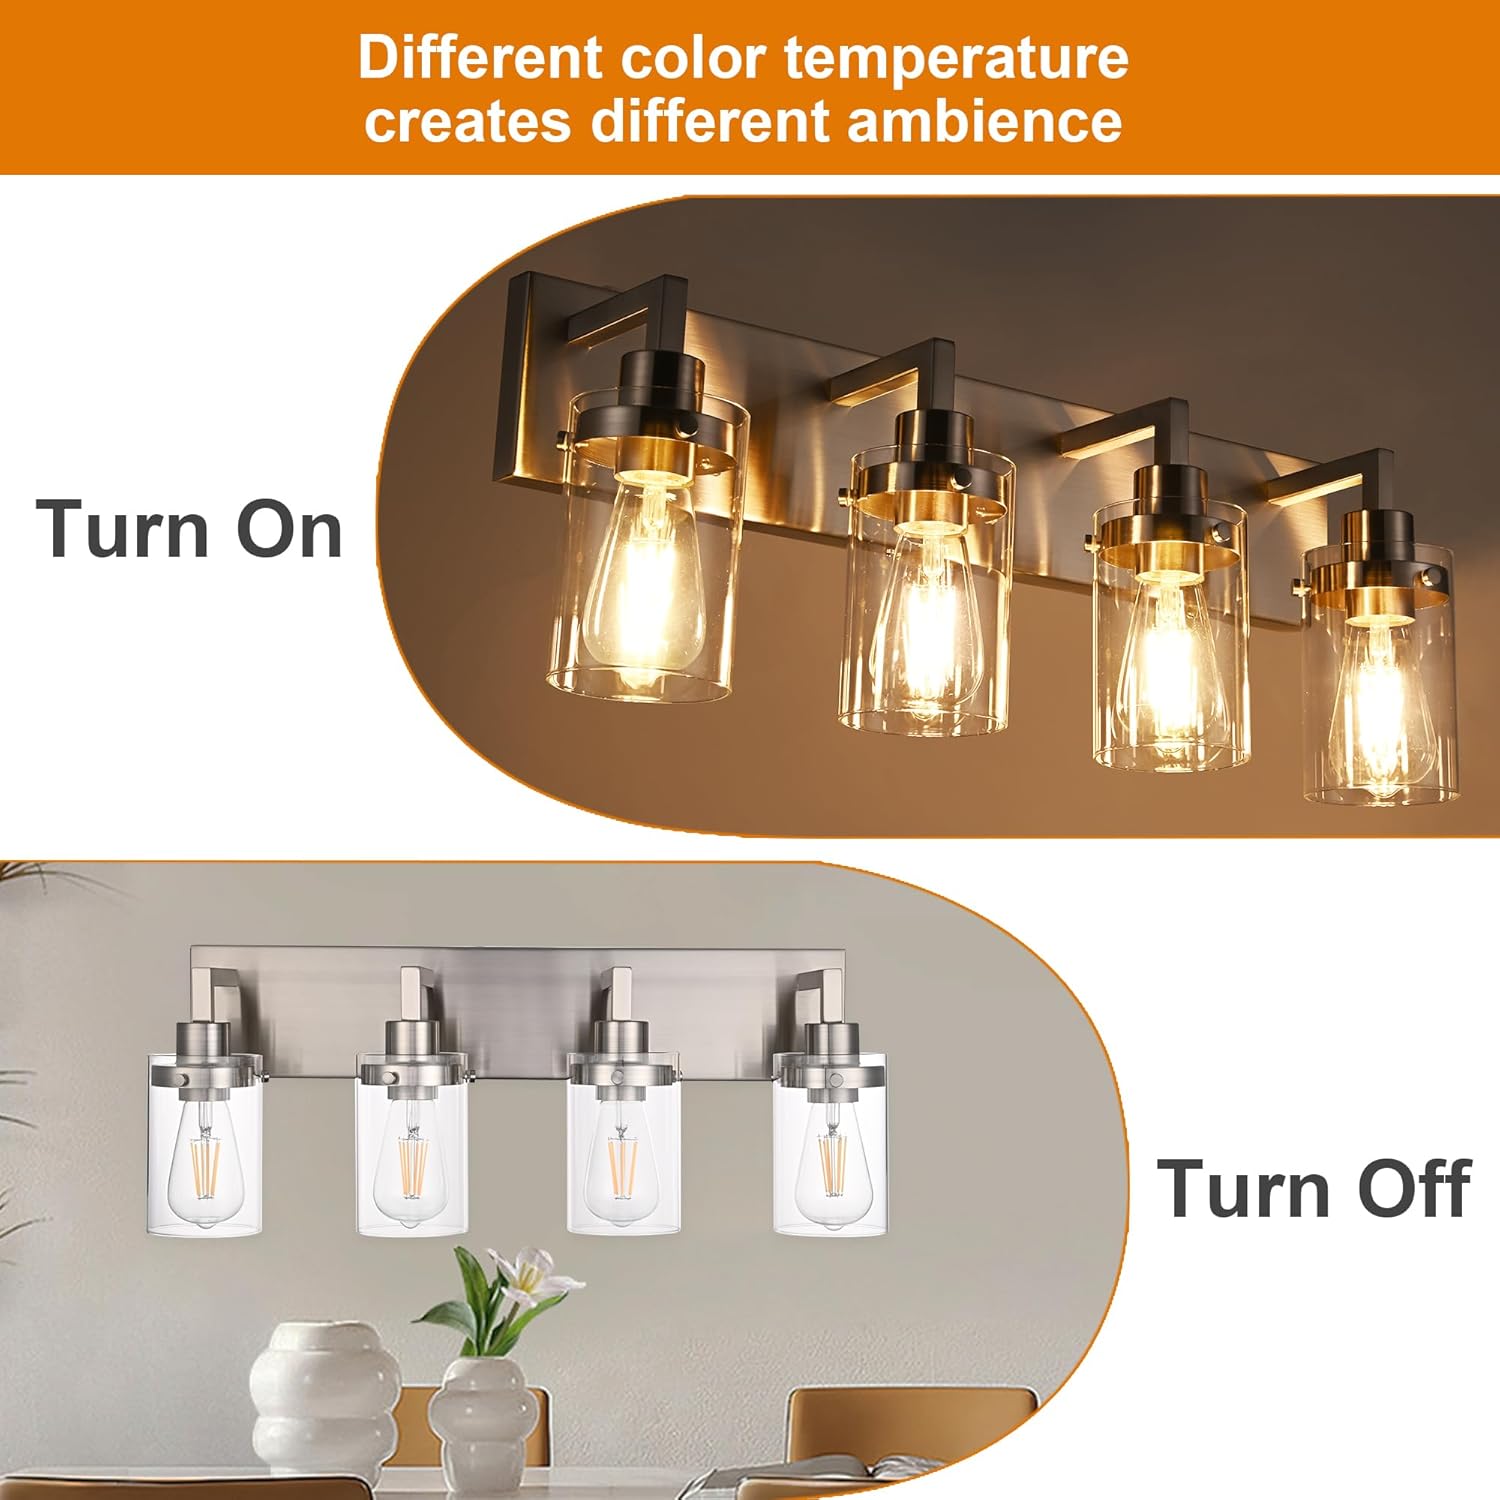
Image: Visual representation of the light fixture in both 'Turn On' and 'Turn Off' states, illustrating how different bulb color temperatures can create varied ambiances.
5. Wartung
Regular maintenance will help preserve the appearance and functionality of your VINLUZ vanity light.
Reinigung: To clean the fixture, ensure the power is off. Wipe the brushed nickel finish with a soft, dry cloth. For the glass shades, use a mild glass cleaner and a soft cloth. Avoid abrasive cleaners or harsh chemicals, as these can damage the finish.
Lampenwechsel: Always turn off the power before replacing bulbs. Allow bulbs to cool completely before handling. Replace with E26 base bulbs, not exceeding 60 watts.
Austausch des Glasschirms: In case of a broken glass shade, contact VINLUZ customer service for a free replacement.
6. Fehlerbehebung
If you encounter issues with your VINLUZ vanity light, refer to the following common problems and solutions:
Problem
Mögliche Ursache
Lösung
Licht geht nicht an.
Kein Strom am Gerät.
Lose Kabelverbindung.
Defekte Glühbirne.
Prüfen Sie den Sicherungsautomaten und den Wandschalter.
Prüfen Sie, ob alle Drahtverbindungen fest sitzen (stellen Sie vorher sicher, dass die Stromzufuhr unterbrochen ist).
Ersetzen Sie die Glühbirne durch eine neue, funktionierende.
Licht flackert.
Lose Glühbirne.
Falscher Glühbirnentyp für den Dimmer (falls zutreffend).
Lose Kabelverbindung.
Die Glühbirne fest anziehen.
Verwenden Sie unbedingt einen Dimmerschalter für dimmbare Glühbirnen.
Prüfen Sie die Kabelverbindungen (stellen Sie vorher sicher, dass die Stromzufuhr unterbrochen ist).
Glass shade is broken.
Unfallschäden.
Contact VINLUZ customer service for a free replacement.
7. Spezifikationen
Modellnummer
1751-4W-SN
Marke
VINLUZ
Hersteller
VINLUZ
Stil
Modern, Farmhouse, Industrial
Farbe/Finish
Gebürstetes Nickel
Material
Metall, Klarglas
Artikelgewicht
7.83 Pfund
Verpackungsabmessungen
24.25 x 12.75 x 6.25 Zoll
Spezifische Verwendungen
Indoor use only (Bathroom, Living Room, Dining Room, Bedroom, Hallway)
Stromquelle
AC
Bandtage
110 bis 240 V
Lampensockel
E26 Standard
Maximal Watttage pro Birne
60 W
Batterien erforderlich
NEIN
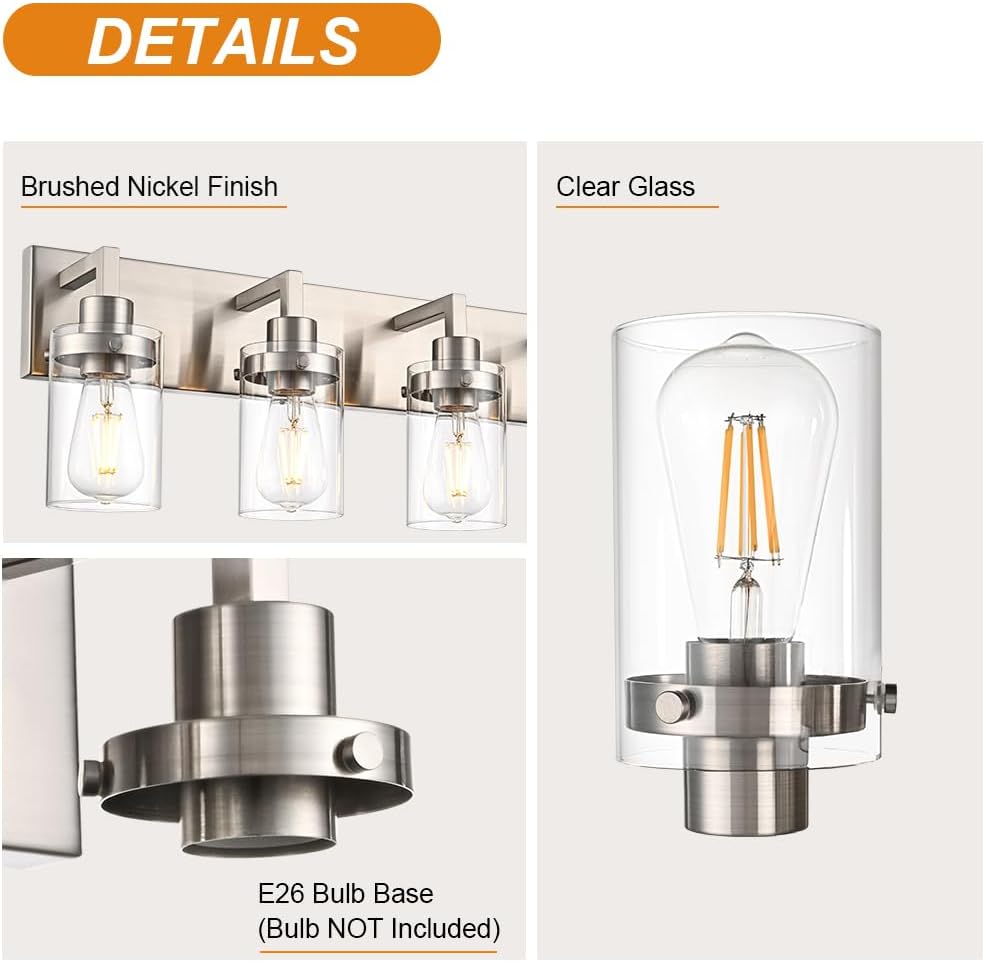
Bild: Detailliert view highlighting the brushed nickel finish, clear glass shade, and the E26 bulb base (bulb not included).
8. Garantie und Kundendienst
VINLUZ is committed to providing quality products and customer satisfaction.
Austausch des Glasschirms: VINLUZ offers free replacement for broken glass shades.
Allgemeiner Support: For any quality issues, skill problems, or replacement parts, please contact the original manufacturer, LightingPlus. You can typically find their contact information on the platform where you purchased the product (e.g., Amazon seller page).
Kontaktmethode: On Amazon, you can click on "LightingPlus" (the seller name) and then click on "Ask a question" to contact them directly.
Ask a question about this manual
Ask about setup, troubleshooting, compatibility, parts, safety, or missing instructions. Manuals+ will review the question and use this page’s manual context to help answer it.