
Einführung
The LifePro Pacer Mini Pro Treadmill is a compact and versatile walking pad designed for light exercise and fitness in both home and office environments. Its adjustable incline and variable speed settings allow for a customized workout experience, helping you stay active throughout your day. This manual provides essential information for the safe and effective use, setup, operation, and maintenance of your Pacer Mini Pro Treadmill.
Wichtige Sicherheitsinformationen
Please read and understand all instructions before operating the treadmill. Failure to follow these instructions may result in injury or damage to the product.
- Stellen Sie das Laufband immer auf eine ebene, stabile Fläche.
- Halten Sie Kinder und Haustiere während des Betriebs vom Laufband fern.
- Benutzen Sie das Laufband nicht, wenn es beschädigt ist oder nicht richtig funktioniert.
- Konsultieren Sie einen Arzt, bevor Sie mit einem neuen Trainingsprogramm beginnen.
- Stellen Sie sicher, dass das Netzkabel nicht eingeklemmt oder beschädigt ist.
- Versuchen Sie nicht, das Laufband selbst zu reparieren. Wenden Sie sich an den Kundendienst.
Packungsinhalt
Überprüfen Sie, ob alle Komponenten im Paket vorhanden sind:
- LifePro Pacer Mini Pro Treadmill Unit
- Fernbedienung
- Netzkabel
- Schmiermittel
- Verstellbarer Lenker
- Tablettenhalter
Aufstellen
Follow these steps to set up your LifePro Pacer Mini Pro Treadmill:
- Auspacken: Nehmen Sie das Laufband und alle Komponenten vorsichtig aus der Verpackung.
- Platzierung: Choose a flat, stable surface for the treadmill. Ensure there is adequate space around the unit for safe operation.
- Handlebar and Feet Assembly: While the main unit comes pre-assembled, minimal assembly is required. Attach the adjustable handlebar and the incline feet as instructed in the included quick start guide. Ensure all screws are tightened securely.
- Erstschmierung: The treadmill may come with some initial lubrication. Refer to the maintenance section for instructions on how to check and apply lubricant if needed before first use.
- Stromanschluss: Schließen Sie das Netzkabel an das Laufband und anschließend an eine geerdete Steckdose an.

Bedienungsanleitung
Operating your Pacer Mini Pro Treadmill is straightforward:
- Einschalten: Plug in the treadmill and press the power button on the unit or the remote control. The LED display will illuminate.
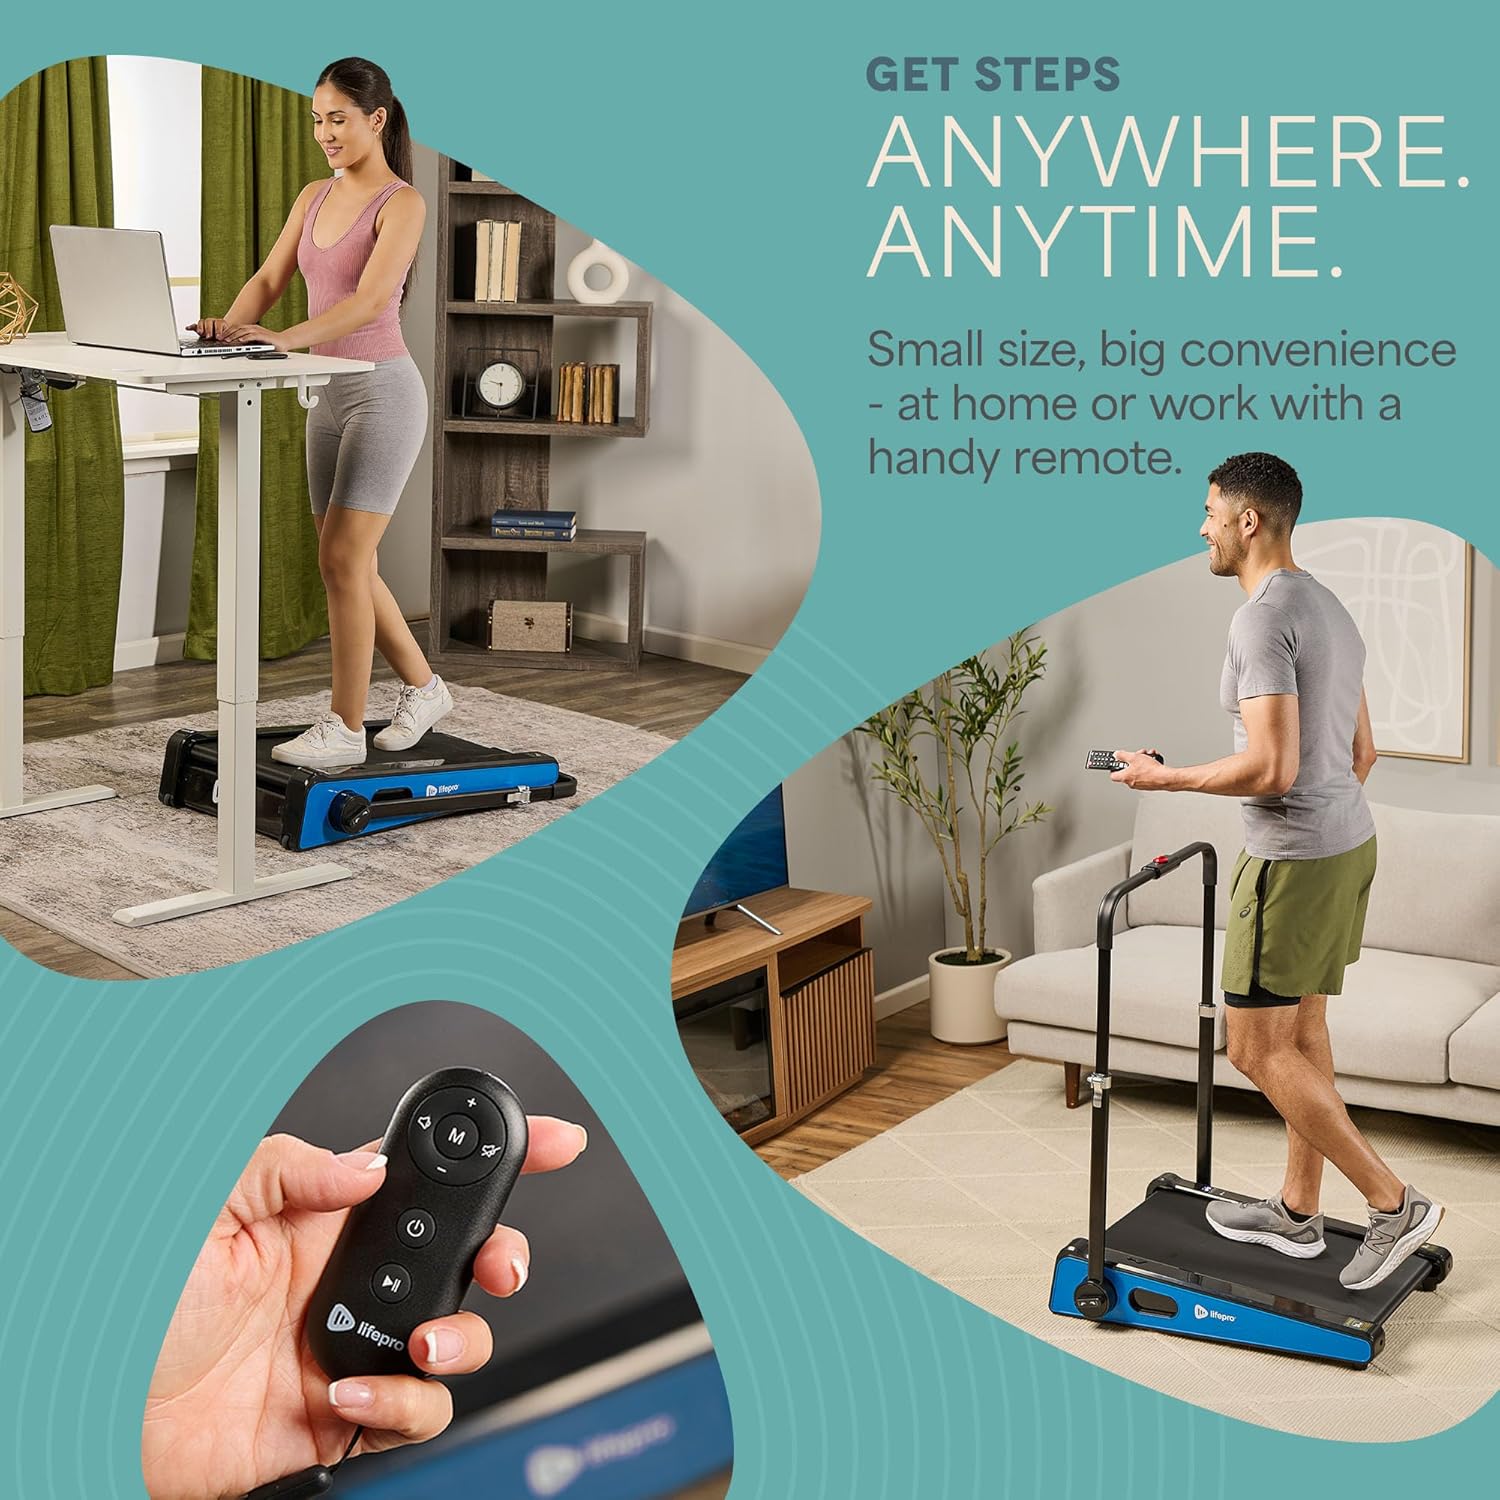
- Geschwindigkeit anpassen: Use the remote control to increase or decrease the walking speed. The maximum speed is 3 MPH. The current speed will be shown on the LED display.
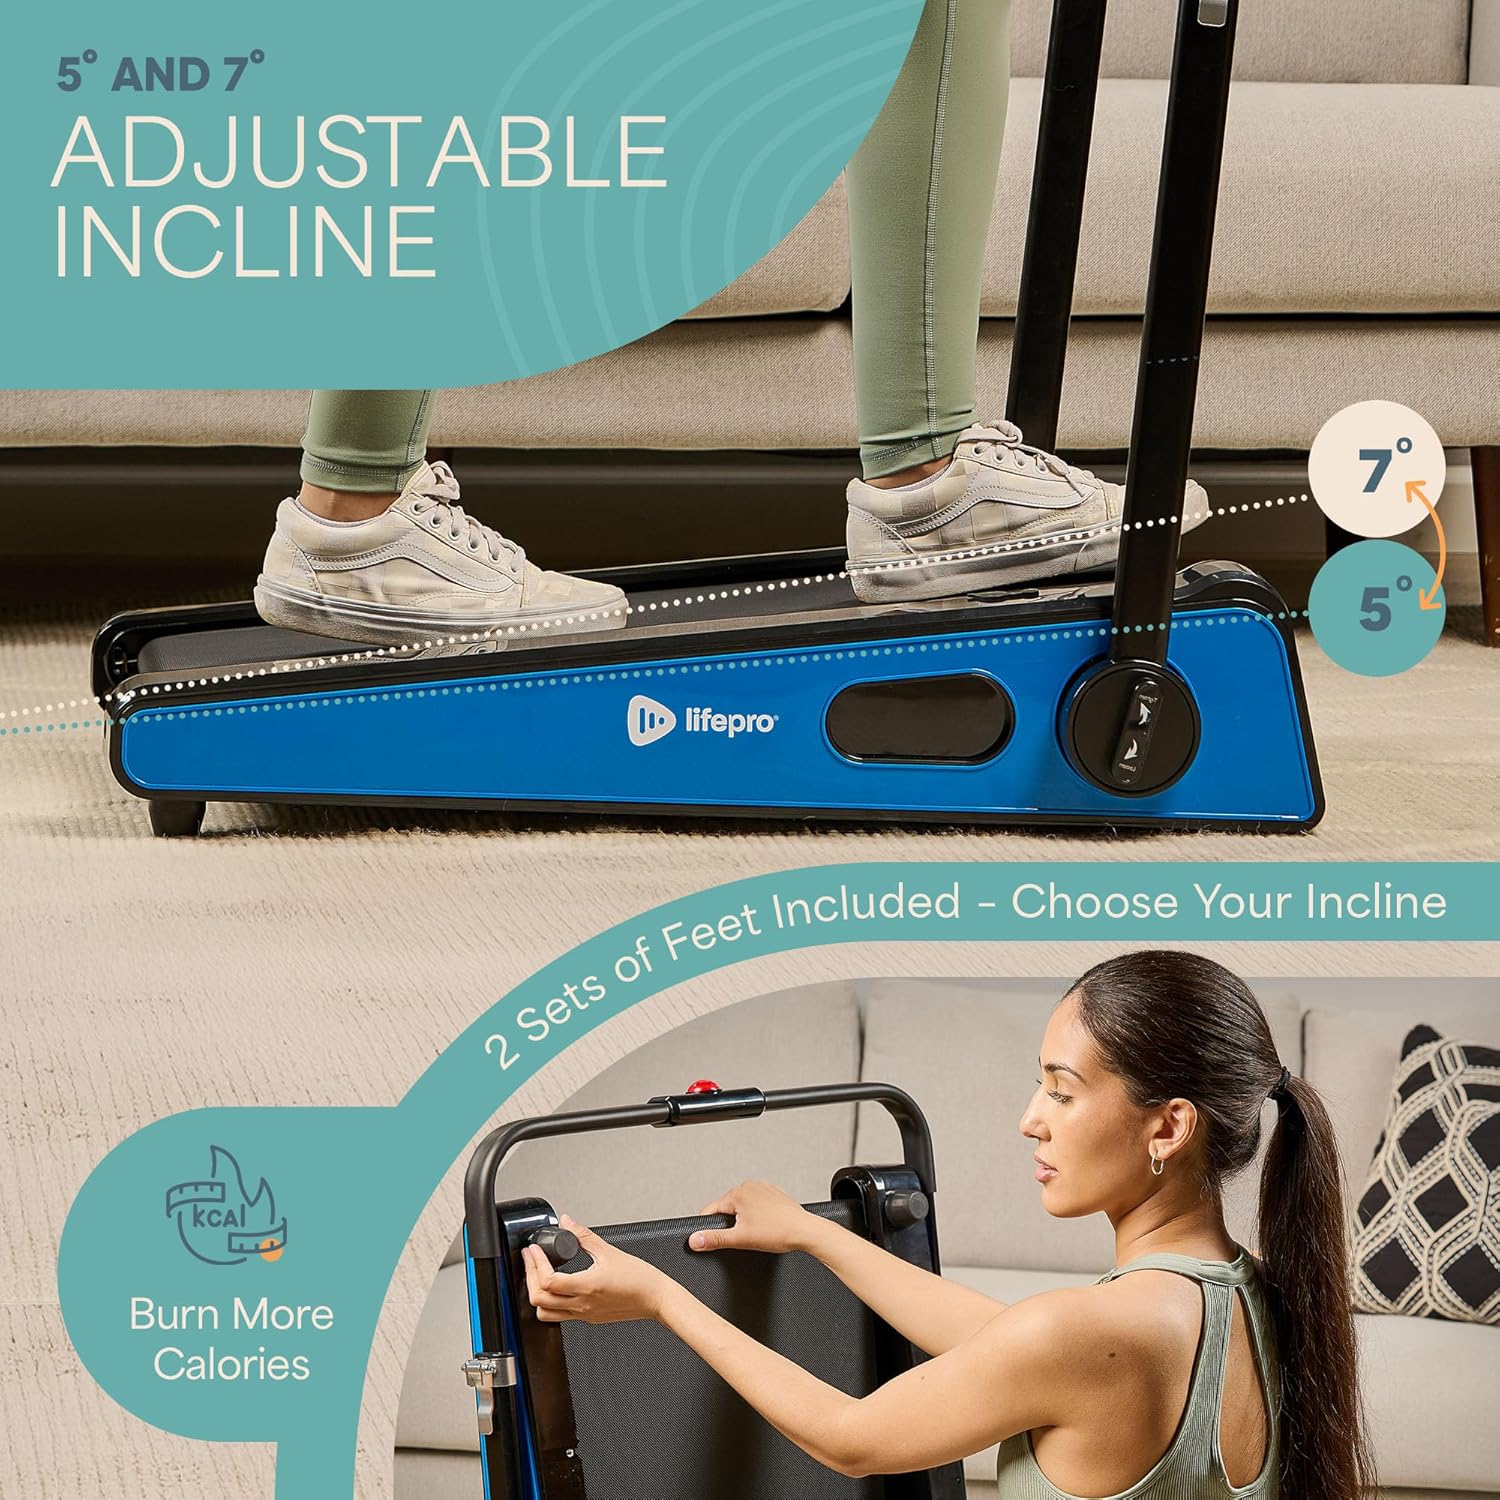
- Neigung anpassen: The treadmill offers adjustable incline settings of 5 or 7 degrees. To change the incline, manually adjust the feet at the rear of the treadmill. Refer to the setup section and product diagrams for visual guidance.
- Überwachen Sie Ihr Training: The LED display shows important workout metrics such as speed, calories burned, and distance covered. This helps you track your progress and stay motivated.
- Ausschalten: To stop your workout, press the stop button on the remote control or the unit. For complete power off, unplug the treadmill from the power outlet.

Wartung
Regelmäßige Wartung gewährleistet die Langlebigkeit und optimale Leistung Ihres Laufbands:
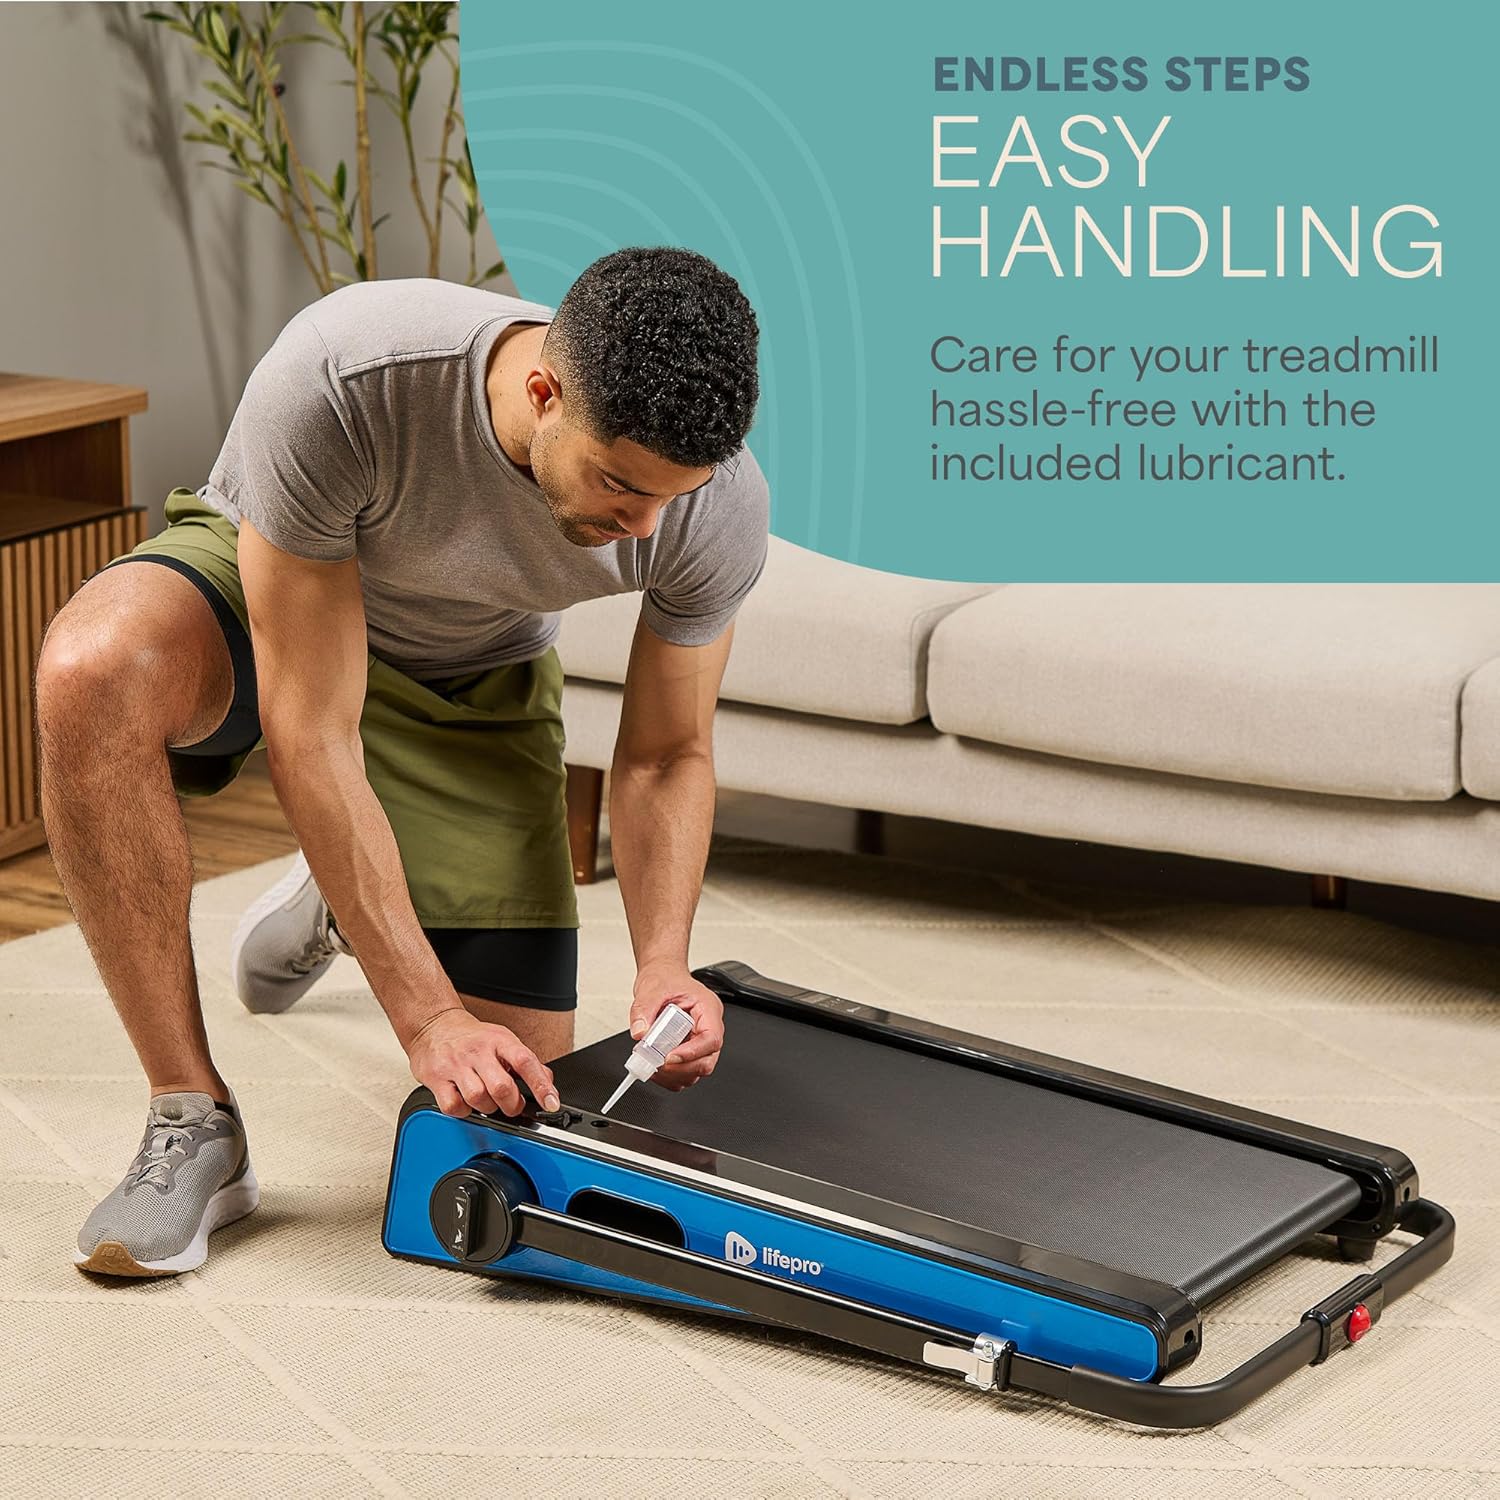
- Schmierung: The walking belt requires periodic lubrication to reduce friction and wear. A dedicated slot on the upper left side of the treadmill allows for easy injection of the provided lubricant. Lubricate as needed, typically every few months depending on usage.
- Reinigung: Wischen Sie die Laufbandoberfläche mit einem Tuch ab.amp Nach jedem Gebrauch mit einem Tuch abwischen, um Schweiß und Staub zu entfernen. Keine Scheuermittel verwenden.
- Lagerung: The Pacer Mini Pro is designed for compact storage. It can be easily stored under a couch, desk, or in a closet thanks to its small footprint and built-in wheels for portability.
Fehlerbehebung
If you encounter any issues with your treadmill, refer to the following common solutions:
- Laufband lässt sich nicht einschalten: Ensure the power cord is securely plugged into both the treadmill and a working electrical outlet. Check the power switch on the unit.
- rutschender oder ungleichmäßiger Riemen: The walking belt may require adjustment or lubrication. Refer to the maintenance section for lubrication instructions. For belt tension adjustment, consult the detailed manual or contact customer support.
- Ungewöhnliche Geräusche: Beenden Sie die Benutzung des Laufbands sofort und überprüfen Sie es auf lose Teile oder Verstopfungen. Sollte das Geräusch weiterhin bestehen, wenden Sie sich bitte an den Kundendienst.
For issues not covered here, please contact LifePro customer support for assistance.
Technische Daten
| Marke | LifePro |
| Modellnummer | LP-PCRMP-BLU-VC |
| Farbe | Blue with Handlebar |
| Produktabmessungen (T x B x H) | 83.1 cm x 63.5 cm x 104.1 cm |
| Artikelgewicht | 53.9 Pfund |
| Material | Edelstahl |
| Höchstgeschwindigkeit | 3 km/h |
| Einstellbare Neigung | 5 oder 7 Grad |
| Besonderheit | Kompaktes Design |
| Empfohlene Verwendung | Light exercise, walking, home and office use |
| Zielgruppe | Erwachsene |
| Maximale Leistung | 1.75 PS |
| Anzeigetyp | LED |
| Stromquelle | Kabelgebundene Elektrik |
| Konnektivitätstechnologie | Ethernet |
| Zählertyp | Digitales |
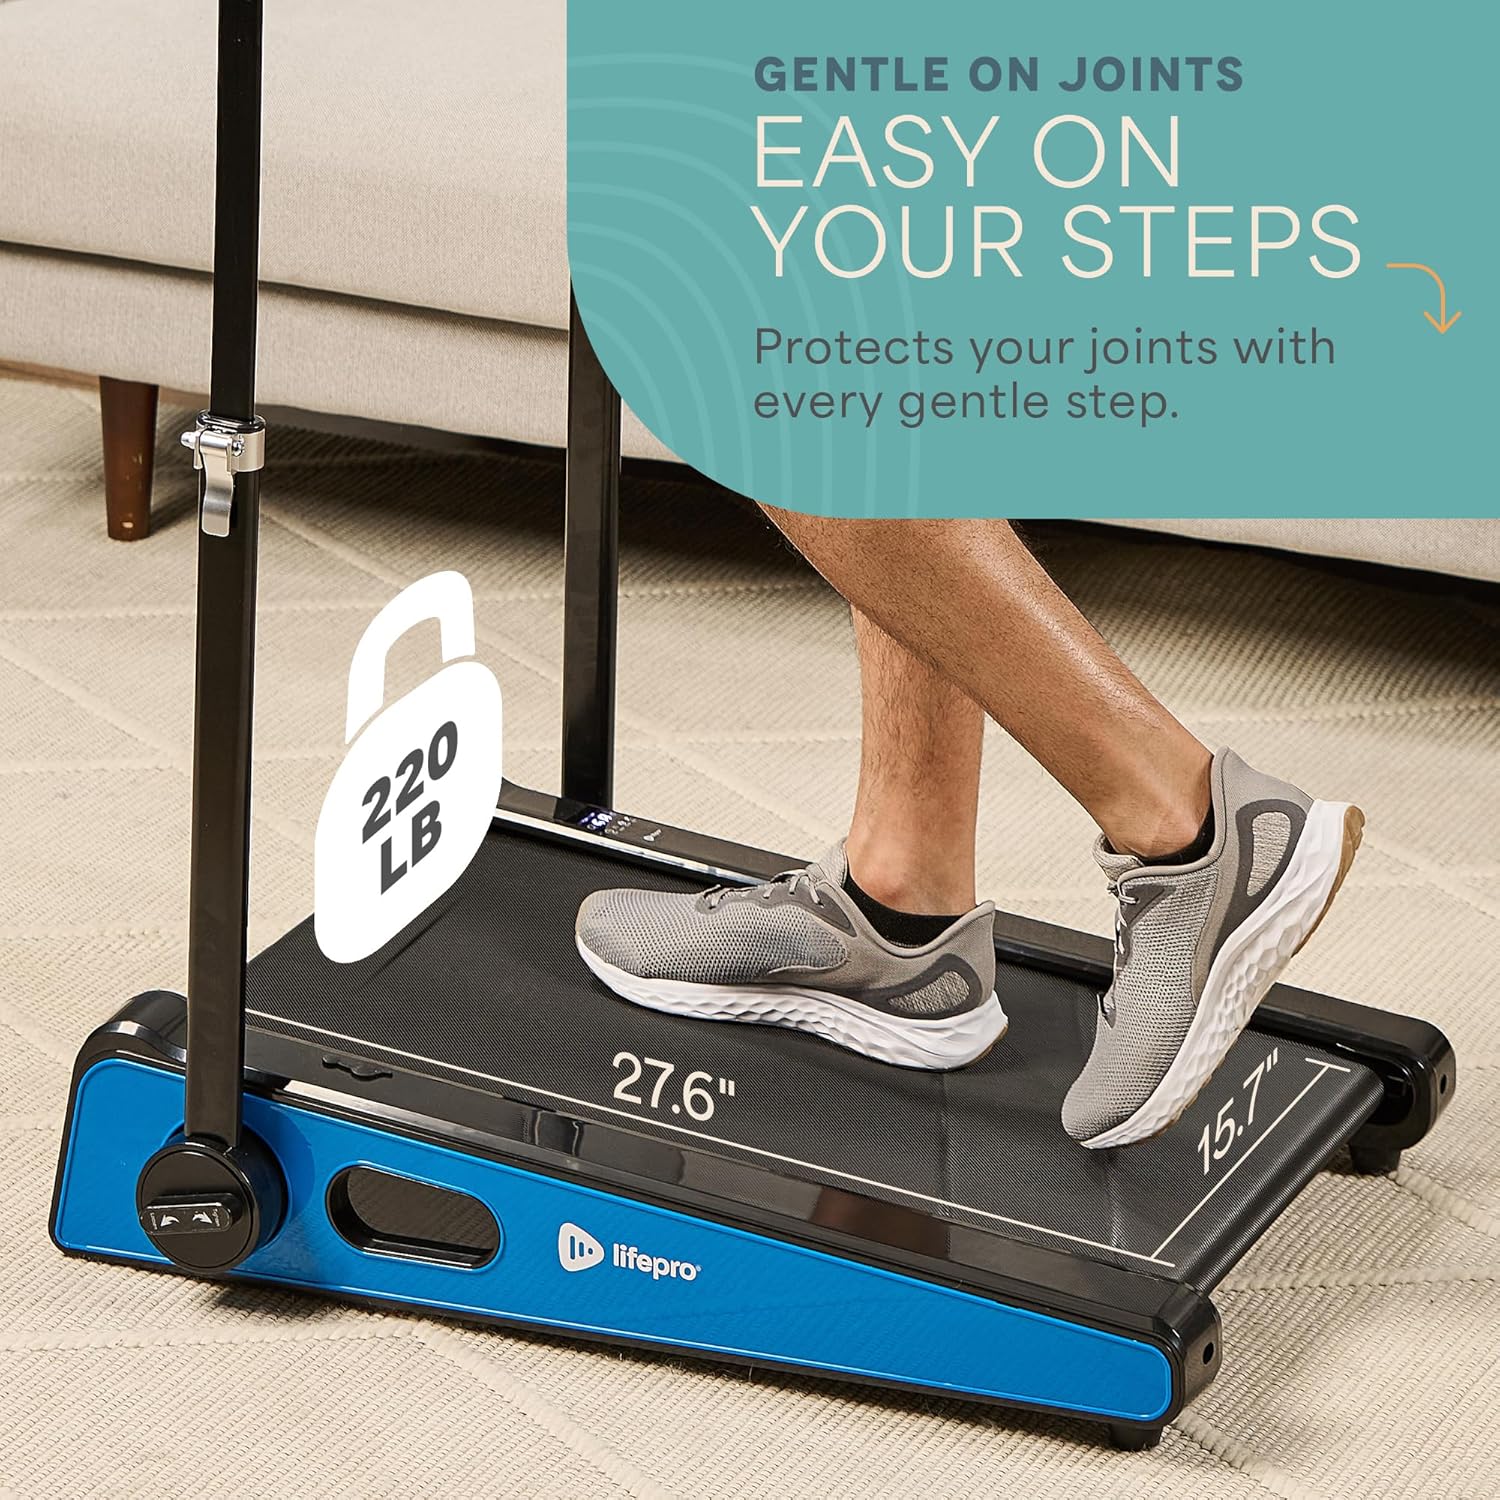
| Maximalgewichtsempfehlung | 220 Pfund |
| Anzahl der Programme | 1 |
| Running Surface Length | 40 Zoll |
| Running Surface Width | 15.7 Zoll |
| Bildschirmgröße | 30 Zoll |
| Montage erforderlich | Minimal (Handlebar and feet attachment) |
| UPC | 810161332328 |
Garantie und Support
LifePro is committed to providing high-quality products and customer satisfaction. The LifePro Pacer Mini Pro Treadmill comes with a lebenslange Garantie, wodurch Sie sich um Ihre Investition keine Sorgen machen müssen.
For any questions, concerns, or technical support, please contact LifePro customer service:
- WebWebsite: www.lifeprofitness.com (Example link, please replace with actual support link if available)
- E-Mail: support@lifeprofitness.com (Example email, please replace with actual support email if available)
- Telefon: [Telefonnummer hier einfügen]
Please have your model number (LP-PCRMP-BLU-VC) and proof of purchase ready when contacting support.