
1. Einleitung
This manual provides detailed instructions for the installation, operation, and maintenance of your ANNKE AU-DT81DX200-V1 4K 8-Channel Digital Video Recorder (DVR). This DVR is designed for security surveillance systems, offering 4K (8MP) high-definition live viewing and recording capabilities. It features advanced H.265+ video compression, AI human/vehicle detection, and supports various camera types for flexible integration.

Image 1.1: The ANNKE 4K 8CH DVR connected to a display, illustrating its 4K Ultra HD video capability.
2. Packungsinhalt
Verify that all items listed below are included in your package. If any items are missing or damaged, contact ANNKE customer support.
- 1x ANNKE 4K 8CH DVR with 2TB Hard Drive
- 1x 5.9 ft/1.8 m HDMI Cable
- 1x 3.2 ft/1 m Ethernet Cable
- 1x Netzteil
- 1x USB-Maus
- 1x Benutzerhandbuch (dieses Dokument)
- 1x Wandaufkleber

Image 2.1: Visual representation of all components included in the ANNKE 4K 8CH DVR package.
3. Systemüberschreitungview
The ANNKE AU-DT81DX200-V1 DVR is a hybrid 5-in-1 system, supporting various camera technologies. It can operate in two primary modes:
- DVR-Modus: Supports up to 8 BNC (TVI/AHD/CVI/CVBS) cameras and an additional 4 IP cameras.
- NVR-Modus: Can be configured to support up to 12 IP cameras exclusively.
This flexibility allows for integration with existing analog systems while providing options for future IP camera expansion.
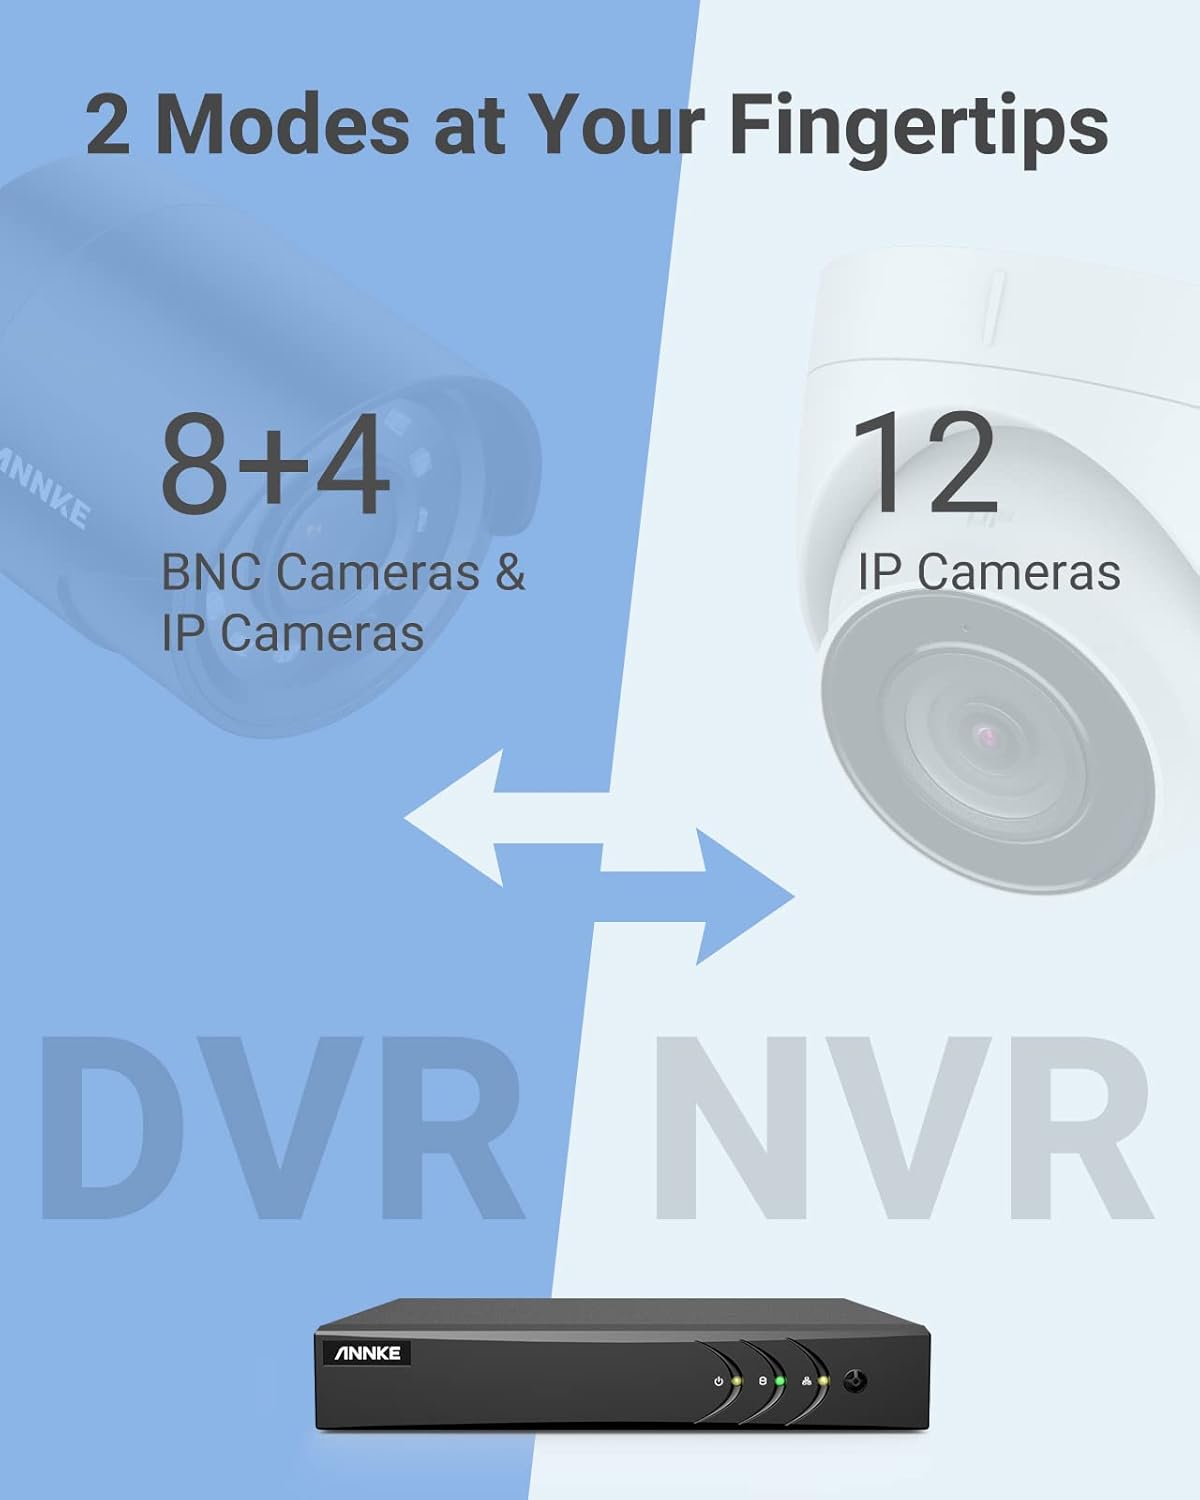
Image 3.1: Illustration of the DVR's dual operational modes, supporting both BNC and IP cameras or IP cameras exclusively.
4. Installationsanleitung
4.1 Physische Einrichtung
- Kameras anschließen: Connect your security cameras to the BNC video input ports on the back of the DVR. For IP cameras, connect them to your network switch/router, and ensure the DVR is also connected to the same network via the Ethernet cable.
- Monitor anschließen: Schließen Sie einen Monitor mit dem HDMI- oder VGA-Ausgang des DVR über das mitgelieferte HDMI-Kabel oder ein VGA-Kabel (nicht im Lieferumfang enthalten) an.
- USB-Maus anschließen: Schließen Sie die USB-Maus an einen der USB-Anschlüsse des DVR an.
- Strom anschließen: Schließen Sie das Netzteil an den Stromeingang des DVR an und stecken Sie es anschließend in eine Steckdose. Der DVR schaltet sich automatisch ein.
4.2 Erstkonfiguration
Beim ersten Einschalten führt Sie der DVR durch einen Einrichtungsassistenten. Folgen Sie den Anweisungen auf dem Bildschirm, um:
- Richten Sie ein sicheres Passwort für das Administratorkonto ein.
- Konfigurieren Sie die Netzwerkeinstellungen (DHCP wird für die meisten Benutzer empfohlen).
- Stellen Sie Datum und Uhrzeit ein.
- Scan and add IP cameras if applicable.
5. Bedienung des DVR
5.1 Live View
Nach der Ersteinrichtung zeigt der DVR das Livebild an. view from connected cameras. Use the USB mouse to navigate the interface. Right-click to access the main menu.
5.2 Aufnahme
The DVR is pre-configured for continuous recording. You can customize recording schedules, motion-triggered recording, or alarm-triggered recording via the main menu under Record > Schedule.
5.3 Wiedergabe
Um zu review aufgenommenes footage:
- Aus dem Leben viewKlicken Sie mit der rechten Maustaste und wählen Sie aus Wiedergabe.
- Select the desired camera(s) and date.
- Use the timeline to navigate through recordings. Events (like motion detection) are often marked on the timeline for quick access.

Image 5.1: The DVR's playback interface, demonstrating how to locate and review Ereignisse auf einer Zeitleiste aufgezeichnet.
6. Erweiterte Funktionen
6.1 KI-gestützte Personen-/Fahrzeugerkennung
The DVR incorporates deep learning-based motion detection 2.0, which can differentiate between human and vehicle movements. This significantly reduces false alarms caused by environmental factors such as leaves or light changes.
- Konfiguration: Enable and configure AI detection for each analog channel via the main menu under AI > Motion Detection 2.0.
- Smart Events: Supports line crossing and intrusion detection for specific areas.
- Benachrichtigungen: Configure the DVR to send app push notifications, email alerts, or trigger a buzzer when human or vehicle motion is detected.
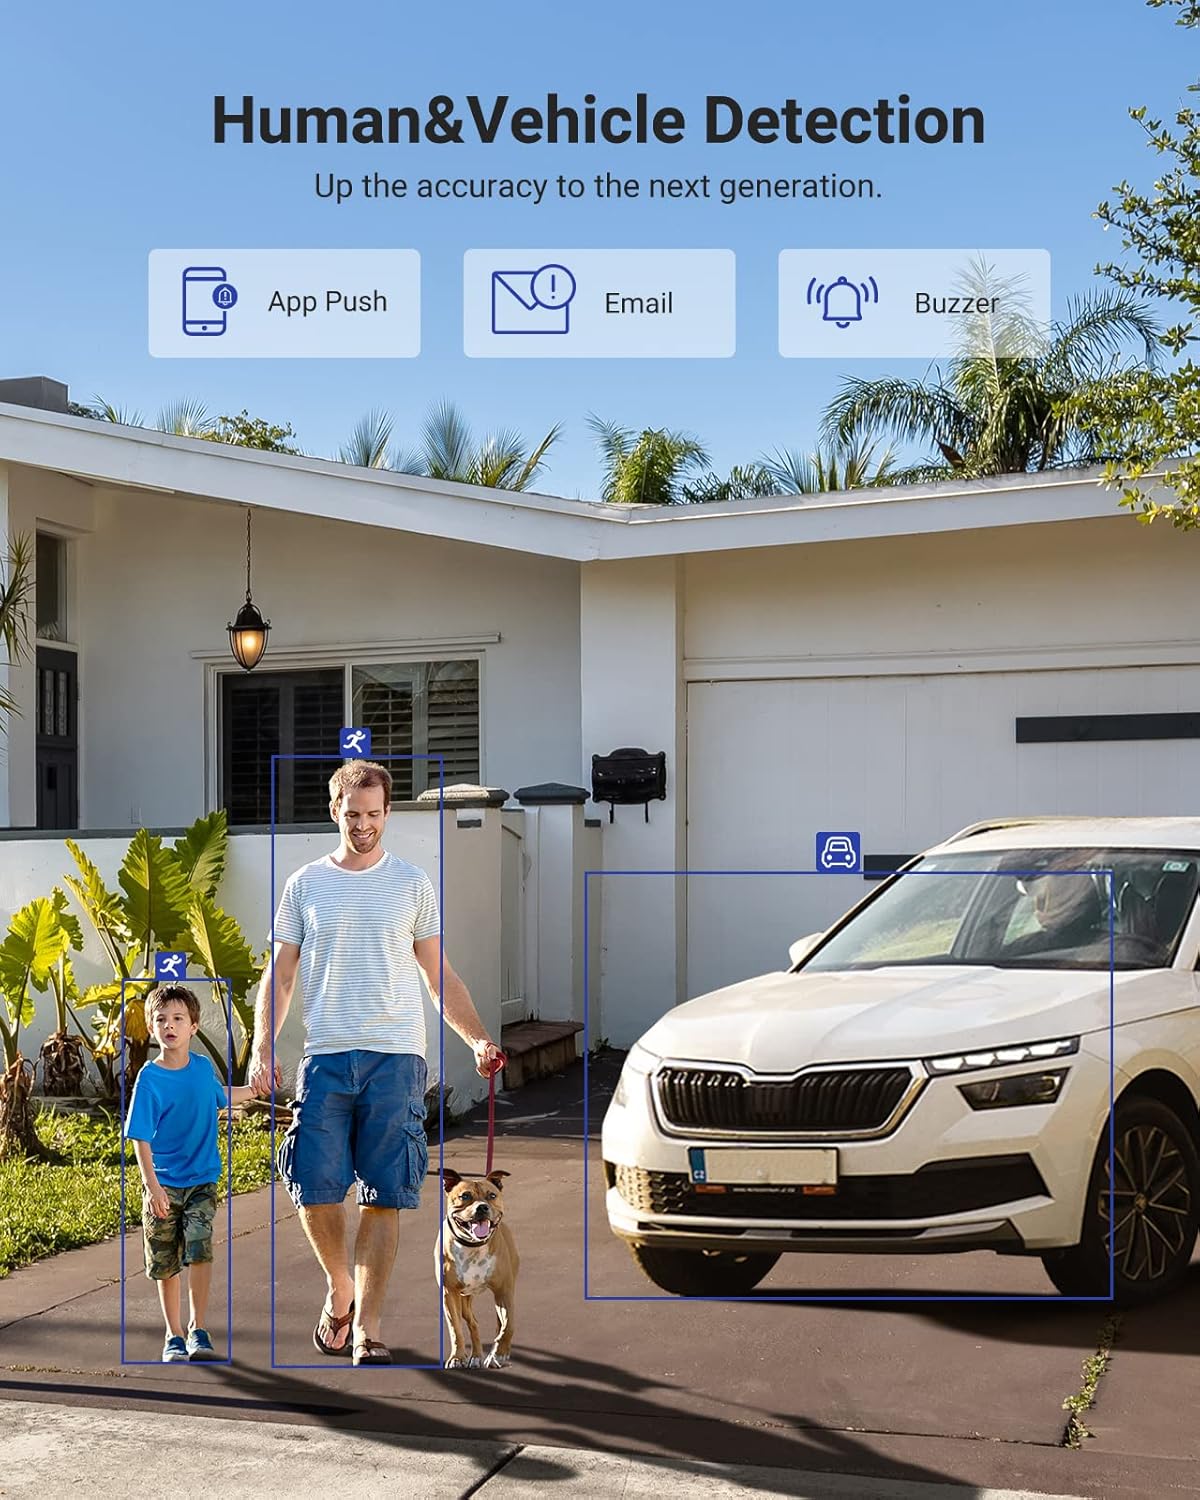
Image 6.1: Visual demonstration of the AI human and vehicle detection capability, showing how the system identifies and distinguishes between people and vehicles.
6.2 Fernzugriff
Access your DVR remotely from anywhere using the ANNKE Vision App or a web Browser.
- ANNKE Vision App: Download the app from the App Store (iOS) or Google Play Store (Android). Register an account and add your DVR by scanning the QR code or entering its serial number.
- Web Browser: Access the DVR's web Schnittstelle durch Eingabe ihrer IP-Adresse in a web Browser auf Ihrem Computer.
- Kompatibilität: The system is compatible with various devices including smartphones, tablets, laptops, and personal computers. It also supports integration with Alexa for voice control.

Image 6.2: Remote access via the ANNKE Vision App, showing compatibility with mobile devices and Alexa.
7. Videomanagement
7.1 H.265+ Videokomprimierung
The DVR utilizes advanced H.265+ video compression technology. This technology significantly reduces file sizes, saving up to 80% of storage space compared to H.264 compression, while maintaining video quality. This allows for longer recording durations on the same 2TB hard drive.

Image 7.1: Comparison illustrating the storage efficiency of H.265+ compression versus H.264.
8. Kompatibilität
The ANNKE AU-DT81DX200-V1 is a versatile 5-in-1 hybrid DVR, designed to be compatible with a wide range of security cameras:
- HD TVI Input: Supports 8 MP@15 fps, 5 MP@20 fps, 3K@20 fps, 4 MP@30 fps.
- AHD Input: Supports 5 MP@20 fps, 4 MP@30 fps, 1080p@25 fps, 1080p@30 fps.
- HD CVI Input: Supports 4 MP@30 fps, 4 MP@25 fps, 1080p@25 fps, 1080p@30 fps.
- CVBS-Eingang: Supports PAL/NTSC standards.
- IPC Input: Supports up to 8MP IP cameras.
This broad compatibility ensures that the DVR can integrate with both older analog cameras and modern IP cameras, providing a flexible upgrade path for existing surveillance systems.

Image 8.1: The DVR's compatibility with various camera technologies, including TVI, CVI, AHD, and IP cameras.
9. Spezifikationen
| Besonderheit | Spezifikation |
|---|---|
| Marke | ANNKE |
| Modellnummer | AU-DT81DX200-V1 |
| Konnektivitätstechnologie | Verdrahtet |
| Auflösung der Videoaufnahme | 4K (8 MP) |
| Anzahl der Kanäle | 8 (Analog) + 4 (IP) or 12 (IP) |
| Videokomprimierung | H.265 Pro+/H.265 Pro/H.265/H.264+/H.264 |
| Unterstützte Kameratypen | TVI, AHD, CVI, CVBS, IPC |
| KI-Funktionen | Human Detection, Vehicle Detection, Line Crossing, Intrusion Detection |
| Speicherkapazität | 2 TB HDD (Up to 10 TB supported) |
| Fernzugriff | ANNKE Vision App, Web Browser |
| Kompatible Geräte | Kameras, Laptops, PCs, Smartphones, Tablets |
| Stromquelle | Kabelgebundene Elektrik |
| Farbe | Schwarz |
| Artikelabmessungen | 17.13 x 12.4 x 3.86 Zoll |
10. Wartung
Regelmäßige Wartung gewährleistet optimale Leistung und Langlebigkeit Ihres DVR-Systems.
- Reinigung: Halten Sie den DVR staubfrei. Reinigen Sie das Gehäuse mit einem weichen, trockenen Tuch. Verwenden Sie keine flüssigen Reinigungsmittel.
- Belüftung: Stellen Sie sicher, dass der DVR in einem gut belüfteten Bereich aufgestellt wird, um eine Überhitzung zu vermeiden. Blockieren Sie keine Lüftungsöffnungen.
- Firmware-Updates: Überprüfen Sie regelmäßig die offiziellen ANNKE-Websites. website for firmware updates. Keeping your DVR's firmware updated can improve performance, add new features, and enhance security.
- Datensicherung: Sichern Sie regelmäßig wichtige Videodateien.tage to an external storage device.
- Festplattenzustand: The DVR's menu may offer options to check the health status of the installed hard drive. Monitor this periodically.
11. Fehlerbehebung
In diesem Abschnitt werden häufig auftretende Probleme behandelt, die bei Ihrem DVR auftreten können.
- Keine Videoausgabe:
- Check HDMI/VGA cable connections to both the DVR and the monitor.
- Stellen Sie sicher, dass der Monitor auf die richtige Eingangsquelle eingestellt ist.
- Verify the DVR is powered on (power indicator light should be active).
- Keine Kameraanzeige:
- Check camera power supply and video cable connections.
- For IP cameras, ensure they are on the same network as the DVR and properly added in the DVR's camera management settings.
- Verify camera compatibility with the DVR (refer to Section 8).
- Fernzugriff funktioniert nicht:
- Stellen Sie sicher, dass der DVR mit dem Internet verbunden ist.
- Check network settings on the DVR (e.g., DHCP enabled, correct IP address).
- Verify the ANNKE Vision App is updated to the latest version.
- Ensure the DVR is properly added to your ANNKE Vision account.
- Fehlalarme durch Bewegung:
- Adjust the sensitivity of motion detection in the DVR settings.
- Utilize the AI Human/Vehicle Detection feature (Section 6.1) to filter out irrelevant movements.
- Define specific detection zones to exclude areas with frequent non-threatening movement.
If you continue to experience issues, please contact ANNKE customer support.
12. Garantie und Support
ANNKE products typically come with a limited warranty. Please refer to the warranty card included in your package or visit the official ANNKE webAuf der Website finden Sie detaillierte Garantiebedingungen speziell für Ihre Region.
For technical support, product inquiries, or warranty claims, please contact ANNKE customer service through their official website or the contact information provided in your product documentation. Have your model number (AU-DT81DX200-V1) and purchase details ready when contacting support.
ANNKE Offizielle WebWebsite: www.annke.com